Page is loading ...

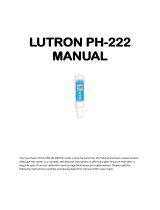
Pen type, with electrode, ATC
PH METER
Model : PH-222
Your purchase of this PH
METER marks a step
forward for you into the
field of precision
measurement. Althou
g
h
this METER is a complex
and delicate instrument,
its durable structure will
allow many years of use
if proper operatin
g
techniques are
developed. Please read
the followin
g
instructions carefully
and always keep this
manual within easy
reach.
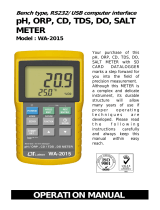
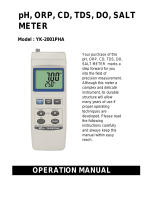
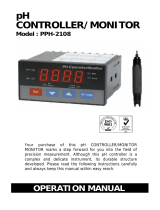
OPERATION MANUAL

TABLE OF CONTENTS
1. FEATURES................................................................1
2. SPECIFICATIONS......................................................1
3. FRONT PANEL DESCRIPTIONS...................................4
3-1 Display............................................................... 4
3-2 Power ( Lo
gg
er, ) Button.................................▲ 4
3-3 Hold ( Enter, CAL ) button ..................................
.
4
3-4 REC ( / button, ) Button............................℃℉ ▼ 4
3-5 pH electrode ( Temp. sensor )..............................4
3-6 Battery compartment/Cover................................ 4
3-7 Protection cover................................................ 4
3-8 pH 7.00 buffer solution, PH-07A...........................4
3-9 pH 4.00 buffer solution, PH-04A...........................4
4. pH CALIBRATING PROCEDURE..................................
.
5
4-1 Calibratin
g
Consideration.....................................
.
5
4-2 Requirin
g
Equipment for Calibration.....................
.
5
4-3 Calibration procedures.........................................5
5.MEASURING PROCEDURE..........................................10
5-1 pH measurement.................................................10
5-2 Data hold............................................................11
5-3 Data record ( Max., Min. readin
g
)........................11
5-4 Chan
g
e Temp. unit , ....................................℃℉ 12
6.DATA LOGGER..........................................................12
6-1 Save data........................................................... 12
6-2 Call data.............................................................13
6-3 Delete data ( Empty the memory ).......................
.
14
7. REPLACEMENT OF BATTERY......................................15
8. REPLACEMENT OF pH ELECTRODE............................
.
15
9. OPTIONAL ACCESSORIES..........................................16

1. FEATURES
* Pen type digital pH meter, all in one, pH electrode is
included, easy for general purpose application.
* Build in temperature sensor, ATC ( auto temperature
compensation ).
* pH 4, pH 7 standard solution are standard accessories.
* Easy to change the pH electrode.
* Temperature measurement, , .℃℉
* IP67, water proof and protection.
* Auto calibration for pH 4, pH 7 or pH 10 or other value.
* High input impedance.
* LCD with two displays and bar graph indicator.
* Data hold function for freezing the desired value.
* Auto power off.
* Records max. and min. value with recall.
* 100 point data logger with recall.
* Microcomputer circuit, intelligent function, high accuracy.
* Compact size, light weight.
* Power supply by DC 1.5 V battery ( UM4/AAA ) x 4 PCs,
* Available for wide applications, such as aquarium,
beverage, fish hatcheries, food processing,
photography, laboratory, quality control, school &
colleges, swimming pools, water conditions.
1

2. SPECIFICATIONS
Display LCD, size : 20 mm x 28 mm.
* With bar graph indicator.
Measurement pH 0 to 14 pH.
Range Temp. -5 to 80 ( 23 to 176 ).℃℉
Resolution pH 0.01 pH.
Temp. 0.1 / 0.1 .℃℉
Accuracy pH ± 0.02 pH
* After calibration.
Temp. ± 0.8 / ± 1.5 .℃℉
pH Input 10^12 ohms.
Imped
a
pH Electrode Included
.
* PE-12
pH Temp. ATC ( Automatic temperature
Compensation compensation ), build thermister Temp.
sensor.
Data Hold Freeze the display reading.
Memory Recall Maximum & Minimum value.
Sampling Approx. 0.8 second.
Time
pH pH 7, pH 4 or pH 10, 3 points
Calibration calibration ensure the best linearity and
accuracy.
*
Other calibration point that near the
pH 7, pH 4, and pH 10 are available.
2

Data Logger Max. can save 100 point data with recall.
Manual, push the data logger button
once will save data one time.
Circuit Custom one-chip of microprocessor LSI
circuit.
Operating Meter :
Temperature 0 to 60 ( 32 to 140 ).℃℉
pH electrode :
-5 to 80 ( 23 to 176 ).℃℉
Operating Less than 80% RH.
Humidity
Power Supply DC 1.5V battery ( UM-4/AAA ) x 4 PCs.
Power Approx. 4.8 mA.
Consumption
Dimension 186 x 40 x 32 mm
( 7.3 x 1.6 x 1.3 inch ).
* Meter with pH electrode.
Weight 131 g/0.36 LB (included electrode).
Power off Auto power shut off to save battery life.
Standard Instruction Manual......................... 1 PC
Accessories pH electrode, PE-12.......................
.
1 PC
pH 7.00 buffer solution, PH-07A...... 1 PC
pH 4.00 buffer solution, PH-04A...... 1 PC
* PE-12, PH-07A, PH-04A are the
consumer accessory.
Optional pH ELECTRODE, Model : PE-12
Accessories pH 7.00 buffer solution, Model : PH-07A
pH 4.00 buffer solution, Model : PH-04A
Hard carrying case, Model : CA-06
Soft carrying case, Model : CA-05A
* refer page 16
3

3. FRONT PANEL DESCRIPTION
3-1 Display
3-2 Power ( Logger, ) Button▲
3-3 Hold ( Enter, CAL ) button
3-4 REC ( / button, ) Button℃℉ ▼
3-5 pH electrode +Temp. sensor, PE-12
3-6 Battery compartment/Cover
3-7 Protection cover
3-8 pH 7.00 buffer solution, PH-07A
3-9 pH 4.00 buffer solution, PH-04A
4

4. pH CALIBRATING PROCEDURE
4-1 Calibrating Consideration
The pH meter already calibrated by mV signal that
simulated from the ideal pH ELECTRODE mV output
( base on 25 environment ). However due to (a) An℃
ideal electrode will produce 0 mV at pH 7.00, but most
electrodes are slightly off. (b) The measuring environment
temperature may not near 25 ( 15 to 35 ). ℃℃
If intend to keep instrument combined electrode within
high accuracy, it is necessary to make the following
calibration procedures ( 4-3 ).
* Basic calibration ( single point calibration ) :
pH 7 calibration.
* Complete calibration ( two points calibration ) :
pH 7 calibration and pH 4 calibration.
* During execute the calibration procedures,
if the Display show " Error " information, then please
do the " Calibration clear " procedures, refer page 8.
4-2 Requiring Equipment for Calibration
1)Combination pH electrode ( PE-12, included ).
2)Buffer solutions :
pH 7.00 buffer solution ( PH-07A, included ).
pH 4.00 buffer solution ( PH-04A, included ).
4-3 Calibration procedures
pH 7 calibration
1)Rinse the electrode in distilled water.
2)Power on the instrument by pressing the " Power button "
( 3-2, Fig. 1 ).
3)Press the " Hold button " ( 3-3, Fig. 1 ) once.
the display will show the " HOLD " symbol.
Press the " button " ( 3-4, Fig. 1 ) once, the display▼
will show following screen in sequence.
5

screen 1
CAL flashing
screen 2
7.00
CAL
4)Place the electrode into pH 7.00 buffer solution ( PH-07A )
Press the " Hold button " ( 3-3, Fig. 1 ) once.
The " 7.00 " will flashing, following show " End ".
then return the normal measurement screen and
finish the pH 7.00 calibration procedures.
screen 3
7.00 flashing
CAL
screen 4
End
screen 5
7.00
return to normal screen
6

pH 4 calibration
1)Rinse the electrode in distilled water.
2)Power on the instrument by pressing the " Power button "
( 3-2, Fig. 1 ).
3)Press the " Hold button " ( 3-3, Fig. 1 ) once.
the display will show the " HOLD " symbol.
Press the " button " ( 3-4, Fig. 1 ) once, the display▼
will show following screen in sequence.
screen 1
CAL flashing
screen 2
7.00
CAL
4)Press the " button " ( 3-4, Fig. 1 ) once, the display▼
will show :
screen 3
4.00
CAL
7

5)Place the electrode into pH 4.00 buffer solution ( PH-04A )
Press the " Hold button " ( 3-3, Fig. 1 ) once.
The " 4.00 " will flashing, following show " End ".
then return the normal measurement screen and
finish the pH 4.00 calibration procedures.
screen 4
4.00 flashing
CAL
screen 5
End
screen 6
4.00
return to normal screen
Calibration clear
During execute the calibration procedures, if
happen some thing wrong ( Display show Error
information ), then execute the following "
Calibration clear " procedures will clear all the
existing calibration data and return to the Default
value.
8

However after execute the " Calibration clear ".
then make the calibration again. if the Display
still show the " Err " ( error information ), then
the " Standard solution " or the pH electrode "
may existing problem.
The calibration procedures are :
1)Power on the instrument by pressing the " Power button "
( 3-2, Fig. 1 ).
2)Press the " Hold button " ( 3-3, Fig. 1 ) once.
the display will show the " HOLD " symbol.
Press the " button " ( 3-4, Fig. 1 ) once, the display▼
will show following screen in sequence.
screen 1
CAL flashing
screen 2
7.00
CAL
3)Press the " button " ( 3-4, Fig. 1 ) once 3 times,▼
the display will show :
screen 3
CLr
CAL
9

5)Press the " Hold button " ( 3-3, Fig. 1 ) once.
The " CLr " will flashing, following show " End ".
then return the normal measurement screen and
finish the " Calibration clear " procedures.
screen 4
CLr flashing
CAL
screen 5
End
5. MEASURING PROCEDURE
5-1 pH measurement
After the pH electrode is calibrated
( section 4-3 ) , the unit is ready for measuring.
1)Power on the meter by pressing the " Power button "
( 3-2, Fig. 1 ).
2)Place the electrode into the measured solution, little
shake the electrode and wait a few seconds to let the
ATC ( automatic temperature compensation ) sensor
to stabilize with the temperature of the solution..
The LCD will show pH value ( up main display ) and
the temperature value ( lower display ) at the same
time.
10

3)After make the measurement, please rinse the electrode
in distilled water.
* After the measurement, the " pH electrode "
( 3-5, Fig. 1 ) should insert into the "
Protection bottle " ( 3-7, Fig. 1 ).
* PE-12, PH-07A, PH-04A is the consumer accessory.
5-2 Data Hold
* During the measurement, press the " Hold Button "
( 3-3, Fig. 1 ) momentarily to hold the measured
value. The LCD will show a " HOLD " symbol.
* Press the" Hold Button " once again to release the
data hold function.
5-3 Data Record ( Max., Min. reading )
1)The data record function records the maximum and
minimum readings. Press the " REC Button " ( 3-4, Fig.
1 ) momentarily to start the Data Record function,
shows " REC " on the display.
2)With the " REC " symbol on the display.
a)Press the " REC Button " ( 3-4, Fig. 1 ) momentarily,
the " REC MAX " symbol along with the maximum
value will appear on the display.
b)Press the " REC Button " ( 3-4, Fig. 1 ) momentarily
again, the " REC MIN " symbol along with the
minimum value will appear on the display.
When display shows " REC MAX " or " REC MIN ",
* press the " Hold Button " ( 3-3, Fig. 1 )
momentarily will delete the max. ( min. ) value,
the display will show the " REC. " only and
execute the memory function continuously.
c)To exit the memory record function, press the "
REC " button for 2 seconds at least. The display will
revert to the current reading, not show " REC "
11

5-4 Change Temp. unit , ℃℉
Press the " / button " ( 3-4, Fig. 1 ) continuously℃℉
at least two seconds, then release the button will
change the Temp. unit from to or to .℃℉℉℃
6. DATA LOGGER
The meter can save max. 100 point data into the
the memory circuit
6-1 Save data
1)Turn on the meter.
2)Press the " REC Button " ( 3-4, Fig. 1 ) momentarily,
shows " REC " on the display.
3)Press the " Logger Button " ( 3-2, Fig. 1 ) momentarily
will save one measuring value to memory, display will
show :
Example :
REC
28
pH a.The memory position that
72 save the recent data.
b.The memory left space no.
c. a + b = 100
For example : 28 + 72 = 100
4)To exit the memory data logger ( record ) function,
press the " REC " button for 2 seconds at least. The
display will revert to the current reading, not show "
REC "
12

6-2 Call data
1)Turn on the meter.
Press the " Hold Button " ( 3-3, Fig. 1 ) momentarily,
LCD shows " HOLD ".
Following, press the " REC Button " ( 3-4, Fig. 1 )
continuously until display shows following , then
release the button.
Example :
28
The total data point that
ttL are saved into the memory.
2)Uses " Button " ( 3-2, Fig. 1 ) or " Button " ▲▼
( 3-4, Fig. 1 ) to call the data that already saved into
the memory.
N
o
During call the data, the " pH " unit will be flashed.
*
Example :
8.07
pH flashing
25.0 ℃
Press " Hold Button " ( 3-3. Fig. 1 ) will exit the
*data call function.
13

6-3 Delete data ( Empty the memory )
1)Turn off the meter first.
2)Press the " REC Button " ( 3-4, Fig. 1 ) continuously and
not release, at the same time press the " Power
Button " ( 3-2, Fig. 1 ) momentarily, the display will
show following screen, then release both fingers from
the buttons.
n
CLr
3)Press " Button " momentarily, display shows :▼
y
CLr
4)Press " Button " ( 3-3. Fig. 1 ) momentarily, the
display shows :
nuLL
CLr
Now all the saved data is deleted, memory will empty.
14

7. REPLACEMENT OF BATTERY
1)
When the LCD display show " " ,
It is necessary to replace the battery. However, in-spec
measurement may still be made for several hours after
Low Battery Indicator appears before the instruments
instrument become inaccurate.
2)To replace the battery, rotate and remove the "
Battery Cover " ( 3-6, Fig. 1 ), take out the old
batteries, install new batteries :
DC 1.5V battery ( UM-4/AAA ) x 4 PCs.
3)When install the batteries, should make attention the
battery polarity.
4)After install the batteries, reinstall the battery cover
again.
8. REPLACEMENT OF pH ELECTRODE
1) Take away the pH electrode and change the
new unit, refer the Fig. 2 .
2) The pH electrode, PE-12 is the standard
accessory of the meter. However the PE-12 is
also the consumer parts, its life is depend Fig. 2
the working period and the maintenance.
3) Rinse the electrode in distilled water after
the usage.
4) " pH Electrode sensing head "
pH electrode
should insert into the PE-12
" Protection bottle " if the meter
is not used.
15

9. OPTIONAL ACCESSORIES
pH ELECTRODE
Model : PE-12
General purpose & high quality pH electrode with BNC
connector.
Range : 1 to 13 pH ( typical 0 to 14 pH ).
pH 7.00 buffer solution
Model : PH-07A
pH 4.00 buffer solution
Model : PH-04A
CARRYING CASE Model : CA-06
Hard carrying case.
( 280 x195 x 65 mm ).
CARRYING CASE Model : CA-05A
Vinyl soft case.
( 260 x110 x 55 mm ).
16
0902-PH222-new
/