Page is loading ...

P1 - 29283 - Rev. D 1115
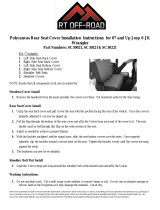
Installation Instructions - Seat Covers, Front Kit
© 2015 Bestop, Inc.
Installation Instructions
Seat Covers, Front Kit
Vehicle Application:
Wrangler 2DR, Wrangler Unlimited
2013-2017
Part Number 29283
Installation Tips
Read and follow, precisely, all installation instructions provided when
installing this product. Failure to do so may result in a poor fit, and could
place occupants of the vehicle in a potentially dangerous situation.
To reduce the risk of accidental injury: Follow all vehicle Manufacturer’s and Bestop®
safety messages, application and installation instructions.
• Do not remove seats from the vehicle to install this product.
• Fit and maintain sides of seat cover as tight to seat as possible, always
matching front to side seam of seat with similar panels and seams of seat cover.
• Remove headrest carefully to avoid damaging manufacturer’s wiring.
Assure all plugs are connected after installation of seat cover.
• Do not use and replace if seat cover becomes damaged or wear no longer allows
tight fit to seat sides.
Tools
Safety Glasses
Support
We’re here to help!
Go to www.Bestop.com and
click “Contact Us”
See a video showing
installation of this product at:
www.bestop.com/video
WARNING
Installation Time
Skill Level
2 Hours
3 - Moderately Difficult

P2 - 29283 - Rev. D 1115 © 2015 Bestop, Inc.
Section 1 Headrest Covers Section 2 Seatback Covers
Parts List
- Required parts for each installation section - Page number in Installation Guide
Page 4 - 7Page 3
Section 3 Seat Bottom Covers Page 8
Installation Instructions
Seat Covers, Front Kit
Installation Instructions - Seat Covers, Front Kit
Vehicle Application:
Wrangler 2DR, Wrangler Unlimited
2013-2017
Part Number 29283
Headrest Covers
Qty. 2
Passenger-Side
Seatback Cover
Qty. 1
Driver-Side
Seatback Cover
Qty. 1
Passenger-Side
Seat-Bottom Cover
Qty. 1
Driver-Side
Seat-Bottom Cover
Qty. 1
Seat Bottom
Elastic Cord S-hooks
Qty. 2

Section 1 Install Headrest Covers
P3 - 29283 - Rev. D 1115 © 2015 Bestop, Inc.
Page 3
Step 1 Step 2
Installation Instructions - Seat Covers, Front Kit
Remove the headrest from the driver’s
seat by pushing in on the release buttons
supporting the headrest shafts and
lifting up on the headrest.
Repeat this procedure for the passenger
side seat.
Step 1
Wrap the headrest covers over the headrests,
making sure that the crossed elastic edging
and internal label are at the back of each
headrest. Adjust the seams for a smoother
appearance.
Set headrests aside - do not reinstall at this
time.
Step 2
2
1

Section 2 Remove Seatback Tilt Levers
P4 - 29283 - Rev. D 1115 © 2015 Bestop, Inc.
Page 4
Step 1 Step 2
Installation Instructions - Seat Covers, Front Kit
Remove the driver side seatback tilt lever by
using a finger to lift and pull the top spring
clip wire up, and push toward the front of the
seat to unlock the lever from the shaft.
Repeat this procedure on the passenger
seat. Note that the spring clip open end
faces the rear of the vehicle on both the
driver and passenger sides of the vehicle.
Step 1
Once the spring clip is in the unlocked position,
pull the lever straight off the shaft. After remov-
ing the lever from the shaft, push the spring clip
back into the locked position, and set the lever
aside for now.
Repeat this procedure on the passenger seat.
Note that the passenger seat in 2-door vehicles
has one 2-arm lever, which removes the same
way as the single-arm levers in 4-door vehicles.
WARNING to preserve airbag functionality,
you MUST remove the seatback tilt levers
before placing the seat covers over the seats.
Step 2
2-Door
Passenger side shown
Note:
The retaining clip should
remain attached to
the seatback tilt lever.

Section 2 Install Seat-Back Covers
P5 - 29283 - Rev. D 1115 © 2015 Bestop, Inc.
Page 5
Step 1 Step 2
Installation Instructions - Seat Covers, Front Kit
Step 1
Carefully stretch and tuck the seat cover
fabric around and under the headrest
release buttons on both driver and
passenger seat covers.
Step 2
Slip the driver-side seat cover over the
driver’s seat, gently working the fabric
down over the seat. Make sure that the
Side Airbag tag is nearest the vehicle door.
Repeat this procedure on the passenger
seat.

Section 2 Replace Seatback Tilt Lever
P6 - 29283 - Rev. D 1115 © 2015 Bestop, Inc.
Page 6
Step 1 Step 2
Installation Instructions - Seat Covers, Front Kit
Step 1
Let the fabric flap drop into place, stretching
the fabric to make sure the seatback tilt
lever shaft protrudes through the hole in the
flap.
Repeat this procedure for the passenger
seat.
Note: Passenger side lever is different on
2-door vehicles.
Push the fabric back to expose the groove on
the shaft if necessary, and with the retaining clip
in the locked position on the seatback tilt lever,
slide the lever onto the shaft on the seat until
the retaining clip snaps into place.
Give the lever a tug once the clip has snapped
into place to make sure that the lever is secure
on the shaft.
Repeat this procedure for the passenger seat.
Step 2
2-Door
Passenger side shown

Section 2 Install Seatback Covers - continued
P7 - 29283 - Rev. D 1115 © 2015 Bestop, Inc.
Page 7
Step 1 Step 2
Installation Instructions - Seat Covers, Front Kit
Step 1
Tilt the seatback forward and tuck the flap and
the straps at the bottom of the seat cover
between the seatback and the seat bottom, so
the straps are underneath the seat.
Bring the straps forward, and drape them over
the slide release bar at the front of the seat.
Repeat this procedure for the passenger seat.
Step 2
Before you tuck the flap at the bottom of the
cover between the seatback and bottom,
tuck the airbag flap into the airbag opening
with one hand, while at the same time
reaching up under the front of the seat cover
with the other hand to pull the airbag flap
tight and smooth inside the seat cover.
Repeat this procedure for the passenger
seat.
NOTE: the airbag flap
should lie flat and smooth
under the seat cover.

Section 3 Install Seat Bottom Covers
P8 - 29283 - Rev. D 1115 © 2015 Bestop, Inc.
Page 8
Step 1 Step 2
Installation Instructions - Seat Covers, Front Kit
Step 1
Attach the two ends of the elastic cords
to the closed end of the the s-hook. Attach the
s-hook to a cross-member or wire underneath the
seat, making sure to keep the cords away from
the seat adjustment tracks.
Attach the 4 nylon straps at the front of the
underside of the seat to the buckles.
Give the straps a gentle tug to snug the covers.
Verify the straps do not interfere with or unplug
any of the wiring found under the seat.
Make sure that the seat will tilt forward and back,
and slide from front to back without the seat rail
snagging the straps.
Step 2
Slip the seat bottom cover over the seat, working
the fabric toward the rear of the seat. Carefully fit
the hole in the fabric over and around the seat
height adjustment lever.
Tuck the nylon straps between the seatback and
the seat bottom, and bring them to the front of the
underside of the seat.
Tuck the flap between the seatback and seat
bottom, and attach the hook-&-loop fabric tab on
the inside of the seat cover flap to the carpeted
area underneath the rear of the seat bottom.
Note: Tilting the
seatback forward slightly
will allow easier access
to tuck the straps and
the flap between the
seatback and seat bottom.
2
1
Hole in fabric
fits over seat-height
adjustment lever
Hook-&-Loop
Fabric Tab

Step 1
Replace the headrests on both
the driver and passenger seats.
Section 3 Replace Headrests
P9 - 29283 - Rev. D 1115 © 2015 Bestop, Inc.
Page 9
Step 1
Installation Instructions - Seat Covers, Front Kit
/