Smith Blair Inc 23800069007009 Installation guide

Type
Installation guide
Installation
Instructions
221, 226, 227, 228, 229, 238, 239, 256, & 257
Full Circle
®
Repair Clamp (Cast Lugs)
Questions: Call 1-800-643-9705 or visit www.smith-blair
.com
Sheet 1 of 2 Rev 1/30/2018
Water
TI-002
STEP 1
Thoroughly clean the pipe where the
clamp will be installed. Be sure to remove
any scale, dirt, or debris that could affect
the gasket seal.
STEP 2
Mark the pipe in both directions a
measured distance from the center of the
break or damaged area.
STEP 3
Place the clamp around the pipe, centered
over the break or damaged area, with the
gasket flap at the top. Note: For optimum
product performance, the fitting should be
lubricated with a suitable lubricant.
STEP 4
Tuck the gasket flap in place and mesh the
lug fingers. Engage the centermost bolt(s)
in the open-slot lugs and tighten hand-
tight. Note: The clamp may be assembled
beside the break or damaged area and slid
into position if the pipe surface is wet or
has been lubricated.
PRE-INSTALL NOTES
When a gap between the ends of the pipes is 1” or
greater, a short section of pipe should be put in the
opening or a thin strip of sheet metal should be
wrapped around it to provide support to the gasket.
Use discretion on larger O.D. pipes.
When a section of pipe wall equal to 40% or more of
the pipe circumference is broken away, a section of
sheet metal should be placed over the opening to
provide a sealing surface for the gasket. Use of a
clamp that extends 3” past the sheet metal on both
sides axially is required.
STEP 5
Rotate the clamp away from gasket taper
to ensure proper seating of the gasket,
and position the bolts and nuts for
convenient tightening.
Recommended Torque Values
Pipe Size
Through 4.73” O.D.
Above 4.73” O.D.
*Do not exceed recommended torque*
238/239 INSTALL NOTES
Do not tap through clamps. These products
are intended for use on repair applications and
applications involving a pre-drilled pipe.
STEP 6
Tighten the nuts working form the center
outward without exceeding torque values
listed below. Note: Completely
tightening the center nut(s) will usually
stop or sufficiently slow the leakage to
simplify completion of the installation.
STEP 7
When the nuts have been tightened
sufficiently to stop the leakage, check
reference marks to assure clamp is still
properly centered over break or damaged
area. Loosen nuts and reposition clamp if
necessary. For multi-band clamps,
maintain similar gaps between bands
while tightening.
STEP 8
Recheck the tightness, and torque the
nuts as evenly as possible to the
recommended torque values listed below.
NOTE: Use of a calibrated torque
wrench is recommended!
Installation
Instructions
221, 226, 227, 228, 229, 238, 239, 256, & 257
Full Circle
®
Repair Clamp (Cast Lugs)
Questions: Call 1-800-643-9705 or visit www.smith-blair
.com
Sheet 2 of 2 Rev 1/30/2018
Water
TI-002
ARRANTY
Smith-Blair
®
warrants its products only against defects in materials and workmanship. Smith-Blairs liability
and customers exclusive remedy under this warranty or any warranty extends for a period of one (1) year
from the date of Smith-Blairs ship date and is expressly limited to repayment of the purchase price, repair or
replacement, at Smith-Blairs option, during said period, upon proof satisfactory to Smith-Blair
®
and upon
customers returning and prepaying all charges on such products to factory or warehouse designated by
Smith-Blair.
This warranty is made expressly in lieu of all other warranties, expressed, implied or statutory with respect to
quality, merchantability or fitness for a particular purpose.
10/11
Metal products are subject to corrosion, particularly when used outdoors and/or underground. A large
number of factors and local conditions af the rate of corrosion. Consult a local corrosion expert
determine the life expectancy of this product when used with your pipeline content, soil, and environment.
Also, consult your system designer to determine the suitability of this product in your piping system. Failure
to determine the suitability of this product in your application, soil, and/or environment can result in premature
product failure. Smith-Blair
®
will provide additional information about this products material specifications at
your request. You may also obtain product information at www.smith-blair .
2/17
THIS PRODUCT DOES NOT RESTRAIN PIPE MOVEMENT. Proper
anchoring is required to prevent pipe pull out. Failure to
anchor or improper anchoring can result in dangerous pipe
content escape, property damage, serious injury, or death.
Refer to smith-blair.com for products designed to restrain axial
pipe movement. Read the product installation instructions
prior to installing this product.
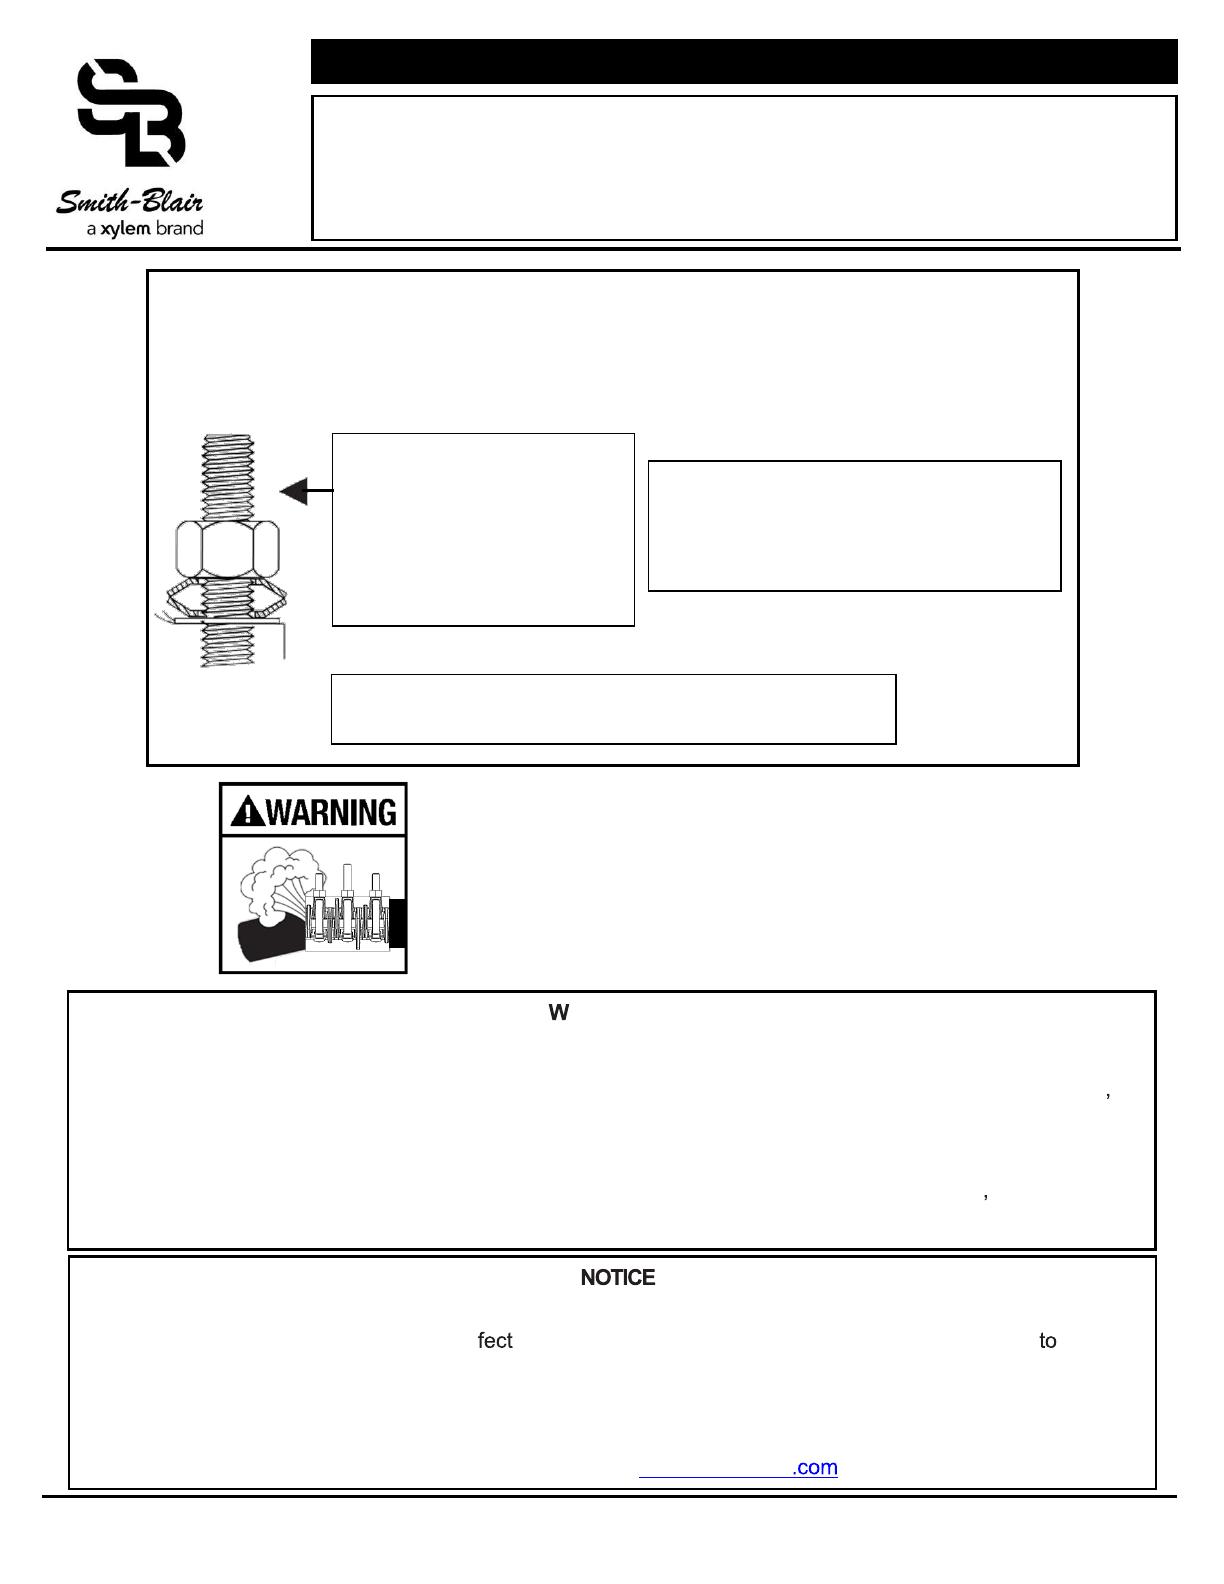
Special Installation Notes for Installation of Type(s)
226, 227, 238, 239, 256, and 257 Full Circle® Repair Clamps
on Polyethylene Pipe
[Not for Gas Service]
Smith-Blair® Belleville
Washers (p/n 150115-000)
must be used on PE pipe
installations. Use of any
other type of Spring Washer
may cause product failure.
WARNING
DO NOT EXCEED TORQUES LISTED BELOW
Through 3.50” O.D. = 25 ft-lbs
Above 4.00” O.D. = 45 ft-lbs
See Smith-Blair HDPE Application Guide for recommended
size(s) and DR(s) clamps are approved for use on
  • Page 1 1
  • Page 2 2

Smith Blair Inc 23800069007009 Installation guide

Type
Installation guide

Ask a question and I''ll find the answer in the document

Finding information in a document is now easier with AI