Installation
Instructions
315 & 317
Ductile Iron Service Saddle with Stainless Strap(s)
Questions: Call 1-800-643-9705 or visit www.smith-blair
.com
NOTE:
Use of this product on PLASTIC PIPE is limited to the following:
1. 4.50” – 12.75” Steel O.D. PVC Pipe with a standard dimension ratio (DR) of 26 or thicker.
2. 4.80” – 21.60” Cast/Ductile Iron O.D. C-900 PVC Pipe Class 150 rating or better (DR18).
Do not use on fiberglass reinforced plastic pipe, plastic irrigation pipe, or plastic pipe other than sizes and types mentioned above.
See other side for POLYETHYLENE pipe installation instructions.
STEP 1
Inspect the shipment received to ensure no damage has
occurred during transit and that no hardware is missing.
Ensure the received saddle is the proper type, tap size, and
correct pipe size range for the installation prior to beginning.
STEP 2
Clean the pipe surface thoroughly, particularly in the area
where the gasket will seat. Be sure to remove any scale, dirt,
or debris that could affect the gasket seal.
STEP 3
Check the gasket for proper positioning in the saddle body. If
necessary, properly position the gasket in the saddle body.
STEP 4
Lubricate the pipe and gasket face with a non-detergent soap
solution. Ensure the lubricant does not freeze.
STEP 5
Mount the saddle body (with gasket in place) as close to the
final tap position as possible
STEP 6
Install the saddle strap(s), washer(s), and nut(s). Use the
washer(s) on the open-lug side of the saddle body.
STEP 7
Before tightening, check the position of the saddle body to
ensure correct orientation on the pipe. Do not move the
saddle body while on the pipe. This can damage the gasket
resulting in product failure.
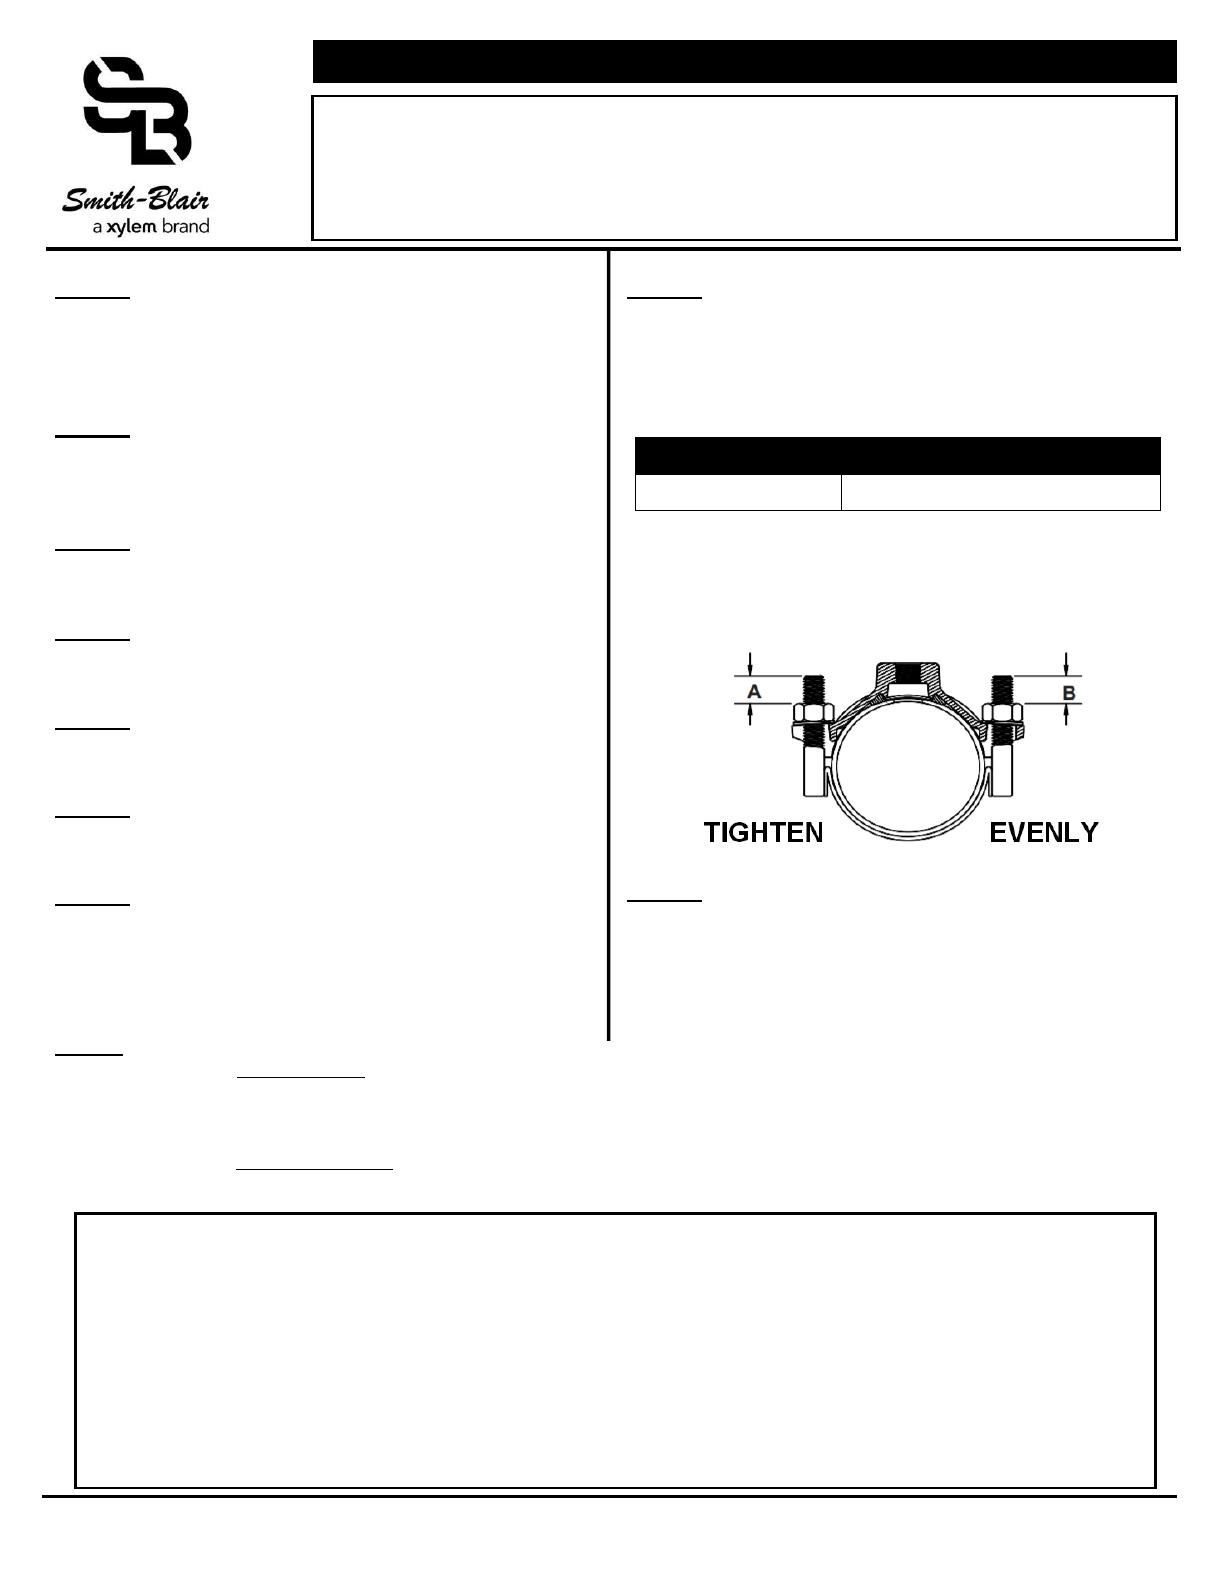
STEP 8
Tighten the nuts progressively and uniformly to the
recommended torque value below. DO NOT OVER
TORQUE. Bolt lengths A & B must be kept equal. See figure
below.
Use of a calibrated torque wrench is recommended
*The torque requirements above are only intended to provide
an effective seal between the saddle gasket and the pipe. The
saddle assembly is not designed to provide structural rigidity for
connections, equipment, or any other alternative use of the
saddle assembly.
STEP 9
Make the connection to the saddle boss. Suitable pipe thread
sealant is recommended. Do not cross thread or twist/rock the
saddle body while making the connection.
W
ARRANTY
Smith-Blair, Inc. warrants its products to be free of defects in materials and workmanship for a period of one (1) year from the date of shipment by
Smith-Blair, Inc. (the "Warranty Period"). Dated proof of purchase, such as a bill of sale, is required to establish warranty eligibility. If a product fails
to perform due to a defect in materials or workmanship during the Warranty Period, Smith-Blair, Inc. will repair or, at Smith Blair, Inc.'s option,
replace the product with the same or comparable item. In the event that the product cannot be repaired and a suitable replacement item is not
available, Smith-Blair, Inc. will refund the original purchase price shown on the proof of purchase. In all cases, the customer is responsible for
returning the allegedly defective product to the factory or warehouse designated by Smith-Blair, Inc.
THIS LIMITED WARRANTY IS EXCLUSIVE AND IS IN LIEU OF ANY EXPRESS OR IMPLIED WARRANTY OF MERCHANTABILITY, FITNESS
FOR A PARTICULAR PURPOSE, OR OTHER WARRANTY OF QUALITY, OR THOSE ARISING FROM A COURSE OF DEALING, CUSTOM, OR
USAGE OF TRADE. THE REMEDIES PROVIDED IN THIS LIMITED WARRANTY STATEMENT ARE THE CUSTOMER'S SOLE AND EXCLUSIVE
REMEDIES. IN NO EVENT SHALL SMITH-BLAIR, INC. BE LIABLE FOR DIRECT, INDIRECT, SPECIAL, INCIDENTAL, OR CONSEQUENTIAL
DAMAGES, WHETHER BASED ON CONTRACT, TORT, OR ANY OTHER LEGAL THEORY, AND WHETHER ADVISED OF THE POSSIBILITY
OF SUCH DAMAGES.