Page is loading ...

1
Technical Manual
RoomMate

3
2
THANK YOU FOR CHOOSING BC NORTHERN LIGHTS
Although the RoomMate is very straight-forward to use, the following manual contains a few guidelines to make
your growing experience even easier.
Tools Required: Adjustable screwdriver, glass cleaner, and cloth
RoomMate Packing & Checklist
Keys - Twist tied to the door handle
Clone shelf - White metal shelf that mounts
on to the 2 screws in the back of the
RoomMate™
1/2 slab 1” rockwool - 48 - Growing
medium used for starting seeds or clones
Packing List
Assembly
Vegetation Chamber Assembly
T-5 Bulb Installation
Internal Fan Mounting Instructions
CO
2
System Assembly
Machine Overview
Contacts and Warranty Procedure
Table Of Contents
3-4
5
7
8
9
10
11
12
1 - 400W Metal Halide Bulb
4 – 12” air stone
400 Watt HPS bulb
Internal fan - For optimum air ow in the
grow chamber (optional)
CO
2
Regulator - Located in brown box.
(optional)
T-5 upgrade - Used to provide more
light from below (optional).
2 – Vent covers -
Used to deect light from
the back of the unit. They attach at the back
of the units.
Measuring syringe - Syringe with black ll
reservoire attached on end.
Mixing reservoir - Large Rubbermaid
reservoir with drain hose.

5
4
Block covers (Pack of 40)
Useful Tools
• Cordless drill
• Hair dryer or small cup of hot water (used for easier installation of pump adapters and air stones)
• Surge protector or universal power supply
Remove all accessories and parts from the reservoir inside the unit. It is a lot easier to assemble the RoomMate
with everything outside the unit.
RoomMate parts (cont’d)
Irrigation whips (5)
4 - 5” mesh pots
Can lter and lter mount
Optional LEDs
1 – 8 pack of 5” rockwool
H
2
O pumps - ECO 185 1 - Pump adapter hose.
DE
L A
L
T
E
S
C OK
6
5
2
3
4
7
0
1
12:14
18H
r
V
e
g
18/6
24/7
OFF
Vegetation
Airpump
Shuto
Flowering
Water Override
CO2
Override
400W MH 400W HPS
125W CFL
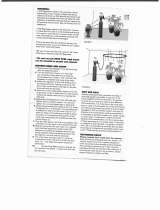
RoomMate Assembly
Do not plug the machine into the wall outlet until the machine is fully assembled
and you have read the instructions. The pumps should not be plugged into the top
of the machine unless there is water in the reservoirs.
These are some things you will need to pick up to have your machine run properly. A surge protector from any
electronic store. Also, we cannot ship pH up or pH down. These can be purchased at any aquarium or pet store,
or at a hot reservoir or pool supply store. Also, if you have a friend you could call to help assist you through setting
this machine up, it would speed up the process and make some things a little easier.
Ensure that both the vegetation and ower rocker switches are off. This will ensure that the lights are off when the
machine is plugged into the wall. Remove all accessories and parts from the reservoir inside the unit.
Air pump shutoff switch is located on the front of the machine.
Unpacking Tips
Remove items in this order. . .
1. All loose items
2. Boxes, dryer (Royale)
3. Mixing reservoir
4. Hydro4 reservoir or Hydro4 lid
The Hydro4 lid is quite exible. If you have trouble getting it out the doors just tilt it a little or give it a squeeze
upward from each end.
It is also recommended that you plug your machine into a surge protector. This will protect your machine from
Electrical Considerations
MS: 5 amps
Typical Household Circuit Breaker: 15-20 amps
*Amperage is calculated on using all components of each unit at the same time. It is recommended that no more
than 2 s go on a single 15 amp breaker.
Hydro4 reservoir lid

7
6
Chamber Assembly
• Do not plug the machine into the wall outlet until the machine is fully assembled and you have read the instructions. The
pumps should not be plugged into the top of the machine unless there is water in the reservoirs.
• Ensure that the rocker switches are off. For the veg/ower switch this will be the center position. For the water override
switch (RM) or accessory switch (MS) this will be down. This will ensure that the lights are off when the machine is
plugged into the wall. Airpump shutoff switch is located on the front of the machine.
• Remove all accessories and parts from the reservoir inside the unit. It is a lot easier to assemble your RoomMate with
everything outside the unit. Remove the Large lid using your drill. (g. 1.2).
• Install the 400-watt MH bulb from inside the growth chamber. Turn bulb clockwise and do not over tighten. Try not to
touch the bulb with your ngers since the oils from your ngers can harm the bulb (g. 1.4).
• Clean glass.
• Replace the large lid using your drill (g. 1.5).
• Install the irrigation whips in your irrigation lid, insert the drip the stakes into the black drip emitter. The drip stake sticks
go into the rockwool in your mesh pots (g. 1.3).
Fig. 1.3
Fig. 1.4 Fig. 1.5
Fig. 1.2
• Installing a Can Filter: Attach your lter mount by squeezing the mount and sliding it into the collar on the exhaust
fan (g. 1.7a). Attach with the bolts provided (g. 1.7b). Slide the neoprene washer over the collar (g. 1.7c). Slide the
Can Filter on to the lter mount and secure on to the box with the rubber washer and wing nut (rubber side of washer
towards the lter) (g.1.7d).
Fig. 1.7a
Fig. 1.7b
Fig. 1.7c
Fig. 1.7d
• Make sure the pump cord is placed in the notch at the back of the reservoir. DO NOT RUN PUMPS DRY!
• Attach the other end of the pump adapter to the 90° that protrudes from the bottom of lid and lower the lid on
the reservoir (g. 1.6).
• Place the 5 inch mesh pots inside the cutouts on the veg reservoir lid.
• Insert the water pump cord in the plastic white channel located in the side of the chamber (g. 2.0). The
channel opens from one side (g. 2.1).
Fig. 1.1 Fig. 1.2 Fig. 1.3
Fig. 1.5a Fig. 1.5b Fig. 1.6
Fig. 2.0
Fig. 2 .1
Only plug the pump in at the top of the chamber (white clip on the right) when water is in the reservoir and you are
ready to begin using the pump. The right clip will run your watering schedule (5 min. in the morning ).
WARNING
Hydro4 Reservoir Assembly
• Hook up four of the 12” air stones to the shorter 12” lengths of clear vinyl tubing and lay the air stones at in
the bottom of the reservoir.
• Hook the black Tee on the airline whips to the airline coming thru the hole in the back of the reservoir.
• Hook up the pump adapter to the ECO 185 water pump (g. 1.5 a, b).
HELPFUL HINT
You may need to soak the adapter in hot water to make inserting easier.
HELPFUL HINT
Insert at a 45 degree angle to make placing the reservoir easier.

9
8
T-5 Bulb Installation
Fig. 4 .1 Fig. 4.2 Fig. 4.3
Installing Your T-5 Bulbs (optional)
• Mount all three T-5 lights onto the irrigation lid by pressing them into the metal T-5 clips.
• On the ends of each T-5 ballast, is a slot for the power cable to connect to them. One end is male (has 2
pins), and the other end is female (has 2 holes).
• Mount the center ballast and the right side ballast with the Female end facing the front of your machine. And
the left ballast with the male end facing the front of the machine.
• Connect the long T-5 jumper cord on the front ends of the ballasts (g. 4.1).
• Connect the main “Tee” T-5 power cord on the back ends of the center T-5 ballast and the right T-5 ballast
(g. 4.2).
• Run the T-5 cord up the duct channel on the inside side panel of the grow chamber, (same as airlines and
water pumps cord), and plug into the T-5 socket at the top of the grow chamber (g. 4.3).
• Your T-5 lights will now come on with the same lighting schedule as your ballasted HPS or MH bulb.
Fig. 4.4 Fig. 4.5
• Unbox the internal fan and locate the Key slot on the handle (g. 4.4).
• Locate the fans mounting bolt in the top/front left corner of the grow chamber (g. 4.5).
• Loosen the bolt enough to slide the fan’s key slot onto the bolt, then tighten the bolt so the fan is secure.
• Plug the internal fans power cord into the “ALWAYS ON” socket right beside the bolt.
• Turn the dial on the backside of fan to 1 of the 2 possible speeds.
Internal Fan Mounting Instructions
CO
2
System Assembly (optional)
• Attach the regulator provided to the CO
2
tank (not provided). Tighten the regulator tting with a wrench
provided (not provided) (g. 3.8).
• Attach the clear CO
2
hose mounted on the back of the machine (g. 3.9) to the brass tting on the regulator
(g. 4.0). Ensure you push the CO
2
line all the way on the barb.
CO2
CO2
CO2
Hose
Gauges
5psi
Fig. 3.8 Fig. 3.9 Fig. 4.0
HELPFUL HINT
You may need to warm up the CO
2
line with warm water or a hair dryer to make insertion easier.
• z
Please ensure that your CO
2
tank is turned off until you are ready to begin using CO
2
. When you are ready to
begin using CO
2
, refer to the CO
2
section in your grow manual. Don’t begin to use CO
2
until the second week of
the owering cycle and only use if your plants have a good root system and look healthy.
WARNING

11
10
CO
2
Injection and Water overrides
The RoomMate features the ultimate easy to use CO
2
injection system The use of CO
2
will dramatically increase
the production of your plants. CO
2
is programmed to inject automatically throughout the day to maintain a
constant level of 1200 to 1600 PPM.
The CO
2
rocker switch override should only be used when initially setting your CO
2
regulator, or when instructed
by BC Northern Lights technical support. If the CO
2
switch has been left in the override (up) position by accident,
it will automatically shut off after 15 minutes as a safety feature so your plants don’t suffocate.
The water override switch is used mainly for draining your nutrients out of your reservoir. If you ick your water
override switch up, it will run your water pump for a max of 20 mins. MAKE SURE YOU DO NOT RUN YOUR
PUMP DRY.
With your water override switch in the off position, your GroSmart will run your automatic watering schedule once
per day for 5 minutes.
HELPFUL HINT
The CO
2
rocker switch must be in the down position for the control center to automatically inject your CO
2
.
Don’t begin to use CO
2
until the second week of the owering cycle and only use if your plants have a good
root system and look healthy.
Clock is in 24-hour format. 4:20 pm = 16:20 / 4:20 am = 04:20 (add 12 after = 1:00pm).
6:00 am - 06:00
7:00 a.m. - 07:00
8:00 a.m. - 08:00
9:00 a.m. - 09:00
10:00 a.m. - 10:00
To SET CLOCK from the main display:
00:00
SYSTEM OFF
1. press the OK key
From the sub menu:
PROGRAM
RUN
PARAMETER
SET CLOCK
2. Use the up/down arrows to choose SET CLOCK and then press OK. Your screen should now read:
*SET CLOCK*
SUMMERTIME
Press OK again to get to the screen:
SET CLOCK
yy/mm/dd
08/04/2_
The last digit of the date will be highlighted and ashing. Press OK again and you will be able to change the number.
Continue using your left and right arrow keys to change the other parts of the date and time. When you have nished
setting the date and time press OK. Your screen should read:
SET CLOCK
SET?
If everything is looking good click OK, then hit ESC twice to back out.
You are now ready to grow! Just make sure your Veg/Flower switch is in the appropriate position!
Setting Time and Date on your RoomMate
11:00 a.m. - 11:00
12:00 p.m. - 12:00
1:00 p.m. - 13:00
2:00 p.m. - 14:00
3:00 p.m. - 15:00
4:00 p.m. - 16:00
5:00 p.m. - 17:00
6:00 p.m. - 18:00
7:00 p.m. - 19:00
8:00 p.m. - 20:00
9:00 p.m. - 21:00
10:00 p.m. - 22:00
11:00 p.m. - 23:00
12:00 p.m. - 00:00
Machine Overview
GroSmart Control Center
The GroSmart is the most state of the art control center available. After years of testing and research with data
loggers, we are condent that the RoomMate’s programming guarantees optimal conditions for growing. The
GroSmart control center is pre-programmed to ensure that your plants have optimal levels of light, air movement,
and water/nutrient solution. Please see below on how to initialize your pre-programmed control center.
The GroSmart is the heart and soul of your RoomMate. Please make sure that before you plug in your machine, all
switches are in the OFF position. You can ONLY set the time on your RoomMate when all of your switches are OFF.

12
Contacts
Our knowledgeable staff are happy to answer any questions or comments you may have. We offer help 7 days a
week, 13 hours a day. From relationship advice to growing questions, your BC Northern Lights rep is there. For
more information visit our website at www.bcnorthernlights.com, or call, email, or mail us.
Phone: 1-866-833-8659
Email: support@bcnorthernlights.com
Address: #311 - 13060 80th Avenue, Surrey, British Columbia, V3W 3B2, Canada
Blair Ext. 116, Blair@bcnorthernlights.com
Sales Manager, Sales & General Tech
Justin Ext. 114, Justin@bcnorthernlights.com
Production manager, lead tech support, and all vendor ordering. If your rep just can’t help you, Justin’s your man.
Len Ext. 121, Len@bcnorthernlights.com
Tracking numbers and all shipping and receiving are done by Len.
Todd Ext. 117, Todd@bcnorthernlights.com
Sales and general tech support.
Myles Ext. 129, Myles@bcnorthernlights.com
Sales and general tech support.
Andy Ext. 133, Andy@bcnorthernlights.com
Sales and general tech support.
Ben Ext. 113, Ben@bcnorthernlights.com
Sales and general tech support.
Warranty Procedure
At BC Northern Lights we offer a 3-year warranty on all components of the RoomMate except bulbs. Please call
your BC Northern Lights rep to explain the problem as there might be an easy x without having to replace a part.
If part needs to be replaced we ship out UPS everyday to service our customers better.
/