Page is loading ...

USER'S MANUAL
To ensure safe usage and full performance of this product, please be sure to read through this manual
completely.
To ensure immediate access whenever needed, store this manual in a safe location.
Unauthorized copying, quotation, or translation of this manual, in whole or in part, without the written
approval of Roland DG Corp., is prohibited.
The contents of this document and the specications of this product are subject to change without
notice.
Roland DG Corp. assumes no responsibility for any loss or damage relating to this product, regardless of
any defect in this product or this manual. Such loss or damage, whether direct or indirect, includes, but
is not limited to, that arising from the specications or performance of this product, that due to failure
of the product to perform, and that arising from any article made using this product.

For Canada
CLASS A NOTICE
This Class A digital apparatus meets all requirements of the
Canadian Interference-Causing Equipment Regulations.
CLASSE A AVIS
Cet appareil numérique de la classe A respecte toutes les
exigences du Règlement sur le matériel brouilleur du
Canada.
For EU Countries
Manufacturer:
ROLAND DG CORPORATION
1-6-4 Shinmiyakoda, Kita-ku, Hamamatsu-shi, Shizuoka-ken, 431-2103 JAPAN
The authorized representative in the EU:
Roland DG Corporation, German Ofce Halskestr. 7, 47877 Willich, Germany
For the USA
FEDERAL COMMUNICATIONS COMMIS-
SION RADIO FREQUENCY INTERFERENCE
STATEMENT
This equipment has been tested and found to comply with the
limits for a Class A digital device, pursuant to Part 15 of the
FCC Rules.
These limits are designed to provide reasonable protection
against harmful interference when the equipment is operated
in a commercial environment.
This equipment generates, uses, and can radiate radio fre-
quency energy and, if not installed and used in accordance
with the instruction manual, may cause harmful interference
to radio communications.
Operation of this equipment in a residential area is likely
to cause harmful interference in which case the user will be
required to correct the interference at his own expense.
Unauthorized changes or modication to this system can void
the users authority to operate this equipment.
When the equipment requires a usb cable, it must be shielded
type.
For California
WARNING
This product contains chemicals known to cause cancer,
birth defects and other reproductive harm, including lead.
Roland DG Corp. has licensed the MMP technology from the TPL Group.
WARNING
This is a Class A product. In a domestic environment this product may cause radio interference in which
case the user may be required to take adequate measures.

Table of Contents ........................................................................................................................1
To Ensure Safe Use ...................................................................................................................3
Important Notes on Handling and Use ............................................................................................9
Chapter 1 Getting Started ..............................................................................................................11
1-1 Great Features ...................................................................................................................12
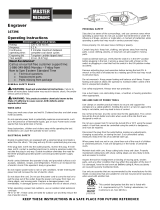
Engraving - ENGRAVER ..............................................................................................................................................................12
Scoring - SCORE ..........................................................................................................................................................................12
1-2 Part Names and Functions ................................................................................................13
Front .................................................................................................................................................................................................13
Rear ...................................................................................................................................................................................................13
Control Panel .................................................................................................................................................................................14
Chapter 2 Installation and Setup ...................................................................................................15
2-1 Checking the Included Items ..............................................................................................16
2-2 Installation ..........................................................................................................................17
Installation Environment ..........................................................................................................................................................17
Unpacking ......................................................................................................................................................................................19
2-3 Cable Connections .............................................................................................................20
Connecting the Power Cord ....................................................................................................................................................20
Connecting to the Computer ..................................................................................................................................................21
2-4 Installing and Setting Up the Software ...............................................................................22
System Requirements ................................................................................................................................................................22
The Software You Can Install and Set Up ............................................................................................................................22
Installing the Windows-based Driver ...................................................................................................................................23
Installing the Software ( Dr. Engrave ) ..................................................................................................................................24
Chapter 3 Getting Ready for and Performing Cutting .................................................................25
3-1 Switching the Power On and Off ........................................................................................26
Switching On the Power ...........................................................................................................................................................26
Switching O the Power ...........................................................................................................................................................26
3-2 Before Starting to Cut ........................................................................................................27
Loading the Material ..................................................................................................................................................................27
3-3 Installing a Tool ..................................................................................................................28
For Engraving (Character Cutter) ...........................................................................................................................................28
How to Remove the Cutter for Engraving ..........................................................................................................................30
How to Remove the Depth Regulator Nose ......................................................................................................................31
For the Scoring (Diamond scraper) .......................................................................................................................................31
Setting the Origin Point ............................................................................................................................................................33
About Tools and Materials ........................................................................................................................................................33
Test Cutting....................................................................................................................................................................................34
3-4 Setting Cutting Conditions .................................................................................................35
Spindle Speed ...............................................................................................................................................................................35
Cutting Speed ...............................................................................................................................................................................35
Attaching the Vacuum-adapter for Chip Cleaning ..........................................................................................................36
3-5 Sending Cutting Data .........................................................................................................37
Sending Cutting Data ................................................................................................................................................................37
Changes That Can Be Made While Cutting .........................................................................................................................37
3-6 Ending Cutting Operations .................................................................................................38
Ending Cutting Operations ......................................................................................................................................................38
Chapter 4 Appendix ........................................................................................................................39
4-1 Maintenance ......................................................................................................................40
Table of Contents
1

Cleaning ..........................................................................................................................................................................................40
Replacing the Bearing for the Depth Regulator Nose ...................................................................................................41
Replacement of Spindle Belt ...................................................................................................................................................41
4-2 What to Do If... ...................................................................................................................42
4-3 Power Rating and Serial Number Locations ......................................................................44
4-4 Interface Specications ......................................................................................................45
Serial Connector ..........................................................................................................................................................................45
4-5 Appendix ............................................................................................................................46
List of Options ...............................................................................................................................................................................46
Instruction Support Chart ........................................................................................................................................................47
Main Specications .....................................................................................................................................................................48
System Requirements for USB Connection ........................................................................................................................48
Please read this agreement before unpacking the media ............................................................................................IV
http://www.rolanddg.com/
Copyright © 2008-2010 Roland DG Corporation
Company names and product name are trademarks or registerd trademarks of their respective holders.
Table of Contents
2

To Ensure Safe Use
Improper handling or operation of this machine may result in injury or damage to property. Points
which must be observed to prevent such injury or damage are described as follows.
About WARNING and CAUTION Notices
WARNING
Used for instructions intended to alert the user to the risk of death or severe injury
should the unit be used improperly.
CAUTION
Used for instructions intended to alert the user to the risk of injury or material damage
should the unit be used improperly.
Note: Material damage refers to damage or other adverse eects caused with respect
to the home and all its furnishings, as well to domestic animals or pets.
About the Symbols
The symbol alerts the user to important instructions or warnings. The specific meaning of
the symbol is determined by the design contained within the triangle. The symbol at left means
"danger of electrocution."
The
symbol alerts the user to items that must never be carried out (are forbidden). The specic
thing that must not be done is indicated by the design contained within the circle. The symbol at
left means the unit must never be disassembled.
The
symbol alerts the user to things that must be carried out. The specic thing that must be
done is indicated by the design contained within the circle. The symbol at left means the power-
cord plug must be unplugged from the outlet.
3

Incorrect operation may cause injury.
WARNING
Be sure to follow the operation procedures
described in this documentation. Never
allow anyone unfamiliar with the usage or
handling of the machine to touch it.
Incorrect usage or handling may lead to an
accident.
Keep children away from the machine.
The machine includes areas and components
that pose a hazard to children and may result
in injury, blindness, choking, or other serious
accident.
Never operate the machine while tired or
after ingesting alcohol or any medication.
Operation requires unimpaired judgment. Im-
paired judgment may result in an accident.
Conduct operations in a clean, brightly lit
location.
Working in a location that is dark or cluttered
may lead to an accident, such as becoming
caught in the machine as the result of an in-
advertent stumble.
Never use the machine for any purpose
for which it is not intended, or use the
machine in an undue manner that exceeds
its capacity.
Doing so may result in injury or re.
Never use a cutting tool that has become
dull. Perform frequent maintenance to
keep and use the machine in good work-
ing order.
Unreasonable usage may result in fire or
injury.
For accessories (optional and consum-
able items, power cord, and the like), use
only genuine articles compatible with this
machine.
Incompatible items may lead to an accident.
WARNING
Before attempting cleaning, maintenance,
or attachment or detachment of optional
items, disconnect the power cord.
Attempting such operations while the machine
is connected to a power source may result in
injury or electrical shock.
Never attempt to disassemble, repair, or
modify the machine.
Doing so may result in re, electrical shock,
or injury. Entrust repairs to a trained service
technician.
CAUTION
Never climb or lean on the machine.
The machine is not made to support a per-
son. Climbing or leaning on the machine may
dislodge components and cause a slip or fall,
resulting in injury.
Install in a location that is level and
stable.
Installation in an unsuitable location may
cause an accident, including a fall or tipover.
To Ensure Safe Use
4

WARNING
Never attempt to cut magnesium or any
other such ammable material.
Fire may occur during cutting.
Keep open flame away from the work
area.
Cutting waste may ignite. Powdered material is
extremely ammable, and even metal material
may catch re.
When using a vacuum cleaner to take up
cutting waste, exercise caution to prevent
re or dust explosion.
Taking up fine cuttings using an ordinary
vacuum cleaner may cause danger of re or
explosion. Check with the manufacturer of the
vacuum cleaner. When the safety of use can-
not be determined, clean using a brush or the
like, without using the vacuum cleaner.
CAUTION
Wear dust goggles and a mask. Wash
away any cutting waste remaining on the
hands.
Accidentally swallowing or inhaling cutting
waste may be hazardous to the health.
The cutting waste or workpiece may catch re or pose a health hazard.
Danger of pinching, entanglement, and burns.
WARNING
Never attempt operation while wearing
a necktie, necklace, loose clothing, or
gloves. Bind long hair securely.
Such items may become caught in the ma-
chine, resulting in injury.
Securely fasten the cutting tool and work-
piece in place. After securing in place,
make sure no wrenches or other articles
have inadvertently been left behind.
Otherwise such articles may be thrown from
the machine with force, posing a risk of in-
jury.
WARNING
Exercise caution to avoid being pinched or
becoming caught.
Inadvertent contact with certain areas may
cause the hand or ngers to be pinched or
become caught. Use care when performing
operations.
Caution: cutting tool.
The cutting tool is sharp. To avoid injury, ex-
ercise caution.
Caution: high temperatures.
The cutting tool and spindle motor become hot.
Exercise caution to avoid re or burns.
To Ensure Safe Use
5

WARNING
Connect to an electrical outlet that com-
plies with this machine’s ratings (for volt-
age, frequency, and current).
Incorrect voltage or insufcient current may
cause re or electrical shock.
Do not use with any power supply other
than the dedicated AC adapter.
Use with any other power supply may lead to
re or electrocution.
Never use out of doors or in any location
where exposure to water or high humidity
may occur. Never touch with wet hands.
Doing so may result in fire or electrical
shock.
Never allow any foreign object to get inside.
Never expose to liquid spills.
Inserting objects such as coins or matches
or allowing beverages to be spilled into the
ventilation ports may result in re or electrical
shock. If anything gets inside, immediately
disconnect the power cord and contact your
authorized Roland DG Corp. dealer.
Danger of electrical short, shock, electrocution, or re
WARNING
Never place any ammable object nearby.
Never use a combustible aerosol spray
nearby. Never use in any location where
gases can accumulate.
Combustion or explosion may be a danger.
Handle the power cord, plug, and electrical
outlet correctly and with care. Never use
any article that is damaged.
Using a damaged article may result in re or
electrical shock.
When using an extension cord or power
strip, use one that adequately satises the
machine’s ratings (for voltage, frequency,
and current).
Use of multiple electrical loads on a single
electrical outlet or of a lengthy extension cord
may cause re.
When the machine will be out of use for a
prolonged period, disconnect the power
cord.
This can prevent accidents in the event of cur-
rent leakage or unintended startup.
Position so that the power plug is within
immediate reach at all times.
This is to enable quick disconnection of the
power plug in the event of an emergency.
Install the machine next to an electrical outlet.
Also, provide enough empty space to allow
immediate access to the electrical outlet.
Never use cutting oil.
This machine is not designed for the ow of
cutting oil. Oil may get inside the machine and
cause re or electrical shock.
Never use a pneumatic blower.
This machine is not compatible with a pneu-
matic blower. Cutting waste may get inside the
machine and cause re or electrical shock.
If sparking, smoke, burning odor, unusual
sound, or abnormal operation occurs, im-
mediately unplug the power cord. Never
use if any component is damaged.
Continuing to use the machine may result in
re, electrical shock, or injury. Contact your
authorized Roland DG Corp. dealer.
To Ensure Safe Use
6

Important notes about the power cord, plug, and electrical outlet
Never place any object on top or subject to damage.
Never bend or twist with undue force.
Never pull with undue force.
Never bundle, bind, or roll up.
Never allow to get wet.
Never make hot.
Dust may cause re.
To Ensure Safe Use
7

Warning labels are afxed to make areas of danger immediately clear. The meanings of these labels
are as follows. Be sure to heed their warnings.
Also, never remove the labels or allow them to become obscured.
Warning Labels
Caution: Pinching Hazard
Contact during operation
may cause the hand or
ngers to become pinched,
resulting in injury.
Caution: Entanglement Hazard
Never inadvertently allow hands,
hair, clothing such as neckties, or
the like near rotating parts while
in operation.
To Ensure Safe Use
8

Important Notes on Handling and Use
This machine is a precision device. To ensure the full performance of this machine, be sure to observe the
following important points. Failure to observe these may not only result in loss of performance, but may
also cause malfunction or breakdown.
This machine is a precision device.
Handle carefully, and never subject the machine to impact or excessive force.
Diligently keep clean of cutting waste.
Use within the range of specications.
Never attempt to move the tool carriage by hand with undue force.
Never needlessly touch anywhere inside the machine except for locations specied in this manual.
Install in a suitable location.
Install in a location that meets the specied conditions for temperature, relative humidity, and the
like.
Install in a quiet, stable location offering good operating conditions.
Never install in out of doors.
Never use the machine in an environment where silicone substances (oil, grease, spray, etc.) are
present. Doing so may cause poor switch contact.
This machine becomes hot.
Never cover the ventilation holes with cloth, tape, or anything else.
Install in a well-ventilated location.
About Tools
Use a cutter that is suitable for the workpiece and the cutting method.
The tip of the tool is breakable. Handle with care, being careful not to drop it.
9

10

Chapter 1
Getting Started
11

1-1 Great Features
Engraving - ENGRAVER
You can engrave nametags and other plastic plates.
The character cutter is usually used for engraving.
Scoring - SCORE
This scribes the surface of materials such as aluminum or brass. An optional diamond scraper that has diamond chips em-
bedded in its tip of the cutter is used to engrave the surface of the material by scraping. This produces a lustrous engraved
area and an attractive nish, especially when aluminum is used.
Tools that can be used with the EGX-30A are optionally available from your authorized Roland DG Corp. dealer or Roland DG
Corp. For details, see page 46 "List of Options"
12
Chapter 1 Getting Started

1-2 Part Names and Functions
Front
Rear
Tool mounting screw
This secures the depth regulator
nose or tool adapter in place.
Vacuum-adapter hose port
This is where the dust col-
lector is attached to take up
cuttings while engraving is
in progress.
Control Panel
(Described on the
following page.)
Table
The workpiece to be
engraved is mounted
on this.
Tool carriage
Serial connector
This is for connecting a serial (RS-232C
compliant) cable.
P. 21, “Connecting to the Computer”
Power-cord connector USB connector
This is for connecting a
USB cable.
P. 21, “Connecting to the
Computer”
13
Chapter 1 Getting Started

Control Panel
rpm knob
This sets the spindle
speed (in rpm).
SPEED knob
This sets the cutting
speed.
SELECT key
This selects the cutting mode. The LED
for the selected mode lights up.
SET SURFACE / TEST key
Pressed briey: When the character cutter has been in-
stalled, this moves the tool up or down.
Held down for one second or longer: Performs test cutting.
PAUSE / VIEW key
Pressed briey: Pauses operation.
Held down for two seconds or longer: Moves the tool
carriage to the rear right (the VIEW position) and pauses
operation.
The functions of these keys differ
depending on whether the key is
pressed briey and immediately
released or held down for a cer-
tain length of time.
ORIGIN POINT / SET ORIGIN POINT key
Pressed briey: Moves the tool carriage to the origin point.
Held down for two seconds or longer: Makes the present
position of the tool carriage the origin point.
Held
down
Pressed
briey
ARROW keys
These are used to move the tool carriage in the direction
of the arrow. Hold down the key for faster movement.
14
Chapter 1 Getting Started
1-2 Part Names and Functions

Chapter 2
Installation and Set-
up
15

Chapter 2 Installation and Setup
2-1 Checking the Included Items
The following items are included with the machine. Make sure they are all present and accounted for.
Character cutter
(φ 3.175 mm)
Depth regulator nose Diamond scraper adapter Hexagonal screwdriver
Spanner Adhesive sheet Test material Vacuum-adapter
Hexagonal wrench AC adapter Power cord
Roland Software Pakcage
CD-ROM
User's manual USB cable
Plate
16

Chapter 2 Installation and Setup
2-2 Installation
Installation Environment
Install in a quiet, stable location oering good operating conditions. An unsuitable location can cause accident, re, faulty
operation, or breakdown.
WARNING
Install in a location that is level and stable.
Installation in an unsuitable location may cause an accident, including a fall or
tipover.
WARNING
Never install in a location exposed to open ame.
Cutting waste may ignite. Powdered material is extremely ammable, and even
metal material may catch re.
WARNING
Never install close to any ammable object or in a gas-lled location.
Combustion or explosion may be a danger.
WARNING
Never install outdoors or in any location where exposure to water or high humidity
may occur.
Doing so may result in re or electrical shock.
WARNING
Position so that the power plug is within immediate reach at all times.
This is to enable quick disconnection of the power plug in the event of an emergency.
Install the machine next to an electrical outlet. Also, provide enough empty space
to allow immediate access to the electrical outlet.
Never install in a location subject to wide uctuations in temperature or humidity.
Never install in a location subject to shaking or vibration.
Never install in a location where the oor is tilted, not level, or unstable.
Never install in a dusty or dirty location, or outdoors.
Never install in a location exposed to direct sunlight or near air-conditioning or heating equipment.
Never install in a location exposed to considerable electrical or magnetic noise, or other forms of electromagnetic en-
ergy.
Never install in an environment where silicone substances (oil, grease, spray, etc.) are present.
17

Installation Space
Ensure that at least the following amount of space is available.
About the installation location
The height of installation should be 0.6 m (23.7 in.) or higher above the work oor.
This machine is desktop type. Install in a location that allows easy access to areas such as the main power switch during
operation.
Installation space
Work space
1.0 m
1.0 m
2.0 m
2.0 m
2-2 Installation
18
Chapter 2 Installation and Setup
/