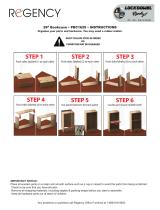
IMPORTANT NOTICE
Place all wooden parts on a clean and smooth surface such as a rug or carpet to avoid the parts from being scratched.
Check to be sure that you have a ll parts and hardware.
Remove all wrapping materials, including staples & packing straps before you start to assemble.
Do not tighten all screws/bolts until completely assembled.
Keep all hardware parts out of reach of children.
Any problems or questions please call Regency Office Furniture at 1-866-816-9822
A
B
C
D
E
F
G
A. Table Top
B. Large Base
C. Cylinder
D. Spider
E. Rod
F. Foot (4)
G. Screws (8)
Square Table Top INSTRUCTIONS
Step 1: Screw 4 feet (F) into
base (B) leg ends.
Step 2: Remove the nut from rod
(E) and set aside.
Step 3: Insert the rod (E) through the
hole in the base (B) and attach nut to
exposed rod end under base bottom.
STEP 4: Next place the cylinder
(C) over the exposed metal rod
STEP 5: Place the exposed end of
the metal rod
(E) through the hole
in the spider (D) and twist the nut
back onto the rod until tight.
The product
should now
look like the
example to the
right.
Organize your parts. You will need a drill, crescent wrench and a pencil. Two people are required for assembly.
(MTBX22, MTBX30, MTBX36, TTSQ3030, TTSQ3636, TTSQ4242, TTSQ4848)
STEP 6: Turn Table Upside down
. Draw 2 diagonal lines across
the table bottom from upper right
corner to lower left then lower
right to upper left.
STEP 7: Place dot 1, located on the
template, directly over the crossing
lines.
STEP 8: Once aligned punch a
pen through remaining template
dots 2,3,4,5 and mark table bot-
tom.
1
2
11
3
4
5
STEP 10: Line up marks made on
the table from step 8 holes on
spider arms.
STEP 11: Screw in all 8 screws
(G) and flip table over.
STEP 9: Place
table top (A) flat
on the floor and
set the
completed base
(H) over the cen-
ter.
H
1
2
3
4
5
2
3
4
5
1
1


