Page is loading ...

BA13-AR_AE_BR_BE-e-0-cover.indd 5 2009-03-24 오전 10:56:16

BA13-AR_AE_BR_BE-e-0-cover.indd 5 2009-03-24 오전 10:56:16

Table of Contents
1. Precaution
1-1 Precautions on electricity ................................................................................1-2
1-2 Precautions on installation ..............................................................................
1-3
1-3 Precautions on services ..................................................................................
1-4
2. Product characteristics and specifications
2-1 Product characteristics ....................................................................................2-1
2-1-1 BA13-A/B Common Functions ............................................................
2-1
2-1-2 Additional functions for the BA13-BR/BE ............................................
2-2
2-2 Major specifications
.........................................................................................2-3
2-3 Appearance and dimensions
...........................................................................2-4
3. Product installation
3-1 Installation materials .......................................................................................3-1
3-1-1 Parts ....................................................................................................3-1
3-2 Installation method ..........................................................................................
3-3
3-2-1 Precautions on installation ..................................................................
3-3
3-2-2 Using the rear nozzle .........................................................................
3-3
3-2-3 Installing the tubing hose type ............................................................
3-4
3-2-4 Installing the braid hose type ...............................................................
3-6
3-2-5 Installing the remote control mount .....................................................
3-8
3-3 Checking the system after installation
.............................................................3-10
4. Disassembling and refitting
4-1 Disassembling and refitting information ..........................................................4-1
4-1-1 Disassembling and refitting information ..............................................
4-1
4-1-2 Necessary tools ...................................................................................
4-1
4-2 Overall disassembling and refitting of BA13-A/B ............................................
4-2
4-2-1 Disassembling the Top Cover / Body Frame .......................................
4-2
4-2-2 Disassembling the Seat Cover / Seat ..................................................
4-4
4-2-3 Disassembling the Main / Power / SMPS PBA ....................................
4-6
4-2-4 Disassembling the Sterilization / Deodorization Assembly ..................
4-8
4-2-5 Disassembling the Nozzle Assembly ...................................................
4-10
4-2-6 Disassembling the Nozzle Assembly parts ..........................................
4-11
4-2-7
Disassembling the Flow Volume Adjustment Valve Assembly / Air Pump
..4-12
4-2-8 Disassembling the Air Dryer Assembly ................................................
4-13
4-2-9 Disassembling the Instant Hot Water Assembly ..................................
4-14
4-2-10 Disassembling the Instant Hot Water Assembly parts .........................
4-15
4-2-11 Disassembling the Feed Water Valve Assembly .................................
4-21
4-2-12 Disassembling the Side PBA-L
............................................................4-23
4-2-13 Disassembling the Fixer-Hook ............................................................
4-23

5. Fault diagnosis
5-1 Diagnosing and repairing faults.......................................................................5-1
5-2 Checking methods per error mode
..................................................................5-4
6. Exploded view of the system and the list of service parts
6-1 Exploded view and parts list of BA13-AR/AE/BR/BE ......................................6-1
6-2 Exploded view and parts list of Nozzle-Assy
...................................................6-3
6-3 Service parts list of BA13-AR/AE/BR/BE ........................................................
6-5
7. Parts location diagrams
7-1 Electrical wiring diagram .................................................................................7-1
7-2 PBA location diagram ......................................................................................
7-2
7-2-1 MAIN PBA ...........................................................................................
7-2
7-2-2 POWER PBA .......................................................................................
7-5
7-2-3 DECO_LED PBA .................................................................................
7-6
7-2-4 BUTTON PBA ......................................................................................
7-7
7-2-5 IR PBA .................................................................................................
7-8
7-2-6 REMOTE CONTROL PBA ...................................................................
7-9
8. Reference information
8-1 Names of each part .........................................................................................8-1
8-2 Functions and reference information
...............................................................8-3
8-2-1 Explanation of indication and operation parts .....................................
8-3
8-2-2 Remote control explanation of indication and operation parts ............
8-5
8-2-3 Using the rear nozzle ..........................................................................
8-8
8-2-4 Using the front nozzle .........................................................................
8-9
8-2-5 Function specifications ........................................................................
8-11
8-2-6 The Water Flow Volume for each Step of the
Rear/Front Cleansing operations .......................................................
8-35
8-2-7 Power Consumption
(Electric charge under the full-loading condition) ................................
8-35
8-2-8 Resistance value and voltage per temperature sensor
(T1, T2, Seat) temperature (10.74 kΩ / 25 °C / 2.5 V).........................8-36
8-3 After services ..................................................................................................
8-37
8-3-1 Cleaning the nozzles ...........................................................................
8-37
8-3-2 Cleaning the product body ..................................................................
8-38
8-3-3 Removing the product .........................................................................
8-39
8-3-4 Cleaning the MESH filter .....................................................................
8-40

Coway co., Ltd
1-1
Precaution
1. Precaution
1. The precautions are for consumers to use the product safely and correctly, and to prevent accidents
or risks during product repairs. Please read the precautions carefully and comply with them.
2. Precautions are classified into Danger, Warning, and Caution with the meanings as follows:
Danger If not observed, serious injury or even death may occur as a result.
Warning If not observed, serious physical injury or property damage may occur as a result.
Caution If not observed, minor physical injury or property damage may occur as a result.

1-2
Coway co., Ltd
Precaution
1-1 Precautions on electricity
Do not use a damaged power cord or loose electric outlet.
- Otherwise electric shock or fire may occur as a result.
Do not pull the power cord or handle the power plug with a wet hand.
- Otherwise short circuit, electric shock, or fire may occur as a result.
Do not forcefully bend the power cord or run it under a heavy object to prevent it from being
damaged or deformed.
- Otherwise electric shock or fire may occur as a result.
If the electrical outlet is wet, carefully unplug the unit and let the electric outlet completely dry before
subsequent use.
- Otherwise electric shock or fire may occur as a result.
Unplug the product before repair, inspection, or parts replacement.
- Otherwise electric shock may occur as a result.
Do not plug into an electrical outlet or power strip that is being used by several other appliances.
Use an electrical outlet dedicated to the product.
- Otherwise fire may occur as a result.
Do not attempt to repair or modify the power cord.
- Otherwise electric shock or fire may occur as a result.
Remove any dust or water off the power plug.
- Otherwise electric shock or fire may occur as a result.
Do not connect and pull out the power plug repeatedly.
- Otherwise electric shock or fire may occur as a result.
In the case the power cord is damaged, do not replace the cord yourself. Call Coway Service Center
to have it replaced.
- Otherwise electric shock or fire may occur as a result.

Coway co., Ltd
1-3
Precaution
1-2 Precautions on installation
Do not install the product where the bidet is exposed to direct sunlight or heating devices.
- Otherwise product deformation or fire may occur as a result.
Do not install the product in areas where moisture or water (rainwater) is present.
- Otherwise electric shock or fire may occur as a result.
Do not use the product in areas where flammable gases or combustible materials are used or stored.
- Otherwise fire may occur as a result.
Use tap water as supply water.
- Industrial water or gray water, if used as supply water, may cause skin damage or diseases.
Do not connect the water inlet to the hot water supply pipe.
- Otherwise product malfunctions or accidents may occur as a result. (Make sure to connect the
water inlet to the cold water supply pipe.)
After installation, make sure to check water supply connections for leaks.
- Rubber packing must be applied to the water hose connections.
When installing the bidet
- Tighten the fixing bolts firmly so that the bidet body won’t be shaky on the toilet.
Installing location
- As the bidet should be installed on the toilet, take caution not to have water splashed on the bidet.
After the bidet is installed
- Keep the removed existing toilet seat in a shaded place to prevent its damage.
Cold water piping
- Make sure to connect the water inlet to the cold water supply pipe. (If the product is connected to
hot water pipe, the filter and hose may be damaged.)

1-4
Coway co., Ltd
Precaution
1-3 Precautions on services
Before the service
Do not let consumers disassemble, repair, or modify the product.
- Otherwise electric shock, fire, or product damage may occur as a result.
To prevent the risk of electric shock, unplug the unit before checking and repairing the product.
- Before checking or repairing the product, make sure to discharge the electrical unit of PBA.
Otherwise, high-voltage electric shock may occur as a result.
To remove the power cord from the electrical outlet, make sure to do it by pulling the power plug.
- Otherwise the power cord may be damaged and electric shock or fire may occur as a result.
- Do not pull out the power plug from the electric outlet with a wet hand.
Do not have the power plug applied to a single electrical outlet to which several other electrical
appliances are connected.
- Otherwise fire may occur as a result of overheating.
When cleaning the product, do not have water or detergent sprinkled on or applied directly to the
product.
- Otherwise electric shock, fire, or product damage may occur as a result.
Do not have an electrical heater placed near the product or have flamed materials such as a lit
cigarette disposed of in the toilet.
- Otherwise fire or product deformation may occur as a result.
Do have any containers with water, medicine, food, any metallic objects, or any flammable material
placed or used on top of the product.
- In the case foreign material gets inside the product, electric shock or fire may occur as a result.
Do not have flammable sprays or materials (gasoline, thinner, alcohol, etc) used or stored near the
product.
- Otherwise fire or product deformation may occur as a result.

Coway co., Ltd
1-5
Precaution
During the service
During the service, check for damage, deformation, or deterioration of the power plug and the
electrical outlet.
- If any abnormality is found, repair or replace the power plug or electrical outlet to prevent electric
shock or fire.
When servicing the product, completely remove dust or foreign material from housing, connection,
and connector parts.
- It is to prevent fire caused by tracing or short circuit.
Check electrical parts, harnesses or connectors for any trace of moisture.
- When moisture exists, replace the parts or completely remove the moisture.
When fitting connectors to PBA terminals, make sure to push the connectors through until you hear
the
‘
click
’
sound.
- If connectors are loosely fitted, a product malfunction or fire may occur as a result.
If a harness or connector terminal is damaged (cut), do not repair but replace it.
- If it is repaired using materials such as insulating tapes, product malfunction or fire may occur as a
result.
After the service
After servicing the product, check the overall assembly status and terminal connection of terminals.
- If electrical wiring is under pressure or parts are fitted incorrectly, re-assemble the product.
Exercise caution not to have internal electrical wiring touches moving parts or sharp objects.
- Otherwise, product malfunction, short circuit, or fire may occur as a result.
After checking the product, tighten the fixing bolts firmly so that the product body is not shaky on the
toilet.
- If the product body is shaky on the toilet or installed out of balance, users may fall down from the
toilet, resulting in injury.
After servicing the product, make sure to check connections such as supply water valve, water
supply hose, or T-shaped valve for leaks.
- Otherwise electrical shock or injury may occur as a result.
Make sure to use a grounded electrical outlet. In the case of short circuit, grounding prevents electric
shock or injury.
- Make sure to connect the power plug to a dedicated electrical outlet with grounding terminals.
If an extension cord should be used, make sure to use one with grounding terminals for power
rating AC 250V 7A or higher.
Connect the electricity and check that the unit operates properly before letting consumers use the
product.
- Make sure to inform the consumer of the malfunction and repair details.

1-6
Coway co., Ltd
MEMO

Product characteristics and specifications
Coway co., Ltd
2-1
2. Product characteristics and specifications
2-1 Product characteristics
2-1-1 BA13-A/B Common Functions
Instant warm water system
- The water is instantly heated when using the rear and front cleaning
functions so that you can immediately use water at your desired
temperature.
Air+ function
- The water stream with air bubbles provides softer, stronger cleansing.
MESH FILTER
- The MESH filter is a semi-permanent item. You can use the filter
repeatedly by cleaning it.
Eco mode
- Bidet eco mode: If the seat sensor does not detect someone sitting
down or no panel or remote control button is pressed for approximately
10 minutes, the seat temperature is set to ‘l’, so that power
consumption is reduced. when bidet eco mode is activated, the eco
mode indicator on the front is turned on.
- Remote control eco mode: If no remote control button is pressed for
approximately 5 seconds, the remote control display is turned off to
reduce the power consumption of the remote control battery.
Stainless steel twin nozzle adopted for enhanced hygiene
- By adopting stainless steel nozzles, you can use the product more
hygienically. In addition, the separation of the cleansing nozzle and the
bidet nozzle ensures extra hygiene.
Wide Water stream
- A widely spread water stream applied to the cleaning water for smoother cleaning.

Product characteristics and specifications
2-2
Coway co., Ltd
2-1-2 Additional functions for the BA13-BR/BE
Wide function
- You can directly select the degree of spread of the cleansing water
from a strong flow of water to a soft, spread-out water flow when using
rear and front cleansing.
Deodorization function
- Once the seat sensor detects a person sitting, the deodorization
function automatically deodorizes odors ensuring a refreshed feeling.
Sterilization function using oxidized silver
- This bidet sterilizes the nozzle with oxidized silver sterilizing water.

Product characteristics and specifications
Coway co., Ltd
2-3
2-2 Major specifications
Basic specifications
Model no. BA13-AR/AE/BR/BE
Standard power voltage 120 V~ 60 Hz
Power consumption 1,200 W
Supply water pressure 0.11 MPa - 0.68 MPa
Dimensions
BA13-AR/BR 382 mm (Width) x 493 mm (Depth) x 144 mm (Height)
BA13-AE/BE 382 mm (Width) x 528 mm (Depth) x 144 mm (Height)
Weight 6 kg ~ 6.5 kg
Warm
water
cleansing
device
Rear cleansing Maximum 0.5 L/min, automatic nozzle self-cleaning function
Front cleansing Maximum 0.5 L/min, automatic nozzle self-cleaning function
Standard time
Rear cleansing 1 minutes, front cleansing 1 minutes, drying 2 minutes
Water pressure control 3 levels Micom control
Warm water temperature control
4 levels (Off: Main water supply temperature, L: 31.5 °C,
M: 34.5 °C, H: 37.5 °C)
Power consumption by heater
1,250 W
Safety devices
Bimetal, temperature sensor,
temperature fuse (overheating prevention), micro switch
Air dryer
device
Warm air temperature control
4 levels (Off: Room temperature, L, M, H)
Standard time Drying for 2 minutes
Power consumption by heater
180 W
Safety devices Bimetal, temperature fuse (overheating prevention)
Heated
seat
Seat temperature control
4 levels (Off: Room temperature, L: 31 °C, M: 34 °C, H: 37 °C)
Power consumption by heater
60 W
Safety devices Bimetal, temperature fuse (overheating prevention)
MESH filter
Specifications 25.2 mm (Length) x 19.8 mm (Ø)
Installation parts
T-shaped connector, bidet hose, fixing plate 2 fixing screws,
2 fixing rubbers, 2 fixing washers, 2 fixing nuts, 2 fixing sliders,
2 screws, 2 anchors, 3 batteries (AAA), Remote control mount
Other functions
Instant warm water system, AIR+water stream, MESH filter,
Power-saving function, Stainless nozzle
(The Wide, Deodorization and Sterilization functions are supported
for the BA13-BR/BE only)
Operating temperature
0 °C ~ 40 °C
The specifications are subject to change without prior notice for reasons of improving the product
performance.

Product characteristics and specifications
2-4
Coway co., Ltd
2-3 Appearance and dimensions
BA13-AR/BR [382 mm (Width) × 493 mm (Depth) × 144 mm (Height)]
411 mm
(16.2 inch)
382 mm
(15 inch)
202 mm
(7.9 inch)
350 mm
(13.8 inch)
134 mm
(5.3 inch)
411 mm
(16.2 inch)
382 mm
(15 inch)
202 mm
(7.9 inch)
385 mm
(15.2 inch)
134 mm
(5.3 inch)
140 mm ~ 210 mm
(5.5 ~ 8.3 inch)
Rear fixing distance : 164 mm (6.5 inch)
49 mm
(1.9 inch)
140 mm ~ 210 mm
(5.5 ~ 8.3 inch)
411 mm
(16.2 inch)
382 mm
(15 inch)
202 mm
(7.9 inch)
350 mm
(13.8 inch)
134 mm
(5.3 inch)
411 mm
(16.2 inch)
382 mm
(15 inch)
202 mm
(7.9 inch)
385 mm
(15.2 inch)
134 mm
(5.3 inch)
140 mm ~ 210 mm
(5.5 ~ 8.3 inch)
Rear fixing distance : 164 mm
(6.5 inch)
49 mm
(1.9 inch)
140 mm ~ 210 mm
(5.5 ~ 8.3 inch)
►BA13-AR/BR(Roundshape)
►Bottomview ►Distancebetweenfixingholes

Product characteristics and specifications
Coway co., Ltd
2-5
BA13-AE/BE [382 mm (Width) × 528 mm (Depth) × 144 mm (Height)]
411 mm
(16.2 inch)
382 mm
(15 inch)
202 mm
(7.9 inch)
350 mm
(13.8 inch)
134 mm
(5.3 inch)
411 mm
(16.2 inch)
382 mm
(15 inch)
202 mm
(7.9 inch)
385 mm
(15.2 inch)
134 mm
(5.3 inch)
140 mm ~ 210 mm
(5.5 ~ 8.3 inch)
Rear fixing distance : 164 mm (6.5 inch)
49 mm
(1.9 inch)
140 mm ~ 210 mm
(5.5 ~ 8.3 inch)
411 mm
(16.2 inch)
382 mm
(15 inch)
202 mm
(7.9 inch)
350 mm
(13.8 inch)
134 mm
(5.3 inch)
411 mm
(16.2 inch)
382 mm
(15 inch)
202 mm
(7.9 inch)
385 mm
(15.2 inch)
134 mm
(5.3 inch)
140 mm ~ 210 mm
(5.5 ~ 8.3 inch)
Rear fixing distance : 164 mm
(6.5 inch)
49 mm
(1.9 inch)
140 mm ~ 210 mm
(5.5 ~ 8.3 inch)
►BA13-AE/BE(Elongatedshape)
►Bottomview ►Distancebetweenfixingholes

2-6
Coway co., Ltd
MEMO

Product installation
Coway co., Ltd
3-1
3. Product installation
3-1 Installation materials
3-1-1 Parts
No. Accessories Item Remark
1 2 fixing screws
2 2 fixing rubbers
3 2 fixing washers
4 2 fixing nuts
5 Fixing plate
6 2 fixing sliders
7 T-shaped connector (for the tubing hose)
8 Rubber packing
9 Tubing hose

Product installation
3-2
Coway co., Ltd
No. Accessories Item Remark
10 T-shaped connector (for the braid hose)
11 Braid hose
12
Remote control mount (including the
sticker for attachment)
13 2 screws
14 2 anchors
15 3 batteries (AAA)

Product installation
Coway co., Ltd
3-3
3-2 Installation method
3-2-1 Precautions on installation
When installing the bidet
Tighten the fixing bolts firmly so that the bidet body won’t be shaky on the toilet.
Installing location
As the bidet should be installed on the toilet, take caution not to have water splashed on the bidet.
After the bidet is installed
Keep the removed existing toilet seat in a shaded place to prevent its damage.
Cold tap water
Make sure to connect the bidet to cold water. (If the product is connected to hot water, the filter and
hoses of the bidet may be damaged.)
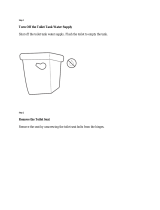
3-2-2 Using the rear nozzle
No.
Explanation Reference picture
1
1) Remove the existing toilet seat
1 and seat cover
2 by removing the fixing nuts.
Keep the removed toilet seat in a shaded
location to prevent it from being damaged.
2
1

Product installation
3-4
Coway co., Ltd
3-2-3 Installing the tubing hose type
No.
Explanation Reference picture
1
1) Turn off the main water supply valve
1 and
disconnect the existing water tank hose
2.
2 1) Connect the rubber packing, the T-shaped
connector (for the tubing hose), and the water
tank hose in this order to the existing water
pipe. Connect the tubing hose to the T-shaped
connector (for the tubing hose).
Please ensure that the rubber packing is inserted
between the water pipe and the T-shaped
connector (for the tubing hose).
Firmly tighten the nuts below and on top of the
T-shaped connector (for the tubing hose) all the
way in a clockwise direction.
3 1) Place the fixing slider over the fixing plate on the
toilet, insert the fixing bolt, and fasten the nut so
that the fixing plate is fixed.
4 1) Align the back of the bidet with the fixing plate
and push the bidet backwards while pressing the
button to the left of the bidet. (Hold the bidet with
both hands and push it backwards until it clicks
into place.)
Check if the bidet moves to the left or right. If it
moves, fasten the fixing nuts again.
Cold main water supply
- Make sure that the bidet is connected to the cold water pipe.
(If the product is connected to the hot water pipe, this may damage the filter and hose).
1
2
/