Page is loading ...

© April 2014, AMT Datasouth Corp.
Fastmark M3 Series
Portable Direct Thermal Bar Code Printer
User’s Guide
Document # 120320

- ii -
Copyright Declaration
Information in this manual is subject to change without notice and does not represent a
commitment on the part of AMT Datasouth Corporation. No part of this manual may be
reproduced or transmitted in any form by any means, for any purpose other than the
purchaser’s personal use, without the expressed written permission of AMT Datasouth
Corporation.
Trademark Credits:
CG is a registered trademark of Agfa Corporation.
CG Triumvirate Bold Condensed font is under license from the Monotype
Corporation.
Windows is a registered trademark of Microsoft Corporation.
All other trademarks are property of their respective owners.
Regulatory Agency Approvals:
CE CLASS B
EN 55022:2006 +A1:2007
EN 55024:1998+A1:2001+A2:2003
EN 61000-4 SERIES REQULATIONS
http://www.amtdatasouth.com/support-1/downloads/
FCC CFR Title 47 Part 15 Subpart
B:2011 Class B
ICES-003 Issue 4:2004 Class B
AS/NZS CISPR22---ITE
AS/NZS 4268-----RF (WIFI & BT)
Following standards for SAR (WIFI)
Radio communications (Electromagnetic Radiation-Human
Exposure) Standard 2003 Amendment 2011 IEC 62209-2

- iii -
Regulatory Statements:
Wichtige Sicherheits-Hinweise
1.
Bitte lesen Sie diese Hinweis sorgfältig durch.
2.
Heben Sie diese Anleitung fűr den späteren Gebrauch auf.
3.
Vor jedem Reinigen ist das Gerät vom Stromentz zu trennen. Verwenden Sie
keine Flüssig-oder
Aerosolreiniger. Am besten eignet sich ein angefeuchtetes
Tuch zur Reinigung.
4.
Die Netzanschluß-Steckdose soll nahe dem Gerät angebracht und leicht zugänglich
sein.
5.
Das Gerät ist vor Feuchtigkeit zu schűtzen.
6.
Bei der Aufstellung des Gerätes ist auf sicheren Stand zu achten. Ein Kippen
oder Fallen könnte
Beschädigungen hervorrufen.
7.
Beachten Sie beim Anschluß ans Stromnetz die Anschlußwerte.
8.
Dieses Gerät kann bis zu einer Außentemperatur von maximal 40℃ betrieben
warden.
Battery safety warning:
DO NOT throw the battery in fire.
DO NOT short circuit the contacts.
DO NOT disassemble the battery.
DO NOT throw the battery in municipal waste.
The symbol of the crossed out wheeled bin indicates that the battery should not be
placed in municipal waste.
CAUTION
Risk of explosion if battery is replaced by an incorrect type. Dispose of used batteries
according to the instructions

- iv -
FEDERAL COMMUNICATIONS COMMISSION INTERFERENCE STATEMENT
This equipment has been tested and found to comply with the limits for a Class B
digital device, pursuant to part 15 of the FCC Rules. These limits are designed to
provide reasonable protection against harmful interference in a residential installation.
This equipment generates, uses and can radiate radio frequency energy and, if not
installed and used in accordance with the instructions, may cause harmful interference
to radio communications. However, there is no guarantee that interference will not
occur in a particular installation. If this equipment does cause harmful interference to
radio or television reception, which can be determined by turning the equipment off and
on, the user is encouraged to try to correct the interference by one or more of the
following measures:
-Reorient or relocate the receiving antenna.
-Increase the separation between the equipment and receiver.
-Connect the equipment into an outlet on a circuit different from that to which the receiver is
connected.
-Consult the dealer or an experienced radio/ TV technician for help.
This device complies with Part 15 of the FCC Rules. Operation is subject to the
following two conditions: (1) This device may cause harmful interference, and (2) this
device must accept any interference received, including interference that may cause
undesired operation.
CAUTION:
Any changes or modifications not expressly approved by the grantee of this device
could void the user's authority to operate the equipment.
RF exposure warning (WiFi)
This equipment must be installed and operated in accordance with provided
instructions and must not be co-located or operating in conjunction with any other
antenna or transmitter. End-users and installers must be providing with antenna
installation instructions and transmitter operating conditions for satisfying RF exposure
compliance.
SAR Value: 0.023 W/kg

~ 6 ~
User Caution................................................................................................................... 8
Packaging ....................................................................................................................... 9
Unpacking the printer .................................................................................................................................... 9
Removing protective material ........................................................................................................................ 9
Introduction .................................................................................................................. 10
Product ........................................................................................................................................................ 10
Key features ................................................................................................................................................. 10
Printer Overview .......................................................................................................... 11
Front view .................................................................................................................................................... 11
Open view .................................................................................................................................................... 12
Bottom view ................................................................................................................................................. 12
Operator Controls ........................................................................................................ 13
LED indication and keys .............................................................................................................................. 13
Setup ............................................................................................................................. 14
Installing the battery .................................................................................................................................... 14
Battery charging........................................................................................................................................... 15
Charging station........................................................................................................................................... 16
Vehicle charger ............................................................................................................................................ 17
Loading media ............................................................................................................................................. 18
Installing belt clip ......................................................................................................................................... 20
Installing IP54-rated environmental case .................................................................................................... 21
Connecting the printer interface .................................................................................................................. 22
Cable communications ................................................................................................................................ 22
Bluetooth communication ............................................................................................................................ 23
Wireless communications with WiFi ............................................................................................................ 23
Power-ON Utilities ........................................................................................................ 24
Power-ON Utility options ............................................................................................................................. 24
Media sensor calibration .............................................................................................................................. 24
Self-test and Dump Mode ............................................................................................................................ 25
Self-test printout........................................................................................................................................... 26
Dump Mode printout .................................................................................................................................... 27
Printer Initialization ...................................................................................................................................... 27
Printer defaults............................................................................................................................................. 28
Table of Contents

~ 7 ~
PAL
TM
Print and Program Overview ........................................................................... 29
Traditional printing ....................................................................................................................................... 29
Legacy data stream interpretation ............................................................................................................... 29
Standalone/downtime applications .............................................................................................................. 30
Diagnostic Tool ............................................................................................................ 32
Starting diagnostic tool ................................................................................................................................ 32
Printer functions ........................................................................................................................................... 33
Setting Bluetooth configuration .................................................................................................................... 34
Setting WiFi configuration ............................................................................................................................ 35
Calibrating media sensor ............................................................................................................................. 36
Troubleshooting ........................................................................................................................................... 37
Maintenance ................................................................................................................................................ 39
Product Characteristics .............................................................................................. 40
Printer specifications ................................................................................................................................... 40
Bar code symbologies ................................................................................................................................. 41
Media ........................................................................................................................................................... 41
Optional features ......................................................................................................................................... 42

~ 8 ~
User Caution
Battery charge takes 2~3 hours
before the first time usage. While
charging the status LED color is
solid amber, fully charged green.
Before connecting or disconnecting
the USB/Serial cable, be sure to turn
off the printer.
Do not connect the printer AC
adaptor to a non-standard power
source. Refer to safety label on
adapter.
Unpack the printer. Make sure that the
printer body and all accessories are
included in the package and no parts are
damaged.
Battery Safety:
DO NOT short circuit the contacts.
DO NOT disassemble the battery.
DO NOT throw the battery in municipal
waste.
Do not use the printer in any location
subject to sudden changes in
temperature, humidity or heat generating
equipment.
Operational safety
CAUTION
Cautions in setting up
CAUTION
Mechanical and electrical repairs
should be conduct by qualified
service personnel.
Refer to the product label (back of the
printer) and verify your power source
exactly meets those requirements.
Do not use this product near heat or
water while utilizing AC power outlet.
Unplug this product from the power
outlet before cleaning.
If the case or cover becomes dirty,
clean it with a soft cloth moistened
with a small quantity of neutral
detergent diluted with water. Never
use a hard cloth or volatile solvent
such as alcohol, thinner, or benzene.
Do not turn off the printer during printing,
as this may lead to a malfunction.
Refer to print adjustments in this manual
before attempting alignments.

~ 9 ~
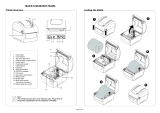
Packaging
Unpacking the printer
Removing protective material
1. This printer has been specially packaged to withstand damage during
shipping. Please carefully inspect the packaging and printer upon
receipt. Open the carton and remove the printer from bubble wrap.
2. If any parts are missing, please contact the Customer Service
Department of your purchased reseller or distributor.
3. It is recommended to keep packaging materials for future use if needed.
CD ROM
AC Adaptor
Quick Start Guide

~ 10 ~
Introduction
Product
Thank you for purchasing your AMT Datasouth bar code printer.
The Fastmark M3 is a, light-weight portable printer efficient for printing quick and
trouble-free labels or receipts on demand. The Fastmark M3 is designed for a
rough life, inside the IP54-rated environmental case to resist dust and water and
with its rubber over-mold design prepared to take up to a five foot fall and keep
printing. These small and light printers can be worn comfortably for a full shift,
without interfering with the user’s tasks. Use USB, Bluetooth, optional 802.11
b/g/n Wireless or serial to connect to a mobile computer or even a smart phone
and produce clear easy-to-read labels or receipts hour after hour.
Applications:
Point of sale
Retail
Healthcare patient safety
Work in process
Distribution
Shipping/ receiving
Compliance labeling
Order fulfillment
Logistics receipts
Ticketing
Key features
IP54 rated protective case to resist dust and water
Plastic design with rubber over-mold construction that withstands
5-foot drop
Ready for EPL, ZPL, CPCL or PAL environments, WinCE Quick-
Link tool & SDK and iOS SDK
Wired & Wireless communications (USB 2.0, RS-232, Bluetooth,
and 802.11 b/g/n)
High-speed processor and extensive memory for fast print speeds
of up to 4-inches per second
2-year limited warranty

~ 11 ~
Printer Overview
Front view
1. LED indicator
2. Feed button
3. Power ON/OFF button
4. Media cover release button
5. Media holder adjustment Knob
6. Media cover
1
2
4
6
3
5

~ 12 ~
Open view
Bottom view
1. Tear edge
2. Print head
3. Media holder
4. Platen
5. Media sensor
*The media sensor position (#5) is selectable by factory
adjustment (L/C/R). Default is the center position.
5
1
3
4
2
1. Li-ion battery
2. Battery open clasp
3. USB interface
4. Power jack
5. Interface cover
1
2
3
4
5

~ 13 ~
Operator Controls
LED indication and keys
1
2
3
4
5
6
1. Power ON/OFF Button
2. Printer status LED
3. Battery charge level LED’s
4. Battery status LED
5. Wireless status LED
6. Feed Button
LED
Status
Indication
Printer status LED
indicator
Off
Printer is ready
Green (blinking)
Printer is paused
Red (solid)
Media cover is open
Red (blinking)
Printer error
Battery status LED
indicator
Green (blinking)
Recharge the battery
Amber (solid)
Battery is charging
Battery charge level
LED indicator
Green
(solid)
Full charged
2/3 charged level
1/3 charged level
WiFi/Bluetooth
status LED indicator
Blue (solid)
Device is ready
Blue (blinking)
Device is communicating
Keys
Function
1. Press and hold for 2-3 seconds to turn on the printer.
2. Press and hold for 2-3 seconds to turn off the printer.
1. Ready status: Feed one label
2. Printing status: Pause the print job

~ 14 ~
Setup
Installing the battery
1. Insert the left side to install
the battery at the rear of the
printer.
2. Push the right side of the
battery.
3. Pull the battery clasp to lock
the battery.
Battery safety warning:
DO NOT throw the battery in fire. DO NOT short circuit the contacts.
DO NOT disassemble the battery. DO NOT throw the battery in municipal
waste. The symbol of the crossed out wheeled bin indicates that
the battery should not be placed in municipal waste.
PUSH

~ 15 ~
Battery charging
It takes 2~3 hours to fully charge the battery before the first time usage. The
lifetime of the battery is 300 times for charge/discharge cycles.
1. Open the interface cover
and plug the power cord to
the power jack.
2. Plug the power adaptor into
an appropriate power outlet.
3. When the battery is
charging, the status LED
indicator is solid amber.
Safety Warning:
Turn OFF printer power before
pluging in power adater. DO NOT
remove battery from printer while
charging
Note:
When charging is complete
(approximately 4~8 hours) the amber
LED will turn off.

~ 16 ~
Charging station
1. Plug power adaptor jack
into the charger station.
2. Install the battery in the
charger station.
3. Plug the power adaptor into
an appropriate power outlet.
LED Color
Description
Green / Solid
Battery is completely charged
Red / Solid
Battery is charging
Red / Blinking
Battery charging error
Off
No battery
Battery is completely charged over 4 ~ 8 hrs.
(optional)

~ 17 ~
Vehicle charger
1. Open the interface cover and
plug the power cord to the
power jack.
2. Plug the vehicle power
adaptor into the car cigarette
lighter socket.
(optional)

~ 18 ~
Loading media
1. Open the printer media
cover by pressing the media
cover release button.
2. Use a coin to rotate the
media holder adjustment
knob, media roll should
have a loose fit to allow
rotation.
Media holder
Note:
The media holder should
overlap bold line dimension
as shown above.

~ 19 ~
3. Place the media roll inside
the printer as shown, and
pull paper past the tear
edge.
4. Press down on each side of
media cover to close, make
sure the cover snaps closed
on both right and left side.

~ 20 ~
Installing belt clip
1. Loop the belt clip through
the slot below the battery.
2. Fasten the belt clip with 2
buttons.
3. The printer can be hung on
a belt.

~ 21 ~
Installing IP54-rated environmental case
1. Open the case top cover.
2. Insert the printer into the
case.
3. Close top case and outside
covers.
Open outside cover while
printing.
Top cover
Outside cover
(optional)
/