Page is loading ...

Thermal Transfer Printer
User Guide
BBP11-34L
Ed 08/09

ii
BPP11 User Manual
Contents
Introduction
Product Introduction ............................................................................................... 1
Compliance ............................................................................................................ 1
Operations Overview
Unpacking and Inspection...................................................................................... 2
Printer Overview..................................................................................................... 3
Setup
Setting Up the Printer............................................................................................. 6
Open / Close the Top Cover................................................................................... 7
Loading the Ribbon ................................................................................................ 8
Loading the Media................................................................................................ 11
Diagnostic Tool..................................................................................................... 18
Install SD Memory Card ....................................................................................... 20
LED and Button Functions
LED Indicator ....................................................................................................... 21
Regular Button Function....................................................................................... 21
Power on Utilities.................................................................................................. 22
Troubleshooting........................................................................................... 27
Maintenance ................................................................................................. 29

BPP11 User Manual
iii
Copyright
This manual is copyrighted with all rights reserved. No portion of this manual may be copied or
reproduced by any means without the prior consent of
Brady Worldwide, Inc.
While every precaution has been taken in preparation of this document,
Brady assumes no liability to
any party for any loss or damage caused by errors or omissions or by statements resulting from
negligence, accident, or any other cause.
Brady further assumes no liability arising out of the
application or use of any product or system described, herein; nor any liability for incidental or
consequential damages arising from the use of this document.
Brady disclaims all warranties of
merchantability or fitness for a particular purpose.
Brady reserves the right to make changes without further notice to any product or system herein to
improve reliability, function, or design.
Reproduction of this material, in part or whole, is strictly prohibited without the written permission of
Brady Worldwide, Inc.. For more information, contact: Brady Worldwide, Inc. Signmark® Division,
2221 W. Camden Road, Milwaukee, WI 53209.
Disclaimer
Every effort has been made to make this guide as accurate and complete as possible. Brady
Worldwide, Inc.
is not responsible for inaccuracies and omissions occurring during the use of this
guide.
This manual is proprietary to
Brady Worldwide, Inc. and may be revised from time to time without
notice.
Brady Worldwide, Inc. disclaims any understanding to provide you with revisions, if any.
All brand or product names referenced in this manual are trademarks or registered trademarks of their
respective companies or organizations.
© 2009 Brady Worldwide, Inc. All rights reserved.
www.bradycorp.com
Edition 08/09
Identification Solutions Division
PO Box 2131
Milwaukee, WI 53201 U.S.A.
Phone: 1-800-537-8791 Fax: 1-800-292-2289

iv
BPP11 User Manual
Revision History
Date Content
2008/8/6 Revise the 3.4.3 section(Loading media in peel-off mode)
2009/08 Revise to include new Brady Standard.

BPP11 User Manual
1
CHAPTER 1 Introduction
Product Introduction
Thank you for purchasing the BRADY BBP11-34L series bar code printer. Although the
printer is small, it delivers reliable, superior performance.
This printer provides both thermal transfer and direct thermal printing at user-selectable
speeds of 2.0 or 3.0 ips. It accepts roll feed, die-cut, and fan-fold labels for both thermal
transfer and direct thermal printing. All common bar codes formats are available. Fonts and
bar codes can be printed in 4 directions, 8 different alphanumeric bitmap fonts and built-in
true type font capability. You will enjoy high throughput for printing labels with this printer.
Compliance
CE Class B:
EN55022: 1998+A1: 2000+A2: 2003
EN55024: 1998+A1: 2001+A2: 2003 IEC 61000-4 Series
EN61000-3-2: 2006 & EN61000-3-3: 1995+A1: 2001
FCC Part 15, Class B
UL, CUL
C-Tick:
CFR 47, Part 15/CISPR 22 3
rd
Edition: 1997, Class B
ANSI C63.4: 2003
Canadian ICES-003
TÜV-GS: EN60950: 2000
Note: Continuous printing will cause printer motor overheat. Printer will stop
printing automatically about 10~15 minutes until motor is cooled down. Do not turn
off power when printer pauses or the data transfered to printer buffer will be lost.
Note: The maximum printing ratio per dot line is 15% for this printer. To print the
full web black line, the maximum black line height is limited to 40 dots, which is
3.3 mm for 300 dpi resolution printer.

2
BPP11 User Manual
CHAPTER 2 Operations Overview
Unpacking and Inspection
This printer has been specially packaged to withstand damage during shipping. Please
carefully inspect the packaging and printer upon receiving the bar code printer. Retain the
packaging materials in case you need to reship the printer.
Unpacking the Printer
The following items are included in the carton:
• (1) Printer unit
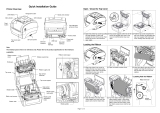
• (1) Product CD, including drivers
• (1) Quick installation guide
• (1) Power cord
• (1) Auto switching power supply
• (1) USB interface cable
If any parts are missing, please contact customer Service.

BPP11 User Manual
3
Printer Overview
Front View
1 Ribbon access cover
2 Top cover open lever
3 Media view window
4 LED indicator
5 Feed button
6 SD card socket
* Recommended SD card specification.
SD V 1.0, V 1.1 SD V 2.0 (SDHC)
9 128MB
9 256MB
9 512MB
9 1GB
9 4GB class 6
- Supported DOS FAT file system.
- Folders stored on the SD card should be in the 8.3 filename format.
- Approved SD card manufacturer: SanDisk, Transcend.

4
BPP11 User Manual
Interior View
1 Ribbon rewind hub
2 Ribbon rewind gear
3 Gap sensor (receiver)
4 Media holder
5 Media holder lock switch
6 Gap sensor (transmitter)
7 Printhead
8 Ribbon supply hub
9 Top cover support
10 Media guide adjustment knob
11 Black mark sensor
12 Platen roller

BPP11 User Manual
5
Rear View
1 Ethernet interface
2 USB interface
3 Parallel/LPT interface
4 Serial/COM interface
5 Power jack socket
6 Power switch
7 Fan-fold paper entrance chute

6
BPP11 User Manual
CHAPTER 3 Setup
Setting Up the Printer
1. Place the printer on a flat, secure surface.
2. Make sure the power switch is off.
3. Connect the printer to the computer with the provided USB cable.
4. Plug the power cord into the AC power cord socket at the rear of the printer, and then plug
the power cord into a properly grounded power outlet.
Ethernet RJ-45
Interface
USB Interface
Parallel/LPT Interface
Serial/COM Interface
Power Supply
Plug

BPP11 User Manual
7
Open / Close the Top Cover
1. Open the printer top cover by pulling the grey tabs located on each side toward the front
of the printer, then lift the top cover to the maximum open angle.
2. A top cover support at the rear of the printer will engage with lower inner cover to hold the
printer top cover open.
3. Hold the top cover and press the top cover support to disengage the top cover support
with lower inner cover. Gently close the top cover.

8
BPP11 User Manual
Loading the Ribbon
1. Open the top cover on the printer by pulling the green open levers located on each side of
the printer and lifting the top cover to the maximum open angle.
2. Open the ribbon access cover.
Note: In normal print mode, the ribbon access cover can be opened while opening
the top cover. The ribbon access cover can be closed while the top cover is open
or closed.
3. Insert the right side of the ribbon right onto the supply hub. Align the notches on the left
side and mount onto the spokes.

BPP11 User Manual
9
4. Insert the right side of the paper core onto the rewind hub. Align the notches on the left
side and mount onto the spokes.
5. Attach the ribbon leader onto the ribbon rewind paper core.
6. Turn the ribbon rewind gear until the plastic ribbon leader is thoroughly wound and the
black section of the ribbon covers the print head. Close the ribbon access cover and the
top cover.

10
BPP11 User Manual
Ribbon Loading Path

BPP11 User Manual
11
Loading the Media
Loading Media
1. Open the printer top cover by pulling the grey tabs, located on each side, toward the front
of the printer, then lift the top cover to the maximum open angle.
2. Separate and hold open the media holders.
3. Place the roll between the holders and close them onto the core.
4. Set the media holder lock switch to Lock (down) to hold the label roll firmly.

12
BPP11 User Manual
5. Optional: If using either an external media holder or folded labels, feed the media
through the rear external label entrance chute.
6. Place the paper, print side face up, through the media sensor .
7. Place the label leading edge onto the platen roller.
8. Move the media guides to fit the label width by turning the guide adjuster knob.
9. Disengage the top cover support and close the top cover gently.
10. Use the Diagnostic Tool to set the media sensor type and calibrate the selected sensor
(see the diagnostic utility quick start guide for more information):
a. Start Diagnostic tool.
b. Select Printer Configuration tab.
c. Click Calibrate Sensor button.
Note: Please calibrate the gap/black mark sensor when changing media.
Loading Path for Roll Labels

BPP11 User Manual
13
External Label Roll Mount Installation (Option)
1. Attach an external paper roll mount on the bottom of the printer.
2. Insert a 1” label spindle into a paper roll and install it on the external paper roll mount.
Note: If your paper core is 1 inch, remove the 1.5” core adapter from the fixed tab.
If label width is 4 inch wide, two fixed tabs are not required.
3. Open the top cover and separate the media holders to fit the media width.
4. Press down the media holder lock switch to fix the media holder.
5. Feed the media through the rear external label entrance chute:
a. Place the paper, print side face up, through the media sensor .
b. Place the label leading edge onto the platen roller.
1.5” Core Adapter*
Fixed Tab
1” Label Spindle
Printing Side
Face Up

14
BPP11 User Manual
6. Move the media guides to fit the label width by turning the guide adjuster knob.
7. Disengage the top cover support and close the top cover gently.
8. Use the Diagnostic Tool to set the media sensor type and calibrate the selected sensor
(see the diagnostic utility quick start guide for more information):
a. Start Diagnostic tool.
b. Select Printer Configuration tab.
c. Click Calibrate Sensor button.

BPP11 User Manual
15
Diagnostic Tool
The Diagnostic Utility is a toolbox that lets users explore the printer's settings and status;
change printer settings; download graphics, fonts, and firmware; create printer bitmap fonts;
and to send additional commands to the printer. Using this convenient tool, you can explore
the printer status and settings and troubleshoot the printer.
Note: This utility works with printer firmware V6.00 and later versions.
Start the Diagnostic Tool
1. To start the software, double click the Diagnostic tool icon .
Note: The diagnostic tool is located at D:\DiagTool.
2. There are four features (Printer Configuration, File Manager, Bitmap Font Manager,
Command Tool) included in the Diagnostic utility.
Features Tab
Printer
Functios
Printer Status
Printer
Setup
Interface

16
BPP11 User Manual
Printer Function (Calibrate Sensor, Ethernet Setup, RTC Setup…)
1. Select the PC interface connected to the bar code printer.
2. Click Function to set.
3. The detail functions in the Printer Function Group are listed in the table.
Note: For more information about Diagnostic Tool, refer to the diagnostic utility
quick start guide in the CD disk \ Utilities directory.
Function Description
Factory Default Initialize the printer and restore the settings to
factory default.
Dump Text Activate the printer dump mode.
Configuration Page Print printer configuration.
RTC Setup Synchronize printer Real Time Clock with PC.
Calibrate Sensor Calibrate the sensor specified in the Printer
Setup group media sensor field.
Reset Printer Reboot the printer.
Print Test Page Print a test page.
Ignore AUTO.BAS Ignore the downloaded AUTO.BAS program.
Ethernet Setup Setup the IP address, subnet mask, gateway for
the on board Ethernet.
/