
FLOAT
Installation Instructions

clarus.com | 888.813.7414 © 2018 Clarus. All rights reserved.
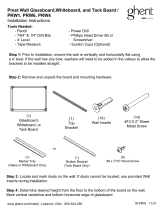
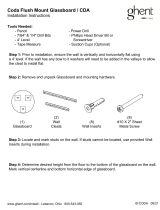
TOOLS NEEDED
PROVIDED HARDWARE
PREPARE YOUR
FLOAT GLASSBOARD
INSTALLATION
• Drill
• 1/4” Drill Bit
• Phillips Head Screw Driver
• Level
• Tape Measure
• Pencil
• Safety Gloves
• Safety Goggles
• Size 8 Screws
• Drywall Anchors
• Wall Bracket
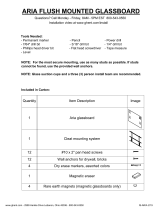
1. Follow uncrating instructions found on the exterior
of your crate.
2. Locate provided hardware.
1. Measure the distance from the top of the board, to the
boom of each row of TruMount clips
(clip adhered to
the glassboard)
. Add 7/8” to that measurement, this is
where you’ll line up the boom of the wall bracket.
2. Level wall brackets and mark hole locations with pencil.
3. Drill pilot holes for drywall anchors.
4. Install provided drywall anchors into pilot holes.
5. Install wall bracket into drywall anchors with provided
screws. (Fig. A).
6. Ensure screws are flush to wall bracket to prevent
scratching your glassboard.
7. Hang glassboard ensuring the TruMount clip is secure to
the wall bracket. (Fig. B).
Fig. A
Fig. B
-
 1
1
-
 2
2


Clarus Float 4x6 Installation guide
- Type
- Installation guide
Ask a question and I''ll find the answer in the document
Finding information in a document is now easier with AI
Related papers


Other documents
-
 Ghent PRW1M23BCWH Operating instructions
-
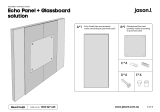 JasonL EWS36-36GB-BE Operating instructions
-
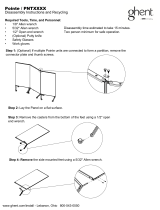 Ghent PNT1PN7736BLKCAS Assembly Instructions
-
Lintex 28828 Datasheet
-
 Lintex 40290 Datasheet
-
 Ghent Coda Circle Glassboard Installation guide
-
SelectBlinds Cordless Roller Shade Installation guide
-
 Ghent ARIASM48WH Installation guide
-
Genie M-4700 User manual
-
 Northwest HW0200004 User manual


