Page is loading ...

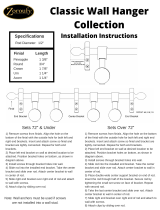
STEP BY STEP INSTALLATION INSTRUCTIONS
Wall Mount
Single Rod Set
Metro Track
Flat Aluminum
Hardware
© 2019 Smith & Noble Home, Inc. All Rights Reserved SN0419
Warranty Service
The enjoyment of your hardware should be everlasting, which is why our
products come with a limited lifetime warranty. The warranty applies to the
original owner, requires a proof of purchase (hang on to your receipt!) and
covers defects in material or craftsmanship. Hardware must have been properly
installed. We reserve the right to determine if your hardware warrants a repair
or a replacement. Visit smithandnoble.com/guarantee to see full details. In
need of warranty service? Call us at 800.248.8888 and we’ll arrange for a repair
or replacement ASAP.

2
800.248.8888
1
smithandnoble.com
A Smooth Set-Up
We want you to love your new hardware and that includes
having a smooth installation experience. We suggest saving
this guide. If you encounter any difculties or questions,
please reach out to us for help. It’s why we’re here. Call us at
800.248.8888 for more info on installation.
We recommend you hold on to all packaging until your
hardware is fully installed. Should something go wrong (we
strongly doubt it), we want any potential returns to be a
painless as possible.
Customer Service Hours
Monday — Friday: 6am — 6pm PT
Saturday — Sunday: 7am — 4pm PT
smithandnoble.com
Everything
You Need
Table of Contents
Step 1 -
Getting Started ..................................3
Overview - Wall Mount Single Rod Set ........................4
Step 2 - Mounting the Brackets ........................ 5 - 6
Step 3 - Attaching the Rod Connector ......................7
Step 4 - Placing Carriers & End Stops ......................8
Step 5 - Attaching Bracket Posts ...........................9
Step 6 - Attaching the Finials .............................9
Step 7 - Attaching Bracket Posts to Bracket Bases ..........10
Step 8 - Attaching Drapery to Rod ........................11
Accessories - Baton/Wand ...................................12
Care & Cleaning ...................................Back Cover
Warranty ..........................................Back Cover

3
4
smithandnoble.com
800.248.8888
STEP 1 - GETTING STARTED OVERVIEW
Before you begin, check the accompanying diagram to make sure you have all the parts you
need.
You’ll need to make sure the surface you intend to install your hardware is sturdy enough
to accommodate the brackets. If you’re screwing directly into a surface this means locating
wood studs that are strong enough to securely bond with the included screws. Otherwise,
you’ll need to use a secure fastener (as illustrated) but please note this piece is not included.
Tools & Parts
Wall Mount Single Rod Set
WALLBOARD OR PLASTER:
Hollow wall applications: Use a secure fastener designed
specically for this purpose.
METAL:
Prepare by pre-drilling holes and then using the included screws.
CONCRETE, STONE, BRICK OR TILE:
Use a masonry drill and surface-specic plugs, anchors, or screws. When selecting a fastener
be sure it’s designed to support the weight of the product being installed (if you’re not sure,
either give us a call or ask a professional at your local hardware store). Once obtained, follow
the fastener manufacturer’s instructions regarding proper installation.
TOOLS YOU WILL NEED TO INSTALL YOUR HARDWARE:
Pencil, screwdriver, ¼" nut driver, level, and a drill with a
7
⁄64" drill bit.
Note: It’s important to monitor the amount of pressure you apply when using a drill. If the
screws are too tight this may cause the screw itself to break off in the wall or window frame.
MOLLY
BOLT
SELF DRILLING
ANCHOR
TOGGLE
BOLT
SCREWDRIVER & PENCIL
(NOT INCLUDED)
POWER DRILL
(NOT INCLUDED)
SPLICE COVER
LEVEL
(NOT INCLUDED)
MOUNTING
SCREWS
END & CENTER
MOUNTING BRACKET
SET
SCREWS
ALLEN
WRENCHES
CARRIERS
SPLICE CENTER BRACKET
MOUNTING
PLATE
CENTER
BOLT
COVER
PLATE
FINIALROD
POST MOUNTING
POST
MOUNTING
BRACKET
SET
SCREW
MASTER
CARRIER
CARRIERS

5
6
smithandnoble.com 800.248.8888
Mounting the Brackets
1. Place the panel on the rod. To en-
sure it drapes at the correct length,
hold it up to the spot you wish to
install it; this will allow you to raise
or lower your treatment as desired.
After you’ve located the ideal loca-
tion, use a pencil to mark the wall
where the top of the rod is resting.
2. Remove the panel from the rod
and then center the rod over the
window opening at the desired
height. Using the pencil, mark
where the ends of each rod are
positioned; if you’re using a center
bracket, note the middle point
between these two spots. If you
have more than one center brack-
et spread these evenly between
the two end brackets and center
point. If you have a spliced rod,
mark where that splice is on the
wall since you will need to add the
special splice bracket at that point.
Measure 6” inward from the marks
you’ve made on both ends and
mark those spots. This is where
the end brackets will be installed.
3. Place center of bracket cover plate
level against wall at the marked
spots. Using a pencil, lightly draw
a circle around the base of the
bracket onto wall, see Figure A.
Check to make sure the circles are
level & aligned with each other.
Remove back plate and center
it inside of the circle outline on
wall. Mark the screw hole loca-
tions for all brackets.See Figure B.
Attach the metal back plate to
the wall, aligning the holes in
the plate with the marks made
in the previous step, see Figure B.
Be sure and attach the plate to
the wall with the appropriate
mounting hardware. (It is always
recommended to try and attach
to the wood studs inside the wall.
Where this is not possible please
use a wall anchor suitable to carry
the weight of your hardware se-
lection as well as your draperies
and any accessories.)
4. Place bracket cover plate on top of
back plate and thread on the post.
Make sure to screw on the post
very tightly. Do not leave any play
or wiggle room.POST
STEP 2 - MOUNTING BRACKETS STEP 2 - MOUNTING BRACKETS
FIGURE A
FIGURE B
CENTER
BOLT
COVER
PLATE
POST
MOUNTING
PLATE
SET
SCREW
METAL
MOUNTING
PLATE
End & Center Brackets
COVER
PLATE
SET
SCREW
Splice Bracket
POST
Mark all holes needed
showing locations of screw
holes for all brackets.
6"
MOUNTING
PLATE
CENTER
BOLT

7
8
smithandnoble.com
800.248.8888
Adding or Removing Carriers
to the Rod
Your track rod will come with all master
carriers and regular carriers pre-installed.
If you need to add or take out some
carriers depending on your drapery,
unscrew the End Cap from the rod.
Remove the carrier & end stop and either
add or take out the carriers needed.
Placing End Stop on the Rod
SPLIT DRAPERY (A)
Once all carriers have been placed in the
track, for split drapery, place end stop in
between the rst carrier from each end
and the second carrier so end of drape
does not move when drape is closed.
ONE WAY DRAW DRAPERY (B)
For one way draw drapery, place end
stop in between the first carrier from
the end and the second carrier of the
side you won’t be opening, so the end
of drape does not move when drape
is closed.
Place another end stop right before
the beginning of the end cap to pre-
vent master carrier from moving all the
way to the end.
Depending on your order, you may
have received a rod connector.
A rod connector is the short piece of
metal placed inside each end of the
rods in a multi-segment system to
join them together.
STEP 3 - ATTACHING THE ROD CONNECTOR STEP 4 - PLACING CARRIERS & END STOPS
B
One Way Draw
End stop & Carrier
positions
ROD CONNECTOR
SET
SCREWS
A
Split Draw
End stop & Carrier
positions
END STOP
CARRIERS
SPLICE
COVER
Join both track sections together
and fasten securely with set screws.
There will be a rod connector on the
back and on the track as well as on
the top of the rod.
Attach the splice cover.
SPLICE COVER
SPLICE
2 SEGMENTS OF RODBACK VIEW
ROD CONNECTOR
SET
SCREWS
SET
SCREWS
CHANNEL ROD
BACK VIEW
FRONT VIEW
SPLICE
COVER
END
STOP
Two splices will be placed
for a tight seam.
One at the top and one in
the middle at the back.

9
10
smithandnoble.com 800.248.8888
Insert the mounting posts into the
channel in the back of the track.
Do not tighten at this time.
Attach End Cap Finial.
If you want to get your drapery all the
way to the end of the rod, then place
opening of end cap at the bottom of
rod where track is.
If you want your draperies to stop
where the end cap starts, move the
open side of the end cap to the top of
track. The covered part of end cap will
be at the bottom where track is.
STEP 5 - ATTACHING BRACKET POSTS STEP 6 - ATTACHING FINIALS
CHANNELS
MOUNTING
POST
MOUNTING
BRACKET
CHANNEL
SPLICE
BRACKET
(Depending on your rod, use
bracket for rods that are spliced.)
Slide in End Cap onto rod and tighten
set screw.
End Cap can be attached with the
opening at the bottom or top
depend-
ing on look you want to achieve.
END CAP FINIALS
OPEN
COVERED SLEEK
OPEN
END CAP FINIAL
COVERED
END CAP FINIAL
BACK OF ROD
BACK OF ROD
CHANNELS
CHANNELS

11
12
smithandnoble.com 800.248.8888
STEP 7 -
ATTACHING BRACKET POSTS TO BRACKET BASES
Insert drapery pin hooks into carriers
and master carriers.
Split Drapery
For Split drapery, start pining from
the center and go towards the ends.
Draw one side
For drapery opening from one side
only, start pining from the opening
side towards the end.
STEP 8 - ATTACHING DRAPERY TO ROD
MASTER
CARRIER
DRAPERY
PINS
CARRIERS
Align the mounting posts in the back
of the track with the brackets mount-
ed to the wall. Slide the mounting posts
onto the brackets but don’t tighten.
Center the track over the widow opening
by sliding the track left or right on the posts.
When the track is centered, rotate the posts
clockwise to tighten against the track. (A)
Tighten the set screw on the mounting
post and install finials. (B)
CENTER THE ROD
(A)
(B)
MOUNTING
POST
BACK VIEW OF ROD
BACK VIEW OF ROD

13
14
smithandnoble.com 800.248.8888
Minimal care and cleaning is needed to maintain the beauty of your Hardware.
To Vacuum: Use brush or dust head attachment.
To Dust: Use soft, clean cloth.
CARE & CLEANING
Baton/Wand (optional)
Baton/Wand will be pre-attached to
the master carrier(s).
CLIP
BATON/
WAND
ACCESSORIES
/