Page is loading ...

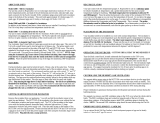
DIGITAL EGG INCUBATOR
-PWFPGMJGFCFHJOTXJUI3DPN
W
A
T
E
R
P
U
LL
OP
EN

%*(*5"-*/$6#"503
How to use Rcom USB 50 / Rcom PRO 50
55
Contents
Introduction
Before use
Function Settings
Other Functions
1. Introduction
(2) Safety Precautions )
(1) Rcom 50 Introduction (
(3) Identification of Parts *
(5) Function of Digital Control & How to Operate ,
(6) SET UP(Other Functions) / Easy Function Operation -
+
(4) Basic Components
4. Other Functions
(1) Egg Turning Check / Alarm for water supplement /
Abnormal High or Low temperatue Alarm / Power Failure Alarm Function %-
3. Function Settings
(2) Incubation start with Manual Mode %(r%)
(1) Incubation Modes / Incubation start with Automatic Mode %'
(3) Incubation start for Other Birds %*
Incubation Termination / Change Cels.& Fahr. /
Return to Factory Setting %+
(6) Incubation conditions reset / How to Set Egg Turning Test /
How to Set Turn ON, OFF Humidification Function %,
%+
(4) Incubation start with PC connection Mode
2. Before use
(2) What is an incubation room? / Preparation for Incubation %%r%&
(1) How to Assemble the Incubator / Egg-Turning plate %$
(5)

%*(*5"-*/$6#"503 6
Contents
㷙 For Rcom USB 50 MODEL PC connecting, refer to the PC-SOFTWARE manual.
5. Incubation
(2) Dew Condensation &$
Humidity & Air Maintenance during Incubation /
Maintenance after Hatching &$
7. Product Information
(2) Troubleshooting &(
(1) Servicing / Frequently Asked Questions (FAQ) &'
(3) Specification &)
6. How to Clean
(2) How to Clean &&
(1) How to Disassemble &%
Introduction
How to Clean
Product Information
How to use Rcom USB 50 / Rcom PRO 50
(1)
The result of Hatching can be changed by a large numbers of factors. Autoelex Co., Ltd.
&
our distributors will not take any responsibility for ‘Loss of eggs or pet/animal lives’ under any
circumstances such as ‘Hatching/Brooding failures’, ‘User’s carelessness’, ‘Personal (un-certificated)
conversion / alteration’, ‘Arbitrary using out of the machine’s purpose’, ‘Electric power failure’, or
‘Malfunctioning’. Please be sure that the machine works without any problem before placing Eggs or
Pets(Animals). Also, we strongly recommend you to read the User’s Manual carefully to minimize of
any failure.
Caution : Caution mark against a fault that can cause damage, trouble, or failure of incubation.
Tip : References or useful suggestions in using Rcom product
Mark Explanation
Warning of actions which may be dangerous or cause damage to the incubator.
Prohibited
Do not disassemble.
Do not touch.
It is necessary to keep.
Remove the power cord from outlet.
Ground Connection for preventing electric shock.

%*(*5"-*/$6#"503
7
[Main Features]
* LCD display with incubation information, and animation graphic design
* Micro chip with optimum incubation conditions according to the species of birds, for incubation beginners
* Manual setting Mode for incubation specialists
* Outer Temp. Sensor included for Automatic Adjustment of Heating rate responding to Incubation Room
Temperature
* Superior design with convenient operation
* Optimum air circulation technique with 5 strong BLDC fans
* Automatic Temp. & Humidity setting and control
* Body locking device
* Water supplement alarm function
* 48 eggs capacity for chicken size eggs ( 116 Quail egg size / 24Goose egg size)
* Antiblastic Humidification method by heating water, which discourages bacterial growth
* Double-glazed view window for minimizing the influence of outside temperature
* Enhanced reliability by applying Swiss's Sensirion's 3rd generation temperature & humidity sensor
* Strong SMPS application for stable power supply
* Upgrade to the latest model incubator with program upgrade (USB MODEL ONLY)
[Safety Features]
* Self-examination function for sensing abnormal conditions
* Alarm and display function for abnormal incubator temperature caused by sudden fluctuation of ambient
temperature
* Incubation data memory function and power outage notification function in case of power failure
* Circulation fan cover for safety and electric safety cut-out switch on the upper main body for safety
* Heater supporter designed for heater tension control and its safety
* Safety cover applied for protecting humidification unit
* Humidification unit durability improved by water proof BLDC fan
* Alarm when water need replenishing
[Easy Features]
* No need of separate humidification unit as it included in main body
Û&RUÛ)FRQYHUWLEOH
* Various kinds of egg trays accept various sized eggs with ease
* Slide plate with embossed feature for preventing skid
* Variable air vent for adjusting air supply
* Bottom body designed for easy cleaning
* Roller Dividers, which can safely apply egg turning for expensive or rare eggs. (Option)
1. Introduction
Rcom 50
Features
Thank you for choosing the Rcom incubator.
The Rcom 50 incubator is the first incubator with creditability to have a superior design and function
which help in controlling optimum incubation conditions. It has two sensors, one for detecting
surrounding environments and the another for internal incubator conditions.
The Rcom50 is designed easy to use and simple to use as a customer orientated product, but please
remember that the user's incubation knowledge and proper operation are very important for the best
incubation result. Therefore, be sure to read this user's manual carefully before you use this incubator.
The Rcom 50 offers optimum incubation conditions, but users need to observe and manage all
incubation conditions such as species of eggs, temperature or humidity for each incubation period, and
an optimum incubation circumstances .
(1) Rcom 50 Introduction

%*(*5"-*/$6#"503 8
1. Introduction
Electrical hazards Be careful the details below when you use.
Setting Cautions Be careful the details below when you use.
Do not pull the cord when
taking out the power cord, and
keep wet hands away from
connecting plug.
Do not use a damaged power
cord or loose outlet.
Risk of electric shock or fire.
Risk of electric shock or fire.
Do not insert multiple
connecting plugs in an outlet.
Risk of fire or electrical
overload.
Never pull the plug out of the
outlet during the incubation
period.
Incubation will be interrupted.
Do not twist or crush electric
cord.
Risk of electric shock or fire.
Cleaning Cautions Be sure to disconnect the electric cord
from the outlet before cleaning.
Clean the incubator by a soft
cloth with a neutral detergent.
Do not spray cleanser directly
on the incubator surface. Do not use chemicals like wax,
benzene, alcohol, thinner,
aromatic, or lubricant, etc.
Brush away dust on the plug
with a dry cloth. For special cleaning of inner
part per year, contact to the
service center.
If you don't clean the inside of
incubator for a long time, dust
can cause some trouble or a fire.
Do not install under the direct
sunlight.
Do not install in dusty or dirty
environment.
Risk of fire or interference
with the incubation process.
Risk of damage or fire within
the incubator.
Do not install in excessively
cold or hot conditions,
cigarette smoke, etc.
Do not install in moist or
humid environment.
Risk of interference with
the incubation process.
Risk of fire or electric shock.
Do not use any other
non-standard parts except
those provided.
Risk of damage or hatching
failure.
Please ensure that no small
objects get into
the holes on the incubator.
Risk of electric shock or fire.
Do not disassemble or modify
the incubator in any way.
Risk if electric shock or fire.
If the incubator sounds
strange or emits smoke
contact your service center.
Risk of electric shock or fire.
If the incubator requires repair
disconnect from the power
supply and please contact to
your service center.
Clean the incubator thoroughly
before storing.
Install away from heat
sources.
Risk of damage to the
incubator case and
interference with the
incubation process.
Do not turn the incubator
upside down.
Water will pour out of the
incubator, and view window
can be dropped or damaged.
Ensure that the incubator is
installed on a stable surface
away from edges.
Risk of damage to incubator
and eggs and user from
accidental knocks or drops.
Do not cover the ventilating
opening.
Inner temperature can rise,
interrupting incubation. Risk of knocking the incubator
or accidental interference with
the controls.
Children should be supervised
to ensure that they do not play
with the appliance.
(2) Safety Precautions

(EX:RCM0950278)
If you register your information
with your machine’s serial
number on our web-site
(www.Rcom.co.kr), you can get
2 year warranty service.
#BDL
Product Serial No.
Handle
Power Connecting (the rear)
For connecting
power cord.
For inlet of air
from outside
Air inlet vent
Water hole
To facilitate water top-up
for the humidity control.
Digital Control Center
See description of
the function and operation.
Main Body-1
Main Body-2
Locking Button
View Window
For a clear view of
the incubation process.
(Double Skin Viewing Window)
Egg Tray
Small, Standard,
or Large egg tray
according to egg size.
Universal Tray
(Sold separately)
< USB MODEL Only >
Connecting the USB cable.
You can set and store
incubation conditions
with your Computer.
USB Cable Connecting Socket
Connecting the electric cord
Power Connecting Socket
%*(*5"-*/$6#"503
9
1. Introduction (3) Identification of Parts and
Compositio
Identification of Parts
110V~120V
PASS
Calibration
RCM 0901278
W
A
T
E
R
P
U
LL
OP
EN
P
U
LL
OP
EN
P
U
LL
OP
EN
For circulating warm air
Vents for air circulation
Serial No.
(EX:RCM0950278)

%*(*5"-*/$6#"503
1. Introduction (4) Basic Components
:
ઔ USB MODEL - You can download updated information at www.Rcom.co.kr
* Can be attached
anywhere for
easy viewing
Small Egg Tray
Standard Egg Tray
Large Egg Tray
USB Cable
PC SOFTWARE CD
< USB MODEL >
Basic Components
Water Cap
Duplicated
View Window
View Window
Power Cord
User's Manual
Easy function
operation
Egg-Turning Plate
Universal Tray
Divider(10EA)
Universal Tray SET Rolling Divider SET
Gc`XGYdUfUhY`m
Main Body-1
Main Body-2
W
AT
ER

%*(*5"-*/$6#"503
1. Introduction
;
Temp. & Humidity UP
Setting Value Change
Xs#Exwwrq
Egg Turning Interval Indication
Egg Turning Angle Indication
ICON NAME AND FUNCTION ICON NAME AND FUNCTION
Fklfnhq
< USB MODEL >
Bird Icon Display
Power Failure Notification
Egg Turning Interval Indication
Egg Turning Angle Indication
RII
--Fkrrvh#d#nlqg--
-#Fklfnhq#举
-#Gxfn#丿#
-#Txdlo#乀#
-#Skhdvdqw#乁#
-#Shdirzo#乂#
-#Jrrvh#乃#
-#zlogjrrvh#乄#
-#J0Skhdvdqw#久#
-#Wxunh|#乆#
-#Rwkhuv#Elugv#乇#
60
90ȋ
Species of Birds
Water Supplement
Humidity Abnormal
FAN Operation Display
Current Humidity Display
Humidification function OFF
Current Temperature Display
Temperature Abnormal Display Heater Stop Display
Heater Operation Display
Humidification Stop Display
Humidification Operation
Display
Egg Turning Indication
Manual Egg Turning Stop
Indication
Automatic Egg Turning Stop
Indication
Incubation Termination
PC Connecting
Alarm
Select Birds
Incubation Termination
Phqx#Exwwrq
Vhohfw#Exwwrq
Select Auto/Manual
Pass to next stage
Temp. & Humidity DOWN
Setting Value Change
Grzq#Exwwrq
Ixqfwlrq#Exwwrq
Other function display,
Return to previous stage
Lqsxw#Exwwrq
Save input and
Pass to next stage
Setting Value Check
Function of Digital Control & How to Operate
(5) Function of Digital Control &
How to Operate
What’s ‘Temperature&Humidity Setting’?
This is that you set up temp.&humi. As you want to have inside of the machine.

%*(*5"-*/$6#"503
1. Introduction (6) SET UP(Other Functions) /
Easy Function Operation
<
SET UP(Other Functions)
Easy Function Operation
Krz#wr#Rshudwh
Function Sdjh
46
4;
4;
4;
4:
4:
4:
47
49
Egg Turning Test Setting Value
Check
5 Sec.
"All Reset"
එ˩එ
2 Sec.
Select
the Species of Bird
"OFF"
Screen
on Incubation
UNDER 30%
Automatic Mode
Incubation
Other(Manual) Mode
Incubation
How to change Setting
under Incubation
Incubation
Termination
Incubator Initialization
(Factory Setting)
俎 俯 倘
How to change
How to turn off
Humidification Function
GIn case of low humidity
incubation
System finish
Are you sure?
Screen
on Incubation
Select YES
Once: Temp. Setting
4 times: Humidity Setting
7 times: Egg Turning Angle Setting
9 times: Egg Turning Interval Setting
Select
the Species of Bird
Temp. Setting
Humid. Setting
Egg Turning Angle Setting
Egg Turning Interval Setting(Incubation day)
Lqir
DOO#UHVHW
##DOO#UHVHW
Factory setting
Alarm sounds when incubator temp. is higher than setting value
because of room temp. change or heating system disorder
* Setting Range : 0.0䮎 ~ 5.0䮎 (Default Setting : 2.0䮎)
Alarm sounds when incubator temp. is lower than setting value
because of room temp. change or heating system disorder
* Setting Range : 0.0䮎 ~ -5.0䮎 (Default Setting : -3.0䮎)
Xqlw
DODUP
#Abnomal
High Alarm
DODUP
Abnomal
low Alarm
Kljk
Whps
KlHuu
Orz
Whps
OrHuu
Vrxqg
Oljkw# * Always On : Always BackLight On
* Event On : 20 Sec. ON with Key input * Always Off : Always BackLight Off
* Default Value : Always On
LCD Backlight management setting
It returns to factory setting when you change the initial setting at discretion.
ON/OFF Setting for Melody, other alarms
* Default Value : ON
Basic information of Incubator (versoin Indication)
T.CAL
Temperature
Calibration
Selecting Centigrade (oC) and Fahrenheit (oF)
* Default Value : Centigrade (oC)
H.CAL
# Humidity
Calibration
Be sure to read CAUTIONS. We do no recommend customers
to recalibrate by their own. If you need to recalibrate, please
ask purchase place.
Be sure to read CAUTIONS. We do no recommend customers
to recalibrate by their own. If you need to recalibrate, please
ask purchase place.
WARNING
Fatal Damage
with Incorrect Calibration
WARNING
Fatal Damage
with Incorrect Calibration
If you want to change setting value, keep pressing "SET" button and change the value.
put some water after take off label from the back and attach to the window.
Push SET UP key and then select each function icon using
UP/DOWN key(ENTER)

110V~120V
Back
%*(*5"-*/$6#"503
43
2. Before use
(1) How to Assemble the Incubator /
Egg-turning plate
How to Assemble
View Window
Egg-Turning Plate
Main Body-1
Main Body-2
If you do not assemble egg turning place correctly,
it can cuase incubator failure.
Gear connecting part of egg turning plate must be
on the top side.
Lock the four locking buttons
at the front and rear of the
incubator.
Insert the power cord in the
socket at the back of the
main body.
Be careful when you assemble egg turning plate.
Gear
connecting part
81'(56,'(
W
AT
ER
Standard Tray
Water Cap
*
Fit the water cap.
*
Fit the water cap.

W
A
T
E
R
P
U
LL
OP
EN
OLPLW#Lqglfdwlrq
%*(*5"-*/$6#"503 44
2. Before use
(2) What is an incubation room? /
Preparation for Incubation
How to turn off Humidification Function : Set humidity level at RH 30%.
What's an Incubation Room? / Preparation for Incubation
1
2
Insert the electric cord in the connecting jack
in the back of the main body and put the main plug into a socket.
The LCD display will light up and show temperature.
110V~120V
Open the watercap and fill the hole with DISTILLED WATER and refill water after about 5 min.
again up to the limit line on its inside mark.
(If you refill water during the incubation period, humidity goes down temporarily.)
The Incubation Room is a confined space for setting and operating an incubator.
Because the incubation room environment has a considerable effect on hatch rate, it's recommended to
control the environment for setting up an incubator; there should be little noise and vibration around and
temperature ranging 28 (82.4 ) with small variation in temperature. Especially, if there are frequent occasions
when the temperature drops suddenly at night, compared with daytime, be sure to check from time to time
and pay attention so that the incubator is not directly exposed to s
unlight during daytime.
After filling up with water, never shake or turn over the main body of the incubator, which would cause
water to spill inside the body and could cause a breakdown. Please close the water cap properly after fiilng.
In case you use the incubator without adding humidification water or intend to incubate eggs at low
humidity under RH 30%, you must stop its humidification function. please turn off the humidity unit if the
unit is empty water otherwise, humidity unit will be broke or you may not no longer use the unit.
(When using this function, the alarm for sensing water drop will go out.)
[See the description of humidification function OFF on Page 18]
During incubation period, check the DISTILLED WATER water levelabout every three days and refill water,
if necessary. (After you refill water, check again after 5min. and refill again.)
DISTILLED
WATER

%*(*5"-*/$6#"503
45
W
A
T
E
R
P
U
LL
OP
EN
2. Before use
(2) What is an incubation room? /
Preparation for Incubation
W
A
T
E
R
P
U
LL
OP
EN
About 2mmAbout 2mm
3Place the eggs to incubate in the egg groove and
then close the view window.
When you use the 'universal rolling divider' which is sold separately, be careful to adjust the distance of rolling
divider so that eggs do not roll out of position. Refer to the picture rignt side.
If you use Mineral water or Tap water for humidification,
the humidity unit can be broken easily because of water
scales. We strongly recommend you to use only
“DISTILLED WATER” for your machine, and
Autoelex Co.,Ltd & our distributors do not indemnify for
warranty service not only if you have any problem with
using mineral water, regular water, tab water and the like
but also if you had improper management or handling
for your machine. In this case, Autoelex Co.,Ltd. & our
distributors will charge for your after service.
Some gap (about 2mm) around the eggs is needed for easy egg turning as shown on the below.
Be careful to close the view window completely;
if not, the temperature and humidity will fail to go up.
The egg to incubate must be a fertilized egg.
(Refer to the guidebook.)
You can buy the ‘Distilled water’ in your local market,
and if you have any question, please contact the shop,
where you purchased your machine.
W
A
T
E
R
ABS
Divider 10EA
<sold separately>

Incubation start with Automatic Mode
Incubation Modes Q Rcom Pro 50 incubator has two modes as automatic and manual mode,
and Rcom USB 50 incubator has three modes as automatic, manual,
and PC connecting mode.
Press MANUAL button to select species of birds in basic screen.
The optimum incubation environment of the birds on the menu screen is memorized in the micro chip.
User can incubate easily using this function.
Select species of birds and press ENTER button for about 2sec. then it starts incubation with automatic mode.
Others Birds
Quail
Turkey WildGoose
Goose
Duck Peafowl
Gold Pheasant
Chick
Pheasant
GH5FH
basic screen before
starting incubation
MENU screen Screen showing
incubation is in progress Screen showing incubation
of other birds is in progress Screen showing
completion of incubation
Auto incubation MANUAL button (Selection of birds)
ENTER button (Auto incubation starts after two seconds)
Rcom PRO 50
Rcom USB 50
ENTER button
Incubation starts.
OTHER (MANUAL) incubation
(Other birds)
ྙ Setting of temperature of
early and middle stages of incubation
Temperature setting ྚ Setting of temperature of final stage of incubation.
ྛ Setting of date of temperature change
in the final stage of incubation.
Humidity setting
ྜ Setting of humidity of
early and middle stages of incubation.
ྜྷ Setting of humidity of final stage of incubation
ྞ Setting of date of humidity change
in the final stage of incubation.
MENU button
UP/DOWN button
(Selection of birds)
ENTER button
(incubation
termination
)
MENU button
UP/DOWN button
("yes" selection)
Egg turning angle setting ྟ Setting of egg turning angle of
early and middle stages of incubation.
ྠ Setting of date of egg turning angle change
in the final stage of incubation.
Incubation termination
(under incubation)
Egg turning interval setting
ྡྷ Setting of incubation date.
ྡ Setting of egg turning interval of
early and middle stages of incubation.
2Sec.
--Fkrrvh#d#nlqg--
-#Fklfn#
-#Gxfn
-#Txdlo
-#Skhdvdqw
-#Shdirzo
-#Jrrvh
#######
-#Rwkhu#Elugv
=
Rwkhu#Elugv
Fklfnhq
Fklfnhq
V|vwhp#ilqlvk
Duh#|rx#vxuhB
\HV
##93
<3䯍
##93
<3䯍
Vwduw
Lqfxedwlrq
Fklfnhq
####93
##<3䯍
Fklfnhq
In auto incubation, user only needs to select type of birds as incubation environments such as optimum
temperature, humidity, egg turning, etc. are automatically controlled.
User can change incubation environments if needed.
%*(*5"-*/$6#"503 46
3. Function Setting (1) Incubation Modes /
Incubation start with Automatic Mode
MANUAL
SHIFT

%*(*5"-*/$6#"503
47
MENU
Incubation start with Manual Mode
Press MENU button on basic screen.
Select the species of birds with UP/DOWN button
and press ENTER button then it goes to incubation
conditions setting mode.
Set required temp. humidity, and egg turning angle & interval
with UP/DOWN button, and press ENTER button to pass to
next step.
This mode helps users to set temp. humidity, and egg turning etc. according to their needs.
This mode is ideal for those persons who are experienced in incubation.
Humidity setting
Temperature setting
Setting of temperature of
early and middle stages of incubation. Setting of temperature of
final stage of incubation. Setting of date of temperature change
in the final stage of incubation.
Setting of humidity of
early and middle stages of incubation. Setting of humidity of
final stage of incubation Setting of date of humidity change
in the final stage of incubation.
Optimum incubation temperature of general birds at early and
middle stages is 37.5 , and the temperature of
final stage is better to set at 37 three days
before the expected date of hatching (D-Day) .
User can optionally change the temperature
of early, middle, and final stages of incubation.
(Default settings: 37.5 , 37.0 , 3days)
The optimum humidity depends on type of birds.
However the humidity of final stage
(3 days before incubation)is generally higher than that of
early and middle stages of incubation.
(Default settings: 45%, 60%, 3days)
)VNJEJUZ
䀽
䀾
䀿
%BZT
[Humidity Setting]
5FNQFSBUVSF
%BZT
䀺
䀻
䀼
[Temperature Setting]
If there is no proper option, please select option other
bird, Refer to Page16.
It is recommended to raise the humidity setting to
over 60% from 1~3days before hatching.
(In areas of high ambient humidity, the humidity
may not need to be raised until the last half day -
after the chick is into the air space at the end of the egg.)
Temperature and humidity is optimized when Rcom products are released.
We do no recommend customers to recalibrate by their own. If you need to recalibrate, please visit our
ZHEVLWHZZZUFRPFRNUĺ'RZQORDGĺ0DQXDORUDVNSXUFKDVHSODFH
Because of low price thermometers and hygrometers are not accurate, e recommend you to use special
calibrated thermo-hydrometer. (Poultry only thermo-hydrometer: check Rcom website: Digilog )
3. Function Setting (2) Incubation start
with Manual Mode
#--###Fkrrvh##d###nlqg#####--
-#Fklfnhq#
-#Gxfn
-#Txdlo
-#Skhdvdqw
-#Shdirzo
-#Jrrvh
-#Zlogjrrvh#
--###Fkrrvh##d###nlqg#####--
Fklfnhq#
UP
DOWN
ENTER
ྙ
ྚ
* Press UP/DOWN button to select bird
species and press ENTER.

[ Setting Finish and Incubation Start ]
Incubation date setting cannot be changed during incubation.
After setting incubation date, press ENTER button to start incubation with melody.
Egg-turning angle setting
Egg turning interval setting
Setting of egg turning angle of
early and middle stages of incubation. Setting of date of egg turning angle change
in the final stage of incubation.
Setting of incubation date. Setting of egg turning interval of
early and middle stages of incubation.
The egg turning angle showing on LCD screen
may be different from the setting angle depending on
egg tray (based on standard egg tray) and
size of eggs. In general, the egg turning angle of
early and middle stages is 90° for chicken, golden pheasant,
pheasant. It is better to set higher angle (110 ~180°)
for bigger eggs and wild birds. It is a general
practice not to turn eggs (turn angle is 0°) at
final stage of incubation (3 days before expected hatching date).
Setting of incubation date: The incubation date of birds on menu screen is a general incubation date.
User can input the correct incubation date.
(Initial settings: depending on type of birds)
It is a function to set the interval (time) of egg-turning .
It turns the eggs with the setting angle of early and
middle stages every 60min.
User can optionally set the egg-turning interval of eggs.
(Initial Setting: 60min.)
5VSO*OUFSWBM
䁂
䁃
[Egg Turning Interval, Incubation Date Setting]
5VSOJOH"OHMF
䁀
䁁
%BZT
[Egg Turning Angle Setting]
If having difference for the egg turning angle between display and actual operating,
Please find and select the proper angle.
:KHQUQG5DQGRPLVVHWWKHHJJWXUQLQJDQJOHLVEHWZHHQaÛDWUDQGRP
(JJWXUQLQJDQJOHVHWWLQJUDQJHÛÛÛÛ ÛÛÛUQG
"rnd"(Random) setting is for operating at random within
the limits from 10min. to 360min.
(JJWXUQLQJLQWHUYDOVHWWLQJUDQJHUQG
PLQ
Vwduw
Lqfxedwlrq
Fklfnhq
##4k
<3ȋ
5VSO*OUFSWBM
[Incubation Start Notification] [During Incubation]
%*(*5"-*/$6#"503 48
3. Function Setting (2) Incubation start
with Manual Mode

MENU
Incubation Start for other birds
Press MENU button in basic screen.
Select Other Birds by UP/DOWM button and then press
ENTER to go to setting.
Set incubation date, temperature, humidity, egg turning
angel and egg turning interval with UP/DOWM button,
and press ENTER button to save setting value.
[Refer to the page 14, 15]
This function is used when user wishes to incubate other birds
which are not memorized in the incubator menu setting.
User can change incubation conditions according to needs.
[Humidity Setting] [Temperature Setting]
[Egg Turning Interval,
Incubation Date Setting] [Incubation Start Notification]
[Egg Turning Angle Setting]
[During Incubation]
Vwduw
Lqfxedwlrq
##93
<3ȋ
5FNQFSBUVSF
%BZT
䀺
䀻
䀼
䀽
䀿
)VNJEJUZ
䀾
%BZT
ș How to Set Consecutive Incubation Function : On Incubation date
setting, raise incubation date up to D-50 and then press UP button
one more, then “?” will be show and it starts Consecutive incubation.
5VSOJOH"OHMF
䁀
䁁
%BZT
5VSO*OUFSWBM
䁂
%BZT
What is Consecutive Incubation Setting?
This function is used if you want to continue incubation without
termination with same setting.
%*(*5"-*/$6#"503
49
3. Function Settings (3) Incubation Start for
Other Birds
#--###Fkrrvh##d###nlqg#####--
-#J0Skhdvdqw#
-#Wxunh|
-#Rwkhu#Elugv#
--###Fkrrvh##d###nlqg#####--
Rwkhu#Elugv#
UP
DOWN
ENTER
ྙ
ྚ
* Press UP/DOWN button to select bird
species and press ENTER.
%%BZ
%BZT
OGYhh]b[X]gd`UmZcf8!8UmQ

SET UP
BACK
Change Cels. & Fahr.
Incubation Termination
Incubation start with PC connecting mode
<Rcom USB 50 MODEL ONLY>
During incubation, press MENU button then you can
see a message as "System finish, Are you sure?"
Select YES with UP/DOWN button and press ENTER.
Refer to the PC Software Manual for starting incubation
in PC connecting mode.
With this function, you can share incubation process,
optimum incubation setting by building a database.
When users have changed the incubator settings,
but want to return to factory setting.
Press SET UP button and select All Reset with
UP/DOWN button. Then, press ENTER.
If you press ENTER button once again, LCD display
goes off with message & alarm. Incubator returns to
factory setting after about 15 sec.
LCD
Display
goes off
Initialization after about 15sec.
6HOHFWÛ&RUÛ)ZLWK83'2:1EXWWRQ
6HOHFWZLWK83'2:1EXWWRQ
Sdudphwhu#vdyhg
Fklfnhq
y
GGGGGyGG
mGfG
** WARNING **
hGy
z p
hG
y
y
V|vwhp#ilqlvk
Duh#|rx#vxuhB
Ilqlvk
Lqfxedwlrq
Fklfnhq
Fklfnhq
##93
<3#䯍
Sdudphwhu#vdyhg
|
{G
GGmOȋmP
{U|
| s
sG
{
sl
Fklfnhq
##93
<3#䯍
MENU
Return to factory setting
%*(*5"-*/$6#"503 4:
3. Function Settings (4) Incubation start with PC connection Mode
,QFXEDWLRQ7HUPLQDWLRQ&KDQJH&HOV)DKU
Return to Factory Setting

MANUAL
SHIFT
Humidification Function ON/ OFF Setting
Egg Turning Test
Incubation Condition Reset during Incubation
You should turn OFF humidification function when you operate incubator without water,
or when you want to incubate with low humidity below 30%.
Press MANUAL button 4 times and then press DOWN button continuously until OFF indication is showing.
Then, press ENTER button to turn humidification off.
If you want to humidification turn ON, set humidity over 30%
4Times 5Times
[Humidification ON] [Humidification OFF]
Press ENTER button for about 5sec. during incubation
period to check egg turning.
If egg turning does not work, check whether you assembled
the egg turning plate properly.
[Refer to the page 10.]
This is used when you want to change incubation
setting mode again during incubation.
Press MANUAL button during incubation, then
Temp. display will blink.
If you want to change Temp. reset with UP/DOWN button
and then press ENTER to save.
Using this method, you can also reset humidity, egg turning
angle, and egg turning interval. If you do not want to change
setting, just press MANUAL button then it passed to next stage.
Also, it returns to incubation screen if you do not press
any key for about 10sec.
You can go directly to the needed setting mode by
pressing MANUAL button several times according to your needs.
It can be used when you want to check the current incubation
condition during incubation.
If you press ENTER button, LCD display indicates
setting Temp. & Humidity.
Sdudphwhu#vdyhg
[Setting Save Message]
Fklfnhq
##93
<3#䯍
Fklfnhq
##93
<3#䯍
0''
)VNJEJUZ
0''
%BZT
Sdudphwhu#vdyhg
ENTER
%*(*5"-*/$6#"503
4;
(6) Incubation conditions reset /
How to Set Egg Turning Test /
Turn ON, OFF Humidification Function
3. Function Settings

When starting egg turning, animation showed
on display with melody.
Egg Turning Check Function
Power Failure Alarm Function
When you first switch on the power, or
in case of power failure during incubation,
display shows this icon and incubator
and incubator alarm sounds for about 10sec.
Press ENTER to remove.
Water Shortage Detecting Function
Fklfnhq
##93
<3ȋ
Fklfnhq
##93
<3ȋ
Fklfnhq
##93
<3ȋ
Fklfnhq
##93
<3ȋ
When water is short, humidification icon
is changed and water supplement
alarm sounds after 5 min. This alarm continues
every 30 sec.
When there is any problem on water detecting
sensor, humidification icon is changed like this
, and alarm sounds with message.
Abnormal High or Low Temperature Alarm Function
Alarm call automatically turned off after 1min. but you
should press ENTER button to switch off alarm indication.
When incubator temperature is different from
setting value, icon is changed ,
and display indicates current temp. and temp.
difference alternatively.
Fklfnhq
##93
<3ȋ
Fklfnhq
##93
<3ȋ
When temp. difference is 2, it indicates 39.5 and
+2.0 alternatively ( setting 37.5)
When temp. difference is -3, it indicates 34.5 and
-3.0 alternatively ( setting 37.5)
<Example>
* How to Set Abnormal Low Temp. Setting (When incubator temp. is lower than setting temp.) [Setting Range: 0 ~ - 5, Default Setting : - 3]
Select with UP/DOWN button Set with UP/DOWN button
When MENU
screen is shown,
press SET UP/
BACK button
and display return
to basic screen.
* How to Set Abnormal High Temp. Setting (When incubator temp. is higher than setting temp.) [Setting Range: 0 ~ 5, Default Setting : 2]
When MENU
screen is shown,
press SET UP/
BACK button
and display return
to basic screen.
It takes about 1min. to return to normal display after
you refill water.
Sdudphwhu#vdyhg
oG{UGz
oUjhs
oG
{
ol
sG
{
sl
oGl
oG{UGl
GGGGGGGGZUWȋjG
Fklfnhq
##93
<3#䯍
Fklfnhq
Sdudphwhu#vdyhg
sG{UGz
oG
{
ol |
sG
{
sl
sGl
sG{UGl
GGGGGT[UWȋjG
%*(*5"-*/$6#"503 4<
(1) Egg Turning Check / Alarm for water supplement /
Abnormal High or Low temperatue Alarm /
Power Failure Alarm Function
4. Other Functions

%*(*5"-*/$6#"503
53
5. Incubation (1) Humidity & Air Maintenance during Incubation /
Maintenance after Hatching
(2) Dew Condensation
Air Vent
CD9B
7@CG9
W
ATE
R
P
ULL OP
EN
W
A
T
E
R
P
U
LL
OP
EN
This is a naturally occurring phenomenon when there is a
significant difference in temperature between inside and
outside of the incubator during incubation period. If this occurs,
water may form in inside bottom of the main body of the
incubator(bottom part).
Maintenance after Hatching
Dew Condensation
Humidity & Air Maintenance During Incubation
As there is some difference in chick feed for each kind of bird, so it's desirable to obtain useful information
about the chicks before hatching.
When hatching, humidity should be relatively high to prevent the
thin membrane from drying out or hardening before hatching.
When hatching, it's recommended not to open the lid often.
This is because if you open the lid often humidity will be rapidly
decreased and it will take a long time to regain the proper humidity.
It's very important to maintain humidity higher 1~3 days before
hatching than the early and middle incubation periods. Humidity
requirements during incubation are RH 45~55% for waterfowl,
RH 40~45% for poultry and RH 35~45% for parrot, in general.
One day before hatching, all kinds of birds need about RH 65%
humidity and sometimes need higher than that.
However, in areas of high ambient humidity, lower levels of
humidity may be needed during incubation.
Incubator internal temperature is 37 (99.5 ) or more, and
hatching room temperature is below 28 , in that case, RH70%
humidity is may not be able. The difference of ±5% humidity
value may occur from the humidity sensors difference, and there
are no problems at hatching
Be sure to use a three-wavelength 20W bulb. If you use a bulb over 20W. temperature goes up, possibly
killing the chick or causing a fire. If there is too much water and a chick would falls into water, its feathers
get wet and it can be died of loss of body heat. Here, dry feathers with a hairdryer. etc
Be sure to use a three-wavelength 20W bulb :
In case breeding room size 370(mm) x 270(mm) x 130(mm)
It's very important to keep humidity higher than RH 60%
before hatching 3days.
Air Controlling Lever : Outer fresh air can be flowed into incubator
inside without affecting insulation. When eggs start hatching,
open air controlling lever either fully or half-open.
When the baby chickens hatch out,
please move them into a brooder.
Hatcher : The machine for egg-hatching. Operate it 1~3 days before egg-hatching. (Rcom MARU H&B)
Brooder : The machine makes baby chickens or birds warm up against cold or cool environment. You can
set up proper temperature and humidity. (Rcom MARU H&B / Rcom Brooder Series)
Please do not try to egg-hatching in the incubator. It makes your incubator broken or faulty, and we do not
give you free warranty service. (Please move all the eggs 1~3 days before hatching into Hatcher or Brooder.)
It is necessary to use a brooder for baby chicken or bird since they are too week against cold or cool environment.
If you try egg-hatching in your incubator, there would be lots of germs, feathers, which causes of low egg hatching
possibility for your next hatching. Also, they can make your incubator broken or faulty.
We strongly recommend you to use independent Hatcher or Brooder for egg-hatching.
If you have any faulty or broken because of not using independent Hatcher or Brooder, we do not serve you the
free warranty service. In other words, you have to pay for the service charge.
To make a simple Hatcher or Brooder, please refer to the our web-site (www.Rcom.co.kr).
/