21126

Noble House 21126, 21125, 302122 Operating instructions

  • Hello! I am an AI chatbot trained to assist you with the Noble House 21126 Operating instructions. I’ve already reviewed the document and can help you find the information you need or explain it in simple terms. Just ask your questions, and providing more details will help me assist you more effectively!
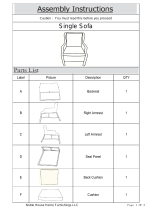
Label Picture Description QTY
A Top 1
B Right Back 1
C Left Back 1
Caution : You must read this before you proceed
BASKET
Picture
Noble House Home Furnishings LLC Page 1 OF 7
D Seat 1
E Pillow 1
F Cushion 1
Label Picture Description QTY
Bolt (M6x35mm) 15
Washer (M6) 29
Nut 15
Bolt Cap 15
Nut Cap 15
Spanner 1
Allen Key 1
Noble House Home Furnishings LLC Page 2 OF 7
Before Beginning
Assembly:
Noble House Home Furnishings LLC Page 3 OF 7
Step 1
This Basket has multiple parts and may require up to 30 minutes to assemble. To give you
an overview of the Basket parts, the above picture is to help you put the various parts into
perspective. Please read through the instructions below to familiarise yourself with the
parts and steps before assembly.
Place the Right Back(B) and Left Back(C) on a clean, non-marring surface.
Note: Find the sticker with the words "upper side" on them, and keep all the upper
sides upwards.
Attach Right Back(B) to Left Back(C) using Bolts(), and Washers() on one side and
Washers() and Nuts() on the other side, with Allen Key() and Spanner().
Do not fully tighten the Bolts.
Overview
FRONT FACING
Right Back (B)
Top (A)
Right Back (B)
Pillow(E)
Seat (D)
Cushion (F)
Left Back (C)
Bolt ()
Washer ()
Nut ()
Washer ()
Upper Side
Base Side
Noble House Home Furnishings LLC Page 4 OF 7
Step 2
Step 3
Align Right Back(B), Left Back(C) and Top(A).
Attach Right Back(B) and Left Back(C) to Top(A) using Bolts(), and Washers() on the
upper side and Washers() and Nuts() on the lower side, with Allen Key() and
Spanner().
Do not fully tighten the Bolts.
Align Right Back(B), Left Back(C) and Seat(D).
Attach Right Back(B) and Left Back(C) to Seat(D) using Bolts(), and Washers() on
the upper side and Washers() and Nuts() on the lower side, with Allen Key() and
Spanner().
Do not fully tighten the Bolts.
Left Back
Top (A)
Right
Back (B)
Seat (D)
Left Back
Right
Back
Seat (D)
Bolt ()
Washer ()
Washer ()
Nut()
Bolt ()
Washer ()
Washer ()
Nut ()
Noble House Home Furnishings LLC Page 5 OF 7
Step 4
Step 5
Lift the Basket and hang the first iron chain on the Spring of the Stand.
Use the fasten Safety Rope to lock on the middle rattan warp at the bottom of the basket
as shown above, screwed up the carabiner to keep the warp never come out from it.
Note: This step should be completed with 2 adults.
Now, tighten all Bolts and Nuts at all joints sequential manner.
Place Bolt Caps() on Bolts() and Nut Caps() on Nuts().
Tie the Pillow(E) to the Basket as pictured above.
Place the Cushion(F) on the Basket.
Your Basket is ready for use.
Pillow (E)
Cushion (F)
Noble House Home Furnishings LLC Page 6 OF 7
Noble House Home Furnishings LLC Page 7 OF 7
/