Page is loading ...

1.WHAT IS SUPPLIED?
Standard upon delivery of an HANWHA Robots kit:
(HND-GRP)
(GRP-CPL-062)
(HND-TIP-START-KIT)
(CBL-COM-2065-10-HF)
(ACC-ADT-USB-RS485)
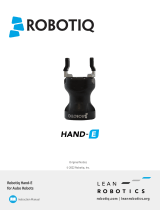
Hand-E
Gripper Coupling
Fingertip Starting Kit
High-Flex Device Cable
USB to RS485 Adapter
Necessary Hardware
2.TOOLS YOU NEED
6.SOFTWARE INSTALLATION
5.WIRING
4.MOUNTING
This step-by-step guide will allow you to install and
use your Hand-E Gripper on HANWHA Robots.
3.GET THE LATEST
PLEASE READ THE INSTRUCTION MANUAL
BEFORE OPERATING THE GRIPPER.
• Browse to support.robotiq.com
• Download the plugin at the root of a USB stick.
To install the plugin, you must be logged in as an administrtor.
1. Have a USB stick that contains the plugin (step 3).
2. Insert the USB stick in the teach pendant or controller.
3. In the left pane, select Management.
4. Tap on RodiX Plugin Management tab.
5. Tap the Add button to launch the file explorer. Then, the
external and internal storage paths are displayed.
6. Select the plugin you want to install and click the OK
button.
7. To get back to normal operations, restart the system.
1. Connect the red wire to a 24V pin.
2. Connect the black wire to a 0V pin.
3. Connect the communication wires in the USB converter
(ACC-ADT-USB-RS485) as shown.
4. Connect the USB converter to the Aubo controller.
1. Mount the coupling (GRP-CPL-062) on your robot arm.
Align with the provided dowel pin.
2. Secure using the provided M6 screws and tooth lock
washers.
3. Mount the Gripper (HND-GRP) on the coupling. Align
with the dowel pin.
4. Secure using the provided M5 screws and tooth lock
washers.
5.Plug the device cable (CBL-COM-2065-10-HF) into the
Gripper’s pigtail cable and attach the cable along the
robot arm using a cable routing system.
THANK YOU FOR
CHOOSING ROBOTIQ
LEAVE ENOUGH EXCESS CABLE TO ALLOW
FULL ROBOT MOVEMENT.
4 mm
Hex Key
2 mm
Slotted Screwdriver
(not included)
485+
485-
485 GND
(1)
(2)
(3)
1
2
3
4
5
!
!
(CBL-COM-2065-10-HF)
WHITE
Pin Signal Name
1
2
485 + (A)
SHIELD
CBL-COM-2065-10-HF
High-Flex Device Cable
GREEN
3
485 GND
485 - (B)
(Gripper)
(M5 screws
and washers)
The red (24V) and black (0V) wires of the device cable
(CBL-COM-2065-10-HF) provide power to the Gripper.
(M6 screws
and washers)
(Gripper coupling)
(Dowel pin)
CAREFUL !
FRAGILE PINS

T: 1.418.380.2788 option 3
November 2021
X-990075-C
HAND-E
QUICK START GUIDE
support.robotiq.com
For installation on
HANWHA robots
In the dashboard, the Gripper can either be closed or
opened, using the E-Open or E-Close button.
To control the gripper directly from the program:
1. Insert a gripper node in the program (see step 9)
2. Tap the Gripper icon in the program to display Gripper
settings.
8. TEST AND JOG
THE GRIPPER
7. ACTIVATE
THE GRIPPER
1. Go to the RodiX menu on the left and select Gripper.
9. USE NODES TO PROGRAM
WITH THE GRIPPER
1. Go to the Command tab
2. If no device is detected, tap the Scan button.
3. Once a device is detected, tap the Activate button.
The gripper will go through its' activation cycle.
3. To change the settings and jog the gripper, tap the
Edit action button.
4. Once done, tap the Save action button.
2. Tap the RodiX tab at the top of the screen and
then
X-990075-C
/