Page is loading ...

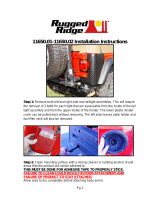
Part Number 11650.20(Front Fender guards)
Step 1: Remove the hood stoppers and front turn signals from both front fenders.
Step 2: Clean mounting surface with a strong cleaner or rubbing alcohol. Avoid
areas that the product will not be adhered to.
THIS MUST BE DONE FOR ADHESIVE TAPE TO PROPERLY STICK.
FAILURE TO CLEAN COULD RESULT IN POOR ATTACHMENT AND
FAILURE OF PRODUCT TO STAY ATTACHED.
Allow area to dry completely before attaching body armor.
Step 3: Test fit the Fender Guard to the vehicle before removing the plastic
backing film. This will aid in aligning the piece properly before securing with the
two-sided 3M tape.
Pg.1

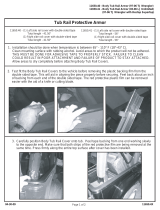
Part Number 11650.20(Front Fender guards)
Step 4: Test fit the Fender Guard to the vehicle before removing the plastic
backing film. This will aid in aligning the piece properly before securing with the
two-sided 3M tape.
Step 5: Remove plastic backing film from the affixed two-sided 3M tape.
Step 6: Position armor onto fender Make sure that it is evenly spaced before
applying any pressure to armor. When satisfied with placement apply pressure
to all areas to properly secure armor to vehicle. Reinstall the front turn signals
with supplied longer screws. Do not over tighten turn signal screws or lens
assembly may crack.
Pg.2
/