Page is loading ...

Adjustable Fixed Rails for
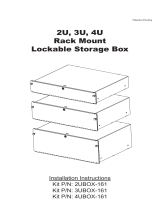
19" 4Post Racks
Installation Instructions
Kit P/N: 1UKIT-109 1UKIT-109-20 1UKIT-109-31
2UKIT-109 2UKIT-109-20 2UKIT-109-31
3UKIT-109 3UKIT-109-20 3UKIT-109-31
109-2469
1U
2U
3U
Patent(s) Pending

Page 2
Kit Contents
Components:
(1) Left Fixed Rail
(1) Right Fixed Rail
(2) Rear Brackets
(1) Cable Crossbar
(1) 30” Velcro Cable Tie
Assembly Hardware Kit:
(8) 8-32 Flat Head Screws
(8) 8-32 Nuts
Cage Nuts for Equipment Thumb Screws:
(2) 10-32 Cage Nuts “Silver” (Dell Standard)
(2) 12-24 Cage Nuts “Black”
(2) M6 Cage Nuts “Gold” (HP-Compaq Standard)
Rack Hardware Kit (2 bags):
(12) 10-32 Pan Head Screws
(12) 12-24 Pan Head Screws
(12) 12-24 Cage Nuts
(12) 12-24 Square Nuts
Rack Hole Type Hardware Used
Square Install the “Black” Cage Nuts in the appropriate square holes.
Attach the rails with the (larger) 12-24 screws.
Threaded Use the appropriate screw: (larger) 12-24 or (smaller) 10-32.
Non-Threaded Use the (larger) 12-24 Screws and the square nuts.
Thumb Screw Support (Optional)
Some equipment has Thumb Screws on the right and left side of the front panel. These
Thumb Screws are used to secure the equipment in the rack. This kit supports the
common Thumb Screw threads.
1. Dell Equipment installed in 10-32 Threaded Racks will support Thumb Screws with no
additional effort.
2. For Square Hole Racks, install the appropriate “Color Coded” Cage Nuts as normal in
the square hole that aligns with the Thumb Screw.
3. For All Round Hole Racks, install the appropriate size cage nut “backwards” in the front
rail anges (see below) in the square hole that aligns with the Thumb Screw.
Thumb Screws Threads: Generic Equipment: Use the “Black” 12-24 Cage Nuts
Dell Equipment: Use the “Silver” 10-32 Cage Nuts
HP-Compaq Equipment: Use the “Gold” M6 Cage Nuts
Cage Nut installed “Backwards”
in the front rail ange for Thumb
Screw Support

Page 3
Installation Instructions
Step 1. Rail Assembly: Attach the Rear Brackets to each Fixed Rail using (4) 8-32 Flat
Head Screws and (4) 8-32 Nuts. Always install the (4) screws and nuts as widely
spaced as possible.
There are multiple ways to orient the Rear Brackets as shown below.
Step 2. Front Rack Attachment: Attach the front of each Fixed Rail to the rack using
hardware from the Rack Hardware Kit (see Page 2).
1U Shown
(2U & 3U Similar)
2U Shown
(1U & 3U Similar)

Warranty Statement
Innovation First, Inc. warrants our products against defects in material and workmanship for a
period of one (1) year from the date of purchase. Innovation First, Inc. liability shall be limited to
repairing or replacing, at our option, any defective product.
Installation Instructions
Step 3. Rear Rack Attachment: Attach the back of each Fixed Rail to the rack using
hardware from the Rack Hardware Kit (see Page 2).
Step 4. Cable Crossbar Attachment: Attach the Cable Crossbar to the rack using
hardware from the Rack Hardware Kit (see Page 2). The Cable Crossbar can be
co-located with the Fixed Rails (as shown below). The Cable Crossbar can be
installed in other locations as needed.
2U Shown
(1U & 3U Similar)
240605958 488 883 886 943887 944888 2469
Note: Cable Crossbar
Not Included
in Some Kits
/