Page is loading ...

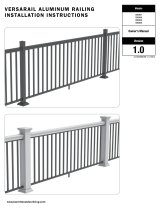
Installation GuideAluminum Railing Kit

We’re happy to help. Call 1-888-743-3673.
BEFORE YOU BEGIN INSTALLATION:
The best choice for strong & durable railing.
• ConsultyourlocalbuildingcodeofcialandcheckallCodeRequirements.
• Readallinstructionsthoroughlypriortoassemblytoassurecorrectinstallation.
THEMANUFACTURERWILLNOTBEHELDRESPONSIBLEFORUNSAFEORINCORRECT
INSTALLATION.
• Theseinstructionsareguidelinesanddonotcovereveryinstallationscenario.
• Alwaysusethefastenersprovidedintherailingkit.DONOTswapanyhardware.
• ThisrailingkithasbeentestedbyATIandmeetstheIRCandIBCconstructioncodestandards.
Additionaltestinginformationisavailableuponrequest.
• Alwaysfollowallsafetyregulationswheninstallingtherailingsectionandalwayswearsafety
glasses.
• Purchaserhasthesoleresponsibilitytodeterminewhetherthealuminumrailingandaluminum
postproductscomplywiththeapplicablecodesandareappropriatefortheintendeduse.The
purchaserandinstallershouldreviewtheintendeduseoftheproductsandthestructuralintegrityof
thedeck,concretepad,orpatioforinstallingthepostswithalicensedprofessionalengineer.
ThankyouforchoosingWeatherablesrailingforyourdeckorpatio!Ouraluminumrailingprovides
strength,durabilityandismaintenancefree.Itmeetsallnationwide(IRC/IBC)buildingcodes.Ideal
forthedo-
it-yourselforaprofessionalinstaller,itissimpletoinstallanddoesnotrequireany
specialtools.Madetolastalifetime,ourpremiumaluminumrailingismanufacturedwiththebest
Americanmadematerialsonthemarket.Thisguideisintendedtohelpmakeyourinstallationeasy.
Forquestions,pleasecall1-888-743-3673andwelcometoWeatherables.
1
HARDWARE & PROFILES
TopRail
Topandbottom
2-piecedrop-inbrackets
Footblockkit
BottomRail
#14TypeFself-
threadingscrews
¾”SquareBalusters
Aluminum Railing Assembly

We’re happy to help. Call 1-888-743-3673.
2
1. CordlessDrill/ImpactDriver
2. 13/64”DrillBit
3. #3PhillipsScrewdriverBit
4. SpeedSquare
5. 2’Level
6. TapeMeasure
7. Mitersaworportablebandsaw
8. RubberMallet
9. Postlevel(optional)
1. Layoutandmarkwherethepostswillbeinstalledonthedecksurface.Assurethatthe5”x5”base
plateisatleast2”fromtheedgeofthedecktoallowforthe2-piecetrim.
2.
Ifinstallingonadeck(wood,composite),assurethatthepostswillattachtothesubstructureofthe
deckorpatio.Thedeckingmayneedtobereinforcedwithsupportlumber(backerboardsuchas
a2”x10”or2”x12”treatedlumbercuttofittightlybetweenthejoistsandinstalledflatunderthe
decking).Useappropriatestructural weatherprooffasteners(notincluded)foryourapplication.
3.
Ifinstallingonconcrete,usetheappropriatestructural weatherproofconcreteanchorsforyourapplication.
4. Usetheincludedshimsandaleveltoplumbandsquarethepost.
5. Securethepoststothedeckandslideontheincluded2-piecepostskirt.
Tools
Section 1: Installing the Posts
1
Aluminum Railing Assembly

We’re happy to help. Call 1-888-743-3673.
3
1. Measurethedistancebetweenposts.
2. Subtract½”fromthetotallengthofthedistancetoallowforthebrackets.
3. Iftherailsneedtobecut,subtractanequalamountfromeachendoftherail.Thiswillkeepthe
picketscenteredinthepanel.
4. Measureandmarkboththetopandbottomrails,assuringthatthecutisnotinthemiddleofapicket
mountandthatthepicketmountslineupbeforecuttingtherail.
5. Cuttherailswithane-toothmitersaworaportablebandsaw.
6. Oncetherailsarecut,insertthepicketsontothebottomrailusingtheinstalledpicketmounts,then
snapthetoprailintothepickets,completingthepanel.
7. Oncethepanelisassembled,installthefootblockmountinthecenterofthebottomrailusingthe
1”self-tappingscrew.
8. Determinethedistancebetweenthedeckorpatioandthebottomrailbasedonlocalbuildingcodes
(generally2”),thencarefullycutafootblockpiecetomatchthedistance(apre-cut2”pieceis
included,aswellasalongerpieceforcustominstallations).
9. Pushthefootblockontothepicketmountonthebottomrail.
Section 2: Assembling the Panel With the Foot Block
2
Aluminum Railing Assembly

We’re happy to help. Call 1-888-743-3673.
4
1. Markthepostatthedesiredheightofthebottomrail(usually2”)Makesuretoaccountforthe3/8"
postangeandthe1/4"bracketwhenmarkingthemeasurement.
2. AlignthebottomBracketwiththemarkandinstallthebottombracketsoneachpost.
3. Settheassembledpanelwithfootblockintothebottombrackets.Markwherethefootblockwill
attachtothedeckorpatio,aswellaswherethetopbracketswillbeinstalled.
4. Takethepaneloutofthebottombracketsandsetaside.
5. Installthefootblockbaseplateintothedeckorpatio.
6. Installthetopbracketsbasedonthemarksonthepost.
7. Settheassembledpanelintotheinstalledbracketsandfastenthemwiththeprovidedscrews.
8. Usingasmallblockofwood,snapthebracketcoversintoplaceoverthetopandbottomrails.
9. Placethecapsontothepostandtapthemtightwitharubbermallet.
Section 3: Installing the Brackets & Foot Block
3
Aluminum Railing Assembly
/


