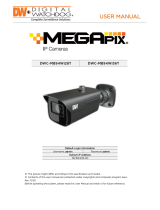
Digital Watchdog DWC-MVT4WiA User manual

Category
Security cameras
Type
User manual

This manual is also suitable for

User’s Manual
7FS9/18
#FGPSFJOTUBMMJOHBOEVTJOHUIFDBNFSBQMFBTFSFBEUIJTNBOVBMDBSFGVMMZ
#FTVSFUPLFFQJUIBOEZGPSGVUVSFSFGFSFODF
MEGApix
®
4MP outdoor vandal dome
IP camera with analytics
DWC-MVT4WiA
4BGFUZ*OGPSNBUJPO
8BSOJOH
5IJTTZNCPMJOEJDBUFTUIBUEBOHFSPVTWPMUBHF
DPOTJTUJOHBSJTLPGFMFDUSJDTIPDLJTQSFTFOUXJUIJO
UIJTVOJU
1SFDBVUJPO
5IJTFYDMBNBUJPOQPJOUTZNCPMJTJOUFOEFEUPBMFSUUIF
VTFSUPUIFQSFTFODFPGJNQPSUBOUPQFSBUJOHBOE
NBJOUFOBODFTFSWJDJOHJOTUSVDUJPOTJOUIFMJUFSBUVSF
BDDPNQBOZJOHUIFBQQMJBODF
$"65*0/
503&%6$&5)&3*4,0'&-&$53*$4)0$,%0/053&.07&$07&303#"$,/064&34&37*$&"#-&
1"354*/4*%&3&'&34&37*$*/(5026"-*'*&%4&37*$&1&340//&-
$"65*0/
3*4,0'&-&$53*$4)0$,
%0/0501&/
#FTVSFUPPOMZVTF UIFTUBOEBSEBEBQUFSUIBUJTTQFDJGJFEJn
UIFTQFDJGJDBUJPOTIFFU6TJOHBOZPUIFSBEBQUFSDPVMEDBVTe
GJSFFMFDUSJDBMTIPDLPSEBNBHFUPUIFQSPEVDU.
*ODPSSFDUMZDPOOFDUJOHUIFQPXFSTVQQMZPSSFQMBDJOHCBUUFSZ
NBZDBVTFan FYQMPTJPO GJSF FMFDUSJDTIPDL PSEBNBHF UP
UIe QSPEVDU
%POPUDPOOFDUNVMUJQMFDBNFSBTUPBTJOHMFBEBQUFS
&YDFFEJOHUIFDBQBDJUZNBZDBVTFFYDFTTJWFIFBUHFOFSBUJPO
PSGJSF
4FDVSFMZQMVHUIFQPXFSDPSEJOUPUIFQPXFSSFDFQUBDMF
*OTFDVSFDPOOFDUJPONBZDBVTFGJSF
8IFOJOTUBMMJOHUIFDBNFSBGBTUFOJUTFDVSFMZBOEGJSNMZ.
"GBMMJOHDBNFSBNBZDBVTFQFSTPOBMJOKVSZ
%POPUQMBDFDPOEVDUJWFPCKFDUTFHTDSFXESJWFSTDPJOT
NFUBMJUFNTFUDPSDPOUBJOFSTGJMMFEXJUIXBUFSPOUPQPf
UIFDBNFSB%PJOHTPNBZDBVTFQFSTPOBMJOKVSZEVFUPGJSF
FMFDUSJDTIPDLPSGBMMJOHPCKFDUT
%POPUJOTUBMMUIFVOJUJOIVNJEEVTUZPSTPPUZMPDBUJPOT
%PJOHTPNBZDBVTFGJSFPSFMFDUSJDTIPDL
*GBOZVOVTVBMTNFMMTPSTNPLFDPNFGSPNUIFVOJUTUPQ
VTJOHUIFQSPEVDU*NNFEJBUFMZEJTDPOOFDUUIFQPXF
Scord
BOEDPOUBDUUIFTF
SWJDFDFOUFS$POUJOVFEVTFJOTVDIB
DPOEJUJPONBZDBVTFGJSFPSFMFDUSJDTIPDL.
*GUIJTQSPEVDUGBJMTUPPQFSBUFOPSNBMMZDPOUBDUUIFOFBSFTU
TFSWJDFDFOUFS/FWFSEJTBTTFNCMFPSNPEJGZUIJTQSPEVDUJO
BOZXBZ
8IFODMFBOJOHEPOPUTQSBZXBUFSEJSFDUMZPOUPQBSUTPGUIF
QSPEVDU%PJOHTPNBZDBVTFGJSFPSFMFDUSJDTIPDL
8"3/*/(
5PQSFWFOUEBNBHFXIJDINBZSFTVMUJOGJSFPSFMFDUSJDTIPD
IB[BSEEPOPUFYQPTFUIJTBQQMJBODFUPSBJOPSNPJTUVSF
8"3/*/(
1.
2.
3.
4.
5.
6.
7.
8.
9.
10.
1SFDBVUJPO
0QFSBUJOH
t#FGPSFVTJOHNBLFTVSFthe QPXFS TVQQMZBOE BMMPUIFS
QBSUT BSF QSPQFSMZDPOOFDUFE
t8IJMFPQFSBUJOHJGBOZBCOPSNBMDPOEJUJPOPSNBMGVODUJPO
JTPCTFSWFETUPQVTJOHUIFDBNFSBJNNFEJBUFMZBOEDPOUBDU
ZPVSEFBMFS
)BOEMJOH
t%POPUEJTBTTFNCMFPSUBNQFSXJUIQBSUTJOTJEFUIFDBNFSB
t%POPUESPQUIFDBNFSBPSTVCKFDUJUUPTIPDLPSWJCSBUJPOBT
UIJTDBOEBNBHFUIFDBNFSB
t$MFBOUIFDMFBSEPNFDPWFSXJUIFYUSBDBSF4DSBUDIFTBOE
EVTUDBOSVJOUIFRVBMJUZPGUIFDBNFSBJNBHF
*OTUBMMBUJPOBOE4UPSBHF
t%POPUJOTUBMMUIFDBNFSBJOBSFBTPGFYUSFNFUFNQFSBUVSF
FYDFFEJOHUIFBMMPXFESBOHF
t"WPJEJOTUBMMJOHJOIVNJEPSEVTUZFOWJSPONFOUT
t"WPJEJOTUBMMJOHJOQMBDFTXIFSFSBEJBUJPOJTQSFTFOU
t"WPJEJOTUBMMJOHJOQMBDFTXIFSFUIFSFBSFTUSPOHNBHOFUJD
yiFMETBOEFMFDUSJDTJHOBMT
t"WPJEJOTUBMMJOHJOQMBDF
TXIFSFUIFDBNFSBXPVMECFTVCKFDU
UPTUSPOHWJCSBUJPOT
t/FWFSFYQPTFUIFDBNFSBUPSBJOPSXBUFS
*NQPSUBOU4BGFUZ*OTUSVDUJPOT
%JTQPTBMPG0ME"QQMJBODFT
 8IFOUIJTDSPTTFEPVUXIFFMCJOTZNCPMJTBUUBDIFEUPBQSPEVDUJUNFBOTUIFQSPEVDUJTDPWFSFECZUIF
&VSPQFBO%JSFDUJWF&$
 "MMFMFDUSJDBMBOEFMFDUSPOJDQSPEVDUTTIPVMECFEJTQPTFEPGTFQBSBUFMZGPSNUIFNVOJDJQBMXBTUFTUSFBN
TUSFBNJOBDDPSEBODFUPMBXTEFTJHOBUFECZUIFHPWFSONFOUPSUIFMPDBMBVUIPSJUJFT
 5IFDPSSFDUEJTQPTBMPGZPVSPMEBQQMJBODFXJMMIFMQQSFWFOUQPUFOUJBMOFHBUJWFDPOTFRVFODFTGPSUIF
FOWJSPONFOUBOEIVNBOIFBMUI
 'PSNPSFEFUBJMFEJOGPSNBUJPOBCPVUEJTQPTBMPGZPVSPMEBQQMJBODFQMFBTFDPOUBDUZPVSDJUZPGGJDF
XBTUFEJTQPTBMTFSWJDFPSUIFTIPQXIFSFZPVQVSDIBTFEUIFQSPEVDU
5IJTFRVJQNFOUIBTCFFOUFTUFEBOEGPVOEUPDPNQMZXJUIUIFMJNJUTGPSB$MBTT"EJHJUBMEFWJDFQVSTVBOUUPQBSUPGUIF'$$3VMFT
5IFTFMJNJUTBSFEFTJHOFEUPQSPWJEFSFBTPOBCMFQSPUFDUJPOBHBJOTUIBSNGVMJOUFSGFSFODFXIFOUIFFRVJQNFOUJTPQFSBUFEJOBDPNNFSDJBMFOWJSPONFOU
5IJTFRVJQNFOUHFOFSBUFTVTFTBOEDBOSBEJBUFSBEJPGSFRVFODZFOFSHZBOEJGOPUJOTUBMMFEBOEVTFEJOBDDPSEBODFXJUIUIFJOTUSVDUJPONBOVBMNBZDBVTF
IBSNGVMJOUFSGFSFODFUPSBEJPDPNNVOJDBUJPOT0QFSBUJPOPGUIJTFRVJQNFOUJOBSFTJEFOUJBMBSFBJTMJLFMZUPDBVTFIBSNGVMJOUFSGFSFODFJOXIJDIDBTFUIFVTFS
XJMMCFSFRVJSFEUPDPSSFDUUIFJOUFSGFSFOFDFBUIJTPXOFYQFOTF
 3FBEUIFTFJOTUSVDUJPOT"MMTBGFUZBOEPQFSBUJOHJOTUSVDUJPOTTIPVMECFSFBECFGPSFJOTUBMMBUJPOPSPQFSBUJPO
 ,FFQUIFTFJOTUSVDUJPOT5IFTBGFUZPQFSBUJOHBOEVTFJOTUSVDUJPOTTIPVMECFSFUBJOFEGPSGVUVSFSFGFSFODF
 )FFEBMMXBSOJOHT"MMXBSOJOHTPOUIFQSPEVDUBOEJOUIFPQFSBUJOHJOTUSVDUJPOTTIPVMECFBEIFSFEUP
 'PMMPXBMMJOTUSVDUJPOT"MMPQFSBUJOHBOEVTFJOTUSVDUJPOTTIPVMECFGPMMPXFE
 %POPUVTFUIJTEFWJDFOFBSXBUFS'PSFYBNQMFOFBSBCBUIUVCXBTICPXMLJUDIFOTJOLMBVOESZUVCJOBXFU
CBTFNFOUOFBSBTXJNNJOHQPPMFUD
 $MFBOPOMZXJUIESZDMPUI6OQMVHUIJTQSPEVDUGSPNUIFXBMMPVUMFUCFGPSFDMFBOJOH%POPUVTFMJRVJEDMFBOFST
 %POPUCMPDLBOZWFOUJMBUJPOPQFOJOHT*OTUBMMJOBDDPSEBODFXJUIUIFNBOVGBDUVSFSTJOTUSVDUJPOT4MPUTBOE
PQFOJOHTJOUIFDBCJOFUBSFQSPWJEFEGPSWFOUJMBUJPOUPFOTVSFSFMJBCMFPQFSBUJPOPGUIFQSPEVDUBOEUPQSPUFDUJU
GSPNPWFSIFBUJOH5IFPQFOJOHTTIPVMEOFWFSCFCMPDLFECZQMBDJOHUIFQSPEVDUPOCFETPGBSVHPSPUIFSTJNJMBS
TVSGBDFT5IJTQSPEVDUTIPVMEOPUCFQMBDFEJOBCVJMUJOJOTUBMMBUJPOTVDIBTBCPPLDBTFPSSBDLVOMFTTQSPQFS
WFOUJMBUJPOJTQSPWJEFEBOEUIFNBOVGBDUVSFSTJOTUSVDUJPOTIBWFCFFOBEIFSFUP
 %POPUJOTUBMMOFBSBOZIFBUTPVSDFTTVDIBTSBEJBUPSTIFBUSFHJTUFSTPSPUIFSBQQBSBUVTJODMVEJOHBNQMJGJFST
UIBUQSPEVDFIFBU
 %POPUEFGFBUUIFTBGFUZQVSQPTFPGUIFQPMBSJ[FEPSHSPVOEJOHUZQFQMVH"QPMBSJ[FEQMVHIBTUXPCMBEFTXJUI
POFXJEFSUIBOUIFPUIFS"HSPVOEJOHUZQFQMVHIBTUXPCMBEFTBOEBUIJSEHSPVOEJOHQSPOH5IFXJEFCMBEF
PSUIFUIJSEQSPOHBSFQSPWJEFEGPSZPVSTBGFUZ*GUIFQSPWJEFEQMVHEPFTOPUGJUJOUPZPVSPVUMFUDPOTVMUBO
FMFDUSJDJBOGPSSFQMBDFNFOU
 1SPUFDUUIFQPXFSDPSEGSPNCFJOHXBMLFEPOPSQJODIFEQBSUJDVMBSMZBUQMVHTDPOWFOJFODFSFDFQUBDMFTBOE
UIFQPJOUXIFSFUIFZFYJUGSPNUIFBQQBSBUVT
 0OMZVTFBUUBDINFOUTBDDFTTPSJFTTQFDJGJFECZUIFNBOVGBDUVSFS
 6TFPOMZXJUIDBSUTUBOEUSJQPECSBDLFUPSUBCMFTQFDJGJFECZUIFNBOVGBDUVSFS
PSTPMEXJUIUIFBQQBSBUVT8IFOBDBSUJTVTFEVTFDBVUJPOXIFONPWJOHUIFDBSUBQQBSBUVT
DPNCJOBUJPOUPBWPJEJOKVSZGSPNUJQPWFS
 6OQMVHUIFBQQBSBUVTEVSJOHMJHIUOJOHTUPSNTPSXIFOVOVTFEGPSMPOHQFSJPETPGUJNF
 3FGFSBMMTFSWJDJOHUPRVBMJGJFETFSWJDFQFSTPOOFM4FSWJDJOHJTSFRVJSFEXIFOUIFBQQBSBUVTIBTCFFOEBNBHFE
JOBOZXBZTVDIBTQPXFSTVQQMZDPSEPSQMVHJTEBNBHFEMJRVJEIBTCFFOTQJMMFEPSPCKFDUTIBWFGBMMFOJOUPUIF
BQQBSBUVTUIFBQQBSBUVTIBTCFFOFYQPTFEUPSBJOPSNPJTUVSFEPFTOPUPQFSBUFOPSNBMMZPSIBTCFFO
ESPQQFE
Table of Contents
1 Product & Accessories ..................................................................................... 6
2 Parts and Description ....................................................................................... 7
3 Installation ......................................................................................................... 8
4 Cabling ............................................................................................................... 9
6 Live View ..........................................................................................................11
7 Camera Configuration...... ............................................................................... 14
7.1 System Configuration ..................................................................................................... 14
7.1.1 Basic Information............................................................................................ 14
7.1.2 Date and Time ................................................................................................14
7.1.3 Local Config ................................................................................................... 15
7.2 Image Configuration ...................................................................................................... 18
7.2.1 Display Configuration ..................................................................................... 18
7.2.2 Video / Audio Configuration ............................................................................ 20
7.2.3 OSD Configuration.......................................................................................... 21
7.2.4 Video Mask ....................................................................................................22
7.2.5 ROI Configuration ........................................................................................... 23
7.4 Alarm Configuration ....................................................................................................... 25
7.4.1 Motion Detection .............................................................................................................25
7.4.2 Other Alarms ...................................................................................................................26
7.4.3 Alarm In .......................................................................,...................................................28
7.4.4 Alarm Out ........................................................................................................................29
7.4.5 Alarm Server ...................................................................................................................29
7.1.4
Storage ......................................................................................................... 15
7.2.6
Lens Control .................................................................................................. 24
7.3
PTZ Configuration ......................................................................................................... 25
7.5 Video Analytics Configuration ....................................................................................................30
7.5.1 Object Removal ...............................................................................................................30
7.5.2 Exception .........................................................................................................................32
7.5.3 Line Crossing ...................................................................................................................33
7.5.4 Intrusion ...........................................................................................................................36
7.5.5 Crowd Density Detection .................................................................................................38
7.5.6 People Intrusion ...............................................................................................................40
7.5.7 People Counting ..............................................................................................................41
5 TF Card ............................................................................................................. 10
Table of Contents (Continue)
7.6 Network Configuration ..............................................................................................................45
7.6.1 CTP/IP ............................................................................................................................45
7.6.2 Port .................................................................................................................................46
7.6.3 Server Configuration ......................................................................................................46
7.6.4 DDNS .............................................................................................................................47
7.6.5 SNMP .............................................................................................................................48
7.6.6 802.1x ............................................................................................................................49
7.6.7 RTSP .............................................................................................................................50
7.6.8 UPnP .............................................................................................................................51
7.6.9 E-mail ............................................................................................................................51
7.6.10 FTP ..............................................................................................................................53
7.6.11 HTTPS .........................................................................................................................53
7.6.12 P2P (Optional) .............................................................................................................55
7.6.13 QoS .............................................................................................................................55
9 Appendix .......................................................................................................... 67
10
Dimensions ...................................................................................................... 69
11
Warranty Information ...................................................................................... 70
12 Limits and Exclusions .................................................................................... 71
7.7 Security Configuration .............................................................................................................55
7.7.1 User Configuration .........................................................................................................55
7.7.2 Online Users ..................................................................................................................57
7.7.3 Block and Allow Lists .....................................................................................................57
7.7.4 Security Management ....................................................................................................57
7.7 Maintenance Configuration ......................................................................................................58
7.8 configuration .....................................................................................................................58
7.8.1 Backup and restore .......................................................................................................58
7.8.2 Reboot ...........................................................................................................................59
7.8.3 Upgrade .........................................................................................................................59
7.8.4 Operation log .................................................................................................................59
8.1 Image Search ..........................................................................................................................61
8.2 Video Search ...........................................................................................................................63
8.2.1 Local video search ........................................................................................................63
8.2.2 SD card video search ....................................................................................................64
8 Search ............................................................................................................. 61
6
1 Product & Accessories
7
2 Parts and Description
8
3 Installation
1. Before installing the camera, make sure
the mounting surface can bear three
times the weight of your camera.
2. Do not let the cables get caught in
improper places or the electric line cover
to be damaged. This may cause a
breakdown or fire.
3. For the installation process, remove
the camera’s dome cover by loosening
the screws at the base of the dome.
4. Using the mounting template sheet or
the camera itself, mark and drill the
necessary holes in the wall or ceiling.
5. Pass the wires through and make all
necessary connections. See cabling
section for more information.
6. To use the camera’s water proof wiring:
a. Install the LAN cable into ‘a’.
b. ‘b’ will be assembled to ‘a’ with a 1/4
turn.
c. Thread ‘c’ tightly to ‘b’ .Adjust the
camera to obtain an optimum
angle by loosening the lock screws.
7. Secure the camera to the mounting
surface with the provided screws.
8. Adjust the camera to obtain an optimum
angle by using the camera’s three axis
gimbal. The camera’s max angles are:
Pan: 0°~360°
Tilt: 0°~ 70°
Rotation: 0°~ 360°
9. Remove the protection film softly to
complete the installation.
9
4 Cabling
1. NETWORK CONNECTIONS If you are using a PoE Switch, connect the camera using
an Ethernet cable for both data and power.
2. NETWORK CONNECTIONS If you are using a non-PoE switch, connect the camera to
the switch using an Ethernet cable for data transmission and use a power adapter to
power the camera.
Use the diagram below to connect all external devices to the camera:
10
5 TF Card
1. To install the camera’s TF Card, locate the TF / micro SD card slot in the
camera’s board by removing the camera’s bubble dome. See image below.
2. Insert a TF card into the TF card slot by pressing the TF card.
3. To remove the TF Card, press the card inward to release from the card
slot.
11
5 Live View
To log in to the camera, open an Internet Explorer page and input the cameras IP address.
If you are connecting to the camera for the first time, be sure to download the ActiveX
control. After downloading, a login window will pop up as shown below.
Input the username and password to log in.
After you log in, you will see the following window.
The following table is the instructions of the icons on the remote preview interface.
The default username is “admin”; the default password is “admin.
The following table is the instructions of the icons on the live view interface.
Icon Description Icon Description
Original size SD card recording indicator
Fit correct scale Color abnormal indicator
Auto (fill the window) Abnormal clarity indicator
Full screen Scene change indicator
Start/stop live view Line crossing indicator
Start/stop two-way audio Crowd density indicator
Enable/disable audio People counting indicator
Snapshot Object removal indicator
Start/stop local
recording
Intrusion indicator
Zoom in People intrusion indicator
Icon Description Icon Description
Zoom out Sensor alarm indicator
PTZ control Motion alarm indicator
AZ control (only
available for the model
with motorized zoom
lens )
Face detection indicator
Those smart alarm indicators will flash only when the camera supports those
functions and the corresponding events are enabled.
In full screen mode, double click on the mouse to exit or press the ESC key on the
keyboard.
Click AZ control button to show AZ control panel. The descriptions of the control panel
are as follows:
Icon Description Icon Description
Zoom - Zoom +
Focus - Focus +
One key focus (used when image is out of focus after manual adjustment
12
The camera can be installed in a compatible external PTZ enclosure through RS485.
Click the PTZ icon to reveal the PTZ control panel. (This function is only available for
the model with RS485 interface).
The descriptions of the control panel are as follows:
Icon Description Icon Description
Move upper left direction Move upper right direction
Move up Stop movement
Move left Move right
Move lower left direction Move lower right direction
Move down Speed adjustment
Zoom out Zoom in
Focus - Focus +
13
Select preset and click to call the preset. Select and set the preset and then click
to save the position of the preset. Select the set preset and click to delete it.
Iris - Iris +
Auto scan Wiper
Light Radom scan
Group scan Preset
6 Camera Configuration
In the DW web client, choose “Config” to go to the configuration interface. Note:
Wherever applicable, click the “Save” button to save the settings.
6.1 System Configuration
6.1.1 Basic Information
In the “Basic Informationinterface, the system information of the device is listed.
Some versions may support device ID and QR code. Having enabled P2P
(see Network Configuration-P2P), the network camera can be quickly added to
mobile surveillance client, by scanning the QR code or entering device ID.
6.1.2 Date and Time
Go to ConfigSystemDate and Time. Please refer to the following interface.
Select the time zone and DST as required.
Click the “Date and Time” tab to set the time mode.
14
6.1.3 Local Config
Go to ConfigSystemLocal Config to set up the storage path of captured pictures
and recorded videos on the local PC. There is also an option to enable or disable the
bitrate display in the recorded files.
If the camera support face detection, local face information storage can be set up here.
(Face detection function is only available for some specified versions).
6.1.4 Storage
This function is only available for the model with SD slot.
Go to ConfigSystemStorage to go to the interface as shown below.
15
SD Card Management
Click the “Format” button to format the SD card. All data will be cleared by clicking this
button.
Click the “Eject” button to stop writing data to SD card. Then the SD card can be ejected
safely.
Snapshot Quota: Set the capacity proportion of captured pictures on the SD card.
Video Quota: Set the capacity proportion of record files on the SD card.
Schedule Recording Settings
1. Go to ConfigSystemStorageRecord to go to the interface as shown below.
2. Set record stream, pre-record time, cycle writing.
Pre Record Time: Set the time to record before the actual recording begins.
3. Set schedule recording. Check “Enable Schedule Record” and set the schedule.
16
Weekly schedule
Set the alarm time from Monday to Sunday for a single week. Each day is divided in
one hour increments. Green means scheduled. Blank means unscheduled. Note that
if a specific time period is not scheduled for motion, the camera will not generate a
motion alarm even if motion is enabled.
“Add”: Add the schedule for a special day. Drag the mouse to set the time on the
timeline.
“Erase”: Delete the schedule. Drag the mouse to erase the time on the timeline.
Manual Input: Click it for a specific day to enter specific start and end times. This
adds more granularities (minutes).
Day schedule
Set the alarm time for alarm a special day, such as a holiday.
Note: Holiday schedule takes priority over weekly schedule.
Snapshot Settings
Go to ConfigSystemStorageSnapshot to go to the interface as shown below.
Set the format, resolution and quality of the image saved on the SD card and the
snapshot interval and quantity and the timing snapshot here.
Snapshot Quantity: The number you set here is the maximum quantity of snapshots.
The actual quantity of snapshots may be less than this number. Supposing the
occurrence time of an alarm event is less than the time of capturing pictures, the actual
quantity of snapshots is less than the set quantity of snapshots.
17
Timing Snapshot: Enable timing snapshot first and then set the snapshot interval and
schedule. The setup steps of schedule are the same as the schedule recording (See
Schedule Recording).
6.2 Image Configuration
Image Configuration includes Display, Video/Audio, OSD, Video Mask and ROI Config.
6.2.1 Display Configuration
Go to ImageDisplay interface as shown below. The image’s brightness, contrast,
hue and saturation and so on for common, day and night mode can be set up
separately. The image effect can be quickly seen by switching the configuration file.
Brightness: Set the brightness level of the camera’s image.
Contrast: Set the color difference between the brightest and darkest parts.
Hue: Set the total color degree of the image.
Saturation: Set the degree of color purity. The purer the color, the brighter the image
is.
Sharpness: Set the resolution level of the image plane and the sharpness level of the
image edge.
Noise Reduction: Decrease the noise and make the image more thorough. Increasing
the value will make the noise reduction effect better but it will reduce the image
18
resolution.
Defog: Activating this function and setting an appropriate value as needed in foggy,
dusty, smoggy or rainy environment to get clear images.
Backlight Compensation (BLC):
Off: disables the backlight compensation function. It is the default mode.
HWDR
WDR can adjust the camera provide a better image when there are both very bright
and very dark areas simultaneously in the field of the view by lowering the brightness
of the bright area and increasing the brightness of the dark area. High, middle and low
can be selected.
Recording will be stopped for a few seconds while the mode is changing from non-
WDR to WDR mode.
HLC: lowers the brightness of the entire image by suppressing the brightness of
the image’s bright area and reducing the size of the halo area.
BLC: If enabled, the auto exposure will activate according to the scene so that the
object of the image in the darkest area will be seen clearly.
HFR: If this function is enabled, the system will restart and then the maximum value of
the frame rate of the main stream can be set to 60 fps. (This function is not available
for motorized zoom cameras).
Anti-flicker:
Off: disables the anti-flicker function. This is used mostly in outdoor installations.
50Hz: reduces flicker in 50Hz lighting conditions.
60Hz: reduces flicker in 60Hz lighting conditions.
White Balance: Adjust the color temperature according to the environment
automatically.
Frequency: 50Hz and 60Hz can be optional.
Day/night Mode: Please choose the mode as needed.
Sensitivity: High, middle and low can be selected for switching back and forth from day
to night modes.
Infrared Mode: Choose “ON”, “OFF” and “Auto” (This function is not available for the
cameras without infrared lights).
Exposure Mode: Choose “Auto” or “Manual”. If manual is chosen, the digital shutter
speed can be adjusted.
Corridor Pattern: Corridor viewing modes can be used for situations such as long
hallways. 0, 90, 180 and 270 are available. The default value is 0. The video resolution
should be 1080P or below if this function is used.
Image Mirror: Turn the current video image horizontally.
Image Flip: Turn the current video image vertically.
Schedule Settings of Image Parameters:
Click the “Schedule” tab as shown below.
19
Set full time schedule for common, day, night mode and specified time schedule for
day and night. Choose “Schedule” in the drop-down box of schedule as shown below.
Drag ” icons to set the time of day and night. Blue means day time and blank means
night time. If the current mode of camera parameters is set to schedule, the image
configuration mode will automatically switch between day and night according to the
schedule.
6.2.2 Video / Audio Configuration
Go to ImageVideo / Audio interface as shown below. In this interface, set the
resolution, frame rate, bitrate type, video quality and so on subject to the actual network
condition.
Click the “Audio” tab to go to the interface as shown below.
Three video streams can be adjustable.
Resolution: The size of image.
20
  • Page 1 1
  • Page 2 2
  • Page 3 3
  • Page 4 4
  • Page 5 5
  • Page 6 6
  • Page 7 7
  • Page 8 8
  • Page 9 9
  • Page 10 10
  • Page 11 11
  • Page 12 12
  • Page 13 13
  • Page 14 14
  • Page 15 15
  • Page 16 16
  • Page 17 17
  • Page 18 18
  • Page 19 19
  • Page 20 20
  • Page 21 21
  • Page 22 22
  • Page 23 23
  • Page 24 24
  • Page 25 25
  • Page 26 26
  • Page 27 27
  • Page 28 28
  • Page 29 29
  • Page 30 30
  • Page 31 31
  • Page 32 32
  • Page 33 33
  • Page 34 34
  • Page 35 35
  • Page 36 36
  • Page 37 37
  • Page 38 38
  • Page 39 39
  • Page 40 40
  • Page 41 41
  • Page 42 42
  • Page 43 43
  • Page 44 44
  • Page 45 45
  • Page 46 46
  • Page 47 47
  • Page 48 48
  • Page 49 49
  • Page 50 50
  • Page 51 51
  • Page 52 52
  • Page 53 53
  • Page 54 54
  • Page 55 55
  • Page 56 56
  • Page 57 57
  • Page 58 58
  • Page 59 59
  • Page 60 60
  • Page 61 61
  • Page 62 62
  • Page 63 63
  • Page 64 64
  • Page 65 65
  • Page 66 66
  • Page 67 67
  • Page 68 68
  • Page 69 69
  • Page 70 70
  • Page 71 71
  • Page 72 72

Digital Watchdog DWC-MVT4WiA User manual

Category
Security cameras
Type
User manual
This manual is also suitable for

Ask a question and I''ll find the answer in the document

Finding information in a document is now easier with AI