Acoustic Energy AEGO3 Owner's manual
- Category
- Musical Equipment
- Type
- Owner's manual
This manual is also suitable for

Owners Manual
WARNING
WARRANTY
To reduce the chance of electric shock, do not expose this system to rain or moisture
To reduce the risk of shock, do not remove the rear panel of this system - there are no
user-serviceable parts inside. Refer servicing to qualied service personnel.
The lightning ash with arrowhead symbol in an equilateral triangle is intended
to alert the user to the presence of uninsulated “dangerous voltage” within the
system enclosure that may be of sucient magnitude to constitute a risk of
electrical shock.
The exclamation point within an equilateral triangle as marked on the system is
intended to alert the user to the presence of important operating and
maintenance instructions in this owners guide.
Your Acoustic Energy Aego³ system is guaranteed against defects in materials, manufacture
and workmanship for two years from the date of purchase. Please retain all original
packaging materials for possible future use.
Under this warranty Acoustic Energy agrees to repair any defect or, at the company’s
discretion, replace the faulty component(s) without charge for parts and labour. This
warranty does not imply any acceptance by Acoustic Energy or its agents for consequential
loss or damage and specically excludes fair wear and tear, accident, misuse or
unauthorised modication.
This warranty is applicable in the United Kingdom only and does not in any way limit the
customer’s legal rights. Claims and enquiries under the warranty for AE products
purchased outside the UK should be addressed to the local importers or distributors.
If you have any reason to claim under the warranty please contact your dealer or
point of purchase in the rst instance.
Acoustic Energy Ltd.
16 Bridge Road, Cirencester,
Gloucestershire, GL7 1NJ
England.
Tel: +44 (0) 1285 654432
Fax: +44 (0) 1285 654430
Support: +44 (0) 1285 656890
E-mail: info@acoustic-energy.co.uk
Designed by Acoustic Energy Ltd (UK), manufactured in Malaysia.
Controls: Full remote control operation
Power Ratings: 110-240V @ 50/60Hz; 65VA
Dimensions (HWD): Subwoofer - 350x195x307mm
Satellites - 105x75x85mm
Soundbar - 70x500x70mm
Weight: 9kg
Finish: Black textured subwoofer
Aluminium, black rubber and
black grille Satellites or Soundbar.
Specication
Inputs: 1 x Stereo Mini-jack
1 x Optical (digital)
1 x Bluetooth (wireless)
Outputs: 2 x RCA Phono (speaker level)
Accessories: 2 x 3m Speaker cables (RCA)
1 x 2m Stereo Mini-jack to
Mini-jack (3.5mm) lead
1 x 2m Optical digital lead
1 x Remote Control
1 x 1.8m Two-pin power cord
with regional mains plug.
C
M
Y
CM
MY
CY
CMY
K
Aego³ Owners Manual - Front Side.pdf 1 29/01/2016 13:58:28

SET-UP GUIDE OPERATION
CONNECTION
Bluetooth®
Thank you for choosing the Acoustic Energy Aego³ music system, please take a moment to
read through this quick set-up guide to ensure correct operation and to get the best
performance from your system.
Whether you’ve chosen the Sub/Sat or Sub/Soundbar variation of the system, the basic
operation remains the same and performance will be very similar between the two models.
When selecting the Bluetooth® “ ” input (indicated by a blue LED on the Subwoofer display panel) for
the rst time, the system will go into “pairing” mode and be visible to Bluetooth®-enabled devices for
connection as “AEGO3”. Once paired with the Aego³ the Bluetooth® source device will play audio
wirelessly through the system and operate overall volume level if the function is available.
Whenever the Bluetooth input is selected in future it will attempt to pair with previously connected
devices and become visible to new devices if no previous connections are available. Pairing mode can
also be manually selected by pressing the “Pair” button; when the system is in pairing mode the blue
LED on the Subwoofer display panel will ash, when connection is made the blue LED will remain lit
and an audible “beep” will be heard. The most recently connected device always takes preference
when attempting to play audio.*
*For instructions on source device’s Bluetooth® operation please refer to that device’s manual or manufacturer.
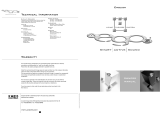
All operation of the Aego³ system is performed via the supplied remote control, there are
no physical controls on the system itself. A brief description of controls is outlined below.
All physical connections on the Aego³ system are made via the downward-ring panel at
the rear of the subwoofer. This placement ensures tidy cabling and allows for placement
close to walls if necessary.
Left and right speaker outputs:
for connection to individual RCA terminals on
Aego Satellite speakers or L/R inputs on
Soundbar via supplied RCA -> RCA cable.
Optical digital input: for connection to a digital source;
ie - TV, Blu-ray player, Satellite box etc.
TIP: If using multiple sources connected to a TV use the
TV Optical out direct into the Aego³ system rather than
individual connection between dierent sources and
the Aego³. Use PCM Audio output setting on source.
Stereo Mini-jack input: for use with supplied
3.5mm Mini-jack -> 3.5mm Mini-jack lead
when connecting to audio or headphone
output on sources such as PC, mobile phone,
portable music player, tablet etc.
Power input: for use with supplied power
cable plugged into mains AC outlet.
Power On/O: Once the Aego system
is correctly wired up as described in the
“CONNECTION” section use this button
to switch the system on or place in
“Standby” mode. When in “Standby”
mode a red LED will be lit on the
Subwoofer display panel.
For complete shut-down unplug the
system from the mains power supply.
Volume Up: use to increase volume, as
indicated by 1-4 white LED’s on Subwoofer
display panel, when maximum volume is
reached the system will produce an
audible “beep”.*
Volume Down: use to decrease volume, as
indicated by 1-4 white LED’s on Subwoofer
display panel.
Aux Input: use to select the Aux line-input
(Mini-jack) as sound source. This will be
indicated by an orange LED on the
Subwoofer display panel.
Dig Input: use to select the Digital input
(Optical) as sound source. This will be
indicated by a white LED on the
Subwoofer display panel.
Bass level -: use to decrease bass output
from subwoofer between levels 1-4 as
described above.
Bass level +: use to increase bass output
from subwoofer between levels 1-4, as
indicated by 1-4 white LED’s on Subwoofer
display panel. 1 being minimum and 4
maximum. For most normal use in mid-
sized rooms, levels 2-3 should provide
the best overall balance. Adjust for
personal preference.
Mute: use to mute system volume,
press again to return volume to last
selected level.
*Note: If audible distortion is heard
TURN VOLUME DOWN
If the Aego³ is overdriven for sustained
periods protection circuitry will put
the system into standby mode.
C
M
Y
CM
MY
CY
CMY
K
Aego³ Owners Manual - Back Side.pdf 1 29/01/2016 14:51:50
-
 1
1
-
 2
2
Acoustic Energy AEGO3 Owner's manual
- Category
- Musical Equipment
- Type
- Owner's manual
- This manual is also suitable for
Ask a question and I''ll find the answer in the document
Finding information in a document is now easier with AI
Related papers
-
 Acoustic Energy Aego Sound3ar User manual
-
 Acoustic Energy Aego P5MkII User manual
-
 Acoustic Energy Aego-T User manual
-
Acoustic Energy Aego-T User manual
-
 Acoustic Energy A Ego 5 User manual
-
 Acoustic Energy AEG05/P5 User manual
-
Acoustic Energy Aego M User manual
-
 Acoustic Energy Aego 140Ci User manual
-
 Acoustic Energy Aego BT2 User manual
-
Acoustic Energy Aelite Two Quick start guide
Other documents
-
Zvox Audio SB400 Setup & Operation
-
Hitachi HSB32B26 User manual
-
 Roth Audio BAR3 User manual
-
 MartinLogan Cadence User manual
-
 MartinLogan Cadence User manual
-
 Zvox Audio SB700 Setup & Operation
-
 Onn Soundbar User manual
-
Paradigm PW Soundbar Installation guide
-
Episode ES-SNDBR-2.1-BLK Owner's manual
-
Insignia NS-SBAR21F20 User manual


