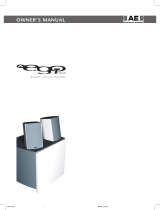
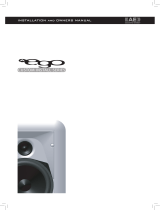
Acoustic Energy Aego-T User manual

Type
User manual

This manual is also suitable for

OWNERS MANUAL
Page Section
1 Introduction
2 Handling
1 3 Installation and Positioning
2 4 Wall Brackets
3 5 Connections and Amplifiers
4 6 Controls and System Setup
5 7 Specifications
5 8 Warranty
5 9 Contact Acoustic Energy
3. Installation and Positioning
Welcome to Aego-T. Perhaps more than any
other audio-visual product, speakers are sensitive
to installation so please take a little time to read
this manual and to follow, as far as practical,
the installation guidelines it contains. Careful
installation will help ensure that your Aego-T
system performs optimally. Should you have any
questions not covered here we are happy to try
and answer them either by telephone or email.
Contact information can be found in Section 11.
Following this introduction, the Manual is divided
into sections covering Handling, Installation
and Positioning, Wall Brackets, Connections
and Amplifiers, Controls and System Setup,
Specifications, Warranty and Contact Information.
We suggest that you read at least the first six
sections carefully before installing and using your
Aego-T system. We would also draw your attention
to the Important Safety Instructions on this page.
Finally, please enjoy your Aego-T system, but
remember it is capable of generating high volume
levels of low frequency sound, so please also be
considerate of your neighbours.
Aego-T comprises relatively delicate precision
engineered items that can be damaged by
inappropriate handling. They are also heavy and
in the case of the subwoofer large. Please take
great care therefore when unpacking, moving and
installing them. Please take care when unpacking
or moving the speakers not to touch any of the
drivers beneath the fabric grilles. Damage to a
driver will at best degrade performance and at
worst result in failure.
The enclosure surfaces should also be handled
sympathetically. Any cleaning should only require a
soft cloth, slightly dampened if necessary. Be wary
of using any polishes or solvent based cleaning
agents.
The packaging should be retained for future use if
possible or appropriately re-cycled.
Contents
1. Introduction
2. Handling
Important Safety Instructions
Ensure that your Aego-T Subwoofer is set to the appropriate mains input voltage before
it is connected to a mains socket. The warranty does not cover damage caused by
incorrect mains voltage. The grilles are designed to protect the drive units from damage
and should not be removed.
1. Read these instructions.
2. Keep these instructions.
3. Heed all warnings.
4. Follow all instructions.
5. Do not use this apparatus near water.
6. Clean only with dry cloth.
7. Do not block any ventilation openings. Install in accordance with the manufacturer’s
instructions.
8. Do not install near any heat sources such as radiators, heat registers, stoves, or other
apparatus (including amplifiers) that produce heat.
9. Do not defeat the safety purpose of the grounding-type plug. A grounding type plug
has two blades and a third grounding prong. The third prong is provided for your safety.
If the provided plug does not fit into your outlet, consult an electrician for replacement
of the obsolete outlet.
10. Protect the power cord from being walked on or pinched particularly at plugs,
convenience receptacles, and the point where they exit from the apparatus.
11. Only use attachments/accessories specified by the manufacturer.
12. Use only with the cart, stand, tripod, bracket, or table specified by the
manufacturer, or sold with the apparatus. When a cart is used, use caution
when moving the cart/apparatus combination to avoid injury from tip-over.
13. Unplug this apparatus during lightning storms or when unused for long
periods of time.
14. Refer all servicing to qualified service personnel. Servicing is required when the
apparatus has been damaged in any way, such as power-supply cord or plug is
damaged, liquid has been spilled or objects have fallen into the apparatus, the apparatus
has been exposed to rain or moisture, does not operate normally, or has been dropped.
15. The apparatus shall not be exposed to dripping or splashing and that no objects
filled with liquids, such as vases, shall be placed on the apparatus.
16. The MAINS plug is used as the disconnect device, the disconnect device shall remain
readily operable.
17. To reduce the risk of fire or electric shock, do not expose this apparatus to rain or
moisture.
Page 1
3. Installation and Positioning
Contents
1. Introduction
2. Handling
Aego-T is a satellite and subwoofer loudspeaker
system designed to be used in domestic audio and
audio-visual (home theatre) systems. It comprises
a compact passive satellite speaker and an active
(powered) subwoofer. The satellite speakers may
be used either placed on furniture or wall-mounted
using the included brackets. The subwoofer should
be used placed on the floor. Use of the satellite
wall-brackets is described in Section 4.
Aego-T satellites need to be connected to an
external power amplifier - this might be a
conventional hi-fi stereo amplifier or a multi-
channel home theatre amplifier/processor. In
either case it should have the facility to provide an
appropriate line-level subwoofer output signal.
Aego-T systems comprising between two and
seven satellites speakers may be installed with
one subwoofer. Systems including more than
seven satellite speakers should include multiple
subwoofers.
To ensure that programme material is heard as
intended it is important that each Aego-T element
is located appropriately. For Aego-T systems
comprising from two to seven satellites locate the
speakers as described in the following paragraphs
and refer to Diagram One over the page. Don’t
worry if it is not practical to follow the diagram
exactly but experiment with the options that
are practical in order to find the one that works
best. Once your Aego-T system is connected
and working (see Section 6), and you begin to
become familiar with its performance, it is likely to
be worthwhile experimenting a little further with
positioning.
Two satellites only (Stereo System)
A stereo system is most likely to be used for
conventional stereo audio only rather than audio-
visual programme. In this case the satellites should
be located near or on the wall facing the listening
position and;
Between 0.05 and 0.5 metres from the rear
wall.
1.0 metres from side walls and clear of corners.
Between 2.0 and 3.5 metres apart.
Equidistant from and angled towards the
listening position.
The location of the subwoofer is less critical but it should be placed a similar
distance away from the listening position as the satellites. Try to avoid a
location for the subwoofer exactly halfway along the length or width of the
room.
Three satellites, one subwoofer (3.1 System)
A 3.1 system is most likely to be used for audio-visual (home theatre)
programme. In this case the satellites should be located one either side of the
screen, and one centrally either directly above or below the screen. The basic
positioning guidelines for the left and right satellites are the same as for the
2.1 system described above. The central satellite may be positioned either on
the wall, on a furniture unit or a screen stand.
The location of the subwoofer is less critical but it should be placed a similar
distance away from the listening position as the satellites. Try to avoid a
location for the subwoofer exactly halfway along the length or width of the
room.
Five satellites, one subwoofer (5.1 System)
A 5.1 system is most likely to be used for audio-visual (home theatre)
programme. In this case, three satellites should be located in front of listening
position, one either side of the screen and one centrally, and two “surround”
satellites located just behind the listening position one either side of the room.
The front central satellite should be located either directly above or below the
screen. The surround satellites may be located well above head height. The
basic positioning guidelines for the left and right satellites are the same as for
the 2.1 system described earlier. The central satellite may be positioned either
on the wall, on a furniture unit or a screen stand.
The location of the subwoofer is less critical but it should be placed a similar
distance away from the listening position as the satellites. Try to avoid a
location for the subwoofer exactly halfway along the length or width of the
room.
Seven satellites, one subwoofer (7.1 System)
A 7.1 system is most likely to be used for audio-visual (home theatre)
programme. In this case, three satellites should be located in front of listening
position, one either side of the screen and one centrally, two “surround”
satellites just behind the listening position one either side of the room, and a
two further surround satellites directly behind the listening position. The front
central satellite should be located either directly above or below the screen.
The surround satellites may be located well above head height. The basic
positioning guidelines for the left and right satellites are the same as for the
2.1 system described earlier. The central satellite may be positioned either on
the wall, on a furniture unit or a screen stand.
The location of the subwoofer is less critical but it should be placed a similar
distance away from the listening position as the satellites. Try to avoid a
location for the subwoofer exactly halfway along the length or width of the
room.
Page 2
3. Installation and Positioning 5. Connections and Amplifiers
Diagram Two
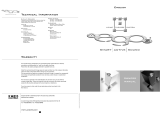
An adjustable wall bracket is supplied with each Aego-T satellite. To install the
wall brackets proceed as described below and illustrated in Diagram Two.
Note: It is very important that wall brackets are fitted securely. If you
are in any doubt about your ability to achieve a secure installation you
should seek professional advice and assistance.
The wall bracket is held to the wall via two screws inserted through elongated
holes in the bracket’s wall plate. No.8 (4.5mm) round-head, rather than
countersunk-head, screws should be used. The length of screw necessary and
type of wall fitting required will depend on the construction and condition
of the wall. If in any doubt seek professional advice.
Once the wall mounting locations for Aego-T satellites have been chosen use
the wall brackets themselves as templates to mark the screw positions. Loosen
the bracket adjustment screw using the allen key supplied and angle the
mounting post away from the wall plate to gain easier access to the holes.
With the screw holes drilled and appropriate wall fittings inserted, securely
screw the brackets to the wall and return the mounting post to the vertical.
Left
Front
Viewing/listening position
Right
Front
Centre
Left
Surround
Right
Surround
Alternative
or Extra Left
Surround
Alternative or
Extra Right
Surround
Subwoofer
Wall Plate
Mounting Post
Bracket Adjustment
Screw
Aego-T Wall Bracket
Aego-T Satellite and Wall
Bracket
Diagram One
4. Wall Brackets
Note: The elongated bracket holes enable some
adjustment for vertical alignment.
To attach an Aego-T satellite to a wall bracket
simply place the satellite above the bracket and
slide it onto the mounting post.
Note: Connecting cables to Aego-T satellites is best
done before they are mounted on wall brackets. See
Section 5.
Loosen the bracket adjustment screw to adjust the
satellites vertical angle. Turn the satellite on the
mounting post to adjust its lateral orientation.
Page 3
3. Installation and Positioning 5. Connections and Amplifiers
Satellite Connection
Connecting Aego-T satellites to an audio amplifier
or audio-visual processor is fundamentally a simple
process. If only two satellites are to be connected,
identify the left and right speaker output terminals
on the amplifier connection panel and connect one
satellite to each. If three or more Aego-T satellites
are to be used in a multi-channel home-theatre
system with an audio-visual processor/amplifier,
identify the appropriate output terminal for each
channel (front left, centre, front right, etc) and
connect a satellite to each.
Aego-T satellites are fitted with a pair of binding-
post terminals intended to be used with stripped
wires. Insert a stripped wire end through the cross-
hole of each terminal and tighten the terminal
sleeve. Take care when connecting cables not to
touch the negative and positive terminals together.
Make connections with all system electronics
switched off.
It is important when connecting Aego-T satellites
to ensure that each is connected with the same
polarity. Positive speaker terminals should always
be connected back to amplifier positive terminals,
and negative speaker terminals connected back to
amplifier negative terminals. Performance will be
seriously degraded if connections are made with
incorrect polarity.
Choice of cable type to connect Aego-T satellites
will be influenced by the characteristics of other
components in your hi-fi system and your dealer or
distributor will be able to advise. Even so, there are
some simple guidelines to consider:
Cable runs to each speaker should be kept as
short as possible consistent with each being
of equal length.
Short cable runs are especially important if
the cable is of relatively small cross-sectional-
area.
If the cable is advertised as “directional” care
should be taken to ensure that its orientation
is as recommended.
Aego-T Satellite Amplifiers
The Aego-T satellite is a relatively high sensitivity speaker that does not
require a generously rated power amplifier for adequate volume levels to be
achieved in an average listening room. A minimum of 25 and maximum of
100 Watts into 8 Ohms per channel is recommended. Aego-T satellites also
offer a relatively easy load to the amplifier and do not make unusually heavy
demands on its power delivery.
No overload protection systems are fitted to Aego-T satellites so it is possible
to cause damage through over-driving. Such damage can occur whatever the
power rating of the amplifier and is not covered by any warranty. If ever the
sound at high volumes becomes distorted your speakers are at risk of damage.
In such circumstances the volume must be reduced.
Subwoofer Connection
The Aego-T subwoofer requires connection both to mains power and an
appropriate subwoofer line-level output signal. The connection sockets are
located on the back of the subwoofer. Leave the subwoofer switched-off at
the mains until all connections are made and ensure that the subwoofer level
control, also located on the connection panel is turned fully anti-clockwise.
Connect the subwoofer to the audio-visual processor subwoofer output using
an appropriate RCA Phono connection cable. Ensure that the cable is of good
quality.
After checking that the mains voltage selector on the subwoofer connection
panel is set correctly, connect the subwoofer via its IEC mains input to a mains
wall socket. Use only the mains cable supplied with the subwoofer.
Page 4Page 4
6. Controls and System Setup 7. Specifications
Subwoofer Controls
Accompanying the mains and signal input sockets on the subwoofer
connection panel are a level control, an auto power switch and a phase
reversal switch. Their function and use is described in the following
paragraphs.
Subwoofer Level
The level control adjusts the volume of the subwoofer relative to the satellites.
Begin with the level control set to around 50%. Detailed subwoofer level
adjustment guidelines can be found below.
Subwoofer Phase
The phase switch reverses the subwoofer acoustic polarity. With the switch
set to the subwoofer output is in phase with the satellites. With the switch
set to 180° the subwoofer output is out of phase with the satellites. Reversing
the subwoofer phase can help optimise the sound of Aego-T satellite and
subwoofer systems. Further subwoofer phase advice can be found below.
Subwoofer Auto Power
The subwoofer mains power switch incorporates an automatic switch-on/
off function. With the switch set to “Auto” the subwoofer will switch on
automatically when an audio signal is present. It will switch off again when
no signal has been present for around 10 minutes. With “on” selected the
subwoofer remains switched-on permanently.
System Setup
Before listening to your Aego-T system make one final check of the cables and
connections. If all appears well begin listening at a relatively low volume to
confirm that the system is operating as expected. Only increase the volume
if you are happy that the sound at low volume is fundamentally as expected.
If you are unhappy, turn the system off and re-check all the cables and
connections.
Aego-T systems may take a little time to reach normal operating temperatures
and to “run-in”. Your ears too will take some time to adjust to the new sound,
so it is unwise therefore to make rapid judgements about the performance of
the system.
The most important aspect of Aego-T system setup is the integration of the
satellites and subwoofer. Assuming the locations chosen for the satellites are
satisfactory, adjusting the subwoofer’s location in the room, its volume level
and phase, and the subwoofer filter frequency selected on the audio-visual
processor should enable a good end result to be achieved.
Select a few short examples of familiar programme material - both movie and
music - to use while adjusting the setup. Listen also from a variety of different
positions in the room. Check for balance and consistency of sound - neither
too much nor too little bass across the range of programme material and
listening positions. Experimentation and careful listening is the key to finding
a good subwoofer setup.
Subwoofer Filter Frequency
The Aego-T satellite and subwoofer are designed to
work together with a crossover frequency of 80Hz
so the first setup parameter to adjust is to set the
audio-visual processor’s subwoofer filter frequency
to this value. As you adjust other parameters you
may find that moving the filter frequency a little,
say 10Hz either way, is beneficial. Adjust other
aspects of the setup, particularly subwoofer phase,
before selecting a filter frequency higher than 90Hz
or lower than 70Hz.
Note: Despite their small size, Aego-T satellites
can handle and reproduce full range audio, so the
audio-visual processor should be set to treat them
as “large” speakers.
Sub-woofer Volume
Setting the subwoofer volume is important in terms
of both overall system balance and the demands
of different types of programme material. You
may find that material with an emphasis on music
works better with a lower subwoofer volume than
movie material with an emphasis on “effects”.
Finding a compromise between the two is a matter
of subwoofer volume adjustment in parallel with
adjusting its position in the room.
Sub-woofer Location
Broadly speaking, the closer a subwoofer is to the
walls of the room (assuming they are solid brick
walls) the more bass it will generate in the room
(and the lower its volume need be set). Moving
the subwoofer closer to the walls however will also
tend to reduce the consistency subwoofer volume
over the listening room (a corner location being
the worst in this respect). Positions closer to the
wall with also tend to change the character of the
bass produced by the subwoofer - it will emphasise
the very lowest signals more. This change in bass
character with location is the variable that enables
a good compromise position for the subwoofer to
be found.
Sub-woofer Phase
Switching the subwoofer phase should be left to
last. If a good subwoofer position is proving difficult
to find, try again with the phase reversed.
Page 5
6. Controls and System Setup 7. Specifications
8. Warranty
9. Contact Acoustic Energy
Your Acoustic Energy speakers are guaranteed against original defects in
materials, manufacture and workmanship for one year from the date of
purchase.
Under this warranty Acoustic Energy agrees to repair any defect or, at the
company’s discretion, replace the faulty component(s) without charge for
parts or labour. This warranty does not imply any acceptance by Acoustic
Energy or its agents for consequential loss or damage and specifically
excludes fair wear and tear, accident, misuse or unauthorised modification.
This warranty is applicable in the United Kingdom only and does not in any
way limit the customer’s legal rights. Claims and enquiries under the warranty
for Acoustic Energy products purchased outside the UK should be addressed
to the local importers or distributors. If you have reason to claim under the
warranty please contact your dealer in the first instance.
Please retain all original packaging materials for possible future use. We
suggest that you complete details of purchase now and keep this information
in a safe place for future reference.
Name:
Address:
Dealer:
Purchase Date:
Serial Numbers:
Acoustic Energy Limited
16 Bridge Road
Cirencester
Gloucestershire GL7 1NJ
UK
Tel: +44 (0)1285 654432 (Sales)
+44 (0)1285 656890 (Technical)
Fax: +44 (0)1285 654430
Web: www.acoustic-energy.co.uk
Aego-T Satellite
Type: Two-way, closed box compact speaker.
Mid/Bass Driver: 100mm damped fibre cone with
25mm thermally bonded voice coil. Shielded high-
power long-throw magnet system.
HF Driver: 25mm Pre-coated textile dome with
ferro-fluid cooled neodymium magnet system and
rear heat sink.
Filter Network: 2nd and 3rd order at 3.5kHz.
Cabinet: Injection moulded and die-cast
aluminium hybrid.
Frequency Response: 100Hz to 20kHz ±3dB
Frequency Range: 75Hz to 30kHz @ -6dB
Power Handling: 100W peak programme
Amplifier Compatibility: 25 - 100 Watts into 8
Ohms
Nominal Impedance: 8 Ohms
Sensitivity: 86.0dB for 1 Watt at 1 metre
Dimensions (H x W x D): 202 x 124 x 146mm
Weight: 2.5kg (single, unpacked)
Aego-T Subwoofer
Type: Closed box, opposed driver active
subwoofer.
Drivers: 2 x 200mm fibre cone with 48mm
thermally bonded voice coil. Shielded high-power
long-throw magnet system.
Low Frequency Cut-off: - 6dB @ 30Hz
Amplifier: 200 Watts into 4 Ohms
Low Pass Filter: 2nd Order at 250Hz
Input Sensitivity: 300mv for rated output
Dimensions (H x W x D): 390 x 360 x 360mm
Weight: 18.5kg (single, unpacked)
Acoustic Energy reserves the right to modify
product specifications.
Acoustic Energy Limited, 16 Bridge Road, Cirencester, Gloucestershire GL7 1NJ.
Tel: +44 (0)1285 654432 (Sales), +44 (0)1285 656890 (Technical). Fax: +44 (0)1285 654430
Email: info@acoustic-energy.co.uk
Web: www.acoustic-energy.co.uk
Manual Part No. MA1201
  • Page 1 1
  • Page 2 2
  • Page 3 3
  • Page 4 4
  • Page 5 5
  • Page 6 6
  • Page 7 7
  • Page 8 8

Acoustic Energy Aego-T User manual

Type
User manual
This manual is also suitable for

Ask a question and I''ll find the answer in the document

Finding information in a document is now easier with AI