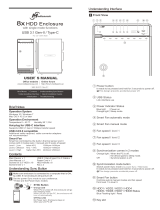
Page is loading ...

Model: QB-35US3R+AES
4-BAY RAID ENCLOSURE
English

CONTENT
Self- Assembly
4-5
Important safety Instructions
6
Windows 2000 / Windows XP / Windows Vista / Windows 7 / Macintosh O.S. 10.X
Backup AES Key to encrypted file
6 - 14
Overview
1-3
Setup
15-24
RAID Modus Einstellungen / LED Anzeigen
Initialization
25-34
Windows Vista / Windows 7 / Macintosh O.S. 10.X
References
35-38
http://www.fantec.de
If you have questions or need help with this device,
please visit our Fantec Support Forum:
http://www.fantec-forum.de/
Please visit our website for more information:

DE - 01/38
DIAGRAM of FANTEC QB-35US3R + AES
FRONT PANEL
OVERVIEW
EN - 01/38

DE - 02/38
DESCRIPTION
LED INDICATION
1. Blue Power on
Orange Sleep mode
2. Rebuild
3. HDD error When any of HDD1~HDD4 has error, HDD error is on.
4. RAID 0 Spanning Mode / BIG
5. RAID 0 Striping Mode
6. RAID 1
7. RAID 3
8. RAID 5
9. RAID 10
10. Power button It needs to be pressed for 3 seconds to power off.
This design prevents accidental power off.
11. eSATA in use / access
12. USB in use / access
13.-16. HDD1 / HDD2 / HDD3 / HDD4
Blue active
Purple access
Red rebuild
17. Smart Fan automatic mode
18. Smart Fan manual mode
19. Fan speed level 1
20. Fan speed level 2
21. Fan speed level 3
22. AES
Blue Decoded
Red Encoded
23. Mode RAID mode button needs to be pressed for 3 seconds to
switch the device's mode. This design will prevent
accidental execution of this function.
24. Fan button Controls auto & manual modes and fan speed from
level 1 to level 3.
25. HDD1 error
26. HDD2 error
27. HDD3 error
28. HDD4 error
EN - 02/38

DESCRIPTION
1. Fan
2. RAID CONFIRMATION button
3. eSATA port
4. USB 3.0 / 2.0 port
DESCRIPTION
1. AES Key port
2. DC Jack
3. DC Power
HDD HANDLE FRONT COVER METAL FRAME
REAR PANEL
SIDE PANEL right
1
3
4
2
EN - 03/38

Quick installation guide
SELF-ASSEMBLY
C. Press down the rib to detach the metal
frame and remove it.
A. Please use the provided handles to
secure the 4 HDDs with screws.
B. Press the circular deepening to open
the cover.
EN - 04/38

EN - 05/38
I. Stellen Sie den gewünschten Raid Modus ein.
D. Take the transport paper
board out of the device.
E. Slide 4 HDDs into the chassis and
make sure they are securely
installed in order from up
to down.
F. Adjust the metal frame that was removed
in Step C. Please make sure the
bottom of the frame stays
inside the track before
closing the cover.
G. Connect the power supply to the device, plug in either USB or eSATA
cable in the rear panel and power on the device.
H. Plug in the AES Key Token
I. Set up RAID Mode.

EN - 06/38
J. Install the AES Key Token backup software.
K. Duplicate the AES Key Token data as a backup for safekeeping.
(please refer to the user manual, page 7-14)
Important safety instructions
1. Keep the AES Key token away from water and heat, and do not disassemble
it. If the key is defective or lost, please contact the local distributor immediately.
2. Access: Plug in the AES Key Token, use the USB or eSATA cable to connect the device
to the PC. When the AES LED turns blue, the device is ready.
3. Lock: Unplug the AES Key Token. When the AES LED turns red, the PC will recognize
the unit as an um-formatted device and it's not possible to access the data.
4. Store the AES Key management software and the backup file in a safe place.
It will be needed to restore a new AES Key Token.
5. Do not change the RAID mode during operation, otherwise the all the data will be lost.
Please save your data before changing the RAID mode.
6. Do not use a defective AES Key Token. The AES functions may be locked down.

EN - 07/38
Back up encrypted file with AES Key Token
Windows XP(32/64 bit) / Windows Vista(32/64 bit) / Windows 7(32/64 bit)
1. Insert the CD ROM and follow the instructions to start installing “AES Key Manager”.
3. Note: Both AES Token have the same AES code, but to go for sure, please backup both
AES Token and store the files on a safe place or burn them on CD/DVD.
2. When the installation is completed, plug in AES Key Token, use the USB or eSATA cable to connect
the device and PC, power on the device, click on Backup Key „Backup AES Key to Encrypted File“,
Apply, and save it in the designated path.
1. Click ”OK”.
Backup AES Key to encrypted file

EN - 08/38
2. Choose a designated path and click “Save”.
3. Click ”OK”.
Note: AES Key Message if the key not plugged in

EN - 09/38
Duplicate to another key
2. Click ”OK”.
1. With a new USB Key Token, users can use Backup Key to get the previous AES code back.
Note: AES Key Message if the key not plugged in

EN - 10/38
3. Restore the file storage path and click “Open”.
4. Click ”OK”.
5.
Generate AES key successfully. Please shutdown the system and then restart it with AES key to take effect.

EN - 11/38
Macintosh 10.5 or later
Back up encrypted file with AES Key Token
1. Insert the CD ROM and follow the instructions to start installing “RAID Manager”.
3. When the first AES Key Token backup is completed, plug it out and plug in the second key, click on
Generate Key > Duplicated Encrypted File to AES Key > Apply, and follow the instructions. And
remember to keep 2 keys with you at all times.
2. When the installment is completed, plug in AES Key Token, use the USB or eSATA cable to connect
the device and PC, power on the device, click on Backup Key “Backup AES Key to Encrypted File”,
Apply, and save it in the designated path.
1. Click ”OK”.
Backup AES Key to encrypted file

EN - 12/38
3. Click ”OK”.
2. Choose a designated path and click “Save”.
Note: AES Key Message if the key not plugged in

EN - 13/38
1. With a new USB Token Key, users can use Backup Key to get the previous AES code back.
Duplicate to another key
2. Restore the file storage path and click “Open”.

EN - 14/38
3. Click ”OK”.
4. File storage and path.
5.
Generate AES key successfully. Please shutdown the system and then restart it with AES key to take effect.
Note: AES Key Message if the key not plugged in

EN - 15/38
First install the HDD from up to down in the enclosure. Power on the device,
press RAID button for 3 seconds until LED flashes. Press it again, select the RAID mode
you want to use and press the Confirmation Button on the rear panel till the device shuts down.
Power the device on again and the RAID mode setup is completed.
SETUP
RAID mode setup
2xHDD
3xHDD
4xHDD
No. of HDDs
RAID MODE
RAID 0 (Spanning)
RAID 0 (Striping)
RAID 1 (Mirroring)
RAID 3
RAID 5
RAID 10
: Supported : N/A

EN - 16/38
RAID mode confirmation button

2TB
2TB
2TB
2TB
8TB
2TB
2TB
EMPTY
EMPTY
MIRRORING
2TB
8TB
2TB
2TB
2TB
2TB
EN - 17/38
Spanning
RAID O
RAID O
Striping
Mirroring
RAID 1
Spanning concatenates multiple hard drives as a single large volume; resulting in a seamless
expansion of virtual volumes beyond the physical limitations of separately connected
hard drives. Thze data are written frim HDD1 to HDD4.
Striping is a method of concatenating multiple hard drives into one logical storage unit.
It is the automated process of writing data across multiple drives simultaneously.
Striping is used to increase the performance of disk reads. The multiple hard drives will
write data in “column” effect. If one drive in a striped set fails, all of the data in the stripe
set is lost.
Mirroring is the automated process of writing data to multiple drives simultaneously.
Mirroring is used to provide redundancy. If one drive fails, the redundant drive(s) will
continue to store the data and provide access to it. The failed drive can then be
replaced and the drive set can be rebuild.

EMPTY
XOR PARITÄT
2TB
2TB
2TB
4TB
2TB
2TB
2TB
XOR PARITÄT
2TB
6TB
STRIPING
2TB
2TB
2TB
2TB
MIRRORING
4TB
MIRRORING
EN - 18/38
RAID 3
Striped set
with dedicated parity
RAID 5
Striped set
with distributed parity
RAID 10
Mirroring +
Striping
This mechanism provides an improved performance and fault tolerance similar to
RAID 5 but with a dedicated parity disk rather than rotated parity stripes.
The single parity disk is a bottle-neck for writing since every write requires updating the
parity data. One minor benefit is the dedicated parity disk allows the parity drive to
fail and operation will continue without parity or performance penalty.
Distributed parity requires all drives but one to be present to operate; drive failure
requires replacement, but the array is not destroyed by a single drive failure.
Upon drive failure, any subsequent reads can be calculated from the distributed parity
such that the drive failure is masked from the end user. The array will have data
loss in the event of a second drive failure and is vulnerable until the data that was
on the failed drive is rebuilt onto a replacement drive.
RAID 10 is mirrored(Raid 1) sets in a striped(Raid 0) set .
/