Page. 1
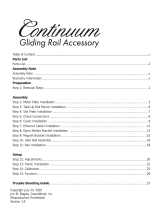
Table of Contents
Safety Instruction
.......................................................................................................................1
Parts List .....................................................................................................................................2
Hardware Box ..............................................................................................................................2
Step 1: Detachment of Rails ........................................................................................................3
Step 2: Table Structure Disassembly ..........................................................................................3
Step 3: Table Extension ...............................................................................................................4
Step 4: Track Extension ...............................................................................................................5
Step 5: Middle Leg Brace Attachment .........................................................................................6
Step 6: Wire Connection ..............................................................................................................7
Step 7: Rail Extensions ................................................................................................................7
Step 8: Track Adjustment ............................................................................................................8
Step 9: Attachment of Rails ........................................................................................................9
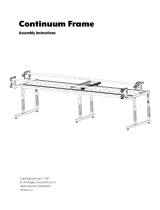
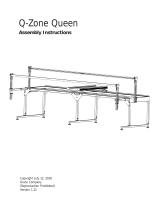
Assembly 2 ft Extension
Read all instructions before using.
When using this machine, basic safety precautions should always be taken, including the following:
DANGER - To reduce the risk of electric shock:
• A quilting machine should never be left unattended when plugged in. Always unplug the machine from the
electrical outlet immediately after using and before cleaning.
WARNING -
• Never operate this system if it has a damaged cord or plug, if it is not working properly, or if it has been
dropped or damaged. Return the system to the nearest authorized dealer for repair or adjustment.
• Keep ngers away from all moving parts.
• To disconnect, always turn the power button to the off position before unplugging any cables.
• Keep the machine and frame free from the accumulation of lint, dust, and loose cloth.
• Do not unplug by pulling on the cord. To unplug, grasp the plug, not the cord.
If you have any questions contact your authorized Baby Lock retailer.
Safety Instruction

Page. 2
Hardware Box
Middle Leg (1)
A100092
Middle Leg Brace (2)
04-10709
Track Coupler (2)
04-10443
M8 x 16mm
SBHCS (16)
03-10951
Ethernet Cable
Short (1)
02-10941
Parts List
M6 x 8mm Set
Screws (8)
03-10111
12 ft Plastic Track (4)
05-10356
Rail Coupler (4)
04-10457
Clamp Rail Coupler (2)
04-10714
Rail 2 ft (4)
04-10515
Idler Rail Clamp 2 ft (2)
04-10942
Fabri-Fast Tubing (4)
05-10517
2 ft Table Assembly (1)
A100109
(The following items are pre-in-
stalled in 2ft Table Assembly)
Rear Track 04-10956
Front Track 04-10957
M6 Connector Bolt 03-10953
M6 Plastic Washer 05-10949
Leveling Foot (2)
(Pre-installed on
Frame Ends and
Middle Leg)
03-10943

M10 x 125mm SBHCS
M10 Washer
Handwheel Assembly
Handwheel Coupler
M6 x 15mm SBHCS
Rail Clamp Lock Pin Assembly
Fig. 1-2
Fig. 1-1
Ethernet Cable Short
Middle Leg
Fig. 2-1
Fig. 2-2
M6 Connector Bolt
M6 Plastic Washer
Front Track Support
Back Track Support
Fig. 2-3
M8 x 16mm SBHCS
Right Table
Assembly End
Page. 3
12 ft Frame Assembly
Tools Required:
4mm Allen Wrench
6mm Allen Wrench
1-1: Remove the M10 x 125mm SBHCS from
the take up rail with a 6mm Allen Wrench to
remove the Handwheel Assembly from the rail
end. Uncouple the Take Up Rail Assembly from
the Rail Holder and remove from the frame.
(Fig. 1-1)
1-2: Detach the Rail Clamp Lock Pin Assembly
from the Idler Rail Clamp Locking Assembly by
removing the M6 x 15mm SBHCS with a 4mm
Allen Wrench. (Fig. 1-2)
1-3: After the rails have been removed from
the frame assembly set aside the sewing ma-
chine and carriage assembly.
Step 1: Detachment of Rails
Note: This instruction manual assumes that the 10 ft frame has been assembled from the Momentum Quilt
Frame Assembly Instructions. If not, apply step 3 onward to the Momentum Quilt Frame Assembly Instruc-
tions.
Tools Required:
4mm Allen Wrench
5mm Allen Wrench
Note: Using two people is recommended for
this step.
2-1: Disconnect the Ethernet Cable Short,
located between the Middle Leg . (Fig. 2-1)
2-2: Detach the Track Supports from the
Table Assembly by removing the M6 Connec-
tor Bolts with a 4mm Allen Wrench. (Fig. 2-2)
2-3: Remove M8 x 16mm SBHCS on the mid-
dle brackets and middle leg to the Right Table
Assembly End with a 5mm Allen Wrench. (Fig.
2-3)
Step 2: Table Structure Disassembly

Fig. 3-1
M8 Hex Nut
M8 Flat Washer
M8 x 55mm SBHCS
Right Table
Assembly End
M8 x 16mm SBHCS
Middle Leg
Fig. 3-2
Right Table
Assembly End
Left Table
Assembly
End
2 ft Table Assembly
M8 x 16mm SBHCS
Fig. 3-3
Page. 4
Step 3: Table Extension
Parts Needed:
1- 2 ft Table Assembly
4- M8 x 16mm SBHCS
1- Middle Leg
Parts from Table Structure Disassembly:
2- M8 x 16mm SBHCS
Note: Using two people is recommended for
this step.
Tools Required:
5mm Allen Wrench
Open wrench 17mm and 13mm
3-1: Adjust the Middle Leg to the same hole
position as the other leg assemblies. To adjust
the legs, remove the pre-installed M8 x 55mm
SBHCS, M8 Flat Washer, and M8 Nylock Nut
from the Middle Leg and reposition the leg to
match the other legs on the frame.
3-2: Align the Middle Leg to the Right Table
Assembly End and tighten with M8 x 16mm
SBHCS. (Fig. 3-2)
3-3: Align the 2 ft Table Assembly between
the left and right table assembly ends and
tighten with M8 x 16mm SBHCS. (Fig. 3-3)

Fig. 4-1
M6 Connector Bolt
M6 Plastic Washer
2 ft Back Track Support
2 ft Front Track Support
5 ft Back Track Support
M6 x 8mm Set Screw
Fig. 4-2
Track Coupler
5 ft Back Track Support
2 ft Back Track Support
Fig. 4-3
M6 x 8mm Set Screw
Fig. 4-4
Fig. 4-5
Rear Track Assembly Side
Plastic Track
Fig. 4-6
M6 Connector Bolt
M6 Plastic Washer
Page. 5
Step 4: Track Extension
Parts Needed:
8- M6 x 8mm Set Screws
2- Track Coupler
4- 12 ft Plastic track
Parts from Table Structure Disassembly:
1- 10 ft Back Track Support
1- 10 ft Front Track Support
16 Connector Bolts
16 M6 Plastic Washer
Tools Required:
3mm Allen Wrench
4mm Allen Wrench
4-1: Detach the 2 ft Track Supports from the
Table Assembly by removing the M6 Connector
Bolts with a 4mm Allen Wrench. (Fig. 4-1)
4-2: Take the 10 ft Back Track Support and loos-
en two M6 x 8mm Set Screw and separate the 10
ft track. (Fig. 4-2) Repeat this process with the 10
ft Front Track Support.
4-3: Insert the Track Coupler into the coupler-
free 5 ft Back Track Support end leaving approxi-
mately half of the coupler exposed. (Fig. 4-3)
Repeat this process with the coupler-free Front
Track Support. Insert and tighten M6 x 8mm Set
Screws into the Track Support end using a 3mm
Allen Wrench. (Fig. 4-4)
4-4: Slide a 2 ft Back Track Support end onto the coupled back track assembly end and tighten the M6 x
8mm Set Screws with a 3mm Allen Wrench to complete one 12 ft Track Support. (Fig. 4-4) Repeat this pro-
cess for the 12 ft Front Track Support.
4-5: Slide the 12 ft Plastic Track down the track groves of the Back Track Support Assembly. (Fig. 4-5)
4-6: Loosely tighten the 12 ft Front Track Assembly and securely tighten the 12 ft Rear Track Assembly onto
the Table Assembly with the Connector Bolts and M6 Plastic Washers. The Rear Track Assembly side should
be ush with the back edge of the table. (Fig. 4-6)
Note: The Front Track Assembly will be adjusted and tightened in Step 8.

Fig. 5-1
Fig. 5-2
Fig. 6-1
Ethernet Cable Short
Middle Leg
Page. 6
Step 5: Middle Leg Brace Attachment
Parts Needed:
12- M8 x 16mm SBHCS
2- Middle Leg Brace
Parts from Table Structure Disassembly:
12- M8 x 16mm SBHCS
2- Middle Leg Brace
Tools Required:
4mm Allen Wrench
5-1: Tighten the Middle Leg Braces to the
Table Assemblies and Middle Legs. The
Middle Leg Braces should lay ush with the
surface of the Table Assemblies and Middle
Leg. (Fig. 5-1 and Fig. 5-2)
Step 6: Wire Connection
Parts Needed:
1- Ethernet Cable Short
Parts from Table Structure Disassembly:
1- Ethernet Cable Short
6-1: Plug the two Ethernet Cable Short into the
Ethernet ports on the underside of the Table As-
semblies between the Middle Legs. (Fig. 6-1)

Fig. 7-1
3mm Allen Wrench
Rail Coupler
Rail Ratcheting EndRail Non-Ratcheting
End
Fig. 7-2
Fig. 7-3
Rail Coupler
Fig. 7-4
Rail 2 ft
10 ft Rail Assembly
10 ft Idler Rail Assembly
Fig. 7-5
Fig. 7-6
Idler Rail Coupler
Idler Rail Clamp
Locking Assembly
Idler Clamp Floating
Assembly
Fig. 7-7
Idler Rail Clamp
Locking Assembly
Idler Clamp Floating
Assembly
Hinges
Page. 7
Step 7: Rail Extensions
Parts Needed:
4- Rail 2ft
4- Rail Coupler
2- Idler Rail Clamp 2ft
2- Clamp Rail Coupler
Parts from Table Structure Disassembly:
4- 10 ft Rail Assembly
1- 10 ft Idler Rail Clamp Assembly
Tools Required:
3mm Allen Wrench
Note: Loosen M6 x 10mm Set Screws if the
Rail Couplers do not easily slide into the rail
ends. (Fig. 10-1)
7-1: Disassemble one end of the 10 ft Rail
Assembly by loosening two M6 x 10mm Set
Screws and sliding the 5 ft Rail Assembly
off the coupler. (Fig. 7-1 and Fig. 7-2) Re-
peat this step for the remaining three 10 ft
Rail Assemblies.
7-2: Insert a Rail Coupler on the free 5 ft rail end. (Fig. 7-3) Repeat this step for the remaining three 10 ft
Rail Assemblies.
7-3: Align and insert a Rail 2 ft on to the coupler ends of a Rail Non-Ratcheting End and Rail Ratcheting
End. (Fig. 7-4) Tighten the M6 x 10mm Set Screws on the 12 ft Rail Assembly. Repeat this step for the re-
maining three 12 ft Rail Assemblies. (Fig. 7-1)
7-4: Disassemble one end of the 10 ft Idler
Rail Assembly by loosening four M6 x 10mm
Set Screws and sliding the 5ft Idler Rail off
the coupler. (Fig. 7-1 and Fig. 7-5)
7-5: Insert the Idler Rail Couplers on the
free 5 ft idler rail end. (Fig. 7-6)
7-6: Align and insert a Idler Rail Clamp
2 ft on to the Idler Rail Coupler ends of a
Idler Rail Clamp Locking Assembly and Idler
Clamp Floating Assembly. (Fig. 7-7) Tigthen
the M6 x 10mm Set Screws on the 12 ft
Idler Rail Assembly. (Fig. 7-1) Align the
Clamp Rails so that the hinges are on the
same side.

M6 Connector Bolts
Front Track
Fig. 8-1
Sewing Machine
Carriage Assembly
Rear Track
M10 x 125mm SBHCS
M10 Washer
Handwheel Assembly
Handwheel Coupler
M6 x 15mm SBHCS
Rail Clamp Lock Pin Assembly
Fig. 9-1
Fig. 9-2
Page. 8
Step 8: Track Adjustment
Tools Required:
4mm Allen Wrench
8-1: Place and align the Bottom Car-
riage Assembly and sewing machine on
the track assemblies. The Front Track
Assembly should be loosely tightened
from a previous step. (Fig. 8-1)
8-2: The Rear Track Support should be
aligned ush with the Table Frame Side
from a previous step. If not, align and
tighten bolts. Do not over tighten bolts.
(Fig. 8-1)
Step 9: Attachment of Rails
Parts Needed:
4- 12 ft Rail Assembly
1- 12 ft Idler Rail Clamp Assembly
1- Handwheel Assembly
1- Handwheel Coupler
1- M10 x 125mm SBHCS
1- Rail Clamp Lock Pin Assembly
1- M6 x 15mm SBHCS
Tools Required:
4mm Allen Wrench
6mm Allen Wrench
9-1: Insert 12 ft Idler Rail Clamp Assembly and
12 ft Rail Assemblies through the throat of the
machine and place into their rail holders.
9-2: Align and attach the Rail Clamp Lock Pin As-
sembly from the Idler Rail Clamp Locking Assembly
by tightening the M6 x 15mm SBHCS with a 4mm
Allen Wrench. (Fig. 9-1)
Note: Use the same Rail Assembly for the take up
rail so the Handwheel Assembly can be installed.
8-3: Press down on the Bottom Carriage Assembly and move the carriage from left to right, tightening
the Front Track M6 Connector Bolts. Continue this step for the remainder of the Connector Bolts along the
frame. Do not over tighten bolts. (Fig. 8-1)
9-3: Insert Handwheel Coupler, Handwheel Assembly, M10 Washer, and M10 x 125mm SBHCS with a 6mm
Allen Wrench and tighten the end of the Rail Assembly. (Fig. 9-2)
Congratulations 2 ft frame extension is completed.
Copyright January 1, 2016
Jim M. Bagley, GraceWood, Inc
(Reproduction Prohibited)
Version 2.1
/