Page is loading ...

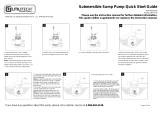
1. Slip the included stainless steel clamp over
the backup pump discharge. Press the backup
pump into the tee. Tighten the clamp. Thread
the check valve into the discharge of the
primary pump. Hand tighten.
3. Measure the connection from the tee to
discharge piping and cut 1-1/2-in Sched 40
PVC to this size. Install 1-1/2-in ex coupling
or union between pipe connected to the pump
and the discharge piping.
4. Install the dual oat assembly on the discharge
piping so the ‘on’ level of the lower oat is
above the ‘on’ position of the primary pump.
Attach the oat to the pipe with the bracket and
stainless steel clamp Be sure the oats are free
to move up and down without any interference.
6. Place the battery inside the battery box and
connect the leads from the controller to the
battery terminals. Connect positive (+) lead
to positive terminal on the battery and black
negative (-) lead to the negative battery
terminal.
Backup
Pump
Discharge tee
Clamp
O-Ring
Pump
Discharge
Measure
distance
1-1/2-in flex
coupling or
union
Clamp
Mounting
Bracket
AC
POWER
FLOAT
STATUS
BATTERY
DC
PUMP
SILENCE
TEST
24/7 BASEMENT
PROTECTION
USB
RESET FLOAT
DC
PUMP
FUSE
30 AMP
by
FW2065 A
1-800-584-8089
BasementSentry.com
DC POWER
+ 15V DC 1.6A
PLATINUM
From float
From
backup
pump
From battery
WiFi ENABLED
BACK-UP
SUMP PUMP
MODEL #
STBB300
BY
BasementSentry.com Toll Free Help Line: 1-800-584-8089
PN 156412 A SW1580 A
A
B
C
D
2. Slide the stainless steel clamp over the check
valve and slide the tee (slit end down) over
the check valve. Tighten clamp over the tee to
secure the check valve.
Check valve
assembly
Clamp
Tee
Backup
Pump
O-Ring
Weep hole
SEE INSTRUCTION MANUAL FOR
IMPORTANT SAFETY WARNINGS
AND ADDITIONAL INFORMATION.
A 12V Pump with o-ring
B Controller
C Dual Float Switch
D Check Valve with o-ring
E Tee Fitting
F Pipe Clamps
G Battery Box
F
G
E
Check valve
assembly
Primary Pump
Discharge
O-Ring
Weep hole
5. Use the included anchors to install the
controller. For best cooling, attach to wall. The
controller must be installed at least 3 ft. above
the sump pit. See separate instructions for WiFi
setup.
AC
POWER
FLOAT
STATUS
BATTERY
DC
PUMP
SILENCE
TEST
24/7 BASEMENT
PROTECTION
USB
RESET FLOAT
DC
PUMP
FUSE
30 AMP
by
1-800-584-8089
BasementSentry.com
DC POWER
+ 15V DC 1.6A
Controller
Minimum
3 ft.
Sump
Basin
Anchors
7. Plug the controller into a GFCI-protected 115V
outlet. Test for backup pump operation by
adding water to the sump basin. Reconnect
power to the primary sump pump by plugging
into the receptacle on the front of the controller.
AC
POWER
FLOAT
STATUS
BATTERY
DC
PUMP
SILENCE
TEST
24/7 BASEMENT
PROTECTION
USB
RESET FLOAT
DC
PUMP
FUSE
30 AMP
by
1-800-584-8089
BasementSentry.com
DC POWER
+ 15V DC 1.6A
GFCI Outlet
Zoeller® is a registered trademark of Zoeller Co. All Rights Reserved.

Zoeller
®
es una marca registrada de Zoeller Co. Todos derechos reservados.
1. Deslice la abrazadera de acero inoxidable incluida
sobre la descarga de la bomba de reserva. Presione
la bomba de reserva en la T. Apriete la abrazadera.
Enrosque la válvula de retención en la descarga de
la bomba principal. Apriete a mano.
3. Mida la conexión desde la T a la tubería de descarga
y corte la tubería de PVC Sched 40 de 1½” a este
tamaño. Instale un acoplamiento exible o una
unión de 3.8 cm (1½”) entre la tubería conectada a
la bomba y la tubería de descarga.
4. Instale el conjunto de otador doble en la tubería
de descarga, de modo que el nivel de encendido del
otador inferior esté por encima de la posición de
encendido de la bomba principal. Una el otador a
la tubería con el soporte y la abrazadera de acero
inoxidable. Asegúrese de que el otador pueda
moverse libremente hacia arriba y hacia abajo sin
ninguna interferencia.
6. Coloque la batería dentro de la caja de batería y
conecte los cables del controlador a los terminales
de la batería. Conecte el cable positivo (+) al
terminal positivo de la batería y el cable negro
negativo (-) al terminal negativo de la batería.
Bomba
de reserva
T de descarga
Abrazadera
Junta tórica
Descarga de
la bomba
Medir la
distancia
Acoplamiento
flexible o unión de
3.8 cm (1-1/2 pulg)
Abrazadera
Soporte
de montaje
AC
POWER
FLOAT
STATUS
BATTERY
DC
PUMP
SILENCE
TEST
24/7 BASEMENT
PROTECTION
USB
RESET FLOAT
DC
PUMP
FUSE
30 AMP
by
FW2065 A
PLUS
1-800-584-8089
BasementSentry.com
DC POWER
+ 15V DC 1.6A
Desde el
flotador
Desde la
bomba de
reserva
Desde la batería
Desde el cargador
de batería
Bomba de
sumidero de
reserva equipada
con WiFi
MODELO #
STBB300
BY
2. Deslice la abrazadera de acero inoxidable sobre
la válvula de retención y deslice la T (extremo
de hendidura hacia abajo) sobre la válvula de
retención. Apriete la abrazadera sobre la T para
asegurar la válvula de retención.
T
Bomba
de reserva
Conjunto de
válvula de retención
Abrazadera
Junta tórica
Orificio de
drenaje
A
Bomba de 12 V con junta
tórica
B
Controlador
C
Interruptor de
flotador doble
D
Válvula de retención con
junta tórica
E
Conector en T
F
Abrazaderas para tubería
G Caja de batería
Conjunto de
válvula de
retención
Descarga de
la bomba principal
Junta tórica
Orificio de drenaje
5. Use los anclajes incluidos para instalar el
controlador. Para un mejor enfriamiento, adhiéralo
a la pared. El controlador debe instalarse al menos
a 0.9 m (3’) por encima de la fosa del sumidero. Vea
las instrucciones separadas para la conguración de
WiFi.
AC
POWER
FLOAT
STATUS
BATTERY
DC
PUMP
SILENCE
TEST
24/7 BASEMENT
PROTECTION
USB
RESET FLOAT
DC
PUMP
FUSE
30 AMP
by
1-800-584-8089
BasementSentry.com
DC POWER
+ 15V DC 1.6A
Controlador
Anclajes
Mínimo de
2.7 m
(3 pies)
Contenedor
para agua
de sumidero
7. Enchufe el controlador en una toma de corriente de
115 V protegida por GFCI. Pruebe el funcionamiento
de la bomba de reserva agregando agua al
contenedor para agua de sumidero.Vuelva a
conectar la alimentación a la bomba de sumidero
principal enchufando en el receptáculo en la parte
frontal del controlador.
AC
POWER
FLOAT
STATUS
BATTERY
DC
PUMP
SILENCE
TEST
24/7 BASEMENT
PROTECTION
USB
RESET FLOAT
DC
PUMP
FUSE
30 AMP
by
1-800-584-8089
BasementSentry.com
DC POWER
+ 15V DC 1.6A
Toma de corriente GFCI
BasementSentry.com Línea gratuita de ayuda: 1-800-584-8089
CONSULTE EL MANUAL DE
INSTRUCCIONES PARA ADVERTENCIAS
IMPORTANTES DE SEGURIDAD.
A
B
C
D
F
G
E
/


