Page is loading ...

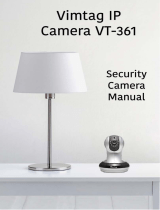
4K 30FPS UltraHD POE IP Bullet Camera
User Manual
Version 1.0.0.
Revised December 3
rd
, 2019

2
Contents
Welcome ........................................................................................................................................................................................... 3
Important Security Warning ............................................................................................................................................................. 3
Important Safeguards and Warnings ................................................................................................................................................ 3
Features and Specifications .............................................................................................................................................................. 4
Overview ........................................................................................................................................................................................... 4
Features ............................................................................................................................................................................................ 4
Device Overview ............................................................................................................................................................................... 5
Connection & Installation ................................................................................................................................................................. 5
Connection Guide ............................................................................................................................................................................. 5
Installation Guide .............................................................................................................................................................................. 5
Camera Access Setup ........................................................................................................................................................................ 6
How to Setup the Camera ................................................................................................................................................................. 7
App Setup ......................................................................................................................................................................................... 7
Amcrest Cloud App Setup ................................................................................................................................................................. 7
Amcrest View Pro Setup ................................................................................................................................................................. 10
Desktop Access Setup ..................................................................................................................................................................... 12
Operation and Interface ................................................................................................................................................................. 14
Setup ............................................................................................................................................................................................... 15
Camera ............................................................................................................................................................................................ 15
Video ............................................................................................................................................................................................... 21
Network .......................................................................................................................................................................................... 24
TCP/IP ............................................................................................................................................................................................. 24
HTTPS .............................................................................................................................................................................................. 31
Event ............................................................................................................................................................................................... 32
Video Detection .............................................................................................................................................................................. 32
Abnormality .................................................................................................................................................................................... 36
Security Exception .......................................................................................................................................................................... 37
Storage ............................................................................................................................................................................................ 38
Schedule ......................................................................................................................................................................................... 38
Destination ..................................................................................................................................................................................... 41
Cloud Storage.................................................................................................................................................................................. 43
System ............................................................................................................................................................................................ 43
General ........................................................................................................................................................................................... 43
Information ..................................................................................................................................................................................... 48
Version ............................................................................................................................................................................................ 48
Log .................................................................................................................................................................................................. 49
Alarm .............................................................................................................................................................................................. 50
Logout ............................................................................................................................................................................................. 50
Remote Web Access Setup ............................................................................................................................................................. 51
Amcrest Cloud Desktop Setup ........................................................................................................................................................ 53
Web Access Setup (AmcrestView.com) .......................................................................................................................................... 53
FAQs/Troubleshooting .................................................................................................................................................................... 54
Glossary of Terms ........................................................................................................................................................................... 55
FCC Statement ................................................................................................................................................................................ 57
IC Warning Statement..................................................................................................................................................................... 57
Appendix A: Toxic or Hazardous Materials or Elements ................................................................................................................. 58

3
Welcome
Thank you for purchasing an Amcrest camera!
This user manual is designed to be a reference tool for the installation and operation of your camera.
Here you can find information about the camera’s features and functions, as well as information to aid in
troubleshooting.
Many of the setup and installation sections below have corresponding videos on YouTube
To access the setup videos, please go to http://amcrest.com/videos
For access to the quick start guide and other support information, go to http://amcrest.com/support
To contact Amcrest support, please do one of the following:
Visit http://amcrest.com/contacts and use the email form
Call Amcrest Support using one of the following numbers
Toll Free: (888) 212-7538
International Callers (Outside of US): +1-713-893-8956
USA: (888) 212-7538
Canada: 437-888-0177
UK: 203-769-2757
Email Amcrest Customer Support [email protected]
Important Security Warning
To keep your Amcrest camera secure and prevent unauthorized access, please make sure to follow the steps
below:
• Always make sure that your camera has the latest firmware as listed on
www.amcrest.com/firmware
• Never use the default password for your camera. Always ensure that your
password is at least 8-10 characters long and contains a combination of lowercase
characters, uppercase characters as well as numbers.
Important Safeguards and Warnings
1.Electrical Safety
All installation and operation should conform to your local electrical safety codes.
The product must be grounded to reduce the risk of electric shock.
We assume no liability or responsibility for any fires or electrical shock caused by improper handling or installation.
2.Transportation Security
Heavy stress, violent vibrations, and excess moisture should not occur during transportation, storage, and
installation of the device.

4
3.Installation
Handle the device with care. Keep the device right side up. Do not apply power to the camera before completing
installation. Do not place objects on top of the camera.
4.Repair Professionals
All the examination and repair work should be done by qualified service engineers.
We are not liable for any problems caused by unauthorized modifications or user-attempted repair.
5.Environment
The camera should be kept in a cool, dry place away from direct sunlight, flammable materials, explosive
substances, etc.
This product should be transported, stored, and used only in the specified environments as stated above. Do not
aim the camera at a strong light source, as it may cause overexposure of the picture, and may affect the longevity
of the camera’s sensors.
Ensure that the camera is in a well-ventilated area to prevent overheating.
6. Operation and Maintenance
Do not touch the camera sensor or lens directly.
To clean dust or dirt off the lens, use an air blower or a microfiber cloth.
7. Accessories
Be sure to use only the accessories recommended by manufacturer.
Before installation, please open the package and check to ensure that all the components are present.
Contact the retailer that you purchased from, or Amcrest directly if anything is broken or missing in the package.
Features and Specifications
Overview
Amcrest provides an excellent digital surveillance product that can be useful to a wide variety of users. This 4K
bullet camera features the latest JS technology which allows the camera to operate in any web browser without
the use of a plugin.
This camera adopts a high-quality design to achieve high levels of reliability and security. It can be configured to
work locally, as well as on a network. This camera works using a POE connection and interfaces with most
networks through the Ethernet port of your router.
Features
This camera has the following features:
• Network Access
The camera can be accessed remotely from a wide variety of internet connected devices, including PCs, Mac, iOS,
and Android devices.
• Cloud Storage Functionality

5
Amcrest offers premium cloud storage options to enable long-term storage. Amcrest Cloud also allows the user to
easily locate and view recordings for playback from any internet connected computer or smartphone
(iOS/Android).
• Advanced Network Protocol Support
This camera is UPnP compatible, and includes functionality for use with DDNS, and other protocols to allow remote
and local connection with a large variety of network hardware.
Device Overview
The diagram below shows the camera’s profile and cable connections.
Please refer to the following chart for information about the camera and its ports. Please see below for detailed
diagram of the camera’s physical features.
1.
Ethernet Port – Provides POE power and data to the camera.
2.
Power – Provides a secondary power option for the camera if you do not want to operate on POE.
Connection & Installation
This section provides information about the connection and installation of your camera.
Connection Guide
The camera initially should be connected via the following method:
In addition to connecting the camera to a computer, the camera can also be connected to a power source, by
connecting the power cable to both a power outlet, and the camera.
Note: If the camera is using a PoE (Power over Ethernet) connection, DO NOT connect the camera to a power
source, otherwise this can result in a major malfunction.
Installation Guide
Follow the steps and use the diagram in this section to install the POE cameras.
Note: Prior to installation ensure that the installation environment can support at least 3 times the weight of the
camera.

6
1. Stick the installation sticker on the designated surface where the device will be installed (wall or ceiling).
2. Drill 4 holes through the holes on the installation sticker.
3. Open the accessories bag and take out the expansion bolt and insert it into the holes.
4. Open accessories bag and take out the screws. Tighten the 4 screws to fix the device on the installation surface
(wall or ceiling).
5. Loosen the sunshade screw to move it around to the desired position, then tighten the screw to lock it into place.
6. Plug in the camera to power it, using either an Ethernet or power cable.
7. Using a Philip’s head screwdriver, (not included) loosen the adjusting screw near the base of the camera. This
allows the camera to be rotated, as well as pivoted within the ball joint.
8. Adjust the device to the desired position.
Camera Access Setup
This section will provide information on how to setup and access your camera through the following methods:
• Local PC (Web User Interface (Web UI), Amcrest Surveillance Pro, etc.)
• Amcrest View Pro app
• Amcrest Surveillance Pro
• Amcrest Cloud
Default Username and Password
To login to the system for the first time, use one of the following default username/password combinations. Once
you have successfully logged in, it is highly recommended to change the password for security reasons.
Username: admin
Password: admin

7
How to Setup the Camera
To make your experience with your Amcrest camera easy and simple, we've provided multiple ways to set up,
view, and operate your camera depending on your needs. Please follow the instructions on this page to set up your
camera in the way that works best for you.
Setting up Your Camera for the First Time
If you are setting up your camera for the first time, or you are setting up your camera for mobile viewing.
Using the Amcrest Cloud app or Amcrest View app on your smartphone or tablet, you can view your camera live
from anywhere, and access features such as taking snapshots, creating recordings, and more.
For Configuring Advanced Settings on Your Camera
If you would like to configure your camera to enable advanced features such as motion direction, e-mail alerts,
FTP, image adjustments, scheduling and more.
For Cloud Storage and Playback
Amcrest Cloud is our optional premium cloud storage solution which allows you to access recorded footage from
any device. We offer free storage plans as well as continuous recording and motion detection storage plans. For
more information on Amcrest Cloud please visit amcrest.com/cloud
For Quick Web Access to Your Cameras
AmcrestView.com is a web portal that allows you to view your cameras and recordings quickly and easily from
anywhere in the world using a web browser. Use AmcrestView.com if you need to simply check-in at a moment's
notice. If you would like to use AmcrestView.com.
App Setup
Amcrest cameras can be used on your mobile device using the following apps:
• Amcrest Cloud
• Amcrest View Pro
Both apps are free and available in the App Store and Google Play store. Please note, each app requires an iOS 6.0
or later version. Android will require a 3.0 or later version OS to run these apps.
For purposes of this guide, we will use iOS, though both apps. The App Interface may differ slightly from the
screenshots below as updates are released. Below, you'll find instructions on how to set up your camera up on the
Amcrest cloud app as well as the Amcrest View Pro app.
Amcrest Cloud App Setup
Amcrest Cloud allows you to access your device from anywhere in the world. Please note, you will need an Amcrest
Cloud account to proceed with Amcrest Cloud app setup. You can register for a cloud account in the Amcrest Cloud
app or from the Amcrest Cloud website at amcrestcloud.com

8
• Please make sure your camera is plugged into a power source and your Ethernet cable is connected from the
camera to your router.
• Make sure your camera and mobile device are on the same network during setup.
• To ensure the camera connects to the cloud, a reboot of your camera is recommended.
To add your camera onto the Amcrest Cloud app, follow these steps:
1. Download and open the Amcrest Cloud app from the App Store or Play Store.
Note: Connect your mobile device to the same network that your camera is on.
2. Register for an Amcrest Cloud account. To register click on Sign Up and fill out the form to complete registration.
3. Tap on Add Camera
4. Give your camera a name (Ex. Garage, Living Room,
Kitchen, etc.) and tap Next to continue.

9
5. Scan the QR code on the back/side/bottom of
the camera or manually enter the camera’s serial
number into the Enter camera S/N (serial number)
field. Press Next to continue.
6. If you are adding a new camera that does not have
a set password the app will automatically detect that
a new camera is being added. Tap OK to proceed.
7. Set a new password for your camera. The password
must be between 8 to 32 characters long and contain
only letters and numbers. When you have finished
setting the password for your camera, enter the
password again in the Confirm Camera Password
section. Tap Next to continue.
8. Confirm and adjust any needed settings for your
camera. When all settings have been confirmed, tap
Finish.
For more information about the Amcrest Cloud app and its features, visit amcrest.com/support

10
Amcrest View Pro Setup
To add your PoE camera to the Amcrest View Pro app follow these steps:
• Make sure your camera is plugged into a power source and your Ethernet cable is connected from the camera to
your router.
• Make sure your camera and mobile device are on the same network during setup.
1. Download and open the Amcrest View Pro app from the App Store or Play Store.
2. Open the app and tap on the + symbol in the
middle of the screen to begin adding your PoE
device.
3. Tap on Add Device to add a new device to your app.

11
4. Tap on PoE Camera
5. Next, select a connection type. Since we will be
setting up a basic P2P connection with the device, tap
on "P2P Connection" to continue.
6. Scan the QR code on the back/side/bottom of
the camera or manually enter the camera’s serial
number into the Enter camera S/N (serial number)
field. Press Next to continue.
7. Give the camera a name (e.g. Garage, Kitchen,
Living Room, etc.) and provide the username and
password for your camera. The default username and
will be admin. Tap Start Live View to continue.
Note: You can tap on the icon to verify the
password.

12
8. The app will prompt you to change the password.
Enter a password between 8 and 32 characters and
confirm the password. Press OK to continue.
9. Your camera is now set up and ready for use on the
Amcrest View Pro app.
For more information about Amcrest View Pro and its functionalities visit amcrest.com/support
Desktop Access Setup
This camera features the latest in JS technology which allows you to access your camera via a wide variety of web
browsers including, Google Chrome, Firefox, Safari and other mainstream web browser via your PC or Mac
computer. For more information on how to access your camera from your computer please refer to the
information below.
To access your camera from your computer you will need to first locate the camera’s IP address. To locate the
camera’s IP address is it highly recommended to download our free Amcrest IP Config Tool software. The Amcrest
IP Config Tool can be downloaded at the following web page: amcerest.com/downloads
In the All Downloads menu, click on IP Config Software to begin the free download. Once the download has
completed installing, locate the IP address associated with the device you would like to view in the browser.

13
Open the web browser and enter this IP address into browser. Press enter to access the web user interface.
In the web user interface, enter the login credentials for your device. If this is the first time accessing the device,
the username and password will both be admin. Click on Login.
If this is the first-time logging into your device, you will be prompted to modify the password for your device. To modify
the password, enter the new password you would like to use in the New Password field and confirm. The password used
should be between 8 and 32 characters long with a combination of letters and numbers.
Click OK when and allow the stream to load.

14
Operation and Interface
This section will show you the basic operation and interfaces of the web user interface for your camera.
Live
By default, the interface opens on the Live tab. The live view tab allows the user to see a live video feed from the camera.
The live view tab has five main sections:
Section 1: These options allow the user quick access to the live view screen and Amcrest Cloud web site.

15
Section 2: This section allows the user to switch between Main Stream and Sub stream.
Section 3: This is the live view feed from the camera.
Section 4: This section allows the user to access setup options, alarm, and logout the interface.
Section 5: This section allows the user to manually take a snapshot of the live view screen.
Cloud Storage
The Cloud Storage tab allows the user quick access to the Amcrest Cloud website.
At this website (amcrestcloud.com) users can register for new accounts as well as view or modify existing accounts.
For more information on Amcrest Cloud visit: amcrest.com/cloud
Setup
The Setup tab allows the user to change different camera settings. Below is a screenshot of the setup tab:
There are 3 main sections to note in the Setup tab:
1. Menu Bar: The menu bar is composed of menu sections, which when clicked display any menu items that fall
under their category.
2. Menu Items: These menu items each open a different menu that allows the user to change specific settings for the
camera.
3. Menu Tab: These tabs open menu options for certain menu items.
Camera
This menu section allows the user to change different camera settings for video and to manage image profiles.

16
Configuration
This menu allows the user to configure image profiles for normal, day, and night usage.
Below is a screenshot that shows the Configuration tab in the Configuration menu item:
Below is an explanation for each of the fields on the Configuration tab in the Configuration menu item:
Picture
• Profile: This dropdown box allows the user to select which profile to modify. The 3 options are Day, Night, and
Normal.
• Brightness: This slider is used to adjust live view and recorded video window brightness. The value ranges from 0
to 100. The default value is 50. The larger the number, the brighter the video is. When you input the value here,
the bright section and the dark section of the video will be adjusted accordingly. You can use this function when
the whole video is too dark or too bright. Please note the video may become hazy if the value is too high. The
recommended value ranges from 40 to 60.
• Contrast: This slider is used to adjust window contrast. The value ranges from 0 to 100. The default value is 50. The
larger the number is, the higher the contrast is. You can use this function when the whole video brightness is OK
but the contrast is not correct. Please note the video may become hazy if the value is too low. If this value is too
high, the dark section may lack brightness while the bright section may overexpose. The recommended value
ranges from 40 to 60.
• Saturation: This slider is used to adjust video window saturation. The value ranges from 0 to 100. The default value
is 50. The larger the number, the stronger the color is. This value has no effect on the general brightness of the
whole video. The video color may become too strong if the value is too high. For the grey part of the video,
distortion may occur if the white balance is not accurate. Please note the video may not be clear if the value is too
low. The recommended value ranges from 40 to 60.
• Sharpness: This slider is used to adjust the sharpness of the video. The value ranges from 0 to 100. The larger the
value is, the clearer the edges are and vice versa. Note: The higher the value, the higher likelihood of picture noise
occurring. The default value is 50 and the recommended value ranges from 40 to 60.

17
• Gamma: This slider is used to adjust the gamma of the video. The larger the number, the brighter the video is.
The default value is 50 and the recommended value ranges from 40 to 60.
• Mirror: This radio button allows the user to turn the mirroring feature on or off. Turning mirroring on will mirror
the picture.
• Flip: This dropdown box allows the user to flip the video feed picture. Flipping the picture is recommended only if
the camera is mounted upside down.
Note: Due to specific limitations cameras 4MP and above will not be able to perform image flips in 90 or 270
degree rotations.
Exposure
This menu allows the user to select the exposure type for the video feed.
Below is a screenshot of the exposure menu:
• Profile: This dropdown box allows the user to select which profile to modify. The 3 options are Day, Night, and
Normal.
• Anti-Flicker: These options allow the user to select what type of anti-flicker technology should be used for the
video feed. The three options are 50 Hz, 60 Hz, and Outdoor. The desired option should offset any flickering effect
caused by the electrical current used in the specific area.
• Mode: This dropdown menu allows the user to modify certain exposure settings related to the device such as, gain
priority, shutter priority or setting a manual gain setting.
▪ gainFirst - This setting will maximize the gain for the ideal exposure. Low Noise Basically turns up the ISO to the
best setting without sacrificing exposure timing.
▪ Shutter Priority - This setting will maximize the fastest shutter speed and will sacrifice the gain in return.
▪ Manual - This setting lets you select your shutter speed and have the gain adjust automatically. Selecting
customized range will let you both the shutter speed an adjust the gain manually.
• 3D NR Level: This slider allows the user to specify the 3D Noise Reduction level. The value ranges from 1-100.

18
To reset to default settings, click the Reset Defaults button. To refresh the screen, click on Refresh. To save the
settings, click the Save button.
BLC Mode
This menu allows the user to select Back Light Compensation. The values are Off, BLC (Auto), WDR, and HLC. This
feature should only be used in black lit environments. Below is a screenshot of this menu:
• BLC: backlight compensation: Default will use the whole image to balance the lighting settings, and Customized will
allow you to balance the lighting settings from the target area.
• WDR: Wide Dynamic Range makes multiple scans of a scene to provide one balanced and unwashed image that is
clear for the user.
• HLC: Highlight compensation is a feature that came out of necessity due to overexposure from strong light sources
like headlights or spotlights.
To reset to default settings, click the Reset Defaults button. To refresh the screen, click on Refresh. To save the
settings, click the Save button.
WB
This dropdown box allows the user to select the white balance for the video feed. The different options are Auto,
Sunny, Night, Outdoor, Customized and Regional Custom.
Selecting customized opens a menu that allows the user to set specific red or blue values. Regional custom allows
the user to select an area (region) on the live view screen in which white balance will be most applicable.
Below is a screenshot of this menu:

19
To reset to default settings, click the Reset Defaults button. To refresh the screen, click on Refresh. To save the
settings, click the Save button.
Day & Night
Day & Night profiles are used to determine when black and white mode is turned on in a dark environment.
Below is a screenshot of this menu:
• Profile: This dropdown box allows the user to select which profile to modify. The 3 options are Day, Night, and
Normal.

20
• Mode: This dropdown box allows the user to select different Day & Night balance modes. The 3 options are Auto,
Color, and B&W.
• Auto - Uses D&N Sensitivity setting to change between color mode and infrared and black and white mode.
• Color - Preset which allows the camera to compensate color in day or night profiles.
• B&W - Sets the picture to black and white, however when illumination is too dark it switches on IR mode.
• Sensitivity: This option allows the user to change the Day/Night Sensitivity of the camera. The three options are
Low, Middle, and High. The higher the sensitivity, the quicker the camera will change into another mode
depending on the light levels.
• Delay: This dropdown box allows the user to set a delay in seconds for how long it takes to switch between Day
and Night modes. The values range from 2 seconds to 10 seconds.
To reset to default settings, click the Reset Defaults button. To refresh the screen, click on Refresh. To save the
settings, click the Save button.
IR Light
This menu allows the user to select whether the IR lights for night vision are on or off for the selected profile.
Below is a screenshot of this menu:
• Profile: This dropdown box allows the user to select which profile to modify. The 3 options are Day, Night, and
Normal.
• Mode: This dropdown box allows the user to select whether to turn the IR light on or off. Auto can also be set to
automatically set the camera’s IR lights on and off based on Day & Night conditions. This setting is usually set by
default within the camera.
• ZoomPrio: Allows the user to adjust correction settings for IR functionality. The default value is 50, however, it can
range from 0 ~ 100
• Correction: Corrects for brightness of the IR light causing focusing problems. This slider ranges from 0 ~ 100.
/