Page is loading ...

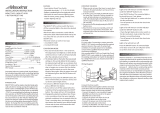
1. Shut off power at circuit breaker or fuse. See Warning above.
2. Remove insulation from wires (approximately 3/8” to 5/8”). The HOT terminals have the dark colored
screws and are marked H on the back. Loop each wire around their respective terminal screws as per
the diagram below (or insert 14AWG solid wire only into the wire holes) and fasten screws securely.
3. Loop the ground wire around the GREEN terminal screw, fasten screw securely. Terminal screws accept
up to 10AWG copper wire.
4. Mount the switch using the long mounting screws provided. Attach wall plate.
5. Restore power at the circuit breaker or fuse. See Warning above.
Maxxima extends a 1 year limited warranty to the original purchase that this product is free from defects
in material and/or workmanship only. Maxxima will replace any warranted product to the original
consumer/purchaser if the product fails because of defects due to workmanship and/or materials within
the limited warranty period. Limited warranty is not transferable and applies to the original installation of
the Maxxima product. This offer does not constitute in any way a product guarantee and Maxxima does not
hereby assume any obligation whatsoever beyond sending a free replacment product.
3-Way decorative switch, push-in & terminal screws, 15A 60Hz 120V
Single pole decorative switch, push-in & terminal screws, 15A 60Hz 120V
SPECIFICATION
INSTALLATION
WARRANTY INFORMATION
MEW-S1503W / MEW-S150W
3-Way Decorative Switch / Single Pole Decorative Switch
W AR NING
WARNINGS
To avoid fire, shock, or death, TURN OFF POWER at the circuit breaker or fuse and test that the
power is off before wiring! - Use only with copper or copper clad wire - To be installed and/or
used in accordance with appropriate electrical codes and regulations - If you are unsure or
uncomfortable about performing the installation, please consult a qualified electrician.
NEUTRAL
Green hex
head screw
Dark colored screws
HOT
LOAD
GROUND
GROUND
HOT
LOAD
NEUTRAL
Green hex head screw
GROUND
Wiring diagram for
Single-Pole installation
Wiring diagram for
3-Way switch installation
Terminal Screws accept up
to 10AWG copper wire
Insert 14AWG Solid wire only
Use Terminal Screws for other type
LOAD
/


