Under Cabinet LED Flexible Light Strip Kit
Important: Read all instructions prior to installation. STN-2-COB
4400 Earth City Expy, St. Louis, MO 63045 866-590-3533 superbrightleds.com
Rev Date: V1 05/04/2022
User Manual
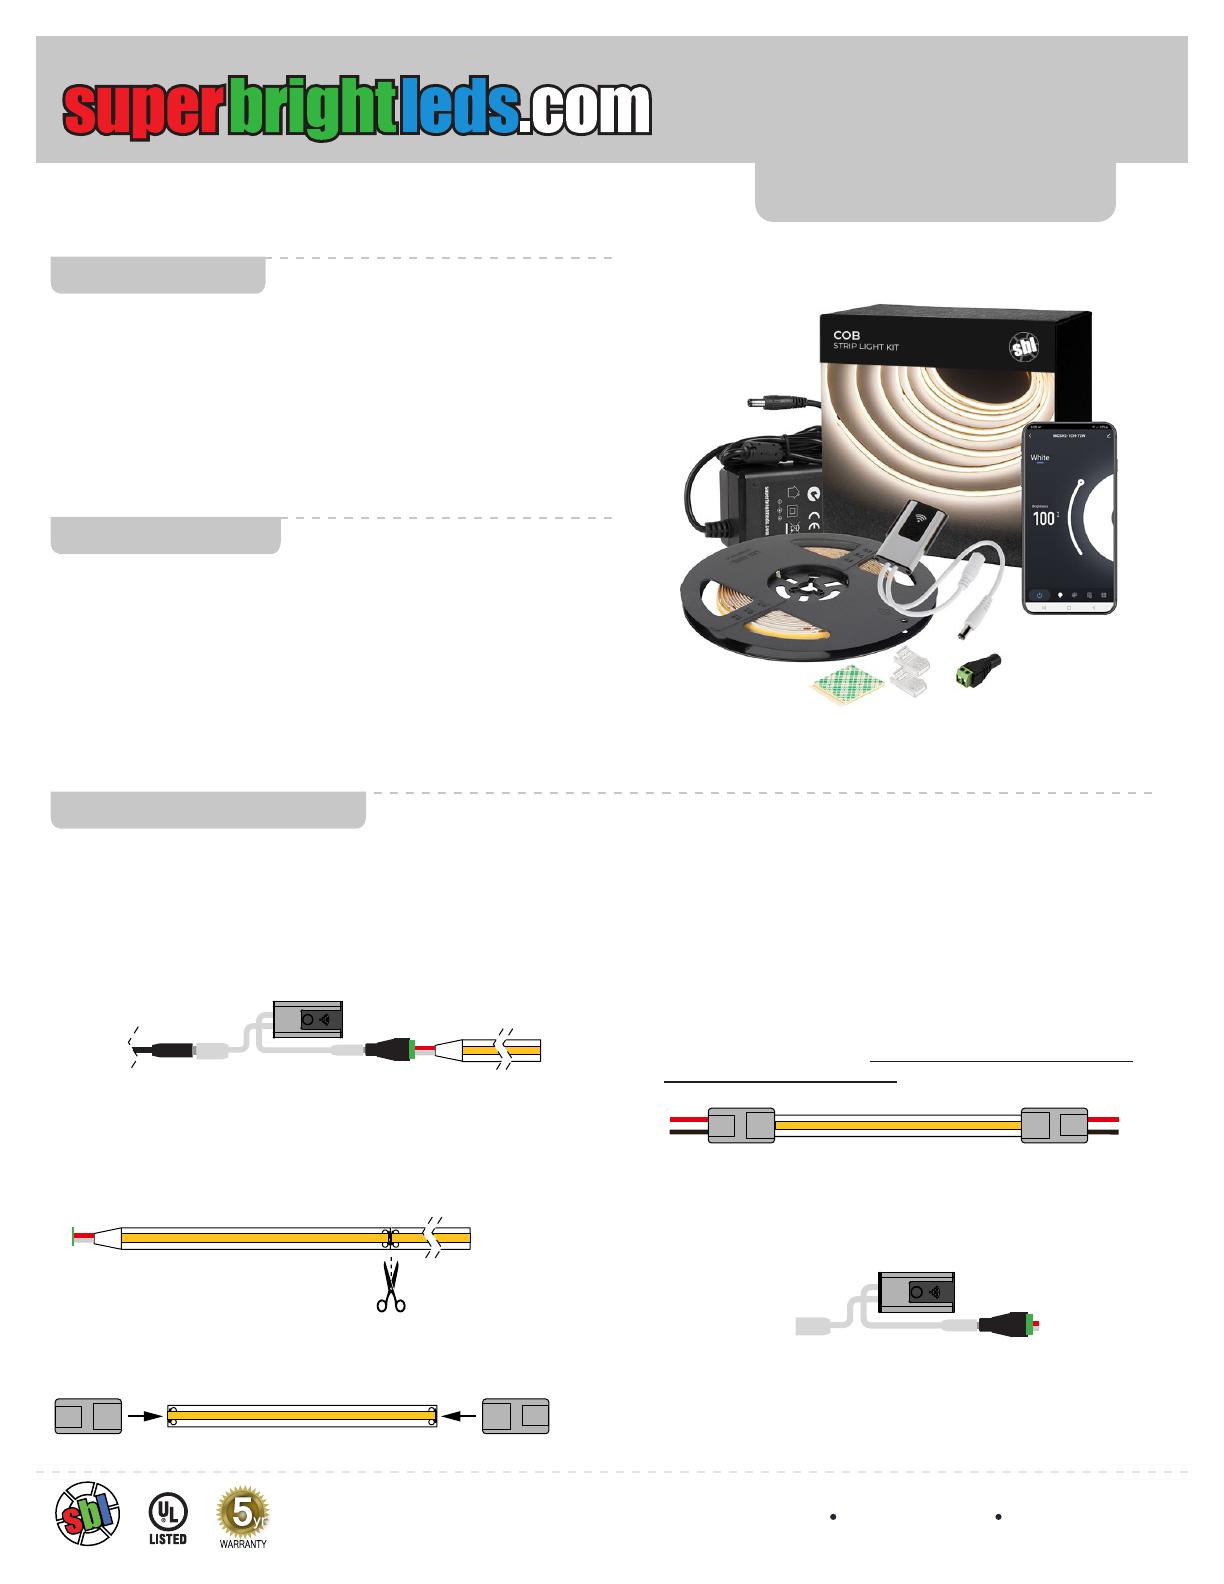
Included Parts
Installation Process
¹
1 - LED COB Strip
1 - Controller with RF Remote (MCSH2-1CH-72W)
1 - Power Supply (CPS-24V-60W)
1 - CPS Connector (CPS-F2ST)
1 - 10 ft Section of 2 Conductor 22 AWG Wire (WP22-2)
14 - Clamp-On Solderless Connectors (SBL-RA2P-8)
2 - Double-Sided Adhesive Foam Pads (3M-FTP)
Preinstall Check
Remove strip from reel and make connections to power supply
and controller. Controller will need to be paired to a smart
device. Refer to controller user manual for pairing instructions.
Briey turn on strip using controller power button to ensure
proper operation of the strip, power supply, controller, and
remote. After successful test, disconnect power supply and
disconnect components.
Layout
Layout strip on counter below cabinets. Hold strips up under
cabinets or measure to determine lengths of strip segments
needed for installation. Cut strip to desired lengths ensuring all
cuts are made only on marked cut lines.
Strip Installation
Attach solderless connectors (SBL-RA2P-8) to strip ends by
placing the connector fully over the strip and pushing down cap
until it locks in place.
¹UL certification only applies to the included strip and power supply
Next, ensure all installation surfaces are clean and dry.
Begin to remove strip’s backing while adhering to bottom front
edge of cabinets for optimal illumination. Press rmly to secure
strips to surface.
Route wire (WP22-2) for strip-to-strip connections under cabinet
seams, windows, and other spaces between cabinets. Cut wire
to length and attach wire ends to solderless connectors by
placing the wire fully into the connector and pushing the cap
down until it locks in place. Ensure the wires are connected to
the correct polarity on the strip.
Controller and Power Connection
Use the double-sided foam adhesive pads (3M-FTP) to mount
the controller. Connect lead wires at the end of the strip run to
the controller (MCSH2-1CH-72W) with CPS Connector (CPS-
F2ST).
Connect the power supply (CPS-24V-60W) to the CPS
connector and apply power to check for proper operation .
Power
Supply
Safety and Notes
• Product should be installed in accordance with applicable national,
state, and local electrical codes.
• To reduce the risk of electric shock, ensure that the main power
source is switched o and the power supply is disconnected
before performing any installation or wiring procedures.
• Product is for use in dry, indoor locations only.
• Do not connect strip or controller directly to AC power.
• Do not connect components other than those included to the
power supply.
• Ensure the polarity of all connections is correct during installation.


