Page is loading ...

14
NIBCO INC. WORLD HEADQUARTERS • 1516 MIDDLEBURY ST. • ELKHART, IN 46516-4740 • USA • PH: 1.800.234.0227
TECH SERVICES PH: 1.888.446.4226 • FAX: 1.888.336.4226 • INTERNATIONAL OFFICE PH: +1.574.295.3327 • FAX: +1.574.295.3455
www.nibco.com
Visit our website for the most current information.
www.nibco.com
AHEAD OF THE FLOW®

15
NIBCO INC. WORLD HEADQUARTERS • 1516 MIDDLEBURY ST. • ELKHART, IN 46516-4740 • USA • PH: 1.800.234.0227
TECH SERVICES PH: 1.888.446.4226 • FAX: 1.888.336.4226 • INTERNATIONAL OFFICE PH: +1.574.295.3327 • FAX: +1.574.295.3455
www.nibco.com
Visit our website for the most current information.
www.nibco.com
AHEAD OF THE FLOW
®
1/2” - 2” Fitting Installation Instructions, continued...
For ASTM A53, A106, A135, A795 (Schedule 10 to 40) carbon steel pipe in 1/2” to 2” sizes
Leak Testing: Unpressed connections are located by pressurizing the system with air or water. When testing with compressed air, the proper maximum
pressure is 15 psi; when testing with water, the maximum pressure is 45 psi. Following a successful leak test, the system may be pressure tested up to 200 psi
if required by local code requirements or project specifications. Leak testing with air can be dangerous at high pressures.
The following standards, codes, and instructions should be followed when installing NIBCO® BenchPressTM fittings:
• The installation shall be made in accordance with local codes.
• For use with ASTM A53, A106, A795 and A135 carbon steel pipe.
• Undue stress or strain on the fittings and the tubing is to be avoided.
• Concealed pipe and fittings shall be protected from puncture threats.
• If the installation requires components in addition to those supplied by the fitting manufacturer, those components shall be specified. The instructions shall
state that only the components provided or specified by the manufacturer are to be used in the installation.
• The fitting/pipe system shall not be used as a grounding electrode for an electrical system.
• The inspection, testing, and purging of the installation shall be performed in accordance with the requirements of the
applicable local codes.
• The fitting/pipe system shall not be used as a means of support.
Notes:
1. To ensure a proper press, maintain the specified minimum distance between fittings. The pressing jaw must have clearance to the adjacent
fitting. Failure to maintain the minimum specified distance may result in an improper seal.
2. A minimum distance to welds must always be maintained.
A minimum of 4 inches must be maintained when welding adjacent to a BenchPress fitting and a minimum of 3 feet must be maintained when
welding in-line. The following precautions should be used to protect the BenchPress fitting:
• Wrap the press fitting connection with a cold wet rag
• Protect the press fitting connection with a weld blanket
• Fabricate weld connections prior to installing the press fitting
Pipe Diameter (in) Distance Between Fittings A (in)
1/2 0.20
3/4 0.20
1 0.20
1-1/4 0.59
1-1/2 0.59
2 0.59
A

16
NIBCO INC. WORLD HEADQUARTERS • 1516 MIDDLEBURY ST. • ELKHART, IN 46516-4740 • USA • PH: 1.800.234.0227
TECH SERVICES PH: 1.888.446.4226 • FAX: 1.888.336.4226 • INTERNATIONAL OFFICE PH: +1.574.295.3327 • FAX: +1.574.295.3455
www.nibco.com
Visit our website for the most current information.
www.nibco.com
AHEAD OF THE FLOW®
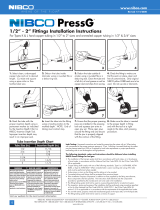
½” - 2” Fitting Installation Instructions
For ASTM A53, A106, A135, A795 (Schedule 10 to 40) carbon steel pipe in 1/2” to 2” sizes
1
1. Select clean, undamaged pipe
and cut to desired length. Cut tube
end square using a pipe cutter or
fine-toothed steel saw. If using a vise
or other method to hold the pipe, do
not damage the pipe section which
is inserted into the fitting. Scratches
or deformed pipe may result in an
improper seal.
2
2. Prep pipe to a smooth and even
surface with a fine grit sandpa-
per. The surface should be free of
indentations, oil, and debris. Do
not use engraved or stamped pipe.
Indentations in the pipe may result in
an improper seal. To avoid damage
to the O-ring, the pipe must be free of
burrs and sharp edges.
3
3. Visually inspect the fitting to ensure
the grip ring, separator ring, and seal
are in place, clean and free of con-
taminants. Only original NIBCO®
yellow HNBR BenchPressGTM seals
are to
be used.
NIBCO, INC NIBCO, INC NIBCO, INC
4
4. Mark the pipe to the proper inser-
tion depth as indicated by the Inser-
tion Depth Chart. Improper insertion
depth may result in an improper seal.
5
5. Fully insert the pipe into the fitting.
For fittings with stops, insert the pipe
to make contact with the fitting stop.
For fittings without a stop, insert the
pipe to a depth no less than the spec-
ified insertion depth. Improper inser-
tion depth may result in an improper
seal. If necessary, the O-ring may be
lubricated with water. Never use oils
or lubricants as these can degrade or
damage the sealing element.
6
6. Ensure the proper press jaw is
installed in the pressing tool. Squeeze
the jaw arms to open the jaw set.
Place open jaws around the fitting
end and ensure the jaw is properly
aligned with the contour of the fitting.
When using the ring and actuator
instead of jaws, use the correct size
ring an appropriate actuator. See
NIBCO Tool and Jaw Compatibility
Matrix for approved tools and jaws.
7
7. Make sure the pipe is inserted
to the proper depth. With the tool
square to the axis of the pipe, start
pressing procedure. After the press
is complete, remove the jaw from the
fitting.
Pipe Insertion Depth Chart
Tube Size (In.) Minimum Insertion Depth (In.)
1/2 1-1/16
3/4 1-1/16
1 1-5/16
1-1/4 1-3/4
1-1/2 1-13/16
2 1-7/8
WARNING ADVERTENCIA
Read press tool operator’s manual
and fitting manufacturer’s installation
instructions before using. Failure to
follow all instructions may result
in extensive property damage and/
or serious personal injury. Call the
NIBCO Technical Service Department
at 1.888.446.4226 if you have any ques-
tions or need assistance.
Antes de usar, lea el Manual del
Operario de esta herramienta de
presión y las instrucciones de in-
stalación del acopliamiento propor-
cionadas por su fabricante. Pueden
ocurrir daños materiales de gran
envergadura y lesiones corporales
de gravedad si no se respetan todas
las instrucciones. Si tiene alguna
pregunta o desea pedir un manual,
llame al Departamento de Servicio
Técnico de NIBCO al 1.888.446.4226.
MISE EN GARDE !
Familiarisez-vous avec le mode
d’emploi de la presse et les instruc-
tions du fabricant des raccords
avant d’utiliser l’appareil. Le
non-respect de leurs consignes
risquerait d’augmenter les risques
de dégâts matériels importants et/
ou de graves blessures corporelles.
Veuillez adresser toutes questions
éventuelles ou demandes de mode
d’emploi à la NIBCO en composant le
1.888.446.4226.

17
NIBCO INC. WORLD HEADQUARTERS • 1516 MIDDLEBURY ST. • ELKHART, IN 46516-4740 • USA • PH: 1.800.234.0227
TECH SERVICES PH: 1.888.446.4226 • FAX: 1.888.336.4226 • INTERNATIONAL OFFICE PH: +1.574.295.3327 • FAX: +1.574.295.3455
www.nibco.com
Visit our website for the most current information.
www.nibco.com
AHEAD OF THE FLOW
®
½” - 2” Fitting Installation Instructions, continued...
For ASTM A53, A106, A135, A795 (Schedule 10 to 40) carbon steel pipe in 1/2” to 2” sizes
Leak Testing: Unpressed connections are located by pressurizing the system with air. When testing with compressed air, the proper maximum pressure
is 15 psi. Following a successful leak test, the system may be pressure tested up to 200 psi if required by local code requirements or project specifications.
Leak testing with air can be dangerous at high pressures.
The following standards, codes, and instructions should be followed when installing
NIBCO® BenchPressGTM fittings for fuel gas:
• The installation of the fuel gas system shall be made in accordance with local codes, or in the absence of local codes, in accordance with the National
Fuel Gas Code NFPA 54, the LP-Gas Code NFPA 58 as applicable.
• For use with ASTM A53, A106, A795 and A135 carbon steel pipe.
• Undue stress or strain on the fittings and the tubing is to be avoided.
• Concealed pipe and fittings shall be protected from puncture threats.
• If the installation requires components in addition to those supplied by the fitting manufacturer, those components shall be specified. The instructions shall
state that only the components provided or specified by the manufacturer are to be used in the installation.
• The fitting/pipe system shall not be used as a grounding electrode for an electrical system.
• The inspection, testing and purging of the installation shall be performed using procedures specified in Part 4 of the National Fuel Gas Code NFPA 54,
ANSI Z223.1, the LP-Gas Code NFPA 58 section 3.2-10 as applicable or in accordance with the requirements of the applicable local codes.
• For use with natural, propane, mixed, and manufactured gasses in the vapor state, not in the liquid state.
• The fitting/pipe system shall not be used as a means of support.
Notes:
1. To ensure a proper press, maintain the specified minimum distance between fittings. The pressing jaw must have clearance to the adjacent
fitting. Failure to maintain the minimum specified distance may result in an improper seal.
2. A minimum distance to welds must always be maintained.
A minimum of 4 inches must be maintained when welding adjacent to a BenchPressG fitting and a minimum of 3 feet must be maintained
when welding in-line. The following precautions should be used to protect the BenchPress fitting:
• Wrap the press fitting connection with a cold wet rag
• Protect the press fitting connection with a weld blanket
• Fabricate weld connections prior to installing the press fitting
Pipe Diameter (in) Distance Between Fittings A (in)
1/2 0.20
3/4 0.20
1 0.20
1-1/4 0.59
1-1/2 0.59
2 0.59
A
/


