ROOTECH Accura 5500 User guide
- Category
- Measuring, testing & control
- Type
- User guide

User Guide[English]
Revision 1.03 2018/03/15

Page 2
Notice
Caution
Indicates the presence of dangerous voltage which can cause severe injury or death
to persons if proper precautions are not followed.
Warning
Alerts the user to the presence of hazards which can cause somewhat injury to
persons, damage to property or damage to the device itself, if proper precautions
are not followed.
Note
Indicates the user’s attention to installation, operating and maintenance instructions.
Electrical Symbols
Indicates alternative voltage or current.
Indicates direct voltage or current.
Installation Considerations
Installation and operation of Accura 5500 meter should be performed only by qualified,
competent personnel that have appropriate training and experience with high voltage and current
devices.
Caution
Failure to observe the following instructions may result in severe injury or death.
◼ During normal operation of the Accura 5500S meter, hazardous voltages are present on its terminal
strips.
◼ Standard safety precautions are followed while performing any installation or service work[removing PT
fuses, shorting CT secondaries, etc].
◼ Do not access to terminal strips of the Accura 5500 meter after installation.

Page 3
Warning
Observe the following instructions, or permanent damage to the meter may occur.
◼ Do not apply Accura 5500 to voltages and currents that exceed input ratings of PT and CT.
Manual
Rootech Inc. reserves the right to make changes in the device specifications shown in this User
Guide without notice. Rootech Inc. advises customers to obtain the latest specifications of device
before giving orders to confirm that the information being relied on by the customer is up to date.
In the absence of written agreement to the contrary, Rootech Inc. assumes no liability for Rootech
Inc. applications assistance, customer’s system design, or infringement of patents or copyrights of
third parties by or arising from the use of devices described herein.
The information contained in this document is believed to be accurate at the time of publication,
however, Rootech Inc. assumes no responsibility for any errors which may appear here and
reserves the right to make changes without notice.
Limitation of Liability
Where applicable law allows and does not prohibit or restrict such limitation, the Rootech, Inc’s
liability for anything relating to this product shall be limited to the price paid for the product.

Page 4
Warranty
For products and software that are sold or licensed by Rootech Inc. during the period from the
date of receipt by you until the present, Rootech warrants only to the original purchaser.
The purchased products shall be substantially free from material defects in material and
workmanship by Rootech for two years from the date receipt by you.
The software itself is provided “as is” without any warranty of any kind.
In order for the original purchaser to make a claim under the warranties described above, the
original purchaser must promptly contact Rootech headquarter. After receiving such notice,
Rootech may either in Rootech’s sole discretion, examine the product at the original purchaser’s
site or issue shipping instructions to the original purchaser to return the relevant product to
Rootech for examination at the original purchaser’s expense, transportation charges prepaid.
If after examining the product Rootech reasonably confirms that such examined product does not
meet the warranties, then the original purchaser’s sole remedy and Rootech’s sole obligation or
liability shall be, at Rootech’s option, to repair, replace or refund the price paid for that product.
Limitation of Warranty
The Warranty does not apply to uninterrupted or error-free operation of the Product or cover
normal wear and tear of the product or costs caused by the removal, installation, or
troubleshooting of the customer's electrical systems.
The warranty claims for defects caused by any of the following factors are not covered.
◼ Improper use(alteration, accident, misuse, abuse) or Failure to act in accordance with installation,
operation or maintenance instructions
◼ Unauthorized modifications, changes or attempted repairs
◼ Failure to comply with applicable safety standards & regulations
◼ Damages when transporting or storing
◼ Damages by force majeure, examples are(not necessarily limited): fire, flood, earthquakes, storm
damage, overvoltage & lightning

Page 5
◼ If the original identify markings(trade-mark, serial number, etc) have been defaced, altered, or removed
Rootech shall not be liable for any other claim than a claim solely for the breach of one of the
above warranties that is made in accordance with the above described procedures- made by the
original purchaser, its employees, agents, or contractors for any loss, damage, or expense
incurred due to, caused by, or related to any purchased product.
Any technical assistance provided by Rootech's personnel or representatives in system design shall
be deemed to be a proposal and not a recommendation. The responsibility for determining the
feasibility of such proposals lies with the original purchaser and should be tested by the original
purchaser.
It is the original purchaser’s responsibility to determine the suitability of any product and
associated documentation for its purposes. The original purchaser acknowledges that 100% "up"
time is not realizable because of possible hardware or software defects. The original purchaser
recognizes that such defects and failures may cause inaccuracies or malfunctions.
Only the terms expressed in these limited Warranties shall apply and no distributor, corporation or
other entity, individual or employee of Rootech or any other entity is authorized to amend, modify
or extend the Warranties in any way

Page 6
Standard Compliance
QMS-1347
KAB-QC-09

Page 7
Revision History
The following versions of the Accura 5500 User’s Guide have been released.
Revision #
Revision date
Description
Revision 1.00
2009. 08. 10
Initial draft
Revision 1.01
2009. 08. 28
1st function added
Revision 1.02
2010. 03. 05
2nd function added
Revision 1.03
2018. 03. 15
Some function deleted

Page 8
Contents
Chapter 1 Introduction ............................................................................................................. 11
Features ................................................................................................................................ 11
Applications .......................................................................................................................... 13
Ditigal protection relay system ....................................................................................... 13
Energy management system .......................................................................................... 13
Demand management system requirements in the field ................................................ 13
Power quality analysis system ........................................................................................ 13
Online monitoring/control ............................................................................................. 13
Parameters ............................................................................................................................ 14
Chapter 2 Mounting ............................................................................................................... 15
Environmental Conditions .............................................................................................. 15
Enclosure Considerations ............................................................................................... 15
Before You Begin ................................................................................................................... 16
Meter Overview ............................................................................................................. 16
Meter Mounting ............................................................................................................. 17
Voltage/current Input Wiring................................................................................................. 18
Wiring diagram[3PTs, 3CTs] ........................................................................................... 18
Wiring diagram[3 phase 3 wire: 2PT Open-delta] .......................................................... 19
Rear terminal ........................................................................................................................ 20
Control Power: PP, PN..................................................................................................... 20
Frame Ground: G ........................................................................................................... 20
CT .................................................................................................................................. 21
PT ................................................................................................................................... 21
CB Status Input .............................................................................................................. 21
CB ON Output................................................................................................................ 21
CB OFF Output ............................................................................................................... 21
Digital Output ................................................................................................................ 21
Digital Input ................................................................................................................... 22
Analog Input: ................................................................................................................. 22
Chapter 3 Meter Operation/Setup .......................................................................................... 23
Front Panel Display ............................................................................................................... 23
Button Functions in Setup Mode ..................................................................................... 24
LCD Menu Operation ............................................................................................................ 25
Menu Structure............................................................................................................... 27

Page 9
Meter Menu Display .............................................................................................................. 28
Scope Menu Display .............................................................................................................. 30
Phase Menu Display .............................................................................................................. 31
Harmonics Menu Display ...................................................................................................... 32
Event Menu Display ............................................................................................................... 33
Setup Menu Display .............................................................................................................. 35
APPENDIX A Specification ....................................................................................................... 47
APPENDIX B Standard ............................................................................................................ 48
APPENDIX C Accuracy/ Reliability ........................................................................................... 49
Parameter Accuracy ....................................................................................................... 49
IEC61326-1: Electrical Equipment for Measurement, EMC requirements ....................... 50
Power quality/ Accuracy ................................................................................................. 50

Page 10
Figures
Fig 2.1 Front Side ........................................................................................................... 16
Fig 2.2 Rear Side ............................................................................................................ 16
Fig 2.3 Side .................................................................................................................... 16
Fig 2.4 Panel Cutting Size .............................................................................................. 16
Fig 2.5 Mounting ............................................................................................................ 17
Fig 2.6 Typical Wiring (3PT, 3CT) .................................................................................... 18
Fig 2.7 Typical Wiring Diagram(3P3W, 2PTs: Open-Delta) .............................................. 19
Fig 2.8 Rear Terminal Diagram ...................................................................................... 20
Fig 3.1 Front panel ......................................................................................................... 23
Fig 3.2 Meter-Summary ................................................................................................. 25
Fig 3.3 event alarm ...................................................................................................... 26
Fig 3.4 Menu Popup Box .............................................................................................. 26
Fig 3.5 Meter - Summary screen .................................................................................. 28
Fig 3.6 Meter – Line Voltage screen ............................................................................. 29
Fig 3.7 Scope screen .................................................................................................... 30
Fig 3.8 Phasor Screen .................................................................................................. 31
Fig 3.9 Harmonics........................................................................................................ 32
Fig 3.10 Event Screen .................................................................................................. 33
Fig 3.11 Setup-General : Information screen ............................................................... 36
Fig 3.12 Setup-General : Power System configuration ................................................. 37
Fig 3.13 Setup-General : Transducer configuration ..................................................... 38
Fig 3.14 Setup-Reset configuration .............................................................................. 39
Fig 3.15 Setup-Event : Dip configuration ..................................................................... 40
Fig 3.16 Setup-Event : Swell configuration ................................................................... 41
Fig 3.17 Setup-Event : Peak Transient .......................................................................... 42
Fig 3.18 Setup-Communication : Ethernet configuration .............................................. 43
Fig 3.19 Setup-DIO : CB configuration ......................................................................... 44
Fig 3.20 Setup-DIO : DI configuration ......................................................................... 45
Fig 3.21 Setup-DIO : DO configuration ........................................................................ 46

Page 11
Chapter 1 Introduction
Features
Item
Standard
Accura 5500
Measurement
Sampling/cycle
Maximum 1024[Normal 128]
Frequency
50/60Hz
Voltage, current, power, frequency, power factor
■
Ground voltage[Vg], neutral current[In]
■
Demand, Peak demand
■
Maximum, minimum
■
Energy
kWh/kVARh received, kWh/kVARh delivered
IEC62053-22 Class 0.2S
■
2kWh/kVARh net[kWh/kVARh received – kWh/kVARh
delivered],
IEC62053-22 Class 0.2S
■
kWh/kVARh total[kWh/kVARh received + kWh/kVARh
delivered].
IEC62053-22 Class 0.2S
■
Harmonics
Voltage/current THD, current TDD
■
Power quality
Dip[Sag], Swell
IEC61000-4-30 Class A
■
Flicker
IEC61000-4-15 Class A
■
Transients
IEC61000-4-30 Class A
16μs@60Hz[20μs@50Hz]
Interharmonics, 5Hz resolution
IEC61000-4-7 Class A
Up to 50th
Harmonics: voltage, current
IEC61000-4-7 Class A
Up to 63rd
Interruption
IEC61000-4-11
■
Event record
Memory
256MB
Time stamp resolution
1ms
Event log[Dip, Swell, Transients, DIO]
1000

Page 12
Waveform capture: voltage, current, digital input
status
Up to recent 100 event logs
Waveform capture resolution, sampling/cycle
128[transient event log: 1024]
max/min log
■
Outage protection
■
Touch screen: 7” WVGA Color TFT LCD
Vector diagram, harmonic graph
■
oscilloscope: voltage 4channes, current 4channels
■
Event record
■
Digital Input/Output
CB control: CBON, CBOFF
2channels
Digital input/output
7/3channels[option: 8/8channels]
CB status input: CBIN
1channel
Communication
RS485, Modbus RTU protocol
2ports
Ethernet, Modbus TCP protocol
1port
General
Dimension
197W x 223H x 168D
Power supply: AC/ DC
85~265V/ 100~300V
*Selecting Option A or B When ordering

Page 13
Applications
Digital protection relay system
Energy management system
Demand management system requirements in the field
Power quality analysis system
Online monitoring/control

Page 14
Parameters
Realtime1
Average2
Total3
Maximum4
Minimum5 †
Phase voltage
■
■
■
■
Line to line voltage
■
■
■
■
Current
■
■
■
Power
Active
■
■
■
Reactive
■
■
■
Apparent†
■
■
■
Energy6
Active
■
■
Reactive†
■
■
Apparent†
■
■
Frequency
■
Power factor
■
■
THD
Voltage
■
Current
■
TDD
Current
■
Harmonics
■
Demand
Power
■
■
Current
■
1Instaneous measuring. 2Average of three phase parameters. 3Total sum of three phase parameters.
4If realtime measurements exceed maximums, the maximums will be updated.
5If realtime measurements is less than minimums, the minimums will be updated.
6Energy is periodically stored to non-volatile memory. †It is available only on RS485 communication.

Page 15
Chapter 2 Mounting
Environmental Conditions
The Accura 5500 should be mounted in a dry, dirt free location away from heat sources and very
high electric fields. To operate properly and effectively, environmental conditions should range
within the following guidelines
Items
Acceptable Range
Position
Indoor use
Operating Temp
-20 ~ 70C[-4℉ ~ 158℉]
Storage Temp
-40 ~ 85C[-40℉ ~ 185℉]
Operating Humidity
5 ~ 95% Non condensing
Enclosure Considerations
The enclosure the Accura 5500 is mounted in (typically a switchgear cabinet) should protect the
device from atmospheric contaminants such as oil, moisture, dust, and corrosive vapors, or other
harmful airborne substances. The mounting enclosure should be positioned such that the doors
may be opened fully for easy access to the Accura 5500 wiring and related components to allow
for convenient troubleshooting.
Warning
The meter should be installed in a switchgear cabinet or similar enclosure to ensure the terminal
strips on the meter base are not user accessible after installation.
Mount the meter in a dry location free from dirt and corrosive vapors. Once installed, no cleaning
of the device is necessary.

Page 16
Before You Begin
Before installing the meter, observe the instructions in this guide and read the safety precautions
presented on the “Installation Considerations” page.
Danger
Power up after the voltage and current wiring is completed.
Meter Overview
Fig 2.1 Front Side
Fig 2.2 Rear Side
Fig 2.3 Side
Fig 2.4 Panel Cutting Size

Page 17
Meter Mounting
Fig 2.5 Mounting

Page 18
Voltage/current Input Wiring
Wiring diagram[3PTs, 3CTs]
Fig 2.6 Typical Wiring (3PT, 3CT)

Page 19
Wiring diagram[3 phase 3 wire: 2PT Open-delta]
Fig 2.7 Typical Wiring Diagram(3P3W, 2PTs: Open-Delta)

Page 20
Rear terminal
Fig 2.8 Rear Terminal Diagram
Control Power: PP, PN
◼ DC 100V ~ 300V
◼ AC 85 ~ 265V
Frame Ground: G
◼ Connected to earth terminal
Page is loading ...
Page is loading ...
Page is loading ...
Page is loading ...
Page is loading ...
Page is loading ...
Page is loading ...
Page is loading ...
Page is loading ...
Page is loading ...
Page is loading ...
Page is loading ...
Page is loading ...
Page is loading ...
Page is loading ...
Page is loading ...
Page is loading ...
Page is loading ...
Page is loading ...
Page is loading ...
Page is loading ...
Page is loading ...
Page is loading ...
Page is loading ...
Page is loading ...
Page is loading ...
Page is loading ...
Page is loading ...
Page is loading ...
Page is loading ...
Page is loading ...
-
 1
1
-
 2
2
-
 3
3
-
 4
4
-
 5
5
-
 6
6
-
 7
7
-
 8
8
-
 9
9
-
 10
10
-
 11
11
-
 12
12
-
 13
13
-
 14
14
-
 15
15
-
 16
16
-
 17
17
-
 18
18
-
 19
19
-
 20
20
-
 21
21
-
 22
22
-
 23
23
-
 24
24
-
 25
25
-
 26
26
-
 27
27
-
 28
28
-
 29
29
-
 30
30
-
 31
31
-
 32
32
-
 33
33
-
 34
34
-
 35
35
-
 36
36
-
 37
37
-
 38
38
-
 39
39
-
 40
40
-
 41
41
-
 42
42
-
 43
43
-
 44
44
-
 45
45
-
 46
46
-
 47
47
-
 48
48
-
 49
49
-
 50
50
-
 51
51


ROOTECH Accura 5500 User guide
- Category
- Measuring, testing & control
- Type
- User guide
Ask a question and I''ll find the answer in the document
Finding information in a document is now easier with AI
Related papers
-
 ROOTECH Accura 2350-TEMPS User guide
-
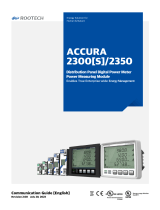 ROOTECH Accura 2300/2350 Communication User Guide
-
 ROOTECH Accura 2350-DO User guide
-
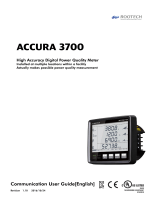 ROOTECH Accura 3700 Communication User Guide
-
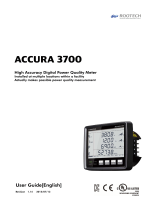 ROOTECH Accura 3700 User guide
-
 ROOTECH Accura 3700 User guide
-
 ROOTECH Accura 2350-GW Quick setup guide
-
 ROOTECH Accura 2300/2350 User guide
-
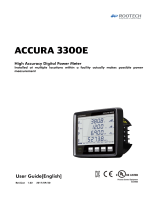 ROOTECH ACCURA 3300E User guide
-
 ROOTECH Accura 3700 User guide


