Page is loading ...

KIT CONTENTS:
1-Center Stabilizer bracket
2-Tie rod brackets
2-Stabilizer Cylinders
1-Center Cover Bracket
1—Kit Bag Containing
4—½” x 2½” Bolts
4—½” Nuts
4—½” Washers
4—⅜” 1 ½” x 2 3/16” U-bolts
2—⅜” x 2 ½” x 3 1/4” U-bolts
12—⅜” Flanged Locknuts
2— Stabilizer Sleeves
JEEP JK DUAL 2.2 SERIES STABILIZER KIT
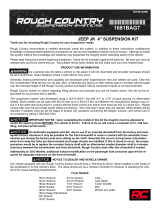
Thank you for choosing Rough Country for your suspension needs.
Rough Country recommends a certified technician installs this system. In addition to these instructions, professional
knowledge of disassemble/reassembly procedures as well as post installation checks must be known. Attempts to install
this system without this knowledge and expertise may jeopardize the integrity and/or operating safety of the vehicle.
Please read all the instructions before beginning the installation. Check the kit hardware against the parts list. Be sure
you have all the needed parts and understand where they go. Also please review the tools needed list and make sure
you have needed tools.
NOTE: THIS STABILIZER IS FOR USE WITH VEHICLES LIFTED 2 1/2”-6”. INSTALLING THIS STA-
BILIZER ON AN UNLIFTED VEHICLE IS NOT RECOMMNENDED.
82262
TOOLS NEEDED:
9/16” Wrench
3/4” Wrench
TORQUE SPECS:
⅜” 10 ft/lbs - 15 ft/lbs
½” 40 ft/lbs - 45 ft/lbs
2.2 Series Stabilizer (2) Center Axle Bracket
Tie Rod
Bracket
Tie Rod
Bracket
Axle U-Bolts (2)
Tie Rod U-Bolts (2) Tie Rod U-Bolts (2)
Stabilizer Mounting Hardware
RC Center Cover

DUAL STABILIZER INSTALLATION INSTRUCTIONS
1. Jack up the front of the Jeep and lower onto jack stands to allow the front wheels to turn.
2. Install the dual center bracket with the supplied u-bolts as shown in Photo 1 with the edge of the bracket against the
differential housing. Do not fully tighten at this time.
3. Install the ½” X 2½” bolt/ washer on the bracket and install on the tie rod as shown in Photo 2 (bolt can not be
installed after installing bracket) with the offset on the bracket to the inside. The offset must be to the inside to
ensure the stabilizers do not bottom-out when turning.
4. Install the cover plate as shown with the ½” X 2½” bolts/washers and stabilizers. See Photo 3. Level the center
bracket horizontally and tighten hardware using a 3/4” wrench on the stabilizers and 9/16” on the axle bracket.
5. Install the opposite ends of the stabilizer cylinders on the tie rod bracket bolts installed in Step 2. See Photo 4.
6. On vehicles equipped with 2 1/2” kits, it may be necessary to adjust the drag link collar to move the pinch bolts away
from the stabilizer cylinders. See Photo 4.
7. Slightly snug all brackets and turn the steering from side to side. Make adjustments to the tie rod brackets to allow
the full stroke of the stabilizer cylinders. This is done by moving the tie rod mounts in or out. After the brackets are
centered. Tighten with a 9/16” wrench.
PHOTO 3 PHOTO 4
By purchasing any item sold by Rough Country, LLC, the buyer expressly warrants that he/she is in
compliance with all applicable , State, and Local laws and regulations regarding the purchase, own-
ership, and use of the item. It shall be the buyers responsibility to comply with all Federal, State and
Local laws governing the sales of any items listed, illustrated or sold. The buyer expressly agrees to
indemnify and hold harmless Rough Country, LLC for all claims resulting directly or indirectly from
the purchase, ownership, or use of the items.
PHOTO 1 PHOTO 2
/