Page is loading ...

1 | Page
V10-TH FAQS
We are weather enthusiasts like you and know proper running equipment is important. These
FAQS provide valuable information on setup, positioning, and troubleshooting your station.
We recommend Adobe Reader version 10 or greater available at: http://get.adobe.com/reader
CONTENTS
V10-TH FAQS ...................................................................................................................................................................... 1
Contents .............................................................................................................................................................................. 1
GENERAL INFORMATION .................................................................................................................................................. 3
BATTERIES: What do I need to know about batteries? ................................................................................................... 3
HARDWARE: Sensor and Station ...................................................................................................................................... 3
What are the power requirements for this station? ......................................................................................................... 3
Power Cord Input: Will this station work in other countries? ......................................................................................... 3
SETUP: How do I setup my station? .................................................................................................................................. 3
MOUNTING: Where do I mount/position my sensor? ...................................................................................................... 4
Where to I place my station? ............................................................................................................................................. 4
What is Distance | Resistance | Interference? .................................................................................................................. 4
How do I Set Alerts? ........................................................................................................................................................... 5
How do I Disarm alerts? ..................................................................................................................................................... 6
What happens when an alert sounds? ............................................................................................................................. 6
How do I view my HI and LO Temperature/Humidity Readings? ................................................................................... 6
How do I reset the Temperature/Humidity Readings? .................................................................................................... 7
What is Heat Index and Dew Point Temperature? .......................................................................................................... 7
Where does the HI | LO reading next to the come from? ............................................................................................... 7
TIME: Does this station have Atomic Time? ..................................................................................................................... 7
How do I manually set the time? ....................................................................................................................................... 7
Why do “SEE APP TO CONNECT” or “LOST WIFI” show on my station? ...................................................................... 8
BACKLIGHT: Does this station have a backlight? ............................................................................................................ 9
Can I operate My station on battery power only? ............................................................................................................ 9
BATTERY: What do the battery icons mean? ................................................................................................................... 9
WEEKDAY: How do I correct the day of the week? ........................................................................................................ 9
Does this station have 12 hour and 24 hour time options? ............................................................................................. 9
Why does the station show different color trees? ........................................................................................................... 9

2 | Page
FORECAST ICONS: What do the forecast icons mean? ............................................................................................... 10
TROUBLESHOOTING ....................................................................................................................................................... 11
How do I change batteries in my sensor without losing data? ..................................................................................... 11
BAR CODE: What are the barcodes and ID Numbers on my sensor and on my station?......................................... 12
How do I delete sensor ID numbers? ............................................................................................................................. 12
FACTORY RESET: How do I factory reset my station? .................................................................................................. 12
DASHES TEMP/HUMIDITY: Why does my thermo-hygro sensor show dashes on the station? ............................... 12
Why don’t my temperature/humidity readings on my station match the weather report? ........................................ 13
TEMP ACCURACY: Why does my thermo-hygro sensor read inccurately? ................................................................ 13
What does a reading of “HI” or “LO” mean? .................................................................................................................. 13
TEMP INTERMITTANT: Why does my temp/humidity reading come and go? ............................................................ 14
Why am I going through batteries quickly? .................................................................................................................... 14
How do I change between Fahrenheit and Celsius? .................................................................................................... 14
GET CONNECTED: Your La Crosse View™ App ............................................................................................................ 14
Where do I find the La Crosse View™ App?.................................................................................................................... 15
How do I connect? ............................................................................................................................................................ 15
What are the requirements to connect? ......................................................................................................................... 15
What are the benefits of using an app? .......................................................................................................................... 16
MESSAGES: What is the meaning of these messages on my station? ........................................................................ 16
Can I move my station to a new house? ......................................................................................................................... 17
Why can’t I see my outdoor sensors in the app? ........................................................................................................... 17
ADD SENSOR: How can I add sensor to my La Crosse View™ app? ........................................................................... 17
Can I connect this station to Weather Underground? ................................................................................................... 18

3 | Page
GENERAL INFORMATION
BATTERIES: WHAT DO I NEED TO KNOW ABOUT BATTERIES?
• Good fresh batteries are important for best performance in your sensor and as backup in
your station.
• Batteries with an expiration date of 2020, were manufactured in 2010.
• We recommend batteries with an expiration date no more than 6 years in advance of the
current year for best performance.
• A minimum voltage of 1.48 v per battery is required for best performance.
• Lithium batteries may be used in outdoor sensor. Alkaline batteries for the station.
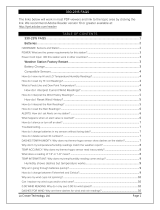
HARDWARE: SENSOR AND STATION
Your V10-TH station comes with:
LTV-TH2
Thermo-hygro sensor that reads Temperature and Humidity.
Your sensor operates at 915MHz RF.
WHAT ARE THE POWER REQUIREMENTS FOR THIS STATION?
LTV-TH2
: 2-AA batteries
V10-TH:
5 volt power cord (required) and 3-AA batteries for optional backup of your time and
date. Battery operation only will not update sensor or Wi-Fi data. Power cord is required.
POWER CORD INPUT: WILL THIS STATION WORK IN OTHER COUNTRIES?
• Your power cord input is 100-240V 0.3A 50/60Hz, and may work in other countries if the
proper plug adapter is used (not included).
Note:
There is no guarantee this station will worn in another country.
• As a standalone station-, you can use this anywhere.
Note:
As a standalone station (sensor to station), you can use this station in other countries.
However the La Crosse View™ app was designed to work with the National Weather Service
(NWS) and National Institutes of Standards and Time (NIST) in the USA. Because of this, we
cannot guarantee that any “connected” features will work in another country.
SETUP: HOW DO I SETUP MY STATION?
Your station is a fully functional standalone station.
1. Install batteries into your sensor (any order).
2. Install power cord into wall outlet, and into the station. Install batteries into the station if you
wish.
3. Let sensor and station sit within 10 feet of each other for several minutes to lock the sensor
signals to the display.

4 | Page
Once the sensor is connected, you can choose to connect to the La Crosse View™ app or
continue to use as a standalone station. You can always connect later if you choose. Click here
for instructions for connecting your station to the La Crosse View™ app.
MOUNTING: WHERE DO I MOUNT/POSITION MY SENSOR?
Your sensor reads independently to your station.
LTV-TH2:
• Place your thermo-hygro sensor at least 6 feet off the ground.
• For accurate temperature readings your sensor needs to be shaded from the sun in a well
vented area.
• Mount your sensor vertically to allow moisture to drain out the bottom.
• Preferred location is on a north facing wall under an eave or deck rail.
• Avoid placing near a metal roof that will cause it to read high on sunny days.
• Avoid other sources of heat such as soffit vents, and window or door frames.
• For accurate humidity readings, avoid placement near vegetation and lakes or other bodies
of water when possible.
• Place your sensor in a well-vented area. Trapped moisture will cause inaccurate readings.
• Maximum transmission distance from your thermos-hygro sensor to your station, in open air
is 400 feet (121.92meters).
• Insert the mounting screw through the front of the transmitter and into the wall. Tighten the
screw to snug (do not over tighten).
WHERE TO I PLACE MY STATION?
Your station is designed for flexible placement on a desk or countertop, or to position on the
wall.
• Position within reach of an outlet that is always active. Some outlets in living rooms and in
bedrooms may only be active when the light switch is on.
• This station must operate with the 5 volt power cord in order to receive sensor updates
and/or to update Wi-Fi data when connected. Operation on battery power will only maintain
time/date settings if you need to move your station.
• Best reception occurs when only one wall is between your station and your sensor outside.
• Position you station six feet from other electronics and wireless devices. If you suspect RF
(radio frequency) interference, simply move your weather station a few feet.
WHAT IS DISTANCE | RESISTANCE | INTERFERENCE?
Distance:
• The maximum transmitting range in open air is over 400 feet (121.92 meters) between your
sensor and your station.
• Consider the signal path from your station to your sensor as a straight line.
• Consider the distance the station is from other electronics in the home.

5 | Page
Resistance:
• Each obstacle: walls, windows, vegetation, stucco, concrete, and large metal objects will
reduce the effective signal range by about one-half.
• Mounting your sensor on a metal fence can significantly reduce the effective signal range.
Interference:
• Consider electronics in the signal path between the sensor and your station.
• Simple relocation of the sensor or the station may correct an interference issue.
• Windows can reflect the radio signal.
• Metal will absorb the RF (radio frequency) signal.
• Stucco held to the wall by a metal mesh will cause interference.
• Transmitting antennas from: ham radios, emergency dispatch centers, airports, military
bases, etc. may cause interference.
• Electrical wires, utilities, cables, etc. may create interference if too close.
HOW DO I SET ALERTS?
Programmable Temperature and Humidity alerts keep you on top of changing conditions.
Alert Setting Order:
• Outdoor LOW Temperature
• Outdoor HIGH Temperature
• Outdoor LOW Humidity
• Outdoor HIGH Humidity
• Indoor LOW Temperature
• Indoor HIGH Temperature
• Indoor LOW Humidity
• Indoor HIGH Humidity
To set alerts:
1.
Hold the ALERTS button to enter alert set mode
2.
Outdoor LOW temperature alert OFF will show.
3.
If you wish to set this alert value, press the + or – buttons to arm this alert (ON).
4.
When the alert is armed (ON) press and release the ALERTS button and the alert value will
flash.
5.
Press the + or – buttons to change the alert value.
6.
Press the ALERTS button to confirm and move to the next alert.
7.
If you do not wish to set an alert, press the ALERTS button again to move the next alert.

6 | Page
8.
(When the alert is OFF (disarmed) press ALERTS button to skip setting that alert value).
Note:
Press the LIGHT button at any time to exit.
HOW DO I DISARM ALERTS?
1. Hold the ALERTS button 3 seconds to enter alert set mode.
2. Press and release ALERTS button until you see the alert you wish to disarm.
3. Press the +/- buttons to disarm the alert. The alert text goes from ON to OFF.
4. Press the LIGHT button to exit.
WHAT HAPPENS WHEN AN ALERT SOUNDS?
• When armed alert value is reached, station will beep 5 times each minute, until out of alert
range.
• The flashing alert icon will indicate the type of alert HI or LO.
• Press any button to stop the alert from sounding.
• The alert icon will continue flashing while alert value is in alert range.
• Disarm the alert to stop the alert entirely.
HOW DO I VIEW MY HI AND LO TEMPERATURE/HUMIDITY READINGS?
Your high and low temperature and humidity readings are recorded with time and date of
occurrence. Each time a new high or low reading is recorded, that reading with time and date of
occurrence will show.
To view your HI | LO records, simply press and release the TEMP button.
Viewing order:
• Outdoor HI Temperature
• Outdoor LO Temperature
• Outdoor HI Humidity
• Outdoor LO Humidity
• Indoor HI Temperature
• Indoor LO Temperature
• Indoor HI Humidity
• Indoor LO Humidity
• Feels Like HI
• Feels Like LO
• Dew Point
Note:
Dew Point does not have a time/date of occurrence.

7 | Page
HOW DO I RESET THE TEMPERATURE/HUMIDITY READINGS?
Your temperature and humidity readings are reset individually.
1. Press and release the TEMP button to view the reading you wish to reset.
2. Hold the MINUS button for 5 seconds to reset individual temperature or humidity value to
current temperature, humidity, time and date.
3. Press and release the LIGHT button to exit.
WHAT IS HEAT INDEX AND DEW POINT TEMPERATURE?
•
Heat Index:
A combination of temperature and humidity. Heat Index is recorded when the
temperature is above 80°F,
•
Dew Point:
Dew point temperature is a measure of atmospheric moisture. It is the
temperature to which air must be cooled in order to reach saturation.
WHERE DOES THE HI | LO READING NEXT TO THE COME FROM?
Your station provides a daily HI | LO temperature reading, as well and the historical records with
time and date stamp listed above. This is shown continually on your station. No button press is
necessary.
•
Standalone station:
The daily HI | LO temperature comes from your thermo-hygro sensor
when you operate as a standalone station.
•
Connected to the La Crosse View™ app:
When you connect to the La Crosse View™ app.
The daily HI | LO reading will come from the NWS, as a forecasted HI and LO. The words
NWS Forecast will show above the temperature.
TIME: DOES THIS STATION HAVE ATOMIC TIME?
•
Standalone station:
When operating as a standalone station, the time needs to be set
manually on this station.
•
Connected to the La Crosse View™ app:
When operating as a connected station the time
will update from the National Institutes of Standards and Time (NIST). Your station will sync
with NIST twice per day.
HOW DO I MANUALLY SET THE TIME?
When operating as a standalone station, you can manually adjust your station’s settings:
1. Hold the SET button for 3 seconds to enter settings menu.
2. Press and release the + or - buttons to adjust the flashing values. Hold to adjust quickly.
3. Press and release the SET button to confirm and move to the next item.

8 | Page
Note:
Press and release the LIGHT button any time to exit settings
Settings order:
•Beep ON/OFF
•12/24 Time
•Hour
•Minutes
•Year
•Month
•Date
•Temperature Fahrenheit/Celsius
•SEE APP (connection prompt for app, no actual function)
Full Program Menu:
1. Hold the SET button for 3 seconds to enter settings. BEEP SOUND ON will show. Press and
release the PLUS or MINUS button if you want the Beep sound OFF.
2. Press and release the SET button to confirm and move to select 12/24 hour time format.
12/24 TIME FORMAT will show. Press and release the PLUS or MINUS button if you want 24
hour time format.
3. Press and release the SET button to confirm and move to the hour. 12: and SET HOUR will
show. Press and release the PLUS or MINUS button to adjust the hour.
4. Press and release the SET button to confirm and move to the minutes. :00 and MINUTES will
show. Press and release the PLUS or MINUS button to adjust the minutes.
5. Press and release the SET button to confirm and move to the year. 2017 and SET YEAR will
show. Press and release the PLUS or MINUS button to adjust the year.
6. Press and release the SET button to confirm and move to the month. JANUARY and SET
MONTH will show. Press and release the PLUS or MINUS button to adjust the month.
7. Press and release the SET button to confirm and move to the date. 01 and SET DATE will
show. Press and release the PLUS or MINUS button to adjust the date.
8. Press and release the SET button to confirm and move to select Fahrenheit or Celsius. TEMP
FAHRENHEIT will show. Press and release the PLUS or MINUS button to select Celsius (°C).
9. Press and release the SET button to confirm and SEE APP TO CONNECT will show. This is a
reminder to connect to the La Crosse View™ app. This is not required when operating as a
standalone station. There is no actual function when you see this. Press the LIGHT button to
exit.
WHY DO “SEE APP TO CONNECT” OR “LOST WIFI” SHOW ON MY STATION?
When operating as a standalone station, you will occasionally see the words SEE APP TO
CONNECT or LOST WIFI.
• SEE APP is a prompt to connect to the La Crosse View™ app. This is not required.
• LOST WIFI again refers to your station searching for a WIFI connection to connect to the
La Crosse View™ app. This is not required.
• These statements should only flash for a few minutes then disappear.
• They may show again for a few minutes if you restart the station or press and release the
SET button.

9 | Page
• When connected you will have these and other status messages. These are described
under below when talking about connected status messages.
BACKLIGHT: DOES THIS STATION HAVE A BACKLIGHT?
Yes, your station has a backlight with 5 levels of intensity. Power cord use is required for this
station to receive updates from the sensor.
• Press and release the LIGHT button to adjust the backlight intensity or to turn it off.
• Intensity levels: 0% (OFF) | 3% | 20% | 50% | 100%
CAN I OPERATE MY STATION ON BATTERY POWER ONLY?
• No, the power cord is required for your sensor to update.
• When you operate as a connected station, the power cord is required to maintain Wi-Fi
connection and sensor updates.
BATTERY: WHAT DO THE BATTERY ICONS MEAN?
• A battery icon will appear near your OUTDOOR temperature reading when you need to
change batteries in your thermo-hygro sensor.
• A battery icon will appear near your INDOOR humidity reading when you need to change
batteries in your station.
• See how to change batteries under troubleshooting.
WEEKDAY: HOW DO I CORRECT THE DAY OF THE WEEK?
• The day of the week will set when the Year, Month, and Date are set. If your day of the
week is incorrect, yet the month and date are correct, please go the program menu and
check the YEAR setting.
DOES THIS STATION HAVE 12 HOUR AND 24 HOUR TIME OPTIONS?
• Yes, you can select 12 hour or 24 hour time format in the program menu.
WHY DOES THE STATION SHOW DIFFERENT COLOR TREES?
The trees and foliage color will change seasonally to provide variety to your station.
Programmed dates in the station tell the trees when to change automatically.

10 | Page
FORECAST ICONS: WHAT DO THE FORECAST ICONS MEAN?
Standalone Station:
When operating as a standalone station, the forecast icons predict
weather condition over the next 12-hours based on the change of atmospheric pressure with
about 70-75% accuracy. As weather conditions cannot be 100% correctly forecasted we are not
responsible for any loss caused by an incorrect forecast.
Forecast Icons for standalone station:
• Sunny
• Partly Sunny
• Cloudy
• Rain
• T-Storm
• Snow
Note:
The “snow” icon appears when the temperature is below 32°F (0°C) and the forecast is
rainy or stormy.
• Your station calibrates barometric pressure based on its location over time to generate an
accurate, personal forecast. Please allow 7-10 days for barometer calibration.
•
IMPORTANT
: As the Station builds memory, it will compare the current average pressure to
the past forty day average pressure for increased accuracy. The longer the Station operates
in one location the more accurate the forecast icons will be.
Connected Station:
When your station is connected to the La Crosse View™ app you will see an
additional 8 forecast icons from the National Weather Service (NWS). Your forecast will update
multiple times per day. The forecast icons predict weather condition for the next 3-6 hours.
Additional forecast icons when connected:
• Windy
• Light Rain
• Severe T-Storm
• Light Snow
• Wintry Mix
Spring: March 20th – Jun 20th Summer: Jun 21st – Sep 20th
Autumn: Sep 21st – Dec 20th Winter: Dec 21st – Mar 19th

11 | Page
• Blizzard
• Ice
• Fog
1. Your weather station checks with the NWS eight times per day.
2. Different stations may show different aspects of the NWS based on when they update from
the NWS.
Note:
the NWS can update their website at any time.
⋅
Weather Forecast Icons (Sun, Rain, etc.):
Predicting weather in the next 3-6 hours.
⋅
Chance of Precipitation:
Forecast for 12 hour period
⋅
HI | LO Temperature:
Forecast of daytime maximum temperature and overnight minimum
temperature.
⋅
Wind Direction:
Forecasted sustained wind direction for the indicated hour
Data Stream items:
⋅
Probability of Hail:
Chance of Hail within 25 miles.
⋅
Probability of Damaging
Thunderstorms:
Chance of Thunderstorms within 25 miles.
⋅
Probability of Tornado:
Chance of Thunderstorms within 25 miles.
⋅
Sky Cover:
Cloud cover percentage for the current hour.
⋅
Snow Accumulation:
Expected accumulation of new snow in a 6 hour period
⋅
Wind Direction:
Forecasted sustained wind direction for the indicated hour
⋅
Wind Speed:
Forecasted sustained wind speed for the indicated hour.
⋅
Wind Gust:
Maximum 3-second wind speed (in knots) forecast to occur within a
2-minute interval. Wind gust forecasts are valid at the top of the indicated hour.
Note:
All NWS wind reads are at a height of 32.8 feet (10 meters).
TROUBLESHOOTING
HOW DO I CHANGE BATTERIES IN MY SENSOR WITHOUT LOSING DATA?
We designed this station for convenience, so that a simple change of batteries does not lose
data or require you to power down your station.
• If you have a low battery icon on your station, you need to replace the batteries in the
sensor or in the station as indicated.
• Simply install fresh batteries into your sensor then hold the SENSOR button for 3 seconds
and your station will search for your sensor.
• When changing the batteries in the station, continue using the power cord. After replacing
the batteries, no other action is needed. The batteries in the station only maintain time/date
in the event of a power outage.

12 | Page
BAR CODE: WHAT ARE THE BARCODES AND ID NUMBERS
ON MY SENSOR AND ON MY STATION?
• Did you know that your sensor will “lock” into your station?
• This ensures that the sensor readings are from your sensor and not a neighbors’.
• When you press and release your SENSOR button you will see your station ID, and your
thermo-hygro sensor ID.
• The sensor ID on the station should match your first six numbers on the barcode of that
sensor.
• These sensor will remain locked to your station until you manually delete them.
• The barcodes are also important identifiers for the La Crosse View™ app if you choose to
connect.
HOW DO I DELETE SENSOR ID NUMBERS?
In the rare event you need to replace your sensor, you will first need to delete the old sensor ID
from your station.
1. Remove batteries from your old sensor.
2. Press and release the SENSOR button to view your sensor ID number.
3. While viewing your sensor ID, hold the MINUS button for 5 seconds to delete your old
sensor ID. Dashes will show for the ID number.
4. Your station will automatically begin searching for the new sensor.
5. Install batteries in your new sensor and allow up to three minutes for your new sensor
readings and ID to appear on your station.
FACTORY RESET: HOW DO I FACTORY RESET MY STATION?
• A factory reset will delete all sensor ID numbers and if connected, remove all Wi-Fi
connections.
• Basically this is a great way to return your station to “out of the box” condition.
• This is more effective than removing all power for clearing out the station.
• All history records will be removed, so write down anything you want to keep.
To factory reset your station:
1. Hold the ALERTS and LIGHT buttons together for 5 seconds.
2. When your station resets it will look for all sensor. Allow at least ten minutes to reacquire the
sensor.
Note:
if operating connected, you will need to reconnect to Wi-Fi from the app. Click here for
details.
DASHES TEMP/HUMIDITY: WHY DOES MY THERMO-HYGRO SENSOR SHOW
DASHES ON THE STATION?
Dashes indicate the connection is lost between your station and the outdoor sensor.

13 | Page
• My first thought is always to check that my batteries are good. If it has been working and
now is not, low batteries are the most common connection problem.
• Next, check your distance, resistance and interference. If everything was working previously
at the same location, this is likely not the issue. However sometimes there is new growth on
trees or bushes that causing another barrier. Radio Frequency (RF) signal does not travel
well through foliage due to the moisture content.
• Occasionally adding a new wireless electronic device to the home will cross the signal path
for the sensor. If this occurs try moving your station a few feet or turning the station 90
degrees for a better angle to receive the sensor signal.
• When you have good batteries, and good location, hold the SENSOR button for three
seconds to search for your sensor. If you regain connection while the sensor is mounted,
great. If you do not regain connection, bring the sensor within 10 feet of the station and
search again.
WHY DON’T MY TEMPERATURE/HUMIDITY READINGS
ON MY STATION MATCH THE WEATHER REPORT?
• Your temperature and humidity readings are from you sensor at your location. Your local
reporting station can be miles away so readings will differ.
TEMP ACCURACY: WHY DOES MY THERMO-HYGRO SENSOR READ INCCURATELY?
• The thermo-hygro sensor reads the environment. If your sensor reads high during the day
but not at night it is a mounting problem.
•
Side-by-side test
: Bring the thermo-hygro sensor in the house and place it next to your
station for 2 hours.
• Compare indoor and outdoor temperature. The temperatures should be within 4 degrees to
be within tolerance. The humidity should be within 14% to be within tolerance.
• If the sensor reads correctly when next to your station then try a different location outside.
• Look for heat sources such as sunlight, door or window frames, or reflected heat that may
cause inaccurate readings.
• Press and release the SENSOR button to view the thermos-hygro sensor ID number.
Compare to the barcode on your sensor to be sure they match.
• If your temperature is reading low, and location is not an issue, you may have a bad sensor.
WHAT DOES A READING OF “HI” OR “LO” MEAN?
• If your outdoor temperature reading shows “HI” or “LO”, check that your batteries are good.
• Overpower or underpowered batteries can cause this reading.
• If batteries are good, replace the outdoor sensor.
• If your temperature is fine but your humidity is reading “HI” or “LO” or dashes, your humidity
may be below 10% Relative Humidity. Your sensor does not read below 10% humidity.

14 | Page
TEMP INTERMITTANT: WHY DOES MY TEMP/HUMIDITY READING COME AND GO?
• RF (radio frequency) communication may come and go occasionally. This can be normal in
some environments (e.g. moister climates).
• If a sensor goes out, please wait 2-4 hours for it to reconnect on its own. Please be patient
– these stations can reconnect on, after many hours out.
• RF (radio frequency) communication is not always 100% on. Certain temporary conditions
can cause it to go out for a time (e.g. 100% humidity).
If a miss happens:
• If sensor loses connection to the station for any reason, the station will show dashes after 30
minutes.
• The station will search for 5 minutes every hour to reconnect with sensor.
• Be sure you have good batteries. Manually search for your sensor by holding the SENSOR
button for three seconds.
Try this:
• Bring your sensor within 10 feet of your station and make sure it is connected to the station.
• After 15 minutes move the sensor into the next room with a wall between the sensor and the
station for 1 hour.
• If there is no loss of signal in that hour, move the sensor just outside.
• Continue moving the sensor back to its original location.
• If you lose connection, look for sources of interference.
WHY AM I GOING THROUGH BATTERIES QUICKLY?
• Test a new set of batteries. Write down the date of installation and the voltage of the
batteries.
• When the batteries fail, please note the date and voltage again. This is helpful in determining
the problem.
• Check for leaking batteries, which may damage the sensor.
HOW DO I CHANGE BETWEEN FAHRENHEIT AND CELSIUS?
• On your sensor, open the battery cover and press the F/C button. This will change the
temperature display on the sensor only.
• On your station enter the program menu to select Fahrenheit or Celsius temperature display
on the station.
GET CONNECTED: YOUR LA CROSSE VIEW™ APP
Enjoy the added benefits of on-the-go monitoring when you are connected via your mobile
device. For support and guidance of your La Crosse View™ app, please visit:
o Android users: http://www.lacrossetechnology.com/support/lacrosseviewandroid
o iOS users: http://www.lacrossetechnology.com/support/lacrosseviewios

15 | Page
WHERE DO I FIND THE LA CROSSE VIEW™ APP?
•
Visit the App Store or Google Play Store to download the free La Crosse View™ app on
your mobile device.
HOW DO I CONNECT?
Confirm that your mobile device is connected to a 2.4 GHz Wi-Fi Network before you connect
your station. Some routers have 5.0GHZ for media streaming and 2.4GHZ for everything else.
•
All
Wi-Fi routers have a 2.4 GHz band.
• Newer routers are often multi-band routers with both 2.4 GHz and 5 GHz bands.
For more information on routers please visit: https://www.lacrossetechnology.com/router_info
Check your station:
• When connecting to the app, ensure the Wi-Fi Indicator icon is blinking.
o
Solid: Indicates that you are connected to Wi-Fi.
o
Flashing: Searching for Wi-Fi Network
o
Not displayed: Not Connected
•
If it is not blinking, perform a Wi-Fi search by pressing & holding the + & - buttons together.
Note:
Station power cord use is required. Battery operation only, will not update sensor or Wi-Fi
data to the station.
L aunch the app:
• Open the app on your iOS or Android device.
Follow instructions in the app:
•
Your La Crosse View™ app will walk you through creating an account and connecting
your station to the
•
Internet. Once connected, your time, date, and local forecast information will update
instantly on your station’s screen.
WHAT ARE THE REQUIREMENTS TO CONNECT?
The La Crosse View™ app is compatible with both iOS and Android mobile devices. Before
connecting, be sure to check a few things:

16 | Page
• Confirm that your mobile device is connected to a 2.4GHz (802.11 b/g/n) Wi-Fi band before
trying to connect your station to the La Crosse View™ app. The station itself cannot accept
5GHz Wi-Fi bands that most dual-band routers offer.
•
Station power cord use is required for Wi-Fi connection.
o
IOS Requirements:
Mobile device with iOS 9.0 (or higher) with cellular or Wi-Fi service
o
Android Requirements:
Mobile device with Android OS 5 (or higher) with cellular or
Wi-Fi service
Note:
You cannot use the app on a laptop or desktop computer.
Tips:
•
Do not use public Wi-Fi networks.
•
Your station and mobile device must be within 10 feet of each other during setup.
•
Hold the PLUS and MINUS buttons together for 3 seconds to have your station search for
your Wi-Fi.
•
If you have connection issues, hold the ALERT and LIGHT buttons together for 5 seconds to
complete a factory restart.
WHAT ARE THE BENEFITS OF USING AN APP?
•
Monitor your backyard weather from anywhere with Internet connection.
•
Set alerts, view graphs, share your home’s weather data with family and friends who have a
free La Crosse View™ app account.
•
Personalize your app with your own photos, and receive push notifications.
•
Expanded forecast icons from the National Weather Service (NWS).
•
NWS Wind Direction.
•
New Data Stream Technology allows you to stream up to three items to your station.
o
National Weather Service (NWS) selectable forecasts: Wind, Snow, Thunderstorms, Hail,
Sky Cover and more.
o
Personal Message: up to 20 characters for special events or reminders.
o
Sensor data.
•
Add extra sensor that will read to your app.
MESSAGES: WHAT IS THE MEANING OF THESE MESSAGES ON MY STATION?
Your station has built in connection status messages for your convenience.
“ALL OK CONNECTED”
- Your station is connected to the app.
“LOST WIFI”
– Your station has lost connection with your Wi-Fi network.
•
Check your power cord connection (power cord required to connect).
•
When trying to reestablish your station’s Wi-Fi connection, be sure your mobile device is on
the same 2.4GHz network you want your station to use.
•
Check your network connection.
•
Hold the + and - buttons together for 3 seconds to search for Wi-Fi.

17 | Page
•
Go into the La Crosse View™ app, select your station, and then choose “Connect Wi-Fi” from
the app menu. Reenter your Wi-Fi network’s login information.
“SEE APP TO CONNECT”
– Your station has lost connection with your app.
•
The Wi-Fi router connection is working.
•
Check your connection to the La Crosse View™ app. Select your station, and then choose
“Connect Wi-Fi” from the app menu. Reenter your Wi-Fi network’s login information.
•
Is there an update to install?
“NO NWS”
- This indicates and error on the NWS server. There is nothing you can do for this.
•
NWS Expanded Forecast, will not update or show.
•
The NWS will resolve this.
•
Very rare to have this error.
Note:
When you first connect to the La Crosse View™ app, “NO NWS” may alternate with “ALL
OK” for a few seconds until the station establishes contact with the NWS server.
CAN I MOVE MY STATION TO A NEW HOUSE?
•
Yes, it is very easy to move your station to a new location. You will simply need to connect to
the new Wi-Fi.
•
If you change your Wi-Fi network, simply go into the La Crosse View™ app, select your
station, and then choose “Connect Wi-Fi” from the app menu. Here, you will just need to
enter your new Wi-Fi network’s login information.
Note:
If switching to a new Wi-Fi network, your station may take up to 3 minutes to reacquire all
sensor information.
WHY CAN’T I SEE MY OUTDOOR SENSORS IN THE APP?
Currently after you connect your weather station into the app, you will need to scan the bar
code on each of your sensor(s) to connect them as well.
1.
Scan the bar code on the sensor (or carefully enter the number manually)
2.
Confirm your sensor image and ID number.
3.
Name the sensors and provide location.
4.
Enjoy! Allow a few minutes for readings to appear.
ADD SENSOR: HOW CAN I ADD SENSOR TO MY LA CROSSE VIEW™ APP?
Check for compatible sensor to purchase at www.lacrossetechnology.com/V10-TH
Note:
The number of sensors you can add will be limited by the memory of your mobile device
and the speed of your Wi-Fi network connection.

18 | Page
Open your La Crosse View™ app to add sensor.
1.
From Main Menu - select “Devices” under “Add/Edit”
2.
On Edit Devices page - select “ADD DEVICE”
3.
Scan Device ID - Scan the Bar Code on your sensor or choose “ADD MANUALLY” to type in
the number on the bar code. Select “CONTINUE”.
4.
On Confirm Device page - Confirm the sensor image and select “YES”
5.
On Enter Device and Location Names page - enter Device Name and select a location or
enter a Location Name for your sensor. Select “DONE”.
•
Repeat steps 1-5 for any additional sensor you wish to add.
•
Allow a few minutes for the new sensor to report to the app.
CAN I CONNECT THIS STATION TO WEATHER UNDERGROUND?
• Unfortunately no, the La Crosse View app and this weather station are incompatible with
Weather Underground.
• However, we invite you to try the easy-to-use sharing features found in La Crosse View.
Share device data with the touch of a button, use the links below to learn how.
o Android users: http://www.lacrossetechnology.com/support/lacrosseviewandroid
o iOS users: http://www.lacrossetechnology.com/support/lacrosseviewios
• Our focus moving forward will be on our own La Crosse View app, as we have the ability to
make custom updates to best suit our customers' needs. So if you have ideas for changes
you'd like to see, please just let us know, your opinion truly matters to us.
• If you must have a station that connects to Weather Underground, we do offer a few models
that will transmit data to both systems (you'll want to check the specs or feature list to make
sure). Being weather enthusiasts ourselves, we appreciate the impact Weather
Underground has had on the weather community. We hope the added features and
personalization of the La Crosse View app will become a weather community standard.
/