Page is loading ...

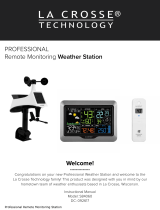
Model: WS6867

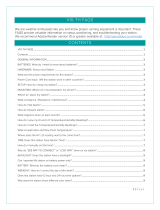
Table of Contents
Setup Preparation . . . . . . . . . . . . . . . . . . . . . . . . . . . . . . . . . . . 2
Setup.......................... . . . . . . . . . . . . . . . . . . . . . . . . . . . . . . . . . 2
Display Icons
.......................... . . . . . . . . . . . . . . . . . .
5
Wind Readings......... . . . . . . . . . . . . . . . . . . . . . . . . . . . . . . . . 5
Wind History......... . . . . . . . . . . . . . . . . . . . . . . . . . . . . . . . . . . . . 6
Rain Readings | History........... . . . . . . . . . . . . . 6
Temperature/ Humidity HI | LO........ 8
Weather Alerts
...............
.......................... 9
Set Weather Alerts
.......................... . . . . . . .
10
Weather Forecast Icon s
........................
11
Seasonal Trees... . . . . . . . . . . . . . . . . . . . . . . . . . . . . . . . . . . . . . .11
Sensor Search.......... . . . . . . . . . . . . . . . . . . . . . . . . . . . . . . . . 12
Mounting Instructions.......................... . 13
Replace Wind Cups
.......................... . . . . . . .
14
Replace Direction al Vane
.....................
15
Factory Restart............. . . . . . . . . . . . . . . . . . . . . . . . . . . . 15
WIFI Icon................... . . . . . . . . . . . . . . . . . . . . . . . . . . . . . . . . 16
Specifications... . . . . . . . . . . . . . . . . . . . . . . . . . . . . . . . . . . . . . . . . .17
Care and Maintenance
..........................
17
Liability Disclaims................................... 18
Page | 1 WS6867

Setup Preparation
Here are some items needed to setup you r station (not included):
1. Phillips head screwdriver for assembly.
2. Fresh Batteries: 5 (five) AA alkaline or lithi um batteries for
the sensors.
3 (three) AAA alkaline bat teries for
the station (optional).
For best results:
• Remove weather station and sensors from the package and
place together on a table or bench, with in easy reach.
• Place batteries and screwdriver within reach of setup location.
• Keep sensors and weathe r station 2-3 meter apart for the first
15 minutes after installi ng batteries.
Setup
Power up. Observe correc t polarity.
• Thermo-hygro sensor- 2-AA batteries
• Multi-sensor- 3-AA batteries
• Weather Station- 5.0 Volt AC adapter
and 3-AAA batteries (optional)
Software version will show for
2 seconds. Lower left corner.
Optional
Place sensors outdoors at least 2 meter above objects below
them (ground, roof, etc.)
• Thermo-hygro sensor-Place in a shaded location to protect
from sun.
• Multi-sensor- Place in an open area. No obstruction s for 15
meter in all directions.
Enjoy your backyard weather!
WS6867
Page | 2
Note: Batteries are not included
TX
°C/°F
1 2 3
Power
Cable
AAA
AAA
AAA
+
+
-
-
+
-
AA
AA
+
-
AA
+
-
+
-
AA
AA
+
-
+
-

•
•
Page | 3 WS6867
•
•
•
•
•
•
•
•
•
•
•
•
•

WS6867

Display icons
Wind Readings
• Current Speed: Highest speed past 30 seconds
• Top Speed: Highest speed in the past hour
• Feels Like: Temperature | Humidity | Wind Speed
• Wind Direction: In letters or degre es
• History: Press and release t he WIND button to view:
1 Hour (default) | 24 Hour | 7 Days | Month | Year
Page | 5 WS6867
WIFI Strength
Temperature
Trend Arrows
Percent Hu midity
Sensor Strength
Humidity
HI | LO Alert
Wind Direction
Fahrenheit | Celsius
Wind Speed
F
orecast Icon
Seasonal Trees
Rainfall Graph

Wind History
Press and release the WIND button to view the maximum wind history
values.
• One Hour: past 60 minute period (default Top Speed record,
already shown)
• 24-hour: Past 24 hour period, from last record
• 7 Days: Past 7-day period, from last record
• Month: Defined by Calendar Month i.e. January 1 - January 31
• Year: Defined by Calendar Year i.e. January 1 - December 31
Reset Wind Speed History:
• Press the WIND button to view individual wind speed readings.
• Hold the MINUS button for five seconds to reset the individual value.
• Wind speed reading will reset to current wind speed.
Rain Readings | History
Press and release the RAIN button to view:
• One Hour: past 60 minute periods, from last record
• Day: 24 hr period from 12:00am - 11:59pm. With current date
• 24-hour: Past 24 hour period, from last record.
• 7 Days: Past 7-day period, from last record
• Month: Defined by Calendar Month i.e. January 1 - January 31.
• Year: Defined by Calendar Year i.e. January 1 - December 31.
• Total: running total since station was powered up (no time stamp)
WS6867 Page | 6
24 Hours 7 Days
Month
Year

• Select your rain history and the station will keep your selection.
• After viewing a history record for 5 seconds, the station will return
to the normal view.
Month Year
Reset Rainfall Readings (each resets individually):
• Press the RAIN button to view individual rain readings.
• Hold the MINUS button for five seconds to reset the individual value.
• Rainfall reading will reset to 0.00
Page | 7 WS6867
One Hour 24 Hours
Day (12:00am - 11:59pm) 7 Day
Total

Temperature/Humidity HI | LO Readings
Press and release the TEMP button to view HI/LO temperature and
humidity readings with time/date stamp.
• Outdoor temperature HIGH
• Outdoor temperature LOW
• Outdoor humidity HIGH
• Outdoor humidity LOW
• Indoor temperature HIGH
• Indoor temperature LOW
• Indoor humidity HIGH
• Indoor humidity LOW
• Feels like HIGH
• Feels like LOW
• Outdoor dew point
Note: Feels Like and Dew Point is not time/date stamped.
WS6867
Page | 8
Outdoor Temp HI
Outdoor Temp LO
Outdoor Humidity HI
Outdoor Humidity LO
Indoor Temp HI Indoor Temp LO

Types o f Weather Alerts
There are 20 weather alerts available on this weather station.
• Outdoor LOW Temperature ON/OFF
• Outdoor LOW Temperature Value -40°C-60°C ( -40°F-140°F )
• Outdoor HIGH Temperature ON/OFF
• Outdoor HIGH Temperature Value -40°C-60°C ( -40°F-140°F )
• Outdoor LOW Humidity ON/OFF
• Outdoor LOW Humidity Value 10%RH-99%RH
• Outdoor HIGH Humidity ON/OFF
• Outdoor HIGH Humidity Value 10%RH-99%RH
• Indoor LOW Temperature ON/OFF
• Indoor LOW Temperature Value 0°C-50°C(32°F-122°F)
• Indoor HIGH Temperature ON/OFF
• Indoor HIGH Temperature Value 0°C-50°C (32°F-122°F)
Page | 9 WS6867
Indoor Humidity HI
Indoor Humidity LO
Feels Like HI
Feels Like LO
Dew Point

• Indoor LOW Humidity ON/OFF
• Indoor LOW Humidity Value 10%RH-99%RH
• Indoor HIGH Humidity ON/OFF
• Indoor HIGH Humidity Value 10%RH-99%RH
• 24-hour Rainfall ON/OFF
• 24-hour Rainfall Value 0-99.9mm (0-3.93 inches)
• High Wind Speed ON/OFF (CURRENT wind)
• High Wind Speed Value 0-180kmh (0-111 mph) (CURRENT wind)
Set Weat her Alerts
Hold the ALERTS button 2 seconds to enter alert set mode.
Outdoor Low Temperature alert OFF will show.
ALERT ON:
1. Press the +/- buttons to arm the alert.
2. Press the ALERTS button and the alert value will flash
3. Press the +/- buttons to set the alert value (Hold to set quickly).
4. Press ALERTS button to move to next alert.
ALERT OFF:
1. Alerts are OFF unless armed. If you do not wish to set an alert,
simply press the ALERTS button again to move to the next alert.
Active Alert:
• When armed alert value is reached, station will beep 5 times
each minute, until out of alert range.
• The flashing alert icon will indicate if is a LOW or HI alert.
• Press any button to stop the alert sound.
• The alert icon will flash while value is in alert range.
WS6867 Page | 10
Alert OFF use +/- to arm Alert ON use +/- to set value

Weather Forecast Icons
• The forecast icons are determine by the barometric pressure sensor.
• The tendency arrow show the changes on the barometric pressure
is rising or falling.
• When Outdoor temperature is below 0°C and the forecast is RAIN
or T-STORM, the LCD will display SNOW.
SUNNY
RAIN
PARTLY CLOUDY
T-STORM
CLOUDS
SNOW
Seasonal Trees
•
The trees and foliage color will change seasonally. The dates are
programmed into the weather station for the scene to change automatically.
Page | 11 WS6867
Spring: March 20th – Jun 20th Summer: Jun 21st – Sep 20th
Autumn: Sep 21st – Dec 20th Winter: Dec 21st – Mar 19th

Sensor Search
Each sensor has a unique ID and will be “parked” to the correct
sensor location on the display until manually deleted.
• If sensor loses connection to the weather station for any reason,
the weather station will show dashes after 30 minutes.
• The weather station will search for 5 minutes every hour
to reconnect with sensor.
• In normal mode press and release the SENSOR button to view
individual sensor ID’s for up to 15 seconds.
• Press and release the + button to search for the sensor, who’s
ID is shown.
• The strength signal icon will animate until the sensor signal is
received, or for 3 minutes if no signal available.
Delete TH Sensor:
1. Press the SENSOR button to
v
iew individual sensor ID.
2. Hold the
-
button for 5 seconds
to delete the sensor and ID.
Add TH Sensor:
1. Install batteries in sensor.
2. Press and release the
SENSOR button to view
sensor area (dashes).
3. Press the + button to search.
4. Press the TX button on sensor.
5. When sensor connects, ID
and readings show.
WS6867 Page | 12
TH Sensor ID
Multi-sensor ID
TH Sensor Deleted

Mounting Instructions
TX233TH Temperature/Humidity Sensor
Option 1:
•
Install one mounting screw into
a wall leaving some extended.
•
Place the transmitter onto the sc rew,
gently pull the transmitter down to
lock the screw into place.
Option 2:
•
Insert the mounting screw through
the front of the transmitter and
into the wall.
•
Tighten the screw to snug (do
not over tighten).
•
Mount the temperature/humidity sensor on a
north-facing wall or in any well shaded
location. Sun will make it read high.
• Under an eave or deck rail is preferred.
• Be sure the outdoor sensor is mounted
verticall y to drain moisture.
•
Avoid mounting under a metal roof and use
stainless steel screws for best RF transmission.
•
The maximum wireless transmission
range to the weather station is over
100 meters (330 feet) in open air,
not including walls or floors.
TX233RW Multi-sensor
• For most accurate wind speed and rainfall
readings, mount the Multi-sensor in an
open area clear for 15 meter in all directions.
• Mount with the solar panel facing south so
the wind directio n is correct. See N, S, E W,
embossed on the top of the sensor.
•
Use the bubble level on the top of the
sensor to ensure it is level, for
accurate rainfall readings.
Bubble
Level
Page | 13 WS6867

• The maximum wireless transmission range to th e station is over 100
meters (330 feet) in open air, not including w alls or trees.
• Mount sensor vertically.
• Cups should be on the top of the sensor.
•
Attach t o mounting surface with screws through the mounting
bracket.
•
The sensor can be mounted from the bott om or from the side.
Alternatively:
• Insert your own mounting pole sensor.
•
Tighten screws
• Mounting bracket would not be used.
Replace Wind Cups
1. Loosen the screw on side of cups
2. Remove cups
3. I nstall new cups
4. Tighten screw
WS6867 Page | 14

Replace Directional Vane
1. Loosen the screw on side of vane
2. Remove direction vane
3. Install new vane
4. Tighten screw
Factory Restart
The factory reset will retu rn the weather station to its default se ttings.
This will clear all previous recorded history, so you may want to write
down data before taking this step.
1. Hold the LIGHT and ALERTS buttons together for 5 seconds t o
reset the weather stati on, clear all records, and return all settings to
default.
2. The weather st
ation will fully populate, then return to a normal
display and search for outdoor sensors.
3. While searching for the outdoor sensors the Wind Speed, Outdoor
Temperature/Humidity and Rainfall totals will show dashes.
4. Once connected to the outd oor sensors (allow 3 minutes) th e Wind
Speed, Outdoor Temperature/Humidity, and Rainfall will show
current readings.
Page | 15 WS6867

WIFI Icon
STEP 1 : Hold the PLUS and MINUS buttons together for 3 seconds to
connect the station.
• The connected icon will flash (near “FORECAST”) while station is
searching for WIFI connection. It will flash up to 1 hour.
• The station must operate on AC power for the WIFI to work.
Slow Flash - no WIFI network connection-check connection
Fast Flash - configure Weather Connect APP
Solid - Connected
Not displayed -No WIFI router-check router
Note: Hold the PLUS and MINUS buttons together for 3 seconds t o
reconnect, if WIFI signal is lost.
STEP 2 : Register your weather station
Download the Weather Connect app. and register your weather station.
Weather Connect
Note: The Weather Connect
App is only for connecting your
weather station to
Weather Underground
STEP 3 : Get Connected
Download the Weather Underground app. and connect your new weather
station to Weather Unde
rground.
When connected:
• Ti me and date will come from the Internet (set your own time zone)
• View you backyard weather on your phone.
• WI-FI icon wil l animate according to signal strength.
WS6867 Page | 16

Specifications
Care and Maintenance
• Do not mix old and new batteries
• Do not mix Alkaline, Stand ard, Lithium or Rechargeable Batteries
• Always purchase the correct size and grade of battery most suitable
for the intended use.
• Replace all batteri es of a set at the same time.
• Clean the battery contacts and also those of the device prior to
battery installation.
• Ensure the batteries are installed correctly w ith regard to polarity
(+ and -).
• Remove bat teries from equi pment wh ich is not to be used for an
extended period of time.
• Promptly remove expired batteries promptly.
Page | 17 WS6867
Indoor
• Temperature Range: 0°C to 50°C ?(32°F to 122°F)
• Humidit y Range: 10% to 99% RH
• Update interval: About every 60 seconds
TH Sensor
• Temperature Range:-40°C to 60°C (-40°F to 140°F)
• Humidit y Range: 10% to 99% RH
• Update interval: About every 58 seconds
• Transmission Range:100 m(330 ft) RF 868MHz open air
• Wind Speed Range: 0-180 kMh (0-111 mph)
Multi-sensor
• Wind Direction: 0-359 degrees
• Rainfall: 0-9999 mm(0-393.7 inches)
• Update interval: About every 30 seconds
• Transmission Range:100 m
(
330 ft
)
RF 868MHz open air
Power
• Weather Station: 5 .0 Volt 500mA adapter incl uded (Primary)
• AC6: HX06-0500500-AG
• Optional Battery: 3 -AAA, IEC, LR3 batteries (not included)
• TX233RW: 3-AA, IEC, LR6 batteries (not included)
• TX233TH: 2-AA, IEC, LR6 batteries (not included)
Battery
• Weather Station: 6 0 to 48 months when using adapter.
Life
• Multi-sensor/TH sensor: over 24 mont h with reputable batteries
Dimensions
• Weather Station:204.47 W x 144.78 H x 34.54 D mm
(8.05” W x 5.70” H x 1.36” D in)
• TX233RW Multi-sensor: 345.69 W x 217.17 H x 130.55 D mm
(13.61” W
x 8.55” H x 5.14” D)
• TX233TH Sensor: 42.42 W x 155.96 H x 21.08 D mm
(1.67” W x 6.14” H x 0.83” D)

LIABILITY DISCLAIMERS
• The electrical and electronic wastes contain hazardous substances.
Disposal of electronic waste in wild country and/or in unauthorized
grounds strongly damages the environment.
• Please contact your local or/and regional authorities to retrieve the
addresses of legal dumping grounds with selective collection.
• All electronic instruments must from now on be recycled. User shall
take an active part in the reuse, recycling and recovery of the lectrical
and electronic waste.
• The unrestricted disposal of electronic waste may do harm on public
health and the quality of environment.
• As stated on the gift box and labeled on the product, reading the
“U
ser manual” is highly recommended for the benefit of the user. This
product must however not be thrown in general rubbish collection
points.
• The manufacturer and supplier cannot accept any responsibility for
any incorrect readings and any consequences that occur should an
inaccurate reading take place.
• This product is designed for use in the home only as indication of
the temperature.
• This product is not to be used for medical purposes or for public
information.
• The s
pecifications of this product may change without prior notice.
• This product is not a toy. Keep out of the reach of children.
• No part of this manual may be reproduced without written
authorization of the manufacturer.
R&TTE Directive 2014/53/EU:
Summary of the Declaration of Conformity : We hereby declare that
this wireless transmission device does comply with the essential
requirements of R&TTE Directive
LA CROSSE TECHNOLOGY
6A Rue du commerce
67118 GEISPOLSHEIM - FR
ANCE
WS6867 Page | 18
/