Page is loading ...

Version-E23-06-21
Manual
Mobile Timing
MT1

Manual
Mobile Timing MT1
- 2 -
Important Information
General
Before using your ALGE-TIMING device read the complete manual carefully. It is part of the device and
contains important information about installation, safety and its intended use. This manual cannot cover
all conceivable applications. For further information or in case of problems that are mentioned not at all
or not sufficiently detailed, please contact your ALGE-TIMING representative. You can find contact details
on our homepage https://www.alge-timing.com/
Safety
Apart from the information of this manual all general safety and accident prevention regulations of the
legislator must be taken into account.
The device must only be used by trained persons. The setting-up and installation must only be executed
according to the manufacturer’s data.
Intended Use
The device must only be used for its intended applications. Technical modifications and any misuse are
prohibited because of the risks involved! ALGE-TIMING is not liable for damages that are caused by im-
proper use or incorrect operation.
Power supply
The stated voltage on the type plate must correspond to voltage of the power source. Check all connec-
tions and plugs before usage. Damaged connection wires must be replaced immediately by an author-
ized electrician. The device must only be connected to an electric supply that has been installed by an
electrician according to IEC 60364-1. Never touch the mains plug with wet hands! Never touch live
parts!
Cleaning
Detergents can cause damage. Never submerge in water or open. The cleaning must not be carried out
by hose or high-pressure (risk of short circuits or other damage).
Liability Limitations
All technical information, data and information for installation and operation correspond to the latest
status at time of printing and are made in all conscience considering our past experience and
knowledge. Information, pictures and description do not entitle to base any claims. The manufacturer is
not liable for damage due to failure to observe the manual, improper use, incorrect repairs, technical
modifications, use of unauthorized spare parts. Translations are made in all conscience. We assume no
liability for translation mistakes, even if the translation is carried out by us or on our behalf.
Disposal
If a label is placed on the device showing a crossed out dustbin on wheels (see drawing),
the European directive 2002/96/EG applies for this device.
Please get informed about the applicable regulations for separate collection of electrical
and electronical waste in your country and do not dispose of the old devices as household
waste. Correct disposal of old equipment protects the environment and humans against
negative consequences!
Copyright by ALGE-TIMING GmbH
All rights reserved. Any duplication, either in full or in part, requires the prior written consent of the copy-
right holder.

Manual
Mobile Timing MT1
- 3 -
Declaration of Conformity
We hereby declare that the following product complies with the below stated standards. All
components used by us are CE certified by their producer and are not modified by ALGE-
TIMING GmbH.
We, ALGE-TIMING GmbH
Rotkreuzstrasse 39
6890 Lustenau
declare in sole responsibility that the radio receiver
Mobile Timing MT1
complies with the following standards/normative documents and in case of intended use com-
plies with the basic requirements of Radio Equipment Directive 2014/53/EU
Telecommunication (TC)terminal device
Applied harmonized standards:
EN 60950-1:2006+A11:2009+A1:2010+A12:2011+A2:2013
EN 62311:2008
EMC: EN301 489-17 v2.1.1. (2009-05) EN 301 489-52 V1.1.0
Radio Spectrum Efficiency:
EN 301 511 Vl2.5.l
EN 301908-1 Vll.1.1
EN 301 908-2 Vll.1.2
Additional information:
The product complies with the low voltage directive 73/23/EEC and EMC directive
2004/108EG and carries the CE sign.
Lustenau, 2019-09-26 ALGE-TIMING GmbH
Albert Vetter
(CEO)

Manual
Mobile Timing MT1
- 4 -
Table of Contents
1 Introduction .................................................................................................................. 5
2 Device description ......................................................................................................... 5
2.1 Display ............................................................................................................................. 6
2.1.1 Status Bar ............................................................................................................................................. 6
2.1.2 Bib ........................................................................................................................................................ 6
2.1.3 Time ...................................................................................................................................................... 6
2.2 Keypad ............................................................................................................................. 6
2.3 Connections ..................................................................................................................... 7
2.3.1 Timing channels.................................................................................................................................... 7
2.3.2 USB ....................................................................................................................................................... 7
2.3.2.1 Firmware Update ......................................................................................................................... 7
3 Operation ..................................................................................................................... 8
3.1 Menu ............................................................................................................................... 8
3.1.1 Channel blocking .................................................................................................................................. 8
3.1.2 Permanent trigger ................................................................................................................................ 8
3.1.3 Memo ................................................................................................................................................... 9
3.1.4 Scroll ..................................................................................................................................................... 9
3.1.5 General ............................................................................................................................................... 10
3.1.5.1 Information ................................................................................................................................ 10
3.1.5.2 Clr mem ..................................................................................................................................... 11
3.1.5.3 Sync out ..................................................................................................................................... 11
3.1.5.4 Mobile Network ......................................................................................................................... 11
3.1.5.5 GPS reception ............................................................................................................................ 13
4 GPS ............................................................................................................................. 13
4.1 Auto trim function .......................................................................................................... 14
5 Software ..................................................................................................................... 15
5.1 alge-results.com platform ............................................................................................... 15
5.2 Create account ............................................................................................................... 15
5.3 Add device ..................................................................................................................... 15
5.3.1 Evaluation software ........................................................................................................................... 16
5.3.1.1 Evaluation with Time.NET2 ....................................................................................................... 17
5.3.1.2 Time.NET Connector .................................................................................................................. 18
6 Technical data ............................................................................................................ 19

Manual
Mobile Timing MT1
- 5 -
1 Introduction
The MT1 is a high-precision timing device. Using the built-in GPS, it is automatically synchro-
nized to the time of day. It has two timing channels with 1/100,000 seconds precision. The
timing pulses are automatically sent to the internet, so the results can be seen live there. As a
result, impulse cables are no longer necessary, which is particularly advantageous for long
distances. Automatic backup to the internet makes a log paper printer obsolete. If necessary,
the start number can be entered in backup or memo mode. The MT1 has a built-in Li-ion bat-
tery and is charged via a USB C socket.
2 Device description
Power on:
Press the ON button, then confirm with the button. This is to prevent from switching on the
device unintentionally. If you only press ON, the device shows its name (ID).
Power off:
Press the OFF button for 3 seconds. The MT1 asks for confirmation. Release the OFF button
and press it again to confirm. You can abort this with the ESC or any other button.

Manual
Mobile Timing MT1
- 6 -
2.1 Display
The OLED display of the MT1 has a resolution of 128 x 64. The display is switched off after 5
minutes without activity. The display is reactivated by any button or a timing pulse.
2.1.1 Status Bar
When the device is switched on, the main menu appears. This main menu has a status bar at
the top with some icons on it. The left icon is the GPS status. Next icon from the left is the
UMTS signal strength. After power on, this icon is blinking. That means the MT1 is searching
for a mobile network operator. If the MT1 finds a mobile network operator, it stops blinking and
shows the signal strength of the mobile network. A small “o” at the icon shows that the MT1 is
online. After a short time is changes to “s”, which means that the MT1 has connection to the
www.alge-results.com server. If the MT1 receives a timing pulse, it is transmitted to the server,
which is displayed with a small arrow. The icon is crossed out if no network is available. A
blinking circle with an arrow means that there is an active network search in progress.
The third icon is the USB icon. It is strike through if there is no USB data connection. Note: A
power supply or power bank has no data connection. In this case, the icon stays strike
through.
The fourth icon from the left is the battery icon which shows the power state and state of
charge. The fifth icon shows the synchronization state. At the beginning, there is no synchroni-
zation. After synchronization, it shows the type of synchronization. Possible state is GPS,
GSM and EXT. The device must be synchronized for timing. You will not receive any
timestamp without. Standard setting is GPS synchronization, which has the highest possible
accuracy. GSM (Server) synchronization has only an accuracy of approx. 0.05s and should be
used for testing only.
At the right end you can find the name of the device for identification. This can be set from
server configuration.
2.1.2 Bib
On the main screen, a bib is blinking. To confirm the next bib press ENTER. To change the bib
enter the number and confirm with ENTER.
Note:
If you want to suppress a wrong pulse, you can enter “0”+ENTER. This disables upcoming
pulses. You can identify the disabled state with a blinking circle.
2.1.3 Time
On the bottom part of the screen you can see the running time.
On the very bottom of the screen, you can find the latest timing pulse (channel, bib and time).
2.2 Keypad
The MT1 has a splash-proof foil keyboard with 12 buttons.

Manual
Mobile Timing MT1
- 7 -
2.3 Connections
2.3.1 Timing channels
The MT1 is equipped with two timing channels on banana plugs. One green and black(C0),
and one red and black (C1) with a precision of 1/100,000 seconds.
2.3.2 USB
The MT1 device has a USB-C interface which can be used for charging and data transmission
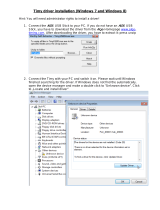
to a PC. This USB interface simulates a virtual COM port. For Windows 7 OS and older you
need a driver to use this COM port. For newer OS you can install the MT1 driver to show the
correct name in the device manager, but it is not necessary. This virtual COM port uses the
same data protocol as the Timy series and TDC 800x series.
No data connection to the PC is shown with a crossed out USB symbol.
Valid data connection to the PC and charging:
The flash symbol shows an existing external power supply. When the battery is charging the
battery symbol shows an animation. The MT1 does not have to be switched on for charging.
Note:
From firmware version V23.43, a "D" (device) is shown when connected to a PC or charger.
When connecting to a printer “H” (host) will be displayed.
2.3.2.1 Firmware Update
You need the MT1 Firmware Update software for a firmware update.
Start with installing this software; then connect the MT1 to the PC. Otherwise, it could be nec-
essary to re-attach the MT1 device. You can choose if you want to update the latest firmware
version from the internet or from a local file, which can be useful for offline installation.
As soon as the MT1 is found in the firmware update software, you can press “Start update” to
start the updating process.
After finishing the download, press the ON/ESC button to restart the device.

Manual
Mobile Timing MT1
- 8 -
3 Operation
In the main menu you can enter the next bib and confirm with .
3.1 Menu
Open the selection menu with the ESC button. Press ESC once again for returning to the main
screen. Use the arrow buttons (‘2’ for scroll up, ‘8’ for scroll down) to choose the menu item.
Press to confirm the selection.
3.1.1 Channel blocking
First menu item is the channel menu. In this menu, you can set the timing channels “Active”,
“Disabled” and “Blocked”. If a timing channel is “Disabled”, no time is stored. That is used dur-
ing breaks to avoid unnecessary data transmission. Use “Blocked” during the event when you
are not sure if the next pulse is valid or not. Use “Active” for normal operation. You can navi-
gate with the arrow buttons. To react very fast, this setting is immediately active. You do not
have to confirm. You can return to the main menu with the ESC or button.
At the main screen, you can see the current state in the left lower corner. A blinking circle
around the C is shown if channels are blocked. It is crossed out if the channels are disabled,
and it does not blink during normal operation.
3.1.2 Permanent trigger
If a timing channel is permanently triggered, the channel display starts to flash after 5 seconds
(standard). That would be the case, for example, if the photocell is misaligned. You can
change this time on the alge-results.com website under devices -> channels.

Manual
Mobile Timing MT1
- 9 -
3.1.3 Memo
With the “memo” menu you can switch to memo-mode. This mode is used if it is not clear
which competitor is next, e.g. at the finish area when you cannot see the competitor come
closer.
The bib number at the first time blinks. You can confirm the given bib with or you can enter
a new bib and confirm with .
If you want to delete an pulse, enter bib ‘0’ or press ESC and confirm with .
If you want to edit another pulse, you can exit the edit mode with 2 x ESC. Then scroll to the
desired time. Press to edit. You can enter the bib and confirm it with .
Exit the memo mode with ESC.
It can happen, that 2 competitors pass at the same time. You will get only one impulse then.
You can double the time by press+hold the ESC button for at least for 3 seconds. Confirm
time doubling with the Enter button. Repeat for more than two competitors.
3.1.4 Scroll
At the “scroll” menu, you can check the timing pulses and edit the bib information. Scroll with
the arrow buttons (2 for scroll up, 8 for scroll down) to the time you want to change. With
you can edit the bib number. Enter the new bib and confirm with . If you enter the bib ‘0’,
the time is be deleted.
Exit the scroll mode with ESC.

Manual
Mobile Timing MT1
- 10 -
3.1.5 General
This is the menu for general information and settings.
3.1.5.1 Information
General information about the MT1 device like serial number, sync setting, used memory,
software version and current accuracy of the device (only available with GPS 3D-fix and mini-
mum 10 minutes of operation and external power). Newer MT1 devices from serial number
230499xxx will show “Design2”.
When you press the arrow down (8) button in the info menu you can change the following spe-
cial settings:
3.1.5.1.1 Setup delay time
Usually the timekeeper will set the delay time on the alge-results.com website.
If it is necessary to change the delay time on the MT1 device, you can do this by pressing the
down arrow key in the info menu. The desired channel can be selected with the arrow keys.
The setting can be changed by pressing the Enter key.
If the setting on the device is changed, this is not reflected by the server.
3.1.5.1.2 Show pulse hold
The pulse hold time of a channel is only set by the timer on the alge-results.com website. The
set values can be displayed by pressing the arrow key down three times in the info menu. You
can’t change this setting on the device.
3.1.5.1.3 Time zone setting
The time zone is normally set by the timer on the alge-results.com website. This setting is only
available if no mobile network is available. This is only intended for offline use. The setting is
therefore not sent to the server.

Manual
Mobile Timing MT1
- 11 -
To change the setting, press the Enter key. You can use the arrow buttons to change the val-
ue in 0.5 hour increments. Confirm the new setting with the Enter key. Exit the menu with the
ESC key.
3.1.5.1.4 0.1s Correction
If you connect a device which has 0.1s delay like a WTN or TED(2), you can setup the 0.1
correction here for each channel. Use the arrow keys to select the channel, then press Enter
to confirm. Use the arrow buttons to select the desired setting and press Enter to confirm. This
setting is available from firmware version V23.43. You can change this setting on the MT1
device only.
3.1.5.2 Clr mem
The MT1 automatically stores all of the timing pulses. On power off procedure the times are
saved to the Flash memory. On restart of the device these times are automatically restored. If
the memory is full, the eldest timing pulse is overwritten.
Here you can delete stored times. Confirm with if you want to proceed. Otherwise press
ESC to exit.
3.1.5.3 Sync out
You can synchronize other devices with a timing pulse on C0. A confirmation is displayed at
the full minute.
Note:
This function is only available if the MT1 device itself is in synchronized state.
3.1.5.4 Mobile Network
3.1.5.4.1 Technologies and Providers
Mobile networks are constantly being improved and equipped with new functions. The evolu-
tionary steps are divided into generations, which coexist in parallel. The oldest active and
slowest generation is 2G. The difference between 2G, 3G and 4G is mainly the speed of data
transmission, but also the power consumption. Since the 4G, there have been the LTE-M and
NB-IoT sub-standards, which were specially developed for low power consumption.

Manual
Mobile Timing MT1
- 12 -
The MT1 application transfers very little data. LTE-M and NB-IoT are ideally suited for this and
have a very long range. In contrast to the current 5G standard, which is unfortunately not very
well suited for our application. In order for the transmission to work, the interaction between
the modem used and the mobile phone provider must work. The original MT1 therefore uses
the 2G and 3G standards, which are very well developed worldwide and also work very well in
remote areas. However, more and more providers are now switching off either 2G or 3G in
favor of 5G technology. The newer MT1 Design2 uses LTE-M transmission as standard. If this
technology is not available, the modem tries to work with 2G. If 2G is not available either, the
system will switch to the slowest technology, NB-IoT. This one has the highest range. But a
network search can take 45 minutes in extreme cases.
General:
The MT1 connects to the very best cellular network. If the connection to the cellular network is
disrupted, the MT1 automatically searches for a network. In this case, the impulses do not get
lost. As soon as the MT1 has a cellular network again, the timing impulses that have not yet
been transmitted are resent. The impulses that have not yet been sent are also transmitted
after restarting the device. If it is not possible to send a timing impulse, you will get the mes-
sage:
You can still work with the MT1:

Manual
Mobile Timing MT1
- 13 -
With the ESC button, the message will disappear.
With the ENTER button, the message will disappear permanently.
A "!" is shown on the display until the outstanding triggers have been transferred.
Mobile state:
This gives information about the current mobile network operator and signal quality. A value
between 0 (poor) and 31 (best) is displayed for "Signal Power". 99 means no network recep-
tion.
Search operator:
You can execute a manual search for an operator. After the search is finished, you have to
choose the one of the listed operators by pressing the number which is shown on the left. Con-
firm with the ENTER button. If no operator listed, there is no mobile network available. This
disables the automatic search function and is therefore not recommended.
Server:
Here we can change to our developer server for testing. Please use the main results server
which is www.alge-results.com. Do not change this setting.
Reconnect mobile network:
In case of a malfunction of the mobile network it can be necessary to execute a manual recon-
nect to re-establish mobile connection. This re-enables the automatic search.
In case you selected a fix operator network with the function “Search operator” you can reacti-
vate with this function the automatic search function.
Note:
If a device is switched off for a long time and it is not assigned to a competition, the internal
SIM card is automatically deactivated. This saves costs when the device is not used.
As soon as you edit the device or assign it to a competition, the SIM card will be reac-
tivated.
It can then take up to 10 minutes before the device can transfer data again. This can be accel-
erated if you select "Reconnect mobile network" or restart the device.
3.1.5.5 GPS reception
If there is no GPS available:
Below picture shows the normal operation with more than 3 satel-
lites in view. In this example there are 7 satellites in use and 26
satellites in view. You also can see the altitude and GPS signal
strength of the 7 best satellites which are used.
The GPS receiver uses GPS, GLONASS and GALILEO satellites.
4 GPS
The internal GPS receiver is always activated. You can see the status of the GPS receiver in
the upper left corner of the status bar.

Manual
Mobile Timing MT1
- 14 -
No GPS reception:
Good GPS reception with 3D-fix:
3D-Fix is displayed with four dots around the circle. The blinking dot in the middle
shows the correct reception of the highly precise second pulse.
After the device has been successfully synchronized, the GPS will be put into standby mode to
save power.
Note:
The distance between two or more MT1 devices must be at least 30 cm as otherwise the GPS
reception can be disturbed.
4.1 Auto trim function
Every clock (quartz) has a deviation. This deviation depends on temperature and aging. That
means that the clock sometimes runs faster or slower.
As soon as the MT1 receives a 3D-fix, it is able to auto trim the internal quartz. The longer the
MT1 receives a GPS signal the more accurate it gets. That eliminates influences from temper-
ature and aging. With this technique, no re-synchronization is necessary, which would cause a
time jump. Current accuracy is displayed in the info menu (see 3.1.5.1).
Note:
In battery operation, the GPS is deactivated after synchronization to save energy
(from firmware V21.C1). The quartz adjustment only works with an external power
supply.

Manual
Mobile Timing MT1
- 15 -
5 Software
5.1 alge-results.com platform
The MT1 system is maintained over the www.alge-results.com website. Open your web
browser and navigate to www.alge-results.com. Then login:
If you do not have an account, you have to create one.
Note:
IE11 and older browsers are not supported.
5.2 Create account
Then please fill in the sign up form.
At the bottom choose “register as timekeeper”. Otherwise you cannot manage devices and
events.
5.3 Add device
To manage your device, you have to add the device to your account. Switch on your MT1 de-
vice and click “REGISTER DEVICE” in your web browser.
Fill in the serial number of your device and click “CONTINUE”

Manual
Mobile Timing MT1
- 16 -
Then enter the PIN code, which is displayed on the MT1 to proof that it is your device. With
each new MT1 device you receive 2000 timing points (TP). You need these TPs for event cre-
ation (150TP) and data transmission. If you want to transfer these TPs to your account, you
have to select this here. Then click “CONTINUE”. Now you can use your MT1 device on the
alge-results.com platform.
There are three possible actions for a device:
First action is edit, where you can change the device name, time zone and synchronization
configuration and delay time. Under “trigger” you can see the received pulses.
Second action is re-read. That action reads the current status of the MT1 device.
Third action removes the device from your account.
Note:
If you want to pass your device to another person, you have to remove it from your account
first. A device can only belong to one account at a time.
To get some more information about the alge-results.com platform we provide an extra manual
at the alge-timing.com website.
5.3.1 Evaluation software
If your evaluation software can work with serial data and supports the communication protocol,
(Timy series or TDC 800x series, time of day format) it can be used to read the timestamps
directly via USB interface.
Since firmware V21.51, a distinction has been made in the protocol as to whether it is a se-
quential start number or a manually entered start number. If a start number is entered explicit-
ly, this time is marked as "correct" with an "*". This corresponds to the functionality of the Timy
Backup with STN* feature.

Manual
Mobile Timing MT1
- 19 -
Note:
If the Time.NET Connector and the evaluation software run on the same PC you need a null
modem cable (from one COM port to the other) or driver software which simulates and con-
nects two COM ports. This COM port simulator (Com0Com) can be downloaded on our web-
site. A manual how to setup this Com0Com comes with the installation.
Note:
A TCP server runs on port 4448 on the Time.NET connector. The same data is transmitted
here as via the COM port. Other programs (OPTIc3, Time.NET, IDCam, ..) that can connect to
it also receive the time stamp.
Note:
Timing pulses of non-MT1 devices are not reflected to the online platform alge-results.com
6 Technical data
Timing channel precision: 1/100,000 s
Number of timing channels: Two channels with banana connectors
Operating temperature: -20 to +65 °C
Time-base: self-calibrating TCXO quartz
Synchronization: external, via internal GPS or GSM
Operating time: 24 h at +25 °C with one impulse per minute
14 h at -20 °C with one impulse per minute
Charging time: app. 2.5 h at +25 °C
Time memory 6,700 times
Battery: Li-Ion rechargeable battery 3.6 V / 10.4 Wh (integrated)
Measurements: 22 x 74 x 34 mm
Weight: 235 g (0.5 lb)
Data connection: 2G & 3G (GSM/EGPRS/UMTS/HSDPA) (Design1)
4G/LTE-M & 2G & 4G/NB-IoT (Design2)
Roaming: worldwide
Display: OLED display with 128 x 64 pixels
/


