Page is loading ...

Easy installing: just glide and embed to
finish installing of plate
Leveler system
-8-
Cantilever Bracket
Angle Adjustable
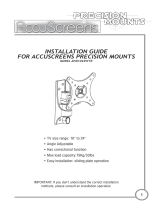
Max load capacity 25Kg/55lbs:
Important: If don't understand about right install ways,
please consult to normal installing specialist.
Important:
Thank you for choosing our productsThank you for choosing our products
INSTALLATION GUIDE
TV Size Range:10 32""~
Inside has balance adjust system
Item No.:PSWLB374Item No.:PSWLB374
MADE IN CHINA

-2-
-7-
Parts:
Has correctional function: If the wall plate were installed imbalance, you
can adjust the TV plate to lever off the assembly. Adjust angle is 10
°.
Has correctional function:
Caution: The turning angle is not too large. Or it may result in personal
injury or product damage.
Caution:
Wall Plate
4
Her Wrench
Box wrench
K
L
Qty
Description
A
B
D
F
C
E
H
G
I
J
4
4
4
4
8
4
3
3
3
1
1
M4x12mm bolt
M4x16mm bolt
M5x12mm bolt
M8x16mm bolt
M5x16mm bolt
M6x16mm bolt
ID
Hardware List:
Long Bolt
Wall Anchor
A-F
KG
HI
Long Bolt Washer
Lengthen staff(J)
TV Plate
Lengthen staff
C
Plastic Cover
Caution : This Product LCD /Plasma Wall Mount Bracket is
intended for use only with the maximum weights indicated .See
apparatus instructions .Use with products heavier than the maximum
weights indicated instability causing possible injury .
Caution :
Use to adjust the degree of those joints.Wrench
Arm Assembly
-520°~ °
20°
±90°
±180°
±°90
L

-6-
-3-
Use an electronic detector in lay position to detect the position of batten,
then making a mark. Put the wall mount in the installing position flatly,
using it as template, lining out holes in the batten. Using a aiguille of
dia.4.5mm to drill three 50mm deep holes. Securely mount the wall plate
with supplied Long bolts(G) and washers(I) by Box wrench(L). As shown in
Fig1.
Fig 1
Installing ways of batten wallInstalling ways of batten wall
Warning: Some TV require two people
to lift, as we are not responsible for any
personal injury or product damage due
to mishandling.
Warning:
Fig 6
Display Adjustments
Function -Horizontal leveling of the display.
Operation -Grasp the sides of the display, and roll it into the desired
position. Then adjusting Roll Tension .
1 Adjusted with the TV plate .
With circumvolve the wall Plate ,TV can adjust in the direction of left
right up and down Vertical Adjusting Angle is from 5° to 20°.
level Adjusting Angle is 20°
.
,
,. -
.
Angle adjusting
Roll ControlRoll Control
Step1 Choose fitting position on the wall.
.Make sure the position that you want installedthe wall plate
Step1 Choose fitting position on the wall.
.
Step2 Installing wall mount
This product offers two installing ways: wooden wall and cement wall.
Determine your mounting type and proceed accordingly.
Step2 Installing wall mount
Important: Make sure there is enough space to spread LCD, considering
the show size.
Important:
Step4 Hang the display
Firstly lift up the TV plate installed the LCD, making the trough on the
arm fit to the trough on it ,according trough to embed the TV plate into
the wall plate.
Step4 Hang the display
Once the TV is positioned in place,
fasten the Tighten Bolts on Receiving
Joint clockwise to secure the display
to the Arm Assembly.
Tighten bolt
2 Adjusted with the arms.
With circumvolve the arms, TV can turning to two sides of wall until
touch the wall. First joint adjusting angle is ±90°,second is ±180°,
third is ±90°.
.
Choose the desired angle and turn clockwise the Tension Knob on the right
of the arm.
50
4.5
G
I
L

-4-
Carefully:Wall anchor is just fit for cement and beton wall. Don't use wall
anchor in drywall to install bracket.
Carefully:
-5-
Installing ways of cement and beton wallInstalling ways of cement and beton wall
Put the wall mount flatly in the installing position,using it as template,
lining out the hole on the wall.Use a aiguille of dia.10.5mm to drill three
50mm deep holes,Insert the wall anchor(H) into the mounting holes, and
lightly tap them flush to the wall with a hammer. Securely mount the
wall plate with supplied Long bolts(G) and washers(I) by Box wrench(L).
As shown in Fig2.
Fig 4
Step3 Installing the LCD
Carefully:
According LCD hole's size, deep, position to choose bolts. Using chose
bolts(A-F) to install the LCD on the plate or staff. If your display > VESA
100, you need to use lengthen staff between your display and this plate.
According your display hole’s size, position to choose Installation lengthen
staff. As shown in Fig 5.
Install the Lengthen staff(J) directly to
the plate by using bolts(C) provided.
(Fig 6) capitulum down.Note:
Don'tforcethebolttoLCD
hole, avoiding damage to people and
instrument. Don't use electronics drill
to fasten blot.
Step3 Installing the LCD
Carefully:
Note:
Assembly
hole(plate)
Assembly
hole(plate)
For M6,M8
blots to LCD
Fig 5
Fig 6
C
C
For M4,M5
blots to LCD
TV Plate
A-F
Capitulum
J
J
Installing the Plastic Cover
Secure the separated Plastic Cover over the
Wall Plate by pushing them toward each
otheruntiltheylockinplace.SeeFig.3.
Installing the Plastic Cover
Fig 3
Fig 2
G
H
Φ10.5mm
50mm
I
L
Balance-adjusting
Using balance-adjusting system on the plate,
make sure whether wall plate is installed
balance. If not, then slide the wall plate let
pointer level in the center position.
/