Page is loading ...

NO PART LIST QTY
BACK REST 1PC
SIDE PANEL
(L)
SEAT
METAL LEGS
ITEM HARDWARE QTY
JCBB SCREW
M8 x 50MM
SPRING WASHER
FLAT WASHER
SCREW
M6 x 35MM
L - KEY
M5 x 65MM
1PC
1PC
1PC
4PCS
14PCS
12PCS
14PCS
1PC
R
L
STEP 1 STEP 2
STEP 3 STEP 4
1
2
3
4
5
A
B
C
D
E
A
E
1
3
2
4
2
3
A
E
C
D
C
D
Your assembly is now completed
ITEM : CLARA- LOVE SEAT
3
2
1
4
31
4
STEP 5
BACK CUSHION
BACK CUSHION COVER
STEP 6
6
2PCS
BACK CUSHION
COVER
4
6
6
SIDE PANEL
(R)
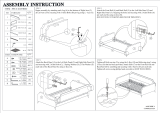
Insert the back rest metal plates to
both arms as shown above. Ensuring
it is correctly in place
Join the arms with the seat by using 2
bolts (A), 2 flat washer (D), 2 spring
washer (C) aligning & going through
the pre-drilled holes as shown below.
Insert the support leg (8) to the
bottom of seat (4) as picture
shown
Install metal leg (5) by securing with
the 3 bolts (B) using L-key (F).
Unpack the back cushion
from vacuum bag
Gently pat the back cushion before
insert into the cover
Please do not tighten the hardware until the entire assembly is completed.
Put the back cushion with cover as
shown.
Parts are keep in the compartments
under the seat (4) as shown. Carefully
unpack all of the parts & hardware to
identify them and ensure to have all
the parts needed for the assembly.
1 . Back Rest x1
2 . Side Panel (L) x1
3 . Side Panel (R) x1
4 . Seat x1
5 . Metal Legs x4
6 . Back Cushion x2
7 . Back Cushion Cover x2
8 . Hardware Bag
Parts :
7
BACK CUSHION 2PCS
7
7
5.1 5.2
5
1PC
L - KEY
M4 x 65MM
F
JCBC
F
B
14PCS
8
SUPPORT LEGS
WITH ADJUSTABLE FEET
1PCS
/


