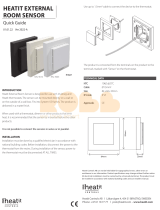
HEATIT Z-Push User guide

Type
User guide

HEATIT Z-Push is a wireless wall-mounted Z-Wave controller that offers flexible control options for your smart home devices. With its interchangeable fronts, you can choose between 1, 2, or 3 rocker switches to suit your needs. The dual-color LED indicators provide visual feedback for button actions. Easily integrate the HEATIT Z-Push into your Z-Wave network using either standard manual inclusion or SmartStart automatic inclusion. The device can be programmed to control various Z-Wave products, set scenes, and work in association with other smart devices.

HEATIT Z-Push is a wireless wall-mounted Z-Wave controller that offers flexible control options for your smart home devices. With its interchangeable fronts, you can choose between 1, 2, or 3 rocker switches to suit your needs. The dual-color LED indicators provide visual feedback for button actions. Easily integrate the HEATIT Z-Push into your Z-Wave network using either standard manual inclusion or SmartStart automatic inclusion. The device can be programmed to control various Z-Wave products, set scenes, and work in association with other smart devices.

Heatit Controls AB can not be held liable for typographical errors, other errors or
omittances in our information. Product specifications may change without further notice.
All electrical installations must be carried out by a licensed electrician. The product must
be installed in accordance with national building codes and our installers manual.
Heatit Controls AB l Läkarvägen 4, 454 31 BRASTAD, SWEDEN
Phone: +47 61 18 77 77 l [email protected]www.heatit.com
INTRODUCTION
The Heatit Z-Push Wall Controller is a wireless wall mounted Z-Wave
Controller. It has mounting options for 1, 2 or 3 rockers, allowing for easy
and practical management of your Z-Wave products. The switch can
be set up to control scenarios or work in association with other Z-Wave
products. Each rocker switch has a dual color LED to indicate button
actions. The Heatit Z-Push Wall Controller is supplied with all three sets
of rockers in the box. The switch fits into System 55 frames.
STATEMENT REGARDING PRODUCTS FROM MULTIPLE
MANUFACTURERS
Please read this before installation
This device may be used with all devices certified with the Z-Wave Plus™
certificate and should be compatible with such devices produced by
any manufacturer. Every primary controller is different depending on
the manufacturer, their target audience and intended use/application.
Please review the functionalities implemented by the primary controller
you intend to use with our Z-Wave Plus certified device to ensure that it
provides the necessary controls to take full advantage of our product’s
capabilities.
INSTALLATION
Installation must be done by a qualified electrician in accordance with
national building codes. Before installation, disconnect the power to the
device from the mains. During installation of the device, power to the
device must be disconnected AT ALL TIMES!
1. Choose and mount the front, which covers your needs (for more
information, see chapter ”Choosing the correct front/assembly”
described in the complete manual).
2. Gently pull the battery plastic tag to power the product.
3. Start the adding procedure from your primary controller.
4. Press any UP button 6 times in a rapid sequence on the device (the
device has a label on the battery cover, pointing towards the UP
buttons). Your device is now added in your primary controller.
5. Install the device in your preferred location.
a. Fix the metal mounting bracket on the wall box or directly
on the wall using the supplied screw kit.
b. Place the device in the wall frame with arrows shown on
label pointing upwards.
c. Press the device and wall frame onto the metal mounting
bracket.
Note: The rocker fastening clips may become looser after having been
mounted and unmounted many times.
ADD/REMOVE
There are two ways to add your devices in a Z-Wave network:
Method 1: Standard (manual)
Please refer to your primary controller manual on how to set the
primary controller in add/remove mode. The device can only be added
or removed from the network if the primary controller is in add/remove
mode.
1. Initiate the learning mode in the controller.
2. Press any UP button 6 times within 3 seconds.
When the learning mode has started, the LED corresponding to the
button you pressed will blink green. The device will indicate ”Success by
emitting a green light for 3 seconds.
Error while adding:
The learning mode times out after 30 seconds if the Heatit Z-Push Wall
Controller does not receive any information from the gateway.
The device will indicate ”Fail” by emitting a red light for 3 seconds,
if this happens, please perform a removing process from the controller
before restarting learning mode.
Method 2: SmartStart (Automatic)
Please refer to your primary controller/gateway to see if SmartStart
is supported by the controller. SmartStart enabled products can be
TECHNICAL DATA
Protocol Z-Wave Plus, 868.4MHz
Chip Z-Wave 700 chip
Battery 1 x CR2450 battery
Est. battery life Estimated 1 year (with default settings
and max. 10 pushes per day)
Buttons 1, 2 or 3 rockers
Ambient temperature 5°C to 40°C (0°C to 40°C storage)
Humidity Max 95% RH
Range RF Min. 40 meters
IP Code IP 20
Size (LxWxH) 55 x 55 x 14mm
Approvals Z-Wave Plus V2
CE
RoHS 2002/95/EC
2002/96/EC (WEEE)
1999/5/EC (RTTE)
Read the full manual at:
manuals.heatit.com
HEATIT Z-PUSH
WALL CONTROLLER
Quick Guide
Ver 2021-A
added into a Z-Wave network by scanning the Z-Wave QR-Code found
on the product with a controller providing SmartStart inclusion. No
further action is required and the SmartStart product will be added
automatically within 10 minutes of being switched on in the network
vicinity.
If the device already belongs to a network, follow the removing process
before adding it to your network. Otherwise, the adding of this device
will fail. When the device is removed from the network, the device will
revert to factory settings.
White RAL 9010
White RAL 9003
Black
Heatit Controls AB tar forbehold om typografiske feil, andre feil eller mangler i vår
informasjon. Produktspesifikasjoner kan bli endret uten ytterligere varsel. Alle elektriske
installasjoner skal utføres av autorisert installatør. Produktet skal installeres i henhold til
gjeldende NEK 400 og installasjonsveiledning.
Heatit Controls AB l Läkarvägen 4, 454 31 BRASTAD, SWEDEN
Phone: +47 61 18 77 77 l [email protected]www.heatit.com
INNLEDNING
Heatit Z-Push Wall Controller er en Z-Wave-bryter for montering på
vegg. Den leveres med tre fronter, slik at du kan velge mellom 1, 2 eller
3 vippebrytere. Dette gjør det enkelt og praktisk å administrere Z-Wave-
produktene dine. Bryteren kan settes opp for å kontrollere scenarier
eller virke sammen med andre Z-Wave-produkter. Hver vippebryter
har en LED med to farger for å indikere handlinger. Heatit Z-Push Wall
Controller leveres med alle tre vippebryterfronter.
Bryteren passer inn i System 55 rammer.
ERKLÆRING VEDRØRENDE PRODUKTER
FRA ULIKE PRODUSENTER
Les dette før installasjon
Denne enheten kan brukes sammen med andre enheter som er
sertifisert med Z-Wave Plus™- sertifikatet og bør være kompatibel med
slike enheter fra andre produsenter. Hver gateway er forskjellig avhengig
av produsent, målgruppe og tiltenkt bruk/applikasjon. Vennligst les
gjennom bruksmulighetene som inngår i din gateway for å sikre at du
kan få full nytte av enhetens funksjoner.
INSTALLASJON
Produktet skal installeres av autorisert installatør i henhold til norske
bygg-forskrifter. Før installasjonen må all strømtilførsel til enheten kobles
fra. Spenningen til enheten MÅ TIL ENHVER TID være frakoblet under
montering.
1. Velg front og montér den fronten som dekker dine behov (for mer
informasjon, se kapittel ”Choosing the correct front/assembly” i den
engelske hovedmanualen).
2. Fjern batteribeskyttelsen.
3. Start inkluderingprosedyren fra gatewayen/kontrolleren.
4. Trykk på hvilken som helst opp knapp 6 ganger i rask rekkefølge
(enheten har en etikett på batteridekslet som peker mot opp
knappene). Enheten din er nå inkludert i Z-Wave-gatewayen.
5. Montér enheten på ønsket sted.
a. Fest monteringsbraketten av metall på veggboksen eller
direkte på veggen ved hjelp av det medfølgende skruesettet.
b. Plasser enheten i plastrammen slik pilen viser oppover på
etiketten.
c. Klikk enheten med plastrammen på metallbraketten.
NB! Vippene på frontene kan bli løsere etter å ha blitt montert og
demontert mange ganger.
INKLUDERING/EKSKLUDERING
Det er to måter å inkludere enheten i Z-Wave nettverket:
Metode 1: Standard (manuell)
Vennligst sjekk gatewaymanualen for hvordan du setter gatewayen
i inkluderings-/ekskluderingsmodus. Enheten kan bare inkluderes
eller ekskluderes fra nettverket hvis gatewayen står i inkluderings-/
ekskluderingsmodus.
1. Start inkluderingsmodus i gatewayen.
2. Trykk på hvilken som helst oppknapp 6 ganger i løpet av 3 sekunder.
Når inkluderingsmodus har startet, vil lysdioden som tilsvarer knappen
du trykket på, blinke grønt. Enheten vil indikere vellykket inkludering
ved at LED lyser grønt sammenhengende i 3 sekunder.
Feil ved inkludering:
Inkluderingsmodus får tidsavbrudd etter 30 sekunder hvis Heatit Z-Push
Wall Controller ikke får kontakt med gatewayen. Enheten vil indikere feil
ved at LED lyser rødt sammenhengende i 3 sekunder. Hvis dette skjer,
må du kjøre en ekskluderingsprosess fra gatewayen før du restarter
inkluderingsmodusen.
Metode 2: SmartStart (Automatisk)
Sjekk om din gateway har støtte for SmartStart. SmartStart-aktiverte
produkter kan legges til i et Z-Wave-nettverk ved å skanne Z-Wave
QR-koden som finnes på produktet så lenge gatewayen har støtte
for SmartStart-inkludering. Ingen ytterligere tiltak er nødvendig, og
TEKNISKE DATA
Protokoll Z-Wave Plus, 868,4MHz
Chip Z-Wave 700 chip
Batteri 1 x CR2450 batteri
Levetid batteri Ca. 1 år (med standardinstillinger og maks.
10 trykk pr. dag)
Brytere 1, 2 eller 3 vippebrytere
Omgivelsestemperatur 5°C til 40°C
(0°C til 40°C lagringstemperatur)
Luftfuktighet Maks. 95% RH
Rekkevidde RF Min. 40 meter
IP-klasse IP 20
Størrelse (LxBxH) 55 x 55 x 14mm
Sertiseringer Z-Wave Plus V2
CE
RoHS 2002/95/EC
2002/96EC (WEEE)
1999/5/EC (RTTE)
Komplett engelsk manual:
manuals.heatit.com
HEATIT Z-PUSH
WALL CONTROLLER
Quick Guide
Ver 2021-A
SmartStart-produktet blir lagt til automatisk innen 10 minutter etter at
det er slått på i nettverksområdet.
Hvis enheten er lagt til i et annet Z-Wave-nettverk, gjennomfør først en
ekskluderingsprosess før du legger enheten til i nettverket igjen, ellers
vil inkluderingsprosessen mislykkes. Når enheten ernes fra nettverket
vil den gå tilbake til fabrikkinnstillinger.
Hvit RAL 9010
Hvit RAL 9003
Sort
  • Page 1 1
  • Page 2 2

HEATIT Z-Push User guide

Type
User guide

HEATIT Z-Push is a wireless wall-mounted Z-Wave controller that offers flexible control options for your smart home devices. With its interchangeable fronts, you can choose between 1, 2, or 3 rocker switches to suit your needs. The dual-color LED indicators provide visual feedback for button actions. Easily integrate the HEATIT Z-Push into your Z-Wave network using either standard manual inclusion or SmartStart automatic inclusion. The device can be programmed to control various Z-Wave products, set scenes, and work in association with other smart devices.

Ask a question and I''ll find the answer in the document

Finding information in a document is now easier with AI

in other languages