Page is loading ...

1
2
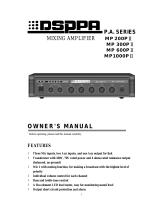
P.A. Series3
4
Mixing Amplifier
5
MP210U/MP310U/MP610U/MP1010U6
7
8
9
10
11
12
13
14
15
16
O W N E R ’ S MA N U A L17
18
Welcome to use the public address system manufactured. For the better application of this
19
equipment, please read the operation instruction carefully prior to use.
20

1
TABLE OF CONTENTS
2
3
FEATURES...................................................................................................................................... - 1 -
4
FRONT PANEL..............................................................................................................................- 2 -
5
REAR PANEL.................................................................................................................................- 3 -
6
ONNECTIONS (without multi-zone outputs).............................................................................. - 4 -
7
CONNECTIONS (with multi-zone outputs)................................................................................ - 4 -
8
Instructions to Infrared Remote Controller...................................................................................- 5 -
9
Operating Instructions....................................................................................................................- 6 -
10
PRECAUTION OF INSTALLATION...........................................................................................- 8 -
11
12
13
14
15
16
17
18
19
20
21
22
23
24
25
26
27
28
29
30
31
32
33
34
35
36
37
38
39
40
41

DSPPA MIXING AMPLIFIER
- 1 -
FEATURES1
The integral broadcasting power amplifier integrating MP3 player, FM tuner, partitioner (6 partitions),
2
preamplifier and power amplifier.
3
MP3/TUNER is subject to remote control, and it is possible to control the conversion between MP3/TUNER,
4
selection of program, adjustment of volume, option repeat mode, and selection of EQ mode and so on by
5
means of infrared remote control;and selection USB/SD.
6
LED digital tube displaying volume, playing status, program number and so on.
7
2MIC inputs,3AUX inputs, and 1AUX output.
8
4-16Ω rated output.
9
6-zone output.
10
Individual volume control and output level indication for each zone output.
11
Mute function for priority input.
12
Treble and Bass control
13
Chime with priority output
14
5-unit LED Meter for monitoring volume output in each zone.
15
Output short circuit protection and caution.
16
17

DSPPA MIXING AMPLIFIER
- 2 -
FRONT PANEL
1
2
3
4
5
6
7
8
9
10
11
12
13
14
15
16
17
18
19
20
1. Power Switch
21
2. LED Power Indicator
22
3. Bass Adjustment Button
23
4. Treble Adjustment Button
24
5. Line Input Volume Adjustment Button
25
6. MIC Input Volume Adjustment Button
26
7. MIC 1 Priority Input Jack
27
8. Zone Volume Adjustment Button (1-6)
28
9. Zone Level Indicator
29
10. Chime Button
30
11. MP3 SD Jack
31
12. MP3/tuner select key
32
13. MP3/tuner status operation key
33
14. MP3/tuner status operation key
34
15. MP3/tuner status operation key
35
16. MP3 USB Jack
36
17. MP3/tuner status display
37
18. Five-unit LED Level Meter
38
39
Note:
40
When all five units of the LED level meter remain lit, it indicates that the sound is distorted. In such case,
41
adjusting each volume adjustment button until LED unit 4 (+8dB) and LED unit 5 (+10dB) flash.
42
18 17 16 15 14 13 12 11 10 9
1 2 3 4 5 6 7 8

DSPPA MIXING AMPLIFIER
- 3 -
1
2
3
REAR PANEL
4
CH4CH1 CH3CH2 CH5 CH6
SPEAKER OUTPUT
ZONE OUTPUT
4-16Ω
~240V/50Hz/6A
MIN MAX
INPUT
MUTE
AUX1 AUX2
OUT
AUX3
MIC4 VOLMIC3 VOL
5
2
1
3
0
4
10
9
8
7
6
5
2
1
3
0
4
10
9
8
7
6
FM ANTENA
FM(75? )
Nur Sicherung 250V
Use Only With A 250V Fuse
Employer Unlquement Avec
Fusible De 250V
6
7
8 91415 10
1 2 3 4
5
MIC2
+
-
F4AL250V
COM 100V COM 100V COM 100V COM 100V COM 100V COM 100V
MIC3 IN MIC4 IN
PHANTOM
MIC
PHANTOM
MIC
1112 13
5
6
7
1. Mute control Button
8
2. MIC 2 Input Jack
9
3. AUX Input Jack 1, 2, 3
10
4. AUX Output Jack
11
(Link with another amplifier or recording equipment)
12
5. 6-zone Output
13
6. AC Power Source Insert
14
7. Fan Exhaust Window
15
8. Speaker Output Terminal
16
9. AC Power Fuse
17
10. FM antenna Jack
18
11. MIC4 Input Jack
19
12. MIC3 Input Jack
20
13. Microphone and phantom power supply switching key
21
14. MIC4 Input Volume Button
22
15. MIC3 Input Volume Button
23

DSPPA MIXING AMPLIFIER
- 4 -
CONNECTIONS
(without multi-zone outputs)1
2
3
4
CH4CH1 CH3CH2 CH5 CH6
SPEAKER OUTPUT
ZONE OUTPUT
4-16Ω
~240V/50Hz/6A
MIN MAX
INPUT
MUTE
AUX1 AUX2
OUT
AUX3
MIC4 VOLMIC3 VOL
5
2
1
3
0
4
10
9
8
7
6
5
2
1
3
0
4
10
9
8
7
6
FM ANTENA
FM(75? )
Nur Sicherung 250V
Use Only With A 250V Fuse
Employer Unlquement Avec
Fusible De 250V
MIC2
+
-
F4AL250V
COM 100V COM 100V COM 100V COM 100V COM 100V COM 100V
MIC3 IN MIC4 IN
PHANTOM
MIC
PHANTOM
MIC
5
6
7
CONNECTIONS
(with multi-zone outputs)8
9
10
11
CH4CH1 CH3CH2 CH5 CH6
SPEAKER OUTPUT
ZONE OUTPUT
4-16Ω
~240V/50Hz/6A
MIN MAX
INPUT
MUTE
AUX1 AUX2
OUT
AUX3
MIC4 VOLMIC3 VOL
5
2
1
3
0
4
10
9
8
7
6
5
2
1
3
0
4
10
9
8
7
6
FM ANTENA
FM(75? )
Nur Sicherung 250V
Use Only With A 250V Fuse
Employer Unlquement Avec
Fusible De 250V
MIC2
+
-
F4AL250V
COM 100V COM 100V COM 100V COM 100V COM 100V COM 100V
MIC3 IN MIC4 IN
PHANTOM
MIC
PHANTOM
MIC
12
13
14
15
16
Note:17
Individual zone opening and closing may be achieved by adjusting Zone Volume Adjustment Button on18
Front Panel.19
20
21
MIC 3
MIC 4
Tuner, CD,
Cassette
Recorder or
another Amp.
To MIC 1 Input
Jack on Front Panel
MIC 1 with Priority
Input
MIC 2
Tuner, CD,
Cassette
Recorder or
another Amp.
MIC 1 with Priority
Input
To MIC 1 Input
Jack on Front Panel
MIC 2
MIC 3
MIC 4

DSPPA MIXING AMPLIFIER
- 5 -
Instructions to Infrared Remote Controller
1
1. MP3/TUNER switch button.
2
2. Mode:MP3 and tuner conversion button.3
3. Mute: MP3/TUNER mute button. Press this4
button once, and the content displayed in LED5
will flash after the played program is muted;
6
and then press this button to cancel the mute.7
4. MP3 play/pause operation button, tuner memory
8
channel call button: press this button repeatedly9
to select the memorized channel progressively in
10
order.11
5. MP3 backward song selection button, radio
12
backward channel selection button.
13
6. MP3 forward song selection button, radio forward
14
channel selection button.
15
7. EQ: Under MP3 output mode, with the Class mode, Jazz mode, Rock mode,
16
Bass mode and Pop mode. This button is also used for calling memorized channel by tuner.
17
8. VOL-: MP3/TUNER volume decrease button.18
9. VOL+: MP3/TUNER volume increase button.19
10. 0-9 numerical keys: They are used to input the serial number of MP3 chapter and memorizing number of tuner20
channel.21
11. U/SD: It is used by tuner to search the memorized channel automatically.22
12. RPT: Selection of MP3 repeat mode including repeat one and repeat all.23
24
25
26
27
28
29
30
31
1
2
4
7
8
10
3
5
6
9
11
12

DSPPA MIXING AMPLIFIER
- 6 -
Operating Instructions
1
According to the connecting diagram above, connect the circuit of the system properly, plug in the power
2
supply in case of no mistake in check, and then turn on the power switch on the front panel. After such startup,
3
this equipment will play the program which is played upon the previous shutdown in the default state. For
4
example, the radio program is being played upon the previous shutdown, the radio program will be played
5
automatically upon this startup. In order to play the MP3 program, please press “MP3/TUNE” button or the
6
“Mode” button on the infrared remote controller (please refer to the instructions to the infrared remote controller)
7
for conversion.
8
9
1. To play MP3 program
10
1) Begin to play: Convert to the status of MP3 play by the above means (no such operation if it is playing
11
MP3 program), insert the U disk storing MP3 programs into the USB interface, and the machine will play
12
automatically. Use the button 12 and 13 on the panel of machine (refer to the instructions to the front panel) or the
13
infrared remote controller (refer to the instructions to the infrared remote controller) to select the chapter to be
14
played, and make use the button 4 to pause the play.
15
2) Selection of repeat mode: MP3 may use the infrared remote controller to select the repeat mode of the
16
program with the options of repeat one and repeat all. Press the button “RPT” once, and LED will display “ONE”
17
indicating the repeated playing of the current played chapter; press button “RPT” again, and LED will display
18
“ALL” indicating the repeated playing of all the chapters on the U disk.
19
3) Selection of EQ mode: MP3 in this machine has five (5) EQ modes, including Class mode, Jazz mode,
20
Rock mode, Bass mode and Pop mode. It is allowed to select by use of the button “EQ” on the infrared remote
21
controller. When pressing the button “EQ”, the digital tube will display “Eq0” through “Eq4”. When pressing
22
continuously, five modes such as “Eq0\Eq1\Eq2\Eq3\Eq4” will appear in order, from which the user can select as
23
required.
24
4) USB/SD: The MP3 player of this device can play the program from the USB port, and also from the SD
25
interface, and select the last inserted memory to play program in it. For example, if it is playing the program from
26
the USB port now, and a SD card is inserted into the device, it will play the MP3 program automatically from the
27
SD card.
28
29
2. To play radio channel program of tuner
30
Convert to the “TUNE” play mode by the above means, and then begin to play the radio program.
31
1)Search channel: Before playing, the user shall first search the radio channel. For this machine, there are
32
two operating methods for searching channel.
33
a. Search the radio channel with the MP3 song selection buttons on the infrared remote controller. Press the
34
song selection button once, the radio frequency will increase or decrease by 0.1MHz. Press the button
35
continuously to enable the frequency to increase or decrease to certain channel. By such method, the searched
36
channel will not be memorized in the channel memorizing number. However, the machine itself has the memory
37

DSPPA MIXING AMPLIFIER
- 7 -
function, so the channel played upon the shutdown will be played automatically upon the next startup. radio
1
b.By use of the button “ ” on the machine panel or the button “U/SD” on the infrared remote controller,
2
it is allowed to search from low-frequency stage to high-frequency stage automatically. The searched channels
3
will be memorized in turn in the memorizing numbers starting from 1 so as to facilitate the direct calling of the
4
channel.
5
2) Calling channel: It is allowed to directly call and play the channels searched and memorized by automatic
6
search. The buttons “ or ” on the panel are used to select forward and backward the memorizing
7
number to call the channel for play or the buttons “ or EQ” on the infrared remote controller or the digital
8
keys from “0-9” to select the memorizing number to call the channel for play.
9
10
Prompt:
11
In the event that this machine is not inserted with U disk prior to startup, the radio
12
program will be played automatically upon startup. At this moment, the U disk is inserted to
13
convert to the MP3 play status automatically.
14

DSPPA MIXING AMPLIFIER
- 8 -
MUTE FUNCTION
1
MIC 1 Input Jack and Chime Button have the highest level of priority. Input signals from them can override
2
other input signals. The grade of this MUTE function can be adjusted.
3
4
5
6
7
8
9
PRECAUTION OF INSTALLATION10
11
1. Do not block ventilation holes.
12
2. The amplifier should not be placed in any of the areas:
13
1) with poor ventilation;
14
2) exposed to direct sunlight;
15
3) with high ambient temperature or adjacent to heat-generating equipment;
16
4) with high humidity or heavy dust;
17
5) susceptible to vibration.
18
3. Make sure the power outlet conforms to the plug of the unit.
19
4. Do not use this unit if the electrical power cord is frayed or broken.
20
5. Always operate the unit with the ground wire
21
6. If a short alarm rings after turning on power and inputting signals, there must be an output short circuit fault.
22
In such case, power should be cut off immediately. Do not turn on the power until the fault is removed.23
24
25
26
27
28
29
30
MUTE
MIN MAX

DSPPA MIXING AMPLIFIER
- 9 -
SPECIFICATIONS
1
2
Specifications are subject to change without notice
3
Model
MP-210U
MP-310U
MP-610U
MP-1010U
Rated Output
60W
120W
250W
350W
Output Regulation
Less than 3dB, from off-load to full load
Input sensitivity
Microphone : ≤3mV (unbalanced)
Line: ≤300mV (unbalanced)
Frequency Response
80Hz-16kHz (±3dB)
Distortion
Less than 1% (at 1kHz, 1/3 rated output voltage)
Ratio of
Signal to Noise
MIC: more than 71dB
LINE: more than 85dB
Tone
Bass: ±10dB(at 100Hz)
Treble: ±10dB(at 10kHz)
Protection
DC voltage; overload; short-circuit.
Mute
Input signals from MIC 1 override other input signals
Power
Requirements
AC 220-240V/50-60Hz
Power
Consumption
120W
250W
500W
650W
Outer Packing Size(mm)
(L×W×H)520×430×195
Unit Size (mm)
(L×W×H)418×338×88
Gross Weight
11.7kg
13.5kg
16kg
17kg
Net Weight
9.7kg
11.5kg
14kg
15kg
4
5
6
7
8
9
10

DSPPA MIXING AMPLIFIER
- 10 -
1
2
3
4
5
6
7
8
9
10
11
CAUTION
● When the “Power switcher” is off, please pull out the power cord from the socket.
Please keep the equipment out of water.
● To reduce the risk of electric shock, do not remove the cover.
● Please contact us or authorized dealers for servicing.
● The symbol on rear panel indicates hazardous live. The connection of these terminals must be
operated by the instructed person.
● The unit connect to the mains by the plug. Pull out the plug when the unit is in fault or danger status.
So the socket for the unit plugging must be set in the place can be easy to plug into and pull out the
plug.
/