Page is loading ...

Instruction / Installation Sheet
66 Clip Connection Block
No. 5540
DISTRIBUTED BY: HOME DEPOT U.S.A., INC.
2455 PACES FERRY RD., N.W.
ATLANTA, GA 30339
FOR ASSISTANCE, CALL:
1-800-394-7519
HOMEDEPOT.COM
MADE IN CHINA
Parts Included:
● 50 Pair 66 Block
● 89D Mounting Bracket
● 50 Binding Clips
Tools Needed:
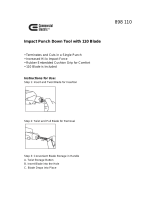
● Impact Punch-Down Tool with 66 Blade
● Screw Driver
● Wire Cutter and/or Wire Stripper
The CE Tech 50 Pair 66 Block can be mounted vertically or horizontally on various surfaces.
Typical installations are mounted vertically on a plywood panel.
Installation Instructions:
Step 1: After determining your desired location, detach the 89D Mounting Bracket from the 50 Pair 66 Block by gently pulling each of the four (4) clips
that hold them together. Mount the 89D Mounting Bracket to the plywood panel with two (2) wood screws (screws not included).
Step 2: Route your cables through the top and/or bottom of the 89D Mounting Bracket, then back out either the left and/or right side. Place the 50 Pair
66 Block on the 89D Mounting Bracket and “click” into place.
Step 3: To terminate conductors, remove the minimum amount of the cabling jacket from the UTP cables (or similar).
NOTE: When Cat 5e performance is needed, it is necessary to insure proper pair twisting of the UTP cable. Do so by removing minimum
amount of cabling jacket. The pair twist must come within ½ inch of the points of termination.
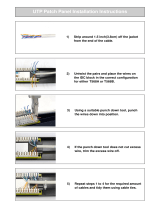
Step 4: Leaving each twisted pair together, route wire pair through the desired slot. Place each wire in its own clip adjacent to the slot the wire pair is
routed through. Terminate each wire to the corresponding clip using an Impact Punch-Down Tool with 66 Blade.
NOTE: To prevent damage to the clips on the block, keep the Impact Punch-down Tool perpendicular to the block while punching down wires.
Step 5: Route cross-connect wire pairs through the same slot that the desired horizontal or backbone cable pair is located. Bridging clips are included
for use where applicable.
NOTE: Use wire cutters to remove any excess wire after punch down at the point of termination.
5540 Rev. 1
CE Tech’s products shall be installed and used only as indicated in CE Tech’s product instruction sheets.
Caution:
• Never install low voltage wiring during lighting storms.
• Never touch un-insulated wires or terminals unless the wire has been disconnected at its network interface.
• Use caution when installing or modifying data or telecommunication lines.
• DO NOT alter, change, or disconnect existing telecommunication wires if you are unsure of their purpose or function.
• It is NOT recommended to install this product in close proximity to an electrical service panel to prevent interference from electrical current.
Important Instructions:
• Read and understand all instructions.
• Do not use this product near water, for example near bath tub, wash bowl, kitchen sink, or laundry tub, in a wet basement, or near a swimming pool.
• SAVE THESE INSTRUCTIONS.
Step 1 Step 2 Step 3 Step 4 Step 5

Hoja de Instrucciones / Instalación
Bloque de Conexión de 66 Sujetadores
Núm. 5540
DISTRIBUIDO POR: HOME DEPOT U.S.A., INC.
2455 PACES FERRY RD., N.W.
ATLANTA, GA 30339
SI NECESITA AYUDA, LLAMA AL:
1-800-394-7519
HOMEDEPOT.COM
HECHO EN CHINA
Piezas Incluidas:
● Bloque 66 de 50 Pares
● Soporte de Montaje 89D
● 50 Sujetadores
Herramientas Necesarias:
● Herramienta Perforadora de Impacto con Cuchilla Tipo 66
● Destornillador
● Cortacables y/o Pelacables
El Bloque 66 de 50 Pares CE Tech puede montarse vertical u horizontalmente en varias superficies.
Las instalaciones típicas se montan verticalmente en un panel de plywood.
Instrucciones de Instalación:
Paso 1: Después de determinar la ubicación deseada, desprende el Soporte de Montaje 89D del Bloque 66 de 50 Pares halando suavemente los
cuatro (4) sujetadores que los unían. Monta el Soporte de Montaje 89D al panel de plywood con dos (2) tornillos para madera (no incluidos).
Paso 2: Pasa los cables por la parte superior y/o inferior del Soporte de Montaje 89D, y después retira el lado izquierdo y/o derecho. Coloca el Bloque
66 de 50 Pares en el Soporte de Montaje 89D y "encájalo" en su lugar.
Paso 3: Para conectar los conductores, retira la cantidad mínima del revestimiento del cableado de los cables UTP (o similares).
NOTA: Cuando se necesita un rendimiento de que Cat 5e, es necesario asegurar una torsión del par adecuada del cable UTP. Hazlo retirando
la cantidad mínima de revestimiento del cableado. La torsión del par debe estar dentro de ½ pulgada (1,27 cm) de los puntos de conexión.
Paso 4: Dejando cada par de cables trenzados unidos, pasa el par de cables a través de la ranura deseada. Coloca los cables en sus propias clavijas
de manera adyacente a la ranura por la que se pasó el par de cables. Conecta cada cable a la clavija correspondiente con una Herramienta
Perforadora de Impacto con Cuchilla Tipo 66.
NOTA: Para evitar dañar las clavijas del bloque, mantén la Herramienta Perforadora de Impacto perpendicular al bloque mientras empalmas
los cables.
Paso 5: Pasa los pares de cables interconectados por la misma ranura en la que está el par de cable horizontal u troncal deseado. Se incluyen las
clavijas conectoras para que uses cuando sea necesario.
NOTA: Quita el exceso de cable con un cortacables después de empalmar en el punto terminal.
5540 Rev. 1
Los productos CE Tech deben instalarse y usarse según se indica en las hojas de instrucciones de productos
CE Tech.
Precaución:
• Nunca instales cables de bajo voltaje durante tormentas eléctricas.
• Nunca toques cables de bajo voltaje o terminales sin aislante, a menos que hayan sido desconectados de la interfaz de la red.
• Ten precaución al instalar o modificar líneas de datos o telecomunicaciones.
• NO modifiques, cambies o desconectes los cables de telecomunicaciones existentes si no estás seguro de su propósito o función.
• NO se recomienda que instales este producto cerca de un panel de servicio eléctrico para evitar interferencias de la corriente eléctrica.
Instrucciones Importantes:
• Lee y entiende todas las instrucciones.
• No uses este producto cerca del agua, por ejemplo, cerca de una bañera, lavamanos, fregadero de cocina o lavadero; ni en un sótano húmedo ni
cerca de una piscina.
• GUARDA ESTAS INSTRUCCIONES
Paso 1 Paso 2 Paso 3 Paso 4 Paso 5
/


