Page is loading ...

WARRANTY
Tower Hobbies guarantees this kit to be free from defects in both material and workmanship at the date of purchase. This
warranty does not cover any component parts damaged by use or modification. In no case shall Tower Hobbies’ liability
exceed the original cost of the purchased kit. Further, Tower Hobbies reserves the right to change or modify this
warranty without notice.
In that Tower Hobbies has no control over the final assembly or material used for final assembly, no liability shall be
assumed nor accepted for any damage resulting from the use by the user of the final user-assembled product. By the act
of using the user-assembled product, the user accepts all resulting liability.
If the buyer is not prepared to accept the liability associated with the use of this product, the buyer is advised to
return this kit immediately in new and unused condition to the place of purchase.
READ THROUGH THIS MANUAL COMPLETELY BEFORE STARTING CONSTRUCTION. IT CONTAINS
IMPORTANT INSTRUCTIONS AND WARNINGS CONCERNING THE ASSEMBLY AND USE OF THIS MODEL.
© Copyright 2002 V 1.0 TOWZ1152 for TOWA1110
Tower Hobbies
P.O. Box #90788
Champaign, IL 61826
(800) 637-6050
www.towerhobbies.com
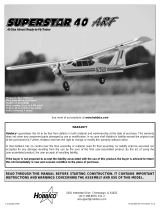
Wingspan: 62 in [1,550mm]
Wing Area: 698 sq in [45.0 sq dm]
Weight: 5 lbs [2,268 g] Length: 50.5 in [1,283mm]
Wing Loading: 17 oz/sq ft [52 g/sq dm]
Engine: .40 - .46 cu in [6.6 – 7.5cc] two-stroke
Radio: 4 channel
TOWER TRAINER 40 MKII
ALMOST-READY-TO-FLY RADIO CONTROLLED MODEL AIRPLANE
ASSEMBLY INSTRUCTIONS
ARF
ARF
®
®
™

TABLE OF CONTENTS
INTRODUCTION..............................................................2
ADDITIONAL ITEMS REQUIRED ...................................3
ENGINE RECOMMENDATIONS .................................3
RADIO RECOMMENDATIONS ...................................3
COVERING ACCESSORIES .......................................3
ADHESIVES AND ASSEMBLING SUPPLIES.................3
OPTIONAL SUPPLIES AND TOOLS ..............................3
PREPARATIONS..............................................................3
ASSEMBLE THE WING...................................................4
JOIN THE WING.........................................................4
HOOK UP THE AILERONS ........................................7
ASSEMBLE THE FUSELAGE .......................................10
MOUNT THE STAB AND FIN ...................................10
INSTALL THE WING MOUNTING DOWELS................13
INSTALL THE FUEL TANK............................................14
MOUNT THE ENGINE...................................................15
MOUNT THE LANDING GEAR .....................................17
PARTS LIST ................................................center section
FINAL ASSEMBLEY ......................................................19
HOOK UP THE CONTROLS ....................................20
INSTALL THE RADIO GEAR.....................................21
APPLY THE DECALS................................................23
PREPARE THE MODEL FOR FLIGHT..........................24
BALANCE THE MODEL (C.G.) .................................25
BALANCE THE MODEL LATERALLY .......................25
PREFLIGHT ...................................................................26
IDENTIFY YOUR MODEL .........................................26
CHARGE THE BATTERIES.......................................26
BALANCE PROPELLERS.........................................26
GROUND CHECK ....................................................26
RANGE CHECK........................................................26
ENGINE SAFETY PRECAUTIONS................................26
AMA SAFETY CODE (EXCERPTS)...............................27
CHECK LIST..................................................................27
GETTING READY TO FLY.............................................28
USING RUBBER BANDS .........................................28
TAXIING ....................................................................28
TAKEOFF ..................................................................29
FLYING .....................................................................29
LANDING..................................................................29
FUEL MIXTURE ADJUSTMENTS.................................29
MODELING TERMS AND TRIVIA.................................30
INTRODUCTION
Thank you for purchasing our Tower Trainer 40 MKII ARF.
This model has been specially created for you and other
first-time radio control modelers. The Tower Hobbies Tower
Trainer 40 MKII ARF offers nearly all the excitement of
piloting a real airplane…and develops skills that will take
you anywhere you want in your new hobby.
SAFETY PRECAUTIONS
PROTECT YOUR MODEL, YOURSELF &
OTHERS...FOLLOW THESE IMPORTANT SAFETY
PRECAUTIONS
1. Your Tower Trainer 40 MKII ARF should not be
considered a toy, but rather a sophisticated, working
model that functions very much like a full-size airplane.
Because of its performance capabilities, the Tower Trainer
40 MKII ARF, if not assembled and operated correctly,
could possibly cause injury to yourself or spectators and
damage property.
2. You must assemble the model according to the
instructions. Do not alter or modify the model, as doing so
may result in an unsafe or unflyable model.
3. You must take time to assemble straight, true and strong.
4. You must use an R/C radio system that is in first-class
condition, and a correctly sized engine and components
(fuel tank, wheels, etc.) throughout the assembly process.
5. You must properly install all R/C and other components
so that the model operates properly on the ground and in
the air.
6. You must check the operation of the model before every
flight to insure that all equipment is operating and that the
model has remained structurally sound. Be sure to check
clevises or other connectors often and replace them if they
show any signs of wear or fatigue.
7. If you are not already an experienced R/C pilot, you
should fly the model only with the help of a competent,
experienced R/C pilot.
Remember: Take your time and follow the instructions to
end up with a well-built model that is straight and true.
We, as the kit manufacturer, provide you with a top
quality kit and instructions, but ultimately the quality and
flyability of your finished model depends on how you
assemble it; therefore, we cannot in any way guarantee
the performance of your completed model, and no
representations are expressed or implied as to the
performance or safety of your completed model.
2

If you have not flown this type of model before, we
recommend that you get the assistance of an experienced
pilot in your R/C club for your first flights. If you’re not a
member of a club, your local hobby shop has information
about clubs in your area whose membership includes
experienced pilots.
In addition to joining an R/C club, we strongly recommend
you join the AMA (Academy of Model Aeronautics). AMA
membership is required to fly at AMA sanctioned clubs.
There are over 2,500 AMA chartered clubs across the
country. Among other benefits, the AMA provides
insurance to its members who fly at sanctioned sites and
events. Additionally, training programs and instructors are
available at AMA club sites to help you get started the right
way. Contact the AMA at the address or toll-free phone
number below:
Academy of Model Aeronautics
5151 East Memorial Drive
Muncie, IN 47302-9252
Tele. (800) 435-9262
Fax (765) 741-0057
Or via the Internet at:
http://www.modelaircraft.org
ADDITIONAL ITEMS REQUIRED
This is the list of hardware and accessories required to
finish the Tower Trainer 40 MKII ARF. Order numbers are
provided in parentheses.
Engine Recommendations
TOWER HOBBIES 46 ABC [TOWG0146]
OS
®
40 LA [OSMG0041]
OS 40 FX [OSMG0540]
OS 46 LA [OSMG0046]
OS 46 FX [OSMG0546]
SUPER TIGRE
®
GS-40 Ring [SUPG0122]
SUPER TIGRE GS-45 ABC [SUPG0150]
Radio Recommendations
FUTABA 4VF [FUTJ62**]
Covering accessories
Tower Custom Sealing Iron (TOWR3250)
Top Flite
®
Hot Sock
™
Iron Cover (TOPR2175)
ADHESIVES AND ASSEMBLING SUPPLIES
In addition to common household tools and hobby tools,
this is the “short list” of the most important items required
to assemble the Tower Trainer 40 MKII ARF. Tower
Hobbies Build-it
™
CA and Epoxy glue are recommended.
❍ 2 oz. Tower Hobbies Build-it
™
CA (TOWR3800)
❍ 30-Minute Tower Hobbies Build-it Epoxy (TOWR3811)
❍ 6-Minute Tower Hobbies Build-it Epoxy (TOWR3807)
❍ Hobby Knife (HCAR0105), #11 Blades (HCAR0211)
❍ Small T-pins (HCAR5100)
❍ Builder’s triangle (HCAR0480)
❍ Small Phillips and flat blade screwdrivers
❍ Small metal file
❍ Pliers with wire cutter (HCAR0630)
❍ Threadlocker (GPMR6060)
❍ RTV Silicone
❍ Great Planes
®
Easy-Touch
™
Bar Sander (GPMR6170)
❍ Easy-Touch Sandpaper, 180 Grit (GPMR6184)
OPTIONAL SUPPLIES AND TOOLS
Here is a list of optional supplies and tools mentioned in
the manual that will help you assemble the Tower Trainer
40 MKII ARF.
❍ Great Planes CG Machine
™
(GPMR2400)
❍ Top Flite Precision Magnetic Prop Balancer
™
(TOPQ5700)
❍ Masking Tape (TOPR8018)
❍ Epoxy Brushes (GPMR8060)
❍ Mixing Sticks (GPMR8055)
❍ Denatured Alcohol (for epoxy clean up)
❍ Non-elastic monofilament or Kevlar fishing line
(K+SR4575)
❍ Builder’s Triangle Set (HCAR0480)
❍ Masking Tape (TOPR8018)
❍ Felt-Tip Marker (TOPQ2510)
❍ Hobbico Servo Horn Drill (HCAR0698)
❍ Great Planes AccuThrow
™
Deflection Gauge (GPMR2405)
❍ Great Planes Stick-on Weight (GPMQ4485)
PREPARATIONS
❍ 1. Remove the major parts of the kit from the box (wings,
fuselage, tail parts, etc.) and inspect them for damage. If any
parts are damaged or missing, contact Product Support at the
address or telephone number listed in this manual.
❍ 2. Remove the masking tape and separate the ailerons
from the wing, the rudder from the fin and the elevator from
the stabilizer. Where necessary, use a covering iron with a
covering sock to tighten the covering that may have
loosened during storage or from removing the masking
tape. Apply pressure over sheeted areas to thoroughly
bond the covering to the wood.
3

❍ 1. In order to assemble the wing you will need the
following items as shown in the photo above.
#1 Right Wing Panel (1)
#2 Left Wing Panel (1)
#3 CA Hinges (8)
#4 Wing Dihedral Braces (2)
#5 Aileron Servo Tray (1)
#6 Aileron Servo Tray Mounting Blocks (2)
#7 Aileron Pushrods (2)
#8 Faslinks (2)
#9 Clevises (2)
#10 Nylon Torque Rod Horns (2)
#11 Silicone Clevis Retainers (2)
❍ 2. In order to assemble the wing you will need the items
shown in the photo above from your radio control
system contents.
JOIN THE WING
❍ 3. Use 6-minute epoxy to glue both 3mm plywood wing
joiners together. Use weights or clamps to hold the joiners
in place until the epoxy cures.
4
ASSEMBLE THE WING

❍ 4. Test fit the aileron servo in the 3mm plywood aileron
servo tray. If necessary, trim the opening in the tray to
accommodate the servo. Once you are satisfied with the fit of
the servo, remove it from the tray and set it aside for now.
❍ 5. Measure the width of your servo. Mark and cut 1/2 of
this distance from the sheeting over the aileron servo
mounting area in both wing panels to accommodate 1/2 of
your aileron servo.
❍ 6. The servo will be centered in the wing after the two
panels are joined. Test fit the servo into the cutout of both
the wing panels. Trim the root rib if necessary to
accommodate the servo and the servo wire. Prepare the
left wing panel the same way.
❍ 7. Trim the covering from the ends of the root ribs on
both wing panels. This is easily done with a sanding block
and medium-grit sandpaper as shown. Do both wing
panels at this time.
❍ 8. Draw a centerline on both sides of the plywood wing
joiner as shown.
❍ 9. Locate the two 8mm square x 38mm aileron servo
tray mounting blocks. Mark a centerline on each block.
Using the wing joiner as a guide, mark the wing dihedral
angle on both of the aileron mounting blocks. Trim and
sand to shape at this time.
Set the blocks aside for now.
5

❍ 10. Test fit the wing joiner into one wing panel, then the
other. Be certain the joiner is installed upright with the
joiner angled upward for wing dihedral. Also make sure that
the joiner slides in all the way to the centerline. Test fit the
wing panels together with the joiner. Make certain both
panels fit well.
❍ 11. The measurement for this wing is 5-1/4” [133mm]
plus/minus 1/2” [13mm] from the top of your table to the
highest point of the wing tip as shown in the photo. To
check that this is correct, join the two wing panels together
with the joiner in place. Lay the wing on a flat surface with one
panel flat on your bench or table. To do this you will need to
allow the trailing edge of the wing to overhang the edge of your
table in order to avoid the aileron torque rods as shown in the
photograph above. After making sure the root ribs are fitting
together with no gaps on the top or bottom of the wing,
measure the distance from the bench surface to the wing tip.
If this measurement is not 5-1/4” [133mm] plus/minus 1/2”
[13mm] make adjustments in the plywood joiner. (It is possible
that the joiner may require slight sanding to remove slivers of
wood or excess epoxy that may interfere with the fit).
❍ 12. Once satisfied with the fit of the joiner and the wing
has the proper dihedral, it is time to glue the two panels
together. First thoroughly coat the inside of both pockets
where the joiner fits and one half of the joiner with 30-
minute epoxy. Making certain the joiner is upright and
insert the coated end into one of the wing panels. Coat the
other end of the joiner and both wing root ribs with the
epoxy and join the two wing panels together.
❍ 13. Wipe away any epoxy that squeezes out from
between the wing halves with paper towels saturated with
alcohol. Use masking tape on the top and bottom to hold
the wing together as shown. Be certain the root ribs on the
ends of the wing panels accurately align. Again, wipe away
excess epoxy and do not disturb the wing until the epoxy
has fully hardened.
6

HOOK UP THE AILERONS
Do the left wing first so the assembly matches the
photographs the first time through. You can do one wing at
a time, or work on them together.
❍❍1. Take a close look at the supplied hinges. The above
photo has this slot highlighted and must be inserted into
place in the proper direction as indicated in the photo.
❍❍2. Test fit the hinges in the hinge slots of the aileron
and the wing. If you have difficulty inserting the hinges,
insert a #11 blade into the slot and carefully move it back
and forth to slightly widen the slot. Test fit the aileron to the
wing with the hinges.
❍❍3. If the hinges don’t remain centered, stick a pin through
the middle of the hinge to hold it in position as shown.
❍❍4. Coat the “arm” portion of the aileron torque rod
that slips inside the aileron and the groove and the hole in
the aileron where the torque rod fits with 30-minute epoxy.
Tip: You may want to use a toothpick to get epoxy into the
hole drilled in the aileron for the aileron torque rod.
❍❍Use a strip of waxed paper between the torque rod
and the wing to keep from gluing the torque rod to the
wing. Be careful to keep the epoxy out of the area where
the rod enters the trailing edge of the wing. Place a small
amount of petroleum jelly in this area. Join the aileron to the
wing and the torque rod with the hinges. Wipe away excess
epoxy with a tissue saturated with alcohol.
❍❍5. Remove the T-pins if you’ve used any. Adjust the
aileron so there is a small gap—just enough to see light
through or to slip a piece of paper through—between the
aileron and the wing.
❍❍6. Apply six drops of thin CA to the top and bottom
of each hinge. Do not use CA accelerator. After the CA has
fully hardened, test the hinges by pulling on the aileron. Go
back and install the other aileron in the same manner.
7

❍ 7. Glue the two 8mm square x 38mm aileron servo tray
mounting blocks that you cut to shape earlier to the aileron
servo tray. Be sure that you glue the flat side of the blocks
to the aileron servo mounting tray.
❍ 8. Place the servo into this assembly and test fit this into
location in the center of the wing. Mark the location of the
mounting blocks with a felt tipped pen.
Use a sharp #11 blade to cut the covering from the wing
for the aileron servo mount. Be extremely careful to cut
only the covering and do not cut into the balsa wood under
the covering.
Be sure to allow room for the aileron servo lead. If
necessary, cut away a small area for the lead to exit the
wing as shown. Glue the servo mount to the wing with 6-
minute epoxy.
❍ 9. Assemble the servo using the four servo grommets
and four brass eyelets as shown in the sketch above. Insert
the servo into the mount and mark the location for the 4
screws. Remove the servo and drill 1/16” [1.6mm] holes
through the servo mount for the servo mounting screws.
Run the servo mounting screws into the mount and then
remove them, which will make threads in the wooden servo
mount. Add a drop of thin CA to the holes and allow to fully
harden, thus hardening the threads for more strength.
Note: Do not apply the thin CA with the servo in place as
you will glue it to the mount. Mount the aileron servo using
the servo mounting screws.
❍ 10. Thread the nylon torque rod horns onto both
aileron torque rods until the top of the horn is even with the
top of the torque rod as shown in the photograph.
❍ 11. Make a two-arm servo arm by cutting two arms off
a four-arm servo arm. Enlarge the outer holes in the arm
with a Hobbico Servo Horn Drill (or a #48 or 5/64” [2mm]
drill bit).
How to cut covering from balsa.
To avoid cutting into the balsa, use a soldering iron
instead of a hobby knife to cut the covering from the stab.
The tip of the soldering iron doesn’t have to be sharp, but
a fine tip does work best. Allow the iron to heat fully. Use
a straightedge to guide the soldering iron at a rate that will
just melt the covering and not burn into the wood. Going
too slowly burns into the wood and weakens it. The hotter
the soldering iron, the faster it must travel to melt a fine
cut. Peel off the covering.
8

❍ 12. Assemble the two aileron pushrods made from two
200mm wire pushrods, clevises, and silicone retainers.
To make the pushrods, thread the clevises onto the wire
pushrods approximately 25 full turns.
❍ 13. Center the servo arm on the servo. Attach the clevis to
the torque rod horn; hold the aileron level with the bottom of
the wing, using a straight edge to assure accuracy. Mark the
location where the wire crosses the hole in the servo arm. At
this location bend the wire 90 degrees.
❍ 14. After bending the pushrods at your mark, slide the
Faslink over the wire and snap it into place on the pushrod.
❍ Cut the wire that extends beyond the Faslink; be certain
to leave 1/16” [1.6mm] of wire protruding from the Faslink
as shown in the photograph.
❍ 15. Install the remaining pushrod in the same manner.
The above photo shows how your assembly should look
when finished.
9

MOUNT THE STABILIZER AND FIN
❍ 1. In order to complete this section you will need the
following items as shown in the photograph above. You will
also need the wing (not shown) for alignment purposes.
#1 Fuselage (1)
#2 Stabilizer (Stab) (1)
#3 Elevator (1)
#4 Fin (1)
#5 Rudder (1)
#6 CA Hinges (7)
❍ 2. Test fit the hinges into hinge slots in the stabilizer
and elevator and the fin and rudder. If necessary insert a
#11 blade into the hinge slots and run it back and forth to
enlarge them slightly.
Important Note: Remember to insert the hinges with the
cut running the correct direction.
❍ 3. Use a hobby knife with a sharp #11 blade and cut the
covering from the openings on both sides of the fuselage for
the stab. Also cut the covering from the opening in the top of
the fuselage for the fin. Remove the elevator from the stab.
❍ 4. Taking accurate measurements, locate the center of
the stab along the trailing edge. Slide the stab into the
fuselage and center it over the aft end of the fuselage.
Insert a T-pin through the stab and into the fuse at the
location shown in the photograph above. This will hold it in
place but will still allow for correct alignment.
10
ASSEMBLE THE FUSELAGE

❍ 5. Support the model with a small stand or cardboard
box. Place the wing into the wing saddle on the top of the
fuselage. Stand five to ten feet behind the model and view
the stab and wing. If the stab and wing align with each
other, proceed to the next step. If the stab and wing do not
align, place a small weight on the “high” side of the stab to
bring it into alignment. If much weight is required, remove
the stab and carefully sand the slot in the fuselage where
the stab fits until it aligns with the wing.
❍ 6. Stick a T-pin into the top of the fuselage centered in the
middle stringer over the firewall. Tie a small loop in one end of
a piece of non-elastic string (K & S #801 Kevlar thread;
K&SR4575). Slip the loop in the string over the T-pin.
❍ 7. Fold a piece of masking tape over the other end of
the string and draw an arrow on it. Slide the tape along the
string and align the arrow with one end of the stab as
shown in the photograph.
Swing the string over to the same position on the other end
of the stab. If the distance is not equal move the stab ½
way to the arrow then move the string back to the other
side to check alignment. Adjust the stab in this manner
until both sides are equal.
❍ 8. When you are satisfied with the alignment of the stab
use a fine-point felt-tip pen such as a Top Flite Panel Line
Pen (TOPQ2510) to mark the outline of the fuselage onto
the top and bottom of the stab.
11

❍ 9. Remove the stab from the fuselage. Use a sharp #11
hobby knife, or refer to the Expert Tip on page 10, to cut
the covering from the stab 1/16” [1.6mm] inside the lines
you marked on the top and bottom of the stab. Do not
remove the covering from the trailing edge of the stab. Use
care to cut only into the covering and not into the wood.
Cutting into the balsa will weaken the structure.
❍ 10. Note: If you like you may remove the rudder and
elevator from the fin and stab for these steps. We will glue
them into place later.
Fit the fin into the fuselage and mark the location of the
fuselage onto the fin with a felt tip pin. Also mark the
location of the fin on top of the fuselage. Using the same
method as with the stab, cut the covering material from the
marks on the bottom of the fin and the top of the fuselage.
11. Apply 30-minute epoxy to all joining surfaces of the
stab. Slide the stab into position. Wipe away residual
epoxy with a tissue dampened with rubbing/denatured
alcohol. If the stab required a weight on one side or the
other to align it with the wing, position the weight. Use the
pin and string to confirm stab alignment. Do not disturb the
model until the epoxy has fully hardened.
❍ 12. Apply 30-minute epoxy to all joining surfaces of the fin.
Insert the fin and wipe away excess epoxy. Use a 90-degree
triangle to check that the fin is vertical. If necessary, use
masking tape to pull the tip of the fin to one side or other of the
stab until it is vertical. Do not disturb the model until the epoxy
has fully hardened.
When the epoxy has fully hardened, make sure the rudder
and elevator are in the proper position with all the hinges
properly installed. Place six drops of thin CA on both sides
of each hinge location. Let the CA cure completely. Do not
use activator. Pull on each control surface to make sure it
is glued properly and securely.
12

❍ 1. For this step you will need the following items as
shown in the photograph above.
#1 Fuselage (1)
#2 Wing Mounting Dowels (2)
#3 2.6mm x 8mm Wood Screws (4)
#4 Molded Wing Dowel Covers (4)
❍ 2. Locate the four positions for the 7mm wing dowel
holes by gently pressing the covering in the areas on the
fuselage sides just below the wing saddles. These
positions can be seen from the inside of the fuselage.
Carefully cut the covering material from the holes using a
sharp hobby knife.
❍ 3. Note: One of the wing mounting dowels is 3mm
longer. Place the longer one in the position to the front of
the fuselage.
Insert both wing mounting dowels so they protrude an equal
amount on both sides of the fuselage. Mix ¼ oz. [7ml] of 30-
minute epoxy. Apply glue around the dowels next to the
fuselage and slide them in and out of the fuselage to help
distribute the epoxy into the fuselage. Using a paper towel
spread the excess epoxy around the ends of the dowels. This
will fuelproof and add strength to the wood. From the inside of
the fuselage, apply more epoxy around the dowels where they
meet the sides of the fuselage. These wing dowels will be used
as the anchors for the rubber bands to hold the wing in
position. Wipe off all excess epoxy using a paper towel and
rubbing/denatured alcohol.
After the epoxy has cured add the molded wing dowel
covers and attach them with four 2.6mm x 8mm wood
screws into the pre-drilled holes in the ends of the wing
dowels as shown in the photograph above.
13
INSTALL THE WING MOUNTING DOWELS

❍ 1. To complete this step you will need the following items
as shown in the photograph above.
#1 Fuel Tank (1)
#2 Clunk (1)
#3 Fuel Pickup Tube (1)
#4 Vent Tube (1)
#5 Fuel Line for Pickup (1)
#6 Stopper with Hardware (1)
#7 Fuel Line (1)
Note: The fuel tank parts shown in the photo are placed
inside the tank at the factory.
❍ 2. Assemble the stopper, tubes, and clunk as shown
in the photograph. Bend the vent tube so it is just below
the top of the tank and then insert this assembly into in the
tank. Tighten the screw to expand the stopper, thus sealing
the tank. Be certain the clunk at the end of the fuel line
inside the tank does not contact the rear of the tank.
Otherwise, the line may become stuck above the fuel level
and discontinue fuel flow.
Remember (or use a felt-tip pen to mark) which tube is the
fuel pick-up tube and which tube is the vent (that will be
connected to the pressure fitting on the muffler). Place the
fuel lines on the vent and fuel pick-up tubes at this time.
❍ 3. Install the tank in the fuselage with the neck of the
tank inserted into the hole in the firewall. Secure the tank
into place with RTV silicone or Zap-A-Dap-A-Goo
(PAAR3200) around the stopper. Then slip the tank into
place. Also put a bead of silicone around the stopper on
the front of the firewall.
14
INSTALL THE FUEL TANK

❍ 1. To complete this step you will need the following items
as shown in the photograph above.
#1 Fuselage (1)
#2 Muffler for Engine (1) (not supplied)
#3 Engine (1) (not supplied)
#4 Spinner (1)
#5 Propeller (1) (not supplied)
#6 Engine Mount, .40 size (1)
#7 Engine Mounting Straps (2)
#8 4mm x 20mm Machine Screws (4)
#9 4mm x 25mm Machine Screws (4)
#10 4mm Lock Washers (8)
#11 4mm Nuts (4)
❍ 2. Secure the engine mount to the firewall with four 4mm
x 20mm machine screws and 4mm lock washers. Use
Threadlocker on the machine screws to keep them from
vibrating loose. Blind nuts are pre-installed behind the firewall.
❍ 3. The engine’s mounting lugs are “sandwiched” between
the engine mount and the engine mount straps. Begin by
placing four 4mm lock washers onto each of the four 4mm x
25mm machine screws.
Pass two of the screws through the two engine mount straps
and place the screws through the back holes of the engine
mount as shown in the photograph. Place two 4mm nuts into
the recesses on the bottom of the engine mount. Start the
screws, but do not tighten them at this time.
15
MOUNT THE ENGINE
NOTE: The engine in your airplane is mounted slightly different from that of most R/C aircraft. This is done to allow the use of many
different types of engines. It also allows a “no-drill” approach to ease the engine installation. Read through the procedure and
understand all the steps before actually performing them.

❍ 4. With the engine in place, install the remaining two
4mm x 25mm machine screws, 4mm lock washers, and
4mm nuts in place at the front of the engine mount as
shown in the photograph. Do not tighten the screws at this
time to allow for the positioning of the engine.
❍ 5. Install the spinner backplate, propeller, propeller washer
and the propeller nut onto the engine. Turn the propeller
counterclockwise until it is against the smallest pins on the
backplate. Keep the propeller horizontal when the engine is
against its compression [the point at which you feel resistance
when you turn the crankshaft counterclockwise]. Use an
adjustable wrench to securely tighten the propeller nut.
❍ 6. Measure the distance from the spinner backplate to the
firewall. It should be 3-3/4” [95mm] on both sides of the
spinner backplate. Adjust the engine if needed and tighten the
screws evenly, using Threadlocker on the screws and the nuts
to secure the engine to the mount. Following the engine
manufacturer’s instructions, install the muffler to the engine.
❍ 7. Attach the silicone fuel lines to the engine. The line
you marked “Vent” should be attached to the muffler. The
other line will be attached to the needle valve. Make sure
there are no sharp bends in the lines. If so, carefully adjust
the lines to allow for a smooth flowing bend to the
appropriate fitting of the engine.
8. Attach the spinner cone with the screws provided. Be
careful not to overtighten these screws. They are threaded
into plastic that can strip out if they are over tightened.
16

❍ 1. To complete this step you will need the following items
as shown in the photograph above.
#1 Fuselage (1)
#2 Main Landing Gear (2)
#3 Nose Gear (1)
#4 Wheels (3)
#5 4mm x 12mm Phillips Head Screws (2)
#6 Nose Gear Bearing Block (1)
#7 4mm Wheel Collars (8)
#8 3mm x 8mm Phillips Head Set Screw (1)
(For Nose Gear Steering Arm Only)
#9 3mm x 5mm Phillips Head Set Screw (7)
#10 4mm Flat Washers (2)
#11 Landing Gear Straps (2)
#12 3mm X 10mm Phillips Head Wood Screws (4)
#13 Nylon Steering Arm (1)
#14 Screw Lock Pushrod Connector Assembly (1)
❍ 2. Test fit the two main landing gear wires into the
pre-drilled holes inside the channel located in the bottom
of the fuselage. If they will not go in easily, drill out the two
holes using a 5/32” [4mm] drill bit. Next, use the drill bit or
hobby knife to bevel the inside corners of the holes so that
the bend in the wire will seat fully into the holes and the
wire will be flush with the bottom of the fuselage. Place the
landing gear wires into the channel. Look carefully and you
will find four pre-drilled holes under the covering. They can
be seen in the photograph.
❍ 3. At the locations of the pre-drilled holes attach the
nylon landing gear straps to the fuselage using the four
3mm x 10mm Phillips head wood screws and the nylon
landing gear straps as shown in the above photograph.
17
MOUNT THE LANDING GEAR

❍ 4. Install the nose gear by attaching the nose gear
bearing bracket to the firewall with two 4mm x 12mm
Phillips head screws and the two 4mm washers which
must go behind the bracket so they act as spacers as
shown in the photograph above. Apply Threadlocker to
these screws before installing them.
❍ 5. The steering arm should be cut off as shown in the
above photograph. Place one of the wheel collars into the
steering arm base, making sure the threaded hole for the
set screw is aligned with the hole in the steering arm base
as shown in the photograph above. The 3mm x 8mm
Phillips head set screw is then placed into the wheel
collar through the hole in the base of the steering arm.
❍ 6. Place the screw lock pushrod connector onto the
steering arm exactly as shown in the above photograph.
Important Note: The screw lock pushrod connector is
assembled in the bag. In order to place it onto the steering arm
you will need to remove the wheel-type nut and the washer on
the end of the unit. Insert the threaded stem of the unit into the
hole on the steering arm in the manner shown in the
photograph. Place the washer on the threaded stem followed
by the wheel-type nut. Apply Threadlocker to the threaded
stem and then gently tighten the nut. It is important not to
overtighten this nut; this would not allow the screw lock
pushrod connector to rotate on the steering arm while in
operation. Adjust the tightness of the nut and test the
connector’s ability to rotate but still be somewhat tight. When
you are satisfied with this adjustment place a small amount of
Threadlocker on the top of the nut and allow it to wick down
into the threads.
❍ 7. Place another wheel collar with a 3mm x 5mm
Phillips head set screw onto the nose gear wire then
insert the nose gear wire into the nose gear bearing
bracket. As you slide it through the bearing bracket, hold
the assembled steering arm in place and slide the nose
gear through the steering arm and into the hole in the
bottom of the engine mount. Note that the existing flat spot
on the nose gear wire is facing forward. When you have the
nose gear installed tighten the two Phillips head set screws
in the wheel collars to complete the installation.
❍ 8. Place a wheel collar and a wheel on the nose gear and
landing gear axles. Add the second wheel collar on the outside
of the wheel to each axle. Center the wheel on the axles as
shown in the photograph. Mark the location of the outer wheel
collar on the axles with a felt tipped pen. Remove the wheel
collars and wheels. Then file or grind a 1/4” [6mm] flat spot on
the axles of the main and nose gear at the locations you
marked. This is done to prevent the wheel collar from turning
or becoming loose during flight. Secure the 3 wheels on the
axles using the 3mm x 5mm Phillips head set screws in the
wheel collars, using Threadlocker on the set screws to hold
them securely in place.
Double check all the wheels to make sure they still spin
freely. If not, move the inner wheel collar away from the
wheel slightly and retighten the screw.
18

#1 Servos (3)
#2 Receiver (1)
#3 Switch (1)
#4 Rubber Grommets (12)
#5 Brass Eyelets (12)
#6 Servo Mounting Screws (12)
#7 Aileron Extension Wire (1)
#8 Receiver Battery (1)
19
FINAL ASSEMBLY
#1 Protective Foam (2)
#2 Faslinks (2)
#3 Screw Lock Pushrod Connector (1)
#4 Silicone Clevis Retainers (3)
#5 Clevises (3)
#6 Control Horn Backplates (2)
#7 Control Horns (2)
#8 2mm x 14mm Phillips Head Screws (4)
#9 680mm Threaded Elevator-Rudder Pushrods (2)
#10 Battery/Receiver Tray (1)
#11 2.6mm x 8mm Wood Screws (4)
#12 105mm Threaded One End Throttle Pushrod (1)
#13 105mm Un-threaded Steering Pushrod (1)
#14 Plastic Steering/Throttle Pushrod Guide Tubes (2)
#15 10mm x 13mm x 80mm Balsa Pushrod Support (1)
#16 Hook and Loop Material (2)
To complete this step you will need the following items, as shown in the photograph above.
The items shown in the above photograph will also be needed from the radio system.

HOOK UP THE CONTROLS
❍ 1. There is a 5mm hole in the firewall for the pushrod
guide tube that will align with the throttle arm on most two-
stroke engines. Use medium sandpaper to roughen both
plastic pushrod guide tubes. Insert one pushrod guide tube
through the hole in the firewall for the throttle, and the other
for the steering pushrod guide tube.
❍ 2. Thread a nylon clevis 25 full turns onto the 500mm
threaded throttle pushrod wire. Slip a silicone retainer
over the clevis. Insert the pushrod with the clevis all the
way into the throttle pushrod guide tube and connect the
clevis to the throttle arm on the engine as shown in the
photograph above.
❍ 3. Run the un-threaded 500mm steering pushrod through
the Screw Lock Pushrod Connector and continue pushing it all
the way into the steering rod guide tube. Position the pushrod
guide tubes to extend approximately 1/8” [3mm] past the
firewall and glue them into place using 6-minute epoxy.
❍ 4. Screw two nylon clevises 25 full turns onto the two
680mm threaded wire pushrods. Slip silicone retainers over
the clevises.
Slit the covering material where the guide tubes exit the
fuselage with a hobby knife. The location of the rudder
tube exit is on top of the fuse next to the fin and the
elevator tube exit is located on the same side of fuse under
the stab. After you have made your cuts, slide the
pushrods through the guide tubes. Connect the clevises to
the control horns placing them in the second hole from
the end of the horn as shown.
❍ 5. Position the control horns on the elevator and rudder
as shown in the photograph. The row of holes in the horns
should be over the hinge line. If necessary small bends
may be made in the pushrods to position them with the
control surfaces. Mark the locations of the holes in the
base of the control horns on the elevator and rudder. At
these locations drill 5/64” [2mm] holes through the elevator
and rudder for mounting the control horns with 2mm x
14mm phillips head screws, and then mount the control
horns using the screws and the nylon backing plates on the
other side of the control surfaces.
20
/