141

Argus 141 Datasheet

  • Hello! I am an AI chatbot trained to assist you with the Argus 141 Datasheet. I’ve already reviewed the document and can help you find the information you need or explain it in simple terms. Just ask your questions, and providing more details will help me assist you more effectively!
ARGUS
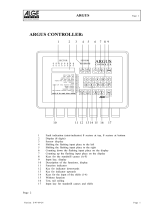
ARGUS 141 1
ARGUS 141
Manual
Version: 1.40 / EN
Note:.
The basic ARGUS package always includes support for at least one DSL interface with a
variety of functions and tests. Support for other interfaces (e. g. a second DSL interface)
and functions is optional (see the options in the datasheet). Consequently, depending on
the scope of the functions delivered, certain menu items may be hidden.
ARGUS
2 ARGUS 141
 by intec Gesellschaft für Informationstechnik mbH
D-58507 Lüdenscheid, Germany, 2010
Alle Rechte, auch der Übersetzung, sind vorbehalten. Kein Teil des Werkes darf in
irgendeiner Form (Druck, Fotokopie, Mikrofilm oder einem anderen Verfahren) ohne
schriftliche Genehmigung reproduziert, vervielfältigt oder verbreitet werden.
All rights are reserved. No portion of this document may be reproduced, duplicated or
distributed in any form (print, copies, microfilm or on any other media) without intec’s
written permission.
ARGUS
ARGUS 141 3
1 Introduction .........................................................................................5
2 Safety Instructions .............................................................................7
2.1 Lithium Ion Battery Pack - Safety Instructions ................................8
3 General Technical Data ....................................................................10
4 Operation - A Brief Guide .................................................................12
5 Menu Hierarchy .................................................................................20
6 Operation on an ADSL Access ........................................................26
6.1 Setting the ADSL Interface and Access Mode ...............................27
6.2 ADSL Settings ...................................................................................31
6.3 The ARGUS in the ATU-R Access Mode .........................................39
6.3.1 Determining the ADSL connection parameter ...........................39
6.3.2 Tests in ATU-R Access mode ....................................................51
6.4 The ARGUS in the ATU-R Bridge Access Mode ............................52
6.4.1 Setting the access mode to ATU-R bridge: ...............................52
7 Operation on a VDSL Access ..........................................................54
7.1 Setting the VDSL Interface and Access Mode ...............................55
7.2 VDSL Settings ...................................................................................59
7.3 The ARGUS in the VTU-R Access Mode .........................................67
7.3.1 Determining the VDSL connection parameter ...........................67
7.3.2 Tests in VTU-R Access Mode ....................................................80
7.4 The ARGUS in the VTU-R Bridge Access Mode ............................81
7.4.1 Setting the access mode to VTU-R bridge ................................81
8 IP tests ...............................................................................................83
8.1 IP ping ................................................................................................83
8.2 Traceroute .........................................................................................93
8.3 HTTP Download ................................................................................98
9 VoIP test ..........................................................................................104
9.1 VoIP telephony ................................................................................104
10 Test reports .....................................................................................118
10.1 Saving Test Reports .......................................................................119
10.2 Displaying the Saved Test reports ................................................120
10.3 Test reports – Sending to a PC .....................................................120
10.4 Deleting Test reports ......................................................................121
10.5 Send All Test reports to a PC ........................................................121
10.6 Delete All Test reports ....................................................................122
11 ARGUS Settings - Device ...............................................................123
11.1 Trace / remote .................................................................................123
11.2 Device Settings ...............................................................................124
11.3 Reset All Parameters ......................................................................126
ARGUS
4 ARGUS 141
12 Using the Battery Pack ...................................................................127
13 Firmware Update .............................................................................129
14 Appendix .........................................................................................131
A) Acronyms........................................................................................ 131
B) Error message: PPP connection ......................................................135
C) Error message: Download test ........................................................136
D) HTTP status codes: .........................................................................137
E) General Error Messages ..................................................................139
F) VoIP SIP status codes .....................................................................140
G) Software Licenses ...........................................................................143
1 Introduction
ARGUS 141 5
1 Introduction
The ARGUS 141 tests VDSL2 and ADSL. This all-rounder with a color display offers
support for VDSL2 (all profiles) and even ADSL (Annex A, B and M); all integrated into a
single handheld device. Separate chipsets for ADSL and VDSL2 ensure optimum
performance on both interfaces. It also offers extensive statistics functions and evaluates
voice quality in accordance with a variety of techniques, such as using MOS tests (R-
factor).
In addition the ARGUS 141 is also well equipped for checking Internet connections as it
has IP ping, trace route and download tests.
Rounding out the package, the ARGUS can operate in xDSL bridge and PC replacement
mode. In view of the above set of features, it is obvious that the ARGUS 141 offers a wide
range of measurement functions for use on xDSL interfaces. Nonetheless, it should not be
overlooked that this extensive set of features has been packed into an small, handy device;
one that is not only very compact and convenient to use on location – wherever that
location might be – but one that is also ready for use in no time.
Ease of Use
The ARGUS 141 is also extremely easy to use. It has a large (320 x 240 pixel) color display
and it is operated by the use of softkeys and includes a USB client interface. The tester
uses a high-powered, long-life lithium-ion (rechargeable) battery pack.
Software updates can be downloaded to a PC free of charge and then loaded into the
ARGUS at any time. They are available at www.argus.info/en/service.
1 Introduction
6 ARGUS 141
An overview of a few of the important ARGUS functions:
Should you have any further questions, please contact us:
intec Gesellschaft für Informationstechnik mbH
Rahmedestr. 90
58507 Lüdenscheid
Germany
Tel.: +49 (0) 2351 / 9070-0
Fax: +49 (0) 2351 / 9070-70
www.argus.info/en
xDSL tests (ADSL, ADSL2 and ADSL2+, VDSL2)
- Synchronisation with determination of the connection parameters and error
counters
- PPP login, xDSL bridge and PC replacement mode
xDSL tests
- IP tests
- IP ping and trace route tests
- Download tests (HTTP)
- VoIP test
- Telephony function
- Quality assessment
2 Safety Instructions
ARGUS 141 7
2 Safety Instructions
The ARGUS may only be used with the included accessories. Usage of other accessories
may lead to erroneous measurements and may even cause damage to the ARGUS and the
connected installation. The ARGUS is only to be used in accordance with the instructions in
this documentation. Any other usage may result in bodily injury and destruction of the
ARGUS.
Return and environmentally acceptable disposal
The RoHS (EU Directive on the “Restriction of Hazardous Substances”) guidelines, which
restrict the use of certain hazardous substances in electrical and electronic equipment,
apply in eight of the ten categories of the WEEE (EU Directive on “Waste Electrical and
Electronic Equipment”) guidelines. Devices which are in Category 9 “Monitoring and
Control Instruments” are currently excluded from the scope of the Directive. The ARGUS
products fall into Category 9 and are thus not subject to the RoHS guidelines. Nonetheless,
we have voluntarily complied with all of the RoHS guidelines since 1 January 2007.
In compliance with WEEE 2002/96/EU and the German Electrical and Electronic
Equipment Act („ElektroG - Elektro- und Elektronikgesetz“), we began marking our testers
in October 2005 with the following symbol
( ) (DIN EN 50419).
In other words, the ARGUS and its accessories may not be disposed of in the household
waste. Regarding the return of old equipment, please contact our Service department.
- Before connecting the ARGUS to an access make certain that the voltages on the
access are not high enough to be dangerous or outside the specified range of the
ARGUS or its accessories. You must also taken into account the fact that the
voltage may vary while the ARGUS is connected to the access.
- Regardless of the interface or access, use the ARGUS only for its intended
purpose.
- Voltages in excess of 50 V AC or 120 V DC can cause mortal injury.
- Never attempt a measurement with the case open!
- The ARGUS is not watertight. Protect the ARGUS from exposure to water!
- Before replacing the battery pack, disconnect all the test leads and switch the
ARGUS off.
- Unplug the power supply from the mains, once the ARGUS is switched off and is no
longer in use (for example after recharging the accumulators)!
- The ARGUS may only be used by trained personnel.
- In connection with the lithium ion battery pack, please observe the following notes
regarding safety and transport.
2 Safety Instructions
8 ARGUS 141
2.1 Lithium Ion Battery Pack - Safety Instructions
Transport
The battery pack has been tested in accordance with the UN recommendations (ST/SG/
AC.10/11/Rev. 4, Part III, Subsection 38.3). Protective measures have been implemented
to prevent harm if it is exposed to excessive pressure, short-circuits, dangerous reverse
currents or other destructive influences. However, since the amount of lithium contained in
the battery pack is in any case less than the current threshold amount, neither the battery
pack itself nor the ARGUS in which it is installed are subject to the international hazardous
goods regulations. Nonetheless, these regulations may apply if several battery packs are
transported at the same time. For more information, please contact us.
The protective features of the battery pack may be harmed if the following
instructions are not observed. In this case extremely high currents and
voltages may result, which could lead to abnormal chemical reactions,
leaking acid, overheating, smoke, or an explosion and/or fire. Furthermore, if
the user does not observe and comply with these instructions both the
performance and service life may suffer.
Safety Instructions and Warnings
1 Do not disassemble or short-circuit the battery pack.
2 Do not put the battery pack in a fire or heat it higher than > 60 °C (+140 °F).
3 Keep the battery pack dry - do not let it get wet or damp.
4 Do not charge the battery pack at temperatures below 0 °C (+32 °F) or
above +40 °C (+104 °F).
5 The battery pack may only be charged using the associated ARGUS or a charger
approved by intec.
6 Do not damage the battery pack with a sharp object.
7 Do not throw the battery pack or expose it to shocks or impacts.
8 If a battery pack is damaged or deformed, do not use it.
9 Like any battery, the battery pack has two poles (plus and minus). To prevent
damage, make certain that it is correctly connected (polarity) to the ARGUS or
charger.
10 The battery pack may only be connected to the associated ARGUS or charger in
the intended manner.
11 The battery pack may not be directly connected to the output of a plug-in power
supply, an automobile cigarette lighter or similar power source.
12 The battery pack may only be used together with an ARGUS.
13 The battery pack may not be connected to, or stored or transported with metallic
objects.
14 Do not expose the battery pack to high electrostatic forces.
2 Safety Instructions
ARGUS 141 9
15 The battery pack may not be used in combination with primary (non-
rechargeable) batteries, nor may it be charged or discharged together with other
rechargeable batteries.
16 If the battery pack is still not properly charged when the charging time has
elapsed, do not charge it again.
17 Do not expose the battery pack to excessive pressure.
18 If the battery pack leaks acid or if it emits an odor, keep it away from open fires.
19 If the battery pack emits an odor or heats up, becomes discolored or misshapen,
or if there are any other indications of that it has malfunctioned while it is in use or
being charged or while it stored, remove the battery pack from the ARGUS or
charger immediately and do not use it again.
20 If the battery pack leaks acid, make certain that you do not get this acid in your
eyes or on your skin. In event that you get this acid in your eyes or on your skin,
rinse the affected area immediately with clean water. Do not rub the affected
area. In either case, seek medical care immediately. Otherwise, permanent injury
may result.
21 The battery pack must be kept out of reach of children.
22 Please read the manual and corresponding security instructions before using the
battery pack.
23 If you find that the battery pack emits an odor, or is rusty or appears to be in
anything other perfect condition before you first use it, please contact intec to
determine how to proceed.
3 General Technical Data
10 ARGUS 141
3 General Technical Data
Tester specifications:
Dimensions / Weight Inputs / Outputs
Height: 235 mm (9.25 in)
Width: 97 mm (3.80 in)
Depth: 55 mm (2.20 in)
Weight approx. 710 g (1.6 lbs)
(incl. battery pack)
- RJ-45 for xDSL
- RJ-45 10/100 BaseT (bridge mode)
- USB-B jack, USB client interface
Keypad
25 Keys
LCD display Temperature ranges
LCD color display with
switchable
background lighting,
320 x 240 pixels
Charging between:
0 °C (+32 °F) to +40 °C (+104 °F)
Operating Temperature:
0 °C (+32 °F) to +50 °C (+122 °F)
Storage temperature:
-20 °C (-4 °F) to +60 °C (+140 °F)
Humidity: up to 95 % relative humidity,
non-condensing
Power supply
Lithium ion battery pack, rated voltage 7.2 V
(observe and comply with the safety instructions)
or
12 V / 1500 mA ARGUS electronic plug-in power
supply
Other information
User safety: EN61010-1
RoHS compliance pursuant to WEEE (EU Directive on
Waste of Electrical and Electronic Equipment)
Quality management in accordance with
DIN EN ISO 9001
3 General Technical Data
ARGUS 141 11
Supported standards:
ADSL (Line):
ITU-T G.992.1, Annex A (ADSL)
ITU-T G.992.2, Annex A (G.lite)
ITU-T G.992.3, Annex A (ADSL2)
ITU-T G.992.5, Annex A (ADSL2+)
ITU-T G.992.1, Annex B (ADSL)
ITU-T G.992.3, Annex B (ADSL2)
ITU-T G.992.5, Annex B (ADSL2+)
ITU-T G.992.3, Annex M (ADSL2)
ITU-T G.992.5, Annex M (ADSL2+)
ANSI T1.413
VDSL (Line):
ITU-T G.993.2 (VDSL2)
Profile:
8a, 8b, 8c, 8d, 12a, 12b, 17a, 30a
Ethernet:
IEEE 802.3
- 10 Base-T
- 100 Base-T
Auto Negotiation
Auto MDIX
Line:
DC voltage: max. +200 V DC
AC voltage: max. 120 V AC
at a maximum of 50/60 Hz
4 Operation - A Brief Guide
12 ARGUS 141
4 Operation - A Brief Guide
LEDs
Softkeys
Cursor keys
Confirmation key
Layer 1 measurement
Telephony: Lift receiver / hangup
Power
Microphone
Fastener for shoulder strap
Numerical keypad
LCD display
Return key
Shift key
Speaker
Power key
-
-
-
-
S
witch the ARGUS on
To start up again after a power down (adjustable see Page 124)
Switch on the display backlighting
In battery mode to save power, the backlighting will switch off
automatically after an adjustable period of time (see Page 124).
To switch off the ARGUS (must be pressed somewhat longer)
After being idle for a period of time which can be set (for example after
10 minutes), the ARGUS will shutdown automatically if it is running in
battery mode (see Page 124). If the ARGUS is connected to its power
supply, it will automatically charge its battery pack when it is switched off
(see page 127).
Confirmation key
-
-
-
-
Open
menu
Open the next display
Start the test
Confirm the entry
4 Operation - A Brief Guide
ARGUS 141 13
Return key
-
-
The ARGUS will return to the previous display and ignore any entries
made at this level, e.g. changes to the settings
Cancel test
Cursor keys
-
-
-
-
Move the cursor thr
ough the display lines (vertical cursor keys)
Move the cursor through a display line (horizontal cursor keys)
Select a menu
Select a function or a test
Telephony
xDSL (Access mode xTU-R)
- Start VoIP telephony
Layer 1 m
easurement
- xDSL access: display the connection parameters
Num
erical keypad
-
-
Entry of the digit
s 0 to 9, letters and special characters
Direct function call (for an example, see Page 29)
Softkeys
-
The fu
nction of the 3 softkeys varies with the situation. The current
function of each softkey is shown in the bottom, highlighted line of the
display.
Common softkeys and their meaning:
<Menu>: The main menu will open.
<Profile>: Display the profile
<Param.>: Access the parameter lists
<Start>: Setup a connection or start a test
<Stop>: Clear down a connection or stop a test
<Del.>: Delete the character before the cursor
<Infos>: Open additional connection information
<12>ab>: entry of the digits 0 to 9 plus * and #
<ab>AB>: entry of the lowercase characters and @, /,- and .
<AB>12>: entry of the uppercase characters and @, /,- and .
You will find the other softkeys described at the relevant points in the
manual.
4 Operation - A Brief Guide
14 ARGUS 141
The ARGUS is in largest part operated with the 4 cursor keys, the confirmation key ,
the return key and the three softkeys.
The current assignment of the three softkeys is shown in the lower line of the display.
On the following pages, only the softkey's meaning in the respective context is shown -
enclosed in angle brackets < >, e.g. <No>. The softkey <> serves the same function
as the confirmation key and the <> softkey performs the same function as the
cursor key on the ARGUS keypad.
Shift key
In some tests, a green circle with a green “S” will be shown in the
uppermost line in the display. This indicates that the softkeys are
assigned twice. In such a case, press the Shift key to change the
function of the softkey (for an example, see Page 110).
Example:
Pressing the Shift key will change
the softkey function.
4 Operation - A Brief Guide
ARGUS 141 15
Example of operation:
Current assignment of the softkeys
<No> The displayed access will not be
used. The Access menu will now open:
Select a line in the display:
in the example, Select a type of
access; the selected type will be
marked in blue (in this example,
ADSL).
Confirm selection
In this example: The ARGUS will
set the type of access to the one
marked in blue. The Access mode
menu will open.
Return to the previous display
without changing to marked type of
access.
Header: Shows the name of the menu (in this
example, the Access menu), the name of the
currently running test etc.
Press the key.
4 Operation - A Brief Guide
16 ARGUS 141
Connectors at top
Connections at bottom
PWR
Connection for the external plug-in power supply.
If the plug-in power supply is connected, the
ARGUS will automatically disconnect the battery
pack. After it is switched off, the ARGUS will
automatically recharge the battery pack (see page
127).
USB-B
USB-B (mini-USB):
- USB client interface to connect to a PC.
Line
xDSL connection Pin assignment: 4/5
LAN
Connection to a PC's network card
(Access mode: xTU-R bridge)
Green "Speed“ LED signals the transmission speed
LED off: 10 BaseT
LED on: 100 BaseT
Yellow “Link/Data” LED signals that a
physical connection has been established
to another Ethernet port
LED on constantly:
A connection has been setup.
LED flashing:
Active - sending or receiving
4 Operation - A Brief Guide
ARGUS 141 17
Charging the battery pack for the first time
The compartment for the rechargeable battery pack (accumulators) is located on the back
of the case. Insert the battery pack with the locating lug at the top and then tighten the
thumbscrew. Use only the battery pack included in the package. With the ARGUS switched
off, connect it to the supplied plug-in power supply.
Press the -key to switch the ARGUS on. The following display should appear (it may
be necessary to first acknowledge other display messages):
The supplied battery pack will not reach its full capacity until it has been fully charged page
127.
Current assignment of the softkeys
Press <Batt.>
Selected
command
Menu name
Press
The ARGUS will switch itself off automatically
as soon as the battery pack is recharged.
Press : Cancel "Charge" battery pack
The access and mode shown
may vary.
4 Operation - A Brief Guide
18 ARGUS 141
Power-Down Mode
Page 125 in battery mode, the ARGUS will automatically power down after it has
been idle for 15 minutes (this setting can be changed, see Page 125). Reasonably
enough, the ARGUS will not power-down during a test (e.g. Loopbox) or when it is
in Trace mode.
As an alternative, it is possible to operate the ARGUS using the included plug-in power
supply. When the power supply is connected, the battery pack is automatically
disconnected. Regardless of the type of supply used, the battery pack should always
installed when you operate the ARGUS. This will ensure among other things the
uninterrupted operation of the real-time clock.
Unplug the power supply from the mains, once the ARGUS is switched off and will
no longer be used (charging the battery pack).
4 Operation - A Brief Guide
ARGUS 141 19
An Overview of the ARGUS Connections
5 Menu Hierarchy
20 ARGUS 141
5 Menu Hierarchy
Switch the ARGUS on
Menu
Access
Selection of the physical
access
The Access Mode menu will
open automatically
The main window will open displaying menus
available for the type of access selected last.
ADSL
VDSL
Menu
battery charging
Charge P. 127
Auto charge
The initial display will depend on the
type of access set last.
In this example: ADSL access
/