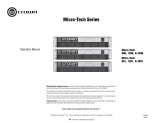
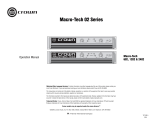
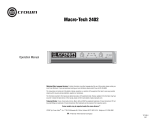
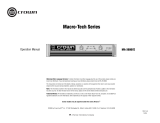
Com-Tech 1600 Amplifier Service Manual
7
Theory
Overview
It should be noted that over time Crown makes im-
provements and changes to their products for various
reasons. This manual is up to date as of the time of
writing. For additional information regarding these
amplifiers, refer to the applicable Technical Notes
provided by Crown for this product.
This section of the manual explains the general opera-
tion of a typical Crown power amplifier. Topics cov-
ered include Front End, Grounded Bridge, and ODEP.
Due to variations in design from vintage to vintage
(and similarities with other Crown products) the theory
of operation remains simplified.
Features
Com-Tech amplifiers utilize numerous Crown innova-
tions including grounded bridge and ODEP technolo-
gies. Cooling techniques make use of the what is
essentially air conditioner technology. Air flows bot-
tom to top, and front to side. Air flows a short distance
across a wide heatsink. This type of air flow provides
significantly better cooling than the “wind tunnel”
technology used by many other manufacturers. Out-
put transistors are of the metal can type rather than
plastic case. This allows for a significantly higher
thermal margin for the given voltage and current
ratings. All devices used are tested and graded to
ensure maximum reliability. Another electronic tech-
nique used is negative feedback. Almost all power
amplifiers utilize negative feedback to control gain
and provide stability, but Crown uses multiple nested
feedback loops for maximum stability and greatly
improved damping. Most Crown amplifiers have damp-
ing in excess of 1000 in the bass frequency range. This
feedback, along with our compensation and ultra-low
distortion output topology, make Crown amplifiers
superior.
Features specific to the Com-Tech Series’ include
slew rate limiting, and audio muting for delay or
protective action. This amplifier can operate in either
a Bridged or Parallel Mono mode as well as dual
(stereo). A sensitivity switch allows selection of input
voltage required for rated output. Level controls are
mounted on the rear panel and are of the rotary type.
Front panel indicators let the user know the status of
the low voltage power supply (enable), signal pres-
ence, distortion, and an ODEP indicator for each
channel which shows the reserve energy status. In
general, the packaging of this model is designed for
maximum watt/price/weight/size value with user friendly
features.
For additional details refer to the specification section,
or to the applicable Owner’s Manual.
Front End Operation
The front end is comprised of three stages: Balanced
Gain Stage (BGS), Variable Gain Stage (VGS), and
the Error Amp. Figure 1 shows a simplified diagram of
a typical front end with voltage amplification stages.
Balanced Gain Stage (BGS)
Input to the amplifier is balanced. The shield may be
isolated from chassis ground by an RC network to
interrupt ground loops via the Ground Lift Switch. The
non-inverting (hot) side of the balanced input is fed to
the non-inverting input of the first op-amp stage. The
inverting (negative) side of the balanced input is fed
to the inverting input of the first op-amp stage. A
potentiometer is provided for common mode rejection
adjustment. Electrically, the BGS is at unity gain.
(From an audio perspective, however, this stage
actually provides +6dB gain if a fully balanced signal
is placed on its input.) The BGS is a non-inverting
stage. It’s output is delivered to the Variable Gain
Stage.
Variable Gain Stage (VGS)
From the output of the BGS, the signal goes to the VGS
where gain is determined by the position of the Sen-
sitivity Switch, and level is determined by the level
control. VGS is an inverting stage with the input being
fed to its op-amp stage. Because gain after this stage
is fixed at 26dB (factor of 20), greater amplifier sensi-
tivity is achieved by controlling the ratio of feedback to
input resistance. The Sensitivity Switch sets the input
impedance to this stage and varies the gain such that
the overall amplifier gain is 26 dB, or is adjusted
appropriately for 0.775V or 1.4V input to attain rated
output.
Error Amp
The inverted output from the VGS is fed to the non-
inverting input of the Error Amp op-amp stage through
an AC coupling capacitor and input resistor. Amplifier
output is fed back via the negative feedback (NFb)
loop resistor. The ratio of feedback resistor to input
resistor fixes gain from the Error Amp input to the
output of the amplifier at 26 dB. Diodes prevent
overdriving the Error Amp. Because the Error Amp
amplifies the difference between input and output
signals, any difference in the two waveforms will
produce a near open loop gain condition which in turn
results in high peak output voltage. The output of the