Page is loading ...

Wandeinbaublock WEB
Wall installation block WEB
Gebrauchsanleitung / Instructions
inVENTer GmbH
Ortsstraße 4a
D-07751 Löberschütz
+49 36427 / 211-0
info@inventer.de
www.inventer.eu
Lieferumfang/Delivery:
• Wandeinbaublock WEB D120 V-210x249x120, Art.-Nummer 3008-0080
Wall installation block WEB D120 V-210x249x120, Item no. 3008-0080
• Wandeinbaublock WEB D180 V-210x249x120, Art.-Nummer 3008-0078
Wall installation block WEB D180 V-210x249x120, Item no. 3008-0078
• Wandeinbaublock WEB D230 V-280x280x365, Art.-Nummer 3008-0081
Wall installation block WEB D230 V-280x280x365, Item no. 3008-0081
Version 07/2020
Revision 3.1
5030-0015
Änderungen vorbehalten./Subject to changes.
Keine Haftung für Druckfehler./No liability for printing errors.
© inVENTer GmbH 1999-2020
Zubehör für Einbauhilfen & weitere Einbauhilfen:
Accessories for installation aids & further installation helps:
• Styroporscheibe R-D120x30, Art.-Nummer 3007-0097
Protective disc R-D120x30, Item no. 3007-0097
• Styroporscheibe R-D180x30, Art.-Nummer 3007-0097
Protective disc R-D180x30, Item no. 3007-0097
• Styroporscheibe R-D230x30, Art.-Nummer 3007-0097
Protective disc R-D230x30, Item no. 3007-0097
• Wandeinbausystem Simplex
Simplex wall build-in system
Lüftungsgeräte / Ventilation units
iV-Smart+, iV-Smart+ Corner, iV-Smart+ Sylt, iV-Light,
VENTOsan JW, VENTOsan SP
Lüftungsgeräte / Ventilation units
aV100
Setzen Sie das Blocksystem an der entsprechenden Stelle ins Mauerwerk
ein. Beachten Sie die Mindestabstände!
Insert the block system into the appropriate place in the masonry. Observe
the minimum distances!
Mauern Sie das Blocksystem ins Mauerwerk ein. Wall in the block system.
Stecken Sie die Wandeinbaublöcke ineinander, bis
Sie ein Blocksystem der Stärke Ihres Mauerwerks
erreicht haben. Put together the wall installation blocks,
until you reach a system of your masonry‘s thickness.
Wandeinbaublock WEB D120 einsetzen
Mounting the wall installation block WEB D120
Wandeinbaublock WEB D180 einsetzen
Mounting the wall installation block WEB D180
Wandeinbaublock WEB D230 einsetzen
Mounting the wall installation block WEB D230
Lüftungsgeräte / Ventilation units
iV14-Zero, iV14-Zero Corner, iV14-MaxAir, iV-Twin+
Schneiden Sie überstehende Teile des Wandeinbaublocks nach Abbin-
den des Mörtels an beiden Seiten mit einem geeigneten Werkzeug (z. B.
Stichsäge/Klingenmesser) bündig zum Mauerwerk ab. Verschließen Sie
die Öffnung des Wandeinbaublocks bauseits (Styropor-Scheiben optional
als Zubehör), um eine Verschmutzung/Beschädigung zu vermeiden.
Trim protruding parts of the wall installation block system on both sides until they
are flush with the masonry once the mortar has set. Use a suitable tool
(e. g. jigsaw or cutter). Close the round opening to prevent contamination/
damage (protective discs optional available).
Bringen Sie Dämmung, Außenputz und Innenputz an. Achten Sie darauf, die
Öffnung nicht einzudämmen/einzuputzen!
Fit insulation and apply inner plaster as well as exterior render. Make sure
not to mask the round opening!
Mauern Sie das Blocksystem ins Mauerwerk ein. Wall in the block system.
Setzen Sie den Wandeinbaublock an der entsprechenden Stelle ins
Mauerwerk ein. Beachten Sie die Mindestabstände!
Werden mehrere Wandeinbaublöcke aneinander gesetzt, befinden sich
die Außenflächen mittig im Mauerwerk (rote Markierung).
Insert the block into the appropriate place in the masonry. Observe the
minimum distances! If several installation blocks are put behind each other
(greater wall thicknesses) make sure that the end surfaces must be positi-
oned centered into the masonry (red marking).
Schneiden Sie überstehende Teile des Wandeinbaublocks nach Abbin-
den des Mörtels an beiden Seiten mit einem geeigneten Werkzeug (z. B.
Stichsäge/Klingenmesser) bündig zum Mauerwerk ab. Verschließen Sie
die Öffnung des Wandeinbaublocks bauseits (Styropor-Scheiben optional
als Zubehör), um eine Verschmutzung/Beschädigung zu vermeiden.
Trim protruding parts of the wall installation block system on both sides until
they are flush with the masonry once the mortar has set. Use a suitable tool
(e. g. jigsaw or cutter). Close the round opening to prevent contamination/dama-
ge (protective discs optional available).
Bringen Sie Dämmung, Außenputz und Innenputz an. Achten Sie darauf, die
Öffnung nicht einzudämmen/einzuputzen!
Fit insulation and apply inner plaster as well as exterior render. Make sure
not to mask the round opening!
120 120
35
25
≤ 365 > 365
ODER
OR
1
2
3
4
5
1
2
3
4

Benutzer- und Sicherheitshinweise
Vielen Dank, dass sie sich für ein inVENTer-Qualitätsprodukt entschieden haben.
Diese Gebrauchsanleitung gibt Ihnen einen Überblick über ihr Produkt und den
sicheren Umgang mit ihm. Ein Symbol auf der linken Seite und ein Signalwort vor
dem Text kennzeichnen Sicherheits- und Warnhinweise:
VORSICHT: Leichter/mittlerer Personenschaden droht unmittelbar.
HINWEIS: Sachschaden droht unmittelbar oder möglicherweise.
Lesen Sie sich vor dem Einbau des Wandeinbaublocks die Gebrauchsanleitung sorg-
fältig durch. Sie ist Teil des Produktes und muss ständig verfügbar sein. Beachten
Sie alle aufgeführten Hinweise, um Personen- und Sachschäden zu vermeiden.
User and safety information
Thank you for purchasing this high quality product from inVENTer!
This instruction provides an overview of the product and the basic safety precautions for
safe and proper operation. A symbol on the left side of the instruction and a signal word in
front of the text indicate the safety and warning instructions as well as its hazard level:
CAUTION: indicates direct danger of minor/significant injury.
NOTE: indicates imminent or possible damage to property.
Please read the installation instructions carefully before mounting the wall installation
block and observe all information provided. These instructions are part of the product,
and must be permanently available. Non-observance of safety warnings could result in
injury and/or property damage.
• CAUTION: When installing the wall installation block, observe the applicable
building codes, fire protection regulations and accident prevention regulations
of the Employer’s Liability Insurance Association [Germany] or local equivalent.
The installation may only be performed by qualified personnel taking into
account the state-of-art in construction engineering.
• NOTE: Only use the installation block for use described in this document.
• NOTE: Before mounting, please check which installation block option you need
for your ventilation unit‘s wall sleeve.
• NOTE: Keep all ignition sources away from the wall installation block (e. g.
open flames, welding sparks, electric arcs/sparks).
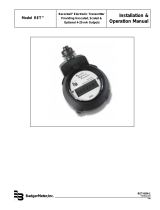
• NOTE: Observe the following minimum distances to adjacent components:
Interiour wall: 250 mm surrounding from central axes
Exteriour wall: 250 mm surrounding from central axes
(Exception: 450 mm upwards, if protective hood Nova is used)
Consult your planner!
• VORSICHT: Die Montage des Wandeinbaublocks darf nur von eingewiesenem
und qualifiziertem Personal unter Beachtung der geltenden Bauvorschriften,
der Feuerschutzverordnung und den Unfallverhütungsvorschriften der Berufs-
genossenschaften sowie unter Beachtung des aktuellen Stands der Bautechnik
erfolgen.
• HINWEIS: Verwenden Sie den Wandeinbaublock nur entsprechend der Einsatz-
fälle, die in dieser Dokumentation beschrieben sind.
• HINWEIS: Prüfen Sie vor dem Einsetzen, welcher Wandeinbaublock für die
Wandeinbauhülse Ihres Lüftungsgerätes benötigt wird.
• HINWEIS: Halten Sie den Wandeinbaublock von allen denkbaren Zündquellen
fern (u. a. offene Flammen, Schweißfunken, elektrische Funken).
• HINWEIS: Beachten Sie die Mindestabstände zu angrenzenden Bauteilen:
Innenwand: 250 mm umlaufend ab Mittelachsen
Außenwand: 250 mm umlaufend ab Mittelachsen
(Ausnahme: 450 mm nach oben, wenn eine
Wetterschutzhaube Nova angebracht werden soll.)
Befragen Sie ggf. Ihren Planer!
Produktbeschreibung
Die Wandeinbaublöcke dienen als Einbauhilfe für alle Lüftungsgeräte der Produktreihen
iV14-Zero, iV-Smart+ und aV100.
Der Wandeinbaublock WEB wird im Rohbau eingesetzt und im Mauerwerk verbaut.
Im Wandeinbaublock befindet sich eine runde Öffnung. Sie ersetzt die bei der Montage
des Lüftungssystems notwendige Kernbohrung.
Die Wandeinbaublöcke WEB bestehen aus Neopor® mit optimierter spezifischer thermi-
scher Leitfähigkeit und tragen damit zusätzlich zur Wärmedämmung bei.
WEB D120 / WEB D180: Die Wandeinbaublöcke sind als Stecksystem aufgebaut.
Durch Zusammenstecken einzelner Wandeinbaublöcke kann das Blocksystem auf alle
gängigen Wandstärken erweitert werden. Bauseitig ist der Wandeinbaublock auf die
exakt benötigte Stärke des Mauerwerks kürzbar.
Durch Vertiefungen auf der Oberfläche des Wandeinbaublocks wird eine optimale Ver-
bindung zwischen Mörtel und Wandeinbaublock erreicht. Nach dem Zusammenstecken
sind die Vertiefungen versetzt angeordnet, um Infiltration zu vermeiden.
WEB D230: Die Wandeinbaublöcke werden aneinander gesetzt. Ein Wandeinbaublock
ist für Wandstärken bis 365 mm anwendbar. Das Blocksystem kann durch aneinander
setzen mehrerer Wandeinbaublöcke beliebig für größere Wandstärken erweitert werden.
Bauseitig ist der Wandeinbaublock auf die exakt benötigte Stärke des Mauerwerks
kürzbar.
Product overview
The wall installation block is available as an option for easy installation of the ventilati-
on unit‘s of product ranges iV14-Zero, iV-Smart+, and aV100.
The wall installation block WEB is inserted into the structural work and built into the
masonry. A round opening is situated in the wall installation block. It replaces the
necessary core drilling when mounting the ventilation unit.
The wall installation block WEB is made of Neopor® with an optimised specific thermal
conductivity. Thus, it contributes to the thermal insulation.
WEB D120 / WEB D180: The wall installation blocks are designed as a plug-in system.
One wall installation block has a depth of 120 mm. By putting together single wall
installation blocks the block system may be expanded on site. By cutting the wall
installation block it can be shortened on site to every common wall thickness.
An optimal connection between mortar and wall installation block is accomplished by
the grooves on the surface of the wall installation block. After putting together different
wall installation blocks the grooves are staggered to avoid occuring infiltration.
WEB D230: The wall installation blocks are rowed up one behind another. One wall
installation block is applicable for wall thicknesses up to 365 mm. By putting together
single wall installation blocks the block system may be expanded on site. By cutting the
wall installation block it can be shortened on site to every common wall thickness.
Technische Details • Specications
210
249
120
Ø
120
210
249
120
Ø
180
120
120
280
280
365
Ø
230
WEB D120
WEB D180
Abmessungen/ Dimensions [mm]
Innendurchmesser/
Internal diameter [�, mm]
Material/ Material
Brandverhalten/
Fire behaviour
• DIN 4102
• EN-ISO 13501-1
WEB D230 Abmessungen/ Dimensions [mm]
Innendurchmesser/
Internal diameter [�, mm]
Material/ Material
Brandverhalten/
Fire behaviour
• DIN 4102
• EN-ISO 13501-1
280 x 280 x 365
230
Neopor WLG 032
(schwer entammbar/
hardly inflammable)
B1
E
210 x 249 x 120
180
Neopor F5300 plus
(schwer entammbar/
hardly inflammable)
B1
E
Abmessungen/ Dimensions [mm]
Innendurchmesser/
Internal diameter [�, mm]
Material/ Material
Brandverhalten/
Fire behaviour
• DIN 4102
• EN-ISO 13501-1
210 x 249 x 120
120
Neopor F5300 plus
(schwer entammbar/
hardly inflammable)
B1
E
Montagehinweise • Installation advices
• Die Anzahl der benötigten Wandeinbaublöcke richtet sich nach der Stärke des
Mauerwerks (Mauerstein ohne Putz oder Dämmung!)
The quantity of installation blocks needed is determined by the masonry‘s thickness (brick
without plaster/render and insulation!)
WEB D120 / WEB D180 WEB D230
Mauerwerk/
Masonry [mm] Anzahl/Quantity Mauerwerk/
Masonry [mm] Anzahl/Quantity
240 2
≤ 365 1300 3
365 3
425 4 > 365 2
• Die Keilezinken am WEB D120/WEB D180 haben
unterschiedliche Größen. Verbinden Sie diese
beim Zusammenstecken mit den Löchern der
entsprechenden Größe. The pins on WEB D120/
WEB D180 have different sizes. Take care to connect
the pin and the gap of the same size when putting
together the wall installation blocks.
• Setzen Sie die Wandeinbaublöcke WEB D230 bei Wand-
stärken über 365 mm so ins Mauerwerk ein, dass die
Außenächen beider Blöcke (rote Fläche) mittig im Mau-
erwerk sitzen. Dadurch gewährleisten Sie beim Einmörteln
die größtmögliche Auageäche. Insert the blocks
WEB D230 for wall thicknesses over 365 mm in such a way, that
the end surfaces (red marking) are centered in the masonry. Thus,
a large contact area is ensured when walling in the block system.
WEB D230
WEB D230
120 120
35
25
250
250
250
450
/