Page is loading ...

~ 1 ~
\
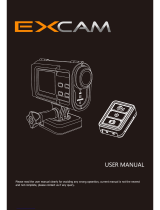
User
Manual

~ 2 ~
—————————— Table of Conten ——————————
Main Feature .................................................................................................................................... 4
Install and Use .................................................................................................................................. 5
Camera body buttons .................................................................................................................. 5
Remote controller ....................................................................................................................... 6
Install Battery ............................................................................................................................ 7
Close back cover......................................................................................................................... 7
Install Memory Card .................................................................................................................... 8
Install waterproof housing ........................................................................................................... 9
Install the Mounts ..................................................................................................................... 10
Video record and Capture .......................................................................................................... 11
Video Playback ......................................................................................................................... 12
Browse Pictures ........................................................................................................................ 13
Delete files ............................................................................................................................... 14
Connect to Television ................................................................................................................ 15
Connect with Computer ............................................................................................................. 17
Battery Power Charge ...................................................................................................................... 18
Charge by computer ................................................................................................................. 18
Charge by Wall charger ............................................................................................................. 19
Charge by Cigar lighter charger .................................................................................................. 19
Full charge time and Using time ................................................................................................. 21
Battery Icon instruction ............................................................................................................. 21
System Menu .................................................................................................................................. 22
Booting picture & screen instuction ............................................................................................. 22
Icon on Screen ......................................................................................................................... 22
Main Menu ............................................................................................................................... 23
Record Setting ................................................................................................................................ 24
Record Mode ............................................................................................................................ 24
Loop Record ............................................................................................................................. 28

~ 3 ~
Video Resolution ....................................................................................................................... 29
Record Content ........................................................................................................................ 30
Time Stamp ............................................................................................................................. 31
Photo Size ................................................................................................................................ 32
Continuous Shot ....................................................................................................................... 33
Self-Timer ................................................................................................................................ 33
System Setting ................................................................................................................................ 34
Language Setting ...................................................................................................................... 34
Date & Time Setting.................................................................................................................. 35
Image Flip ............................................................................................................................... 37
Light Frequency ........................................................................................................................ 38
Auto Power OFF ....................................................................................................................... 39
Auto Screen OFF....................................................................................................................... 40
Volume .................................................................................................................................... 41
Format .................................................................................................................................... 42
Reset....................................................................................................................................... 44
Firmware Update ...................................................................................................................... 45
Version .................................................................................................................................... 47
Specifications .................................................................................................................................. 48
Wall Charger ................................................................................................................................... 50
Charger .......................................................................................................... 错误!未定义书签。
Adaptor .......................................................................................................... 错误!未定义书签。
Accessories ............................................................................................................ 错误!未定义书签。
在使用前详细阅读说明书,以避免错误操作,本说明书本非全面或最近,有任何疑问请联系我们

~ 4 ~
Main Feature
480 x 240,1.5” TFT LCD Screen
5.0MP FULL HD CMOS sensor
170° Super wide angle FOV( field of view) under 720P, 127 ° under 1080P 720P
H.264 Compression into MP4 video format
20 Meters ( 60 Feet) Waterproof
RF wireless remote controller (Power ON&OFF, Start & Stop video record )
Support Timing record, Motion detect record, Auto record and Loop record
Support Timing Capture ( Self-timer) , Continuous capture
Zoom focus available under 720P video record and Picture capture mode
Video resolution option in setting:
16:9 Full HD 1920 x 1080P 30FPS
4:3 Full HD 1440 x 1080P 30FPS
16:9 HD 1280 x 720P 60FPS
16:9 HD 1280 x 720P 30FPS
4:3 WVGA 848 x 480 60FPS
Picture resolution option in setting:
4000 x 3000 12MP
3200 x 2400 8MP
2592 x 1944 5MP
Video & Picture playback
Support 1GB~32GB High speed TF (Micro-SD) memory card
High speed USB2.0 interface for Power charge and Data transfer
HDMI、USB and RCA output optional

~ 5 ~
Install and Use
Camera body buttons
1.Video Record Indicator (red)
2.Power Indicator (red) & Power charge Indicator
(green)
3.MIC
4.Tripod screw hole
5.Audio output
6.TF card slot
7.REC&Confirm button
8.UP & Zoom+
9.Menu button
10.Down & Zoom- / Remote Pair
11.Power ON & Picture Capture
12.USB Port
13.HDMI Port
14. TFT LCD
15. Speaker

~ 6 ~
Remote controller
Start video record
Remote to start video record only under Camera Powered ON, not valid if camera is OFF.
Stop video record
Remote to power OFF directly or stop video record and then power OFF.
Remote Pair with Camera
Hold the “<” button under power OFF state ( don’t loose it ), then press POWER button to turn ON the
camera, then immediately press the button on the remote controller, after the camera turned ON,
then loose the “<” button.
Note:
-Screen will keep dark during the pair process
-Camera will power ON automatically if paired successfully
-Camera will power OFF automatically if pairing failed
This operation only necessary when you bought new remote controller, pairing process has been did before
leave factory.

~ 7 ~
Install Battery
Please install the battery according to the graphic:
Open the battery cover
Install the battery ( Note: label side face up)
Close back cover

~ 8 ~
Install Memory Card
1.Install the TF card according to graphic
2.Camera without built-in memory, support 1GB~32GB TF card external memory expand
3. After installed the SD card, rest available memory could be checked on the screen
Screen won't display the SD card
icon if without valid SD card
installed correctly
Screen will display the SD card
icon if valid SD card installed
correctly
Attention:
Please use the original SD card for good using experience. Bad or phony SD card would happen the
problem like "can not read" or "file damaged". Please format the SD card in this camera before use it the
first time.

~ 9 ~
Install waterproof housing
As arrowhead showed in graphic below, pull "A" locker, "B" locker will slack off at same time
automatically
Put the camera into the waterproof housing as graphic below:
Close the cover
Close the locker "B" first, and then press the "A" locker to locked-in.

~ 10 ~
Install the Mounts
+ =
Please choose the suitable mount to finish the installation according to different use.
Waterproof Housing buttons instruction:
Note:
Waterproof housing max depth is 20 Meters ( 60 Feet)
A pot of fog or water globule would glue to the inside cover, it is allowed and won't effect the camera
working.

~ 11 ~
Video record and Capture
1.Press POWER button turn on the camera, press REC button to start the video record, a red icon will
flash on the screen during this time.
Press " <" and " >" button to zoom, press REC again to stop the video record and video will be saved at
the same time.
2.Under power on state, press POWER button to take picture, the camera icon on the screen flash into red
color and go back to white color during this time. Press " <" and ">" to zoom.
The camera support Continuous capture and timing record, please read page 32 for more detailed setting
and operation.

~ 12 ~
Video Playback
Press MENU button to enter the main menu of camera, use " < " and ">" to choose the video folder, the
quantity of video clips will display on the corner.
Press REC button to enter the folder, video clip thumbnail will showed like below:
Press "<" and ">" to choose the video clip, press REC to confirm, press again to start video playing
Delete files - Please read page 14 for more details.

~ 13 ~
Browse Pictures
Press MENU button to enter the main menu, use "<" and ">" to choose the picture folder, picture
quantity will display on the corner.
Press REC button to enter the picture folder, picture thumbnail will show like below:
Press "<" and ">" to select picture for browsing, press REC to confirm, use "<" and ">" to browse other
pictures.
Delete files - Please read page 14 for more details.

~ 14 ~
Delete files
Long press MENU button under playing back or browsing state, delete option menu will display on the
screen
Use "<" and ">" to make setting:
No:cancel current operation and quit
Yes:confirm current operation and quite
ALL:confirm delete all files in the folder
Press REC button to confirm operation
Attention:
The files will not be recover after deleted, recommend to make copy in the computer before make this
operation.

~ 15 ~
Connect to Television
1.USB-RCA cable connect with TV ( output)
Find out the USB-RCA cable in standard accessories, USB side insert to camera, RCA side insert to TV
( Yellow for Video, White for Audio)
2. HDMI cable connect with TV (output)
Please insert the A type connector to the TV , insert C type connector to camera
Note:
The video that output to TV is 1080P resolution when playing back video clip, real-time output display is
480i only.

~ 16 ~
3. 2.5mm - RCA cable connect with TV (output)
2.5MM - RCA cable is not included in standard accessories.
Start playing back video clip or browse pictures
a. Turn the TV to AV or HDMI input channel, power on the camera
b. Press MENU button to enter main menu, press " < " and ">" to select video or picture folder, press
REC button to enter
c. Use " <" and ">" button to select the file to playing, press REC to confirm, press again to play.
Note:
Real-time output resolution to TV is 480i.

~ 17 ~
Connect with Computer
Connect the camera with computer via USB cable, available for data transfer, power charge and firmware
update.
Power on the camera after connect it with the computer by USB cable, and the screen will display “ USB
connected” like graphic below, means successfully connected.
Removable disc will be found under “ My Computer” , enter the disc and it is available to browse 、copy
or playback the media.

~ 18 ~
Battery Power Charge
Install the battery ( Note: label side face up)
Charge by computer
Note:
Power charge by computer, please make sure the camera is POWER OFF state. The green charging
indicator will turn on, indicator will turn off after full charged.

~ 19 ~
Charge by Wall charger
Charge by Cigar lighter charger
Attention: Only original power charger that offered in standard accessories available.

~ 20 ~
—————————— 电池充电 ——————————
d,Charge power via the charger,
/