Ruckus Wireless ZoneFlex R500 Quick Setup Manual

Type
Quick Setup Manual

Ruckus Wireless ZoneFlex R500 is a powerful dual-band 802.11ac Wi-Fi access point designed to provide reliable and secure wireless connectivity for businesses and organizations. With its advanced features like MU-MIMO and beamforming, the R500 delivers high-speed and consistent Wi-Fi coverage for multiple devices simultaneously. It supports multiple wireless networks (SSIDs) with different security settings, allowing for flexible network segmentation and guest access.

Ruckus Wireless ZoneFlex R500 is a powerful dual-band 802.11ac Wi-Fi access point designed to provide reliable and secure wireless connectivity for businesses and organizations. With its advanced features like MU-MIMO and beamforming, the R500 delivers high-speed and consistent Wi-Fi coverage for multiple devices simultaneously. It supports multiple wireless networks (SSIDs) with different security settings, allowing for flexible network segmentation and guest access.

Copyright © 2015 Ruckus Wireless, Inc.
Published September 2015, Part Number 800-70564-002 Rev C
Page 1 of 4
Unleashed
TM
R500 Access Point
Quick Setup Guide
This Quick Setup Guide provides step-by-step instructions on how to
set up your Ruckus Wireless Unleashed R500 Dual Band 802.11ac WiFi
Access Point. After completing the steps described in this Guide, the
Unleashed Master Access Point (Master AP) will be created. Additional
Unleashed access points can be added to the network for additional
coverage and capacity.
Before You Begin
Before deploying Ruckus Wireless products, please check for the latest
software and release documentation.
User Guides and Release Notes are available at
http://support.ruckuswireless.com/documents.
Software Upgrades are available at
http://support.ruckuswireless.com/software.
Open Source information is available at
http://opensource.ruckuswireless.com.
Software License and Limited Warranty are available at
http://support.ruckuswireless.com/warranty.
Package Contents
Unleashed R500 Access Point
One wall-mount anchor kit, including two 1" No. 8 steel panhead
Phillips sheet metal screws, one 5mm M2.5 x 1.06 Torx security
screw, and wall-mount anchors
One external T-bar bracket (two unassembled parts)
•One unit removal pin
Regulatory flyer
Product warranty statement
Declaration of Conformity, if required
•This
Quick Setup Guide
Step 1: Collect Tools and Setup Requirements
Make sure that you have the following setup requirements:
A PC/Mac/mobile client with a WiFi network adapter and a web
browser
One Cat 5e Ethernet cable
Network switch or router, with Internet connectivity
An AC power adapter (sold separately), or
an 802.3af or 802.3at -compliant Power over Ethernet (PoE)
switch or PoE injector
No. 2 Phillips screwdriver and T8 Torx driver for wall mounting
anchor kit
When mounting the Unleashed R500 to a truss or pole, two
customer-supplied cable ties
Step 2: Connect the AP to Power and Your Network
Figure 1. : Top view
1 After removing your Unleashed AP from its package, connect it
to your network switch or router using an Ethernet cable.
2 Using an AC adapter (sold separately), connect the AP 12VDC
port to a protected power source.
Alternatively, connect the PoE port to a PoE injector or PoE
switch for both power and network connections.
3 Verify that the Power LED on the external enclosure is a steady
green.
Figure 2. : Bottom view
Step 3: Log In and Run the Setup Wizard
1 As soon as the Unleashed AP is powered on and connected to
the local network, it boots up and begins broadcasting a
temporary unencrypted ESSID named “Configure.Me-[xxxxxx]”
from the 2.4 GHz radio only.
2 Using your client’s WiFi configuration settings, select and
associate to the “Configure.Me-[xxxxxx]” SSID.
3 Launch a web browser and enter the following into the
browser’s URL bar:
unleashed.ruckuswireless.com, and
press
Enter.
Figure 3. Connect to the “ConfigureMe” SSID
\
Figure 4. : Select Create New Unleashed Network
4 Select Create New Unleashed Network, and click
Start to begin.
5 The “Configuring Unleashed Master” progress screen displays
the progress. Wait until the initialization process completes.
.
6 Once initialization is complete, ensure that you are still
connected to the “Configure.Me” SSID, and click
Next.
7 You will be redirected to the Setup Wizard. Complete the steps
in the Setup Wizard and click
Finish.
Note: If you will be using PoE, then you will need a Cat 5e (or
better) Ethernet cable to connect the AP to the PoE injector or
switch.
PoE Port 12VDC Port
Note: Do NOT disconnect the power or network cable from
the device during the setup process.
Note: The Unleashed Master initialization process can take
up to 5 minutes to complete.
Copyright © 2015 Ruckus Wireless, Inc.
Published September 2015, Part Number 800-70564-002 Rev C
Page 2 of 4
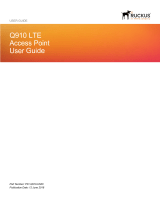
Figure 5. Complete the Setup Wizard to set up your Unleashed network
8 Once the Setup Wizard is finished, a “Configuring system
settings and rebooting” progress screen appears. Wait until the
process is complete.
Figure 6. Configuring system settings and rebooting
9 Connect to the WLAN that you configured in the Setup Wizard,
and click
OK to reconnect. You will be redirected to the
unleashed.ruckuswireless.com login screen.
10 Enter your Admin Name and Password to login.
Figure 7. The Login page
11 Upon successful login you will be presented with the
Unleashed Dashboard, which displays an overview of your
Ruckus Unleashed network.
Figure 8. : The Unleashed Dashboard
STEP 4: CUSTOMIZE YOUR WIRELESS LANS
Once the Unleashed Master AP has been initialized, you can fine-tune
the settings of your first WLAN (that you created during the setup wizard),
and create any additional WLANs needed prior to attaching additional
Unleashed member APs. Then, when you deploy additional member
APs in whatever order you prefer, they will automatically retrieve all WLAN
configuration settings (and any other settings you have configured) from
the Unleashed Master AP.
1 From the Dashboard, click anywhere in the WiFi Networks
section to expand the display of your deployed WLANs.
2 On the left side of the screen, select the WLAN box for the
WLAN you would like to configure, and click the
Edit button to
edit the configuration; or click
Create to create a new WLAN.
3 If you made any changes to the original WLAN, you will be
disconnected and will need to reconnect once the changes
have been deployed on the AP radios.
Congratulations! Your Unleashed network is now configured and ready
for use. You may now proceed to
Step 5: Deploy Additional
Unleashed Access Points.
STEP 5: DEPLOY ADDITIONAL UNLEASHED ACCESS
P
OINTS
Deploying additional Unleashed member APs is simply a matter of
connecting them to the same Layer 2 network (subnet) and providing
power. They will discover the Unleashed Master and join automatically.
No additional steps are necessary.
FOR MORE INFORMATION
For more information on managing your Unleashed network, refer to the
Ruckus Wireless Unleashed Access Point User Guide
, available from
https://support.ruckuswireless.com.
(OPTIONAL) MOUNTING INSTRUCTIONS
The Unleashed R500 can be mounted to a T-bar, wall or ceiling a using
the enclosed mounting kits. Refer to the following sections:
Mounting on a Flat Surface
Mounting on a Recessed Drop-Ceiling T-Bar
Mounting on a Flush Drop-Ceiling T-Bar
Mounting on a Truss or Pole
Mounting on a Flat Surface
1 Use the Mounting Template on the last page of this Quick
Setup Guide as a template to mark the locations for drill holes
on the mounting surface. There are two sets of keyholes
available on the AP. One allows the AP to be mounted to a wall
or ceiling. The other allows the Unleashed R500 to be mounted
to an accessory bracket (not included).
2 Use a 5mm drill bit to drill holes approximately 25mm into the
mounting surface (A in
Figure 9.).
3 Insert the anchors and mounting screws into the mounting
surface, leaving approximately 1/4” (6 mm) of the screw heads
protruding for the AP enclosure.
4 Insert the unit removal pin into the hole on the side of the AP to
release the locking mechanism (B in
Figure 9.).
5 Place the AP onto the mounting screws so that the screw
heads enter the mounting holes on the AP enclosure, and push
the AP down to lock in place.
6 Remove the unit removal pin to release the locking mechanism
and secure the AP.
7 To remove the AP, insert the unit removal pin into the hole on
the side of the AP to unlock, then push the AP up to release the
AP enclosure from the mounting screws.
Figure 9. . Flat surface mounting
A
B
Copyright © 2015 Ruckus Wireless, Inc.
Published September 2015, Part Number 800-70564-002 Rev C
Page 3 of 4
Mounting on a Recessed Drop-Ceiling T-Bar
The enclosed T-bar bracket supports mounting to recessed drop ceiling
T-bars.
Mounting an AP using the External Bracket
Removing an External Bracket from a T-Bar
Removing an External Bracket from an AP
Mounting an AP using the External Bracket
1 Insert the unit removal pin (A in Figure 10.) into the hole on the
side of the Unleashed R500 (B in
Figure 10.) to release the
locking mechanism.
Figure 10. . Attaching the external bracket to the AP
2 Position the studs on the bottom of the T-bar bracket (C in
Figure 10.) in the mounting holes on the Unleashed R500
enclosure, and then slide the T-bar bracket until the studs are in
the narrow parts of the Unleashed R500 mounting keyholes
(arrow).
3 Remove the unit removal pin (A in Figure 10.) to engage the
locking mechanism and secure the T-bar bracket to the
Unleashed R500.
4 Make sure that the locking tab (D in Figure 10.) is in the first
position on the T-bar bracket (C in
Figure 10.).
5 Gently push the ceiling tiles up and out of the way.
6 Position the T-bar bracket so its two clasps grip one edge of
the T-bar (A in
Figure 11.). Make sure that both clasps are
gripping the T-bar.
Figure 11. . Attaching the external bracket to the T-bar
7 Hold the Unleashed R500 in place and gently push the locking
tab (B in
Figure 11.) until its clasp grips the other edge of the T-
bar.
Removing an External Bracket from a T-Bar
1 Move the ceiling tiles out of the way.
2 Gently lift up the locking tab (A in Figure 12.) by sliding your
fingers under the tab.
3 While lifting up on the locking tab, rotate the Unleashed R500-
and-T-bar bracket assembly (B in
Figure 12.). The Unleashed
R500-and-T-bar bracket assembly comes away from the T-bar.
Figure 12. . Removing the external bracket from the T-bar
Removing an External Bracket from an AP
1 Insert the unit removal pin (A in Figure 13.) into the hole on the
side of the Unleashed R500.
2 Gently lift up the retainer tab (B in Figure 13.).
3 Gently push the T-bar bracket (C in Figure 13.) until it detaches
from the Unleashed R500.
Figure 13. . Removing the external bracket from an AP
Mounting on a Flush Drop-Ceiling T-Bar
Mounting an AP using the Integrated Bracket
Removing an AP Integrated Bracket from a T-Bar
Mounting an AP using the Integrated Bracket
1 Orient the AP so that the T-bar is positioned between the T-bar
clips as shown in
Figure 14., then rotate the AP until the third
T-bar clip catches the T-bar and the latch locks the T-bar in
place (
Figure 15.).
Figure 14. . Attaching the integrated bracket to the T-bar
Figure 15. . Locking the integrated bracket to the T-bar
2 Insert the Torx security screw into the hole near the latch to lock
the AP in place.
Removing an AP Integrated Bracket from a T-Bar
1 To remove the AP from a T-bar, first remove the security screw,
then depress the latch while rotating the AP so that the T-bar
clips disengage the T-bar.
Mounting on a Truss or Pole
1 Feed the customer-supplied cable ties through the two slots on
the back of the Unleashed R500.
2 Fasten the Unleashed R500 to the truss or pole using the cable
ties.
Note: This mounting bracket can also be used on a flush
drop-ceiling T-bar, so the four rubber feet on the bottom of the
AP minimize ceiling tile displacement.
A
B
C
D
A
B
CAUTION: Make sure that all three clasps are gripping the
T-bar!
A
B
C
B
A
Copyright © 2015 Ruckus Wireless, Inc. Page 4 of 4
Published September 2015, Part Number 800-70564-002 Rev C
Mounting Template
  • Page 1 1
  • Page 2 2
  • Page 3 3
  • Page 4 4

Ruckus Wireless ZoneFlex R500 Quick Setup Manual

Type
Quick Setup Manual

Ruckus Wireless ZoneFlex R500 is a powerful dual-band 802.11ac Wi-Fi access point designed to provide reliable and secure wireless connectivity for businesses and organizations. With its advanced features like MU-MIMO and beamforming, the R500 delivers high-speed and consistent Wi-Fi coverage for multiple devices simultaneously. It supports multiple wireless networks (SSIDs) with different security settings, allowing for flexible network segmentation and guest access.

Ask a question and I''ll find the answer in the document

Finding information in a document is now easier with AI