
Picture
Caution : You must read this before you proceed
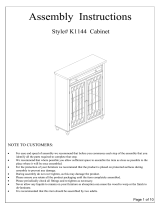
Computer Table
Thank You for purchasing one of our products, please carefully read through
the instructions below.
Caution: The Table Top and other parts are heavy.
Two adults are required whenever lifting or moving them.
General Care: Keep your furniture out of direct sunlight. Use desk pads and
coasters to protect the surface from dents, scratches, and moisture condensation from hot or
cold liquids.
Cleaning: To clean, wipe the surface with damp (not wet) cloth or wipe dry with a clean lint free
cotton cloth.
Page 1 OF 6

Label Picture Description QTY
A Metal Leg
2
B Shelf Side Panel
2
C Shelf Middle Panel
1
D Table Top
1
E Left Side Panel
1
F Right Side Panel
1
G Upper Shelf
1
H Back Panel
1
I Rail
1
J Leg Support Rail
2
Label Picture Description QTY
①
Positioning Dowel
18
②
Cam Bolt
11
③
Cam Lock
11
④
Bolt (M6x40mm)
3
⑤
Bolt (M6x12mm)
3
⑥
Bolt (M6x35mm)
7
⑦
Bolt (7x50mm)
3
⑧
Allen Key
1
⑨
Screwdriver
1
Page 2 OF 6

Before Beginning
Assembly:
Step 1
With assistance of your adult partner, attach the Rail(I) between the Metal Legs(A) using Bolts(④) with Allen Key(⑧).
Do not tighten any Bolts until all are in place.
Overview
This Table has multiple parts and may require up to 60 minutes to assemble. To give you an overview of the Table parts, the
above picture is to help you put the various parts into perspective. Please read through the instructions below to familiarise
yourself with the parts and steps before assembly.
Leg Support Rail(J)
Table Top(D)
Shelf Middle Panel (C)
Right Side Panel(F)
Left Side Panel(E)
Shelf Side Panel(B)
Upper Shelf(G)
Back Panel(H)
Metal Leg(A)
FRONT FACING
Page 3 OF 6

Step 2
Step 3
Step 4
Step 5
Attach Shelf Middle Panel(C) between Shelf Side Panels(B) using Positioning Dowels(①).
5.1) Attach Back Panel(H) to Table Top(D) using Bolts(⑦) with Allen Key(⑧).
5.2) Attach Upper Shelf(G) to Shelf Side Panel(B) using Positioning Dowels(①).
Do not tighten any Bolts until all are in place.
2.1) Attach Leg Support Rails(J) to Metal Legs(A) using Bolts(⑥) with Allen Key(⑧).
2.2) Attach the Leg Support Rails(J) to Rail(I) using Bolts(⑤) with Allen Key(⑧).
Do not tighten any Bolts until all are in place.
Attach assembled Shelf to the Table Top(D) using Positioning Dowels(①).
2.1
2.1
2.2
5.1
5.2
Page 4 OF 6

Step 6
Step 7
Step 8
Attach Cam Bolts(②) to Left Side Panel(E) and Right Side Panel(F) using Screwdriver(⑨) as pictured.
Inspect and make sure all parts are in place, and all Bolts are securely tightened.
Your Computer Table is ready for use.
This Computer Table can only be used on a flat, level surface.
7.1) Insert Cam Locks(③) into Back Panel(H) and Table Top(D) with Screwdriver(⑨).
7.2) Insert Positioning Dowels(①) into Left Side Panel(E) and Right Side Panel(F), then insert Left Side Panel(E) and Right Side
Panel(F) into Shelf Assembly.
Attach Left Side Panel(E) and Right Side Panel(F) to Shelf Assembly by turning the Cam Locks with Screwdriver(⑨) until they
"Lock".
Attach Assembled Table Top(D) to Metal Legs(A) using Bolts(⑥) with Allen Key(⑧).
Do not tighten any Bolts until all are in place.
Step 9
Cam Bolt
Mounting
"+- " label
7.1
7.2
Page 5 OF 6

Page 6 OF 6
-
 1
1
-
 2
2
-
 3
3
-
 4
4
-
 5
5
-
 6
6


Noble House 7314 Operating instructions
- Type
- Operating instructions
- This manual is also suitable for
Ask a question and I''ll find the answer in the document
Finding information in a document is now easier with AI
Related papers

Other documents
-
Southern Enterprises HZ1032A0TX Assembly Instructions Manual
-
SEI HZ030400TX Assembly Instructions Manual
-
-
Southern Enterprises MS998700TX Assembly Instruction Manual
-
-
 Signature Home 4411K Installation guide
-
-
-
-
 Sorellle Presley Crib Assembly Instruction Manual

