Page is loading ...

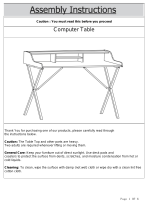
Caution : You must read this before you proceed
TV Stand
Thank You for purchasing one of our products, please carefully read through the instructions below.
Caution: The Table Top and other parts are heavy.
Two adults are required whenever lifting or moving them.
General Care: Keep your furniture out of direct sunlight. Use desk pads and coasters to protect the
surface from dents, scratches, and moisture condensation from hot or cold liquids.
Cleaning: To clean, wipe the surface with damp (not wet) cloth or wipe dry with a clean lint free cotton
cloth.

Label Picture Description QTY
A Top Panel
1
B Bottom Panel
1
C Back Panel
1
D Left Side Panel
1
E Right Side Panel
1
F Left Stand Panel
1
G Right Stand Panel
1
H Door Rail
2
I Left Door Panel
1
J Right Door Panel
1
K Glass Panel
1
M Leg
4
N Support Leg
2

Label Picture Description QTY
①
Cam Lock
21
②
Cam Bolt
21
③
Positioning Dowel (φ8*40mm)
17
④
Glass Clip
4
⑤
Screw (M3.5*14mm)
29
⑥
Connector
4
⑦
Bolt (M6*16)
25
⑧
Washer
25
⑨
Screwdriver
1
Before Beginning Assembly:

Step 1
Step 2
Overview
Take out all the Parts and Hardware, place them on a clean, non-marring surface.
Place the Bottom Panel(B) bottom up, and attach Leg(M) to Bottom Panel(B) using Bolts(⑦) and Washers(⑧) with
Screwdriver(⑨).
Tighten all Bolts fully in a sequential manner.
Repeat the same process to attach the remaining Legs(M) and Support Legs(N) to Bottom Panel(B).
Note: Be certain to Align the marks "P" on Bottom Panel(B) and Legs(M) to ensure correct placement.
This TV Stand has multiple parts and may require up to 60 minutes to assemble. To give you an overview of the TV Stand
parts, the above picture is to help you put the various parts into perspective. Please read through the instructions below to
familiarise yourself with the parts and steps before assembly.
Right Stand
Panel(G)
Support Leg(N)
Bottom Panel(B)
Door Rail(H)
Right Door
Panel(J)
Leg(M)
Top
Panel(A)
Glass Panel(K)
Left Door Panel(I)
Left Side Panel(D)
FRONT FACING
Leg(M)

Step 3
Step 4
Step 5
Insert Positioning Dowels(③) into mounting positions on Left Side Panel(D),Left Stand Panel(F), Right Stand Panel(G)
and Right Side Panel(E) by hand as pictured above.
Stand the Bottom Panel(B) up.
Attach Cam Bolts(②) to mounting positions on the Bottom Panel(B) with Screwdriver(⑨) as pictured.
Insert Positioning Dowels(③) into mounting positions on the Bottom Panel(B) by hand.
Attach Cam Bolts(②) to the mounting position on Left Side Panel(D),Left Stand Panel(F), Right Stand Panel(G) and
Right Side Panel(E) with Screwdriver(⑨) as pictured.
4.1:Insert Cam Locks(①) on Left Stand Panel(F) and Left Side Panel(D) into the mounting positions of Door Rail(H) with
Screwdriver(⑨) as shown in the picture.
4.2:Attach Door Rail(H) to Left Stand Panel(F) and Left Side Panel(D) by turning the Cam Locks with Screwdriver(⑨) until
they "Lock".
Repeat the same process to attach Door Rail(H) to Right Stand Panel(G) and Right Side Panel(E).
Cam Bolt
Mounting
Positions
4.1
4.2

Step 8
Step 7
Attach Cam Bolts(②) to mounting positions on Top Panel(A) with Screwdriver(⑨) as pictured.
6.1:Insert Cam Locks(①) into the mounting positions on Left Side Panel(D),Left Stand Panel(F), Right Stand Panel(G)
and Right Side Panel(E) with Screwdriver(⑨) as picture.
6.2:Attach Left Side Panel(D) and Left Stand Panel(F) to Bottom Panel(B) by turning the Cam Locks(①) with
Screwdriver(⑨) until they "Lock".
Repeat the same process to attach Right Stand Panel(G) and Right Side Panel(E) to Bottom Panel(B).
Caution:Make sure the side of groove on Left Side Panel(D), Right Side Panel(E) and Bottom Panel(B) are on
back side.
Step 6
Insert the Back Panel(C) into the grooves on Left Side Panel(D), Right Side Panel(E) and Bottom Panel(B).
6.1
Cam Bolt
Mounting
Positions
6.1
6.2

Step 9
Attach Glass Clips(④) to Left Stand Panel(F) and Right Stand Panel(G) using Screws(⑤) with Screwdriver(⑨).
Tighten the Screws fully in a sequential manner.
Attach Connectors(⑥) to the mounting position on Left Door Panel(I) using Screws(⑤) with Screwdriver(⑨) as pictured
above.
Repeat same process to attach remaining Connectors(⑥) on Right Door Panel(J).
Tighten the Screws fully in a sequential manner.
Caution:There are lead mounting Position on Left Door Panel(I) and Right Door Panel(J) to fix Connector.
Step 11
9.1:Insert Cam Locks(①) into the mounting positions on Left Stand Panel(F), Left Side Panel(D), Right Stand Panel(G)
and Right Side Panel(E) with Screwdriver(⑨) as pictured.
9.2:Attach the Top Panel(A) to Left Stand Panel(F), Left Side Panel(D), Right Stand Panel(G) and Right Side Panel(E) by
turning the Cam Locks with Screwdriver(⑨) until they "Lock".
Step 10
Cam Bolt
(on A)
Mounting
Positions
"+- " label
9.2
9.1

Inspect and make sure all parts are in place, and all Bolts are securely tightened.
Your TV Stand is ready for use.
This TV Stand can only be used on a flat, level surface.
Carefully place Glass Panel(K) onto the suckers on Glass Clips(④).
Step 14
Step 12
Attach Right Door Panel(J) with Connectors(⑥) to Right Side Panel(E) using Screws(⑤) with Screwdriver(⑨).
12.1) First attach Connector(⑥) loosely using two Screws(⑤). Then make adjustments until Connector is even. Add
remaining Screws and tighten completely.
12.2) Adjust the alignment of the Right Door Panel(J) and Right Side Panel(E) by tightening the two middle screws on the
Connector(⑥) until the Panels are flush.
Repeat the same process to attach the Left Door Panel(I) to Left Side Panel(D).
Caution:There are lead mounting Position on the inner side of Right Side Panel(E) and Left Side Panel(D) to fix
Connector.
Step 13
12.1: Adjust Connector to be
even
12.2: Adjust the alignment and gap
for both Panels

/