Page is loading ...

®
SPECIFICATION SUBMITTAL Page
Job Name:
Job Number:
Model Numbers:
CasétaR Wireless Load Controls
369987a 1 09.09.16
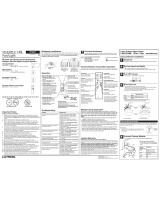
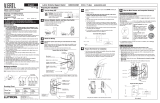
CasétaR Wireless Load Controls
The CasétaR Wireless family of Dimmers and
Switches can be controlled directly and remotely
when paired with PicoR Remote Controls providing
a system that delivers convenience and ease of
installation.
CasétaR Wireless Dimmers and Switches use
LutronR patented Clear ConnectR RF Technology
which enables wireless communication with PicoR
Remote Controls and the LutronR Smart Bridge and
Smart Bridge PRO.
Features
• Works with PicoR Remote Control
• Works with the LutronR App (via a Smart Bridge or
Smart Bridge PRO)
1
• LutronR patented Clear ConnectR RF Technology
works through walls and floors
• Includes Front Accessible Service Switch (FASST)
for safe lamp replacement
• Works with LutronR Radio Powr SavrT Occupancy
and Vacancy Sensors in standalone applications
(sensors do not work with Smart Bridge or Smart
Bridge PRO)
CasétaR Wireless
In-Wall Switch
CasétaR Wireless
In-Wall Dimmer
CasétaR Wireless
Plug-In Lamp Dimmer
CasétaR Wireless
ELV+ Dimmer
1
The Lutron® App is required for setup and usage with the Smart Bridge and Smart Bridge PRO. The LutronR App is compatible with iOSR devices version 8.0
or later and AndroidT devices 4.0 or later.
iOS is a registered trademark of Cisco in the U.S. and other countries and is used under license.
Android is a trademark of Google Inc.
Note: Certain models or load types will require a neutral connection. (see Load Types and Capacity sections)
1

®
SPECIFICATION SUBMITTAL Page
Job Name:
Job Number:
Model Numbers:
CasétaR Wireless Load Controls
369987a 2 09.09.16
Specifications
Regulatory Approvals
• cULus Listed
• NOM Certified
• FCC Approved. Complies with the limits for a Class B
digital device, pursuant to Part 15 of the FCC Rules
• Industry Canada Certified
• IFTEL Certified
• NEMA 410 (-6ANS, -5WS, -10NXD, and -5NE)
Power
Operating voltage:
• 120 V~ 50/60 Hz: -3PCL, -6WCL, -10NXD, -6ANS,
-5NE
• 120 / 277 V~ 50 / 60 Hz: -5WS-DV
Key Design Features
• Tested to withstand electrostatic discharge without
damage or memory loss, in accordance with
IEC 61000-4-2.
• Tested to withstand surge voltages without damage
or loss of operation, in accordance with IEEE
C62.41-1991 Recommended Practice on Surge
Voltages in Low-Voltage AC Power Circuits.
• Load controls always operate locally and do not
require system control.
• Power failure memory: should power be interrupted,
the control will return to its previously set level prior
to the interruption when power is restored.
• PD-5WS-DV, PD-6ANS, and PD-10NXD use
conventional 3-way wiring.
• Uses LutronR ClaroR Wallplates or designer-style
wallplates from other manufacturers. Wallplates are
sold separately.
• LutronR ClaroR Wallplates snap on with no visible
means of attachment.
• Requires a 1-gang U.S. wallbox. 3
1
⁄2 in (89 mm)
depth recommended, 2
1
⁄4 in (57 mm) depth
minimum.
• Green status LED(s) to indicate load status.
System Communications and Capacity
• CasétaR Wireless In-Wall Switches and Dimmers
communicate with PicoR remote controls and the
LutronR Smart Bridge/Smart Bridge PRO through
Radio Frequency (RF).
• The CasétaR Wireless In-Wall Switches and Dimmers
communicate with LutronR Radio Powr SavrT
Occupancy and Vacancy
Sensors in a standalone
application. Sensors do not work with Smart Bridge
or Smart Bridge PRO.
• The CasétaR Wireless In-Wall Switches and Dimmers
must be located within 60ft (18m) line-of-sight or
30ft (9m) through walls, of PicoR remote controls
and LutronR Smart Bridge devices.
Device limits
• PicoR Remote Controls and Radio Powr SavrT
Occupancy Sensors: up to 10devices (total) may
be paired to each CasétaR Wireless In-Wall Switch/
Dimmer (with no Smart Bridge installed).
• Smart Bridge or Smart Bridge PRO system: up to
50total wireless devices (CasétaR Wireless Dimmers/
Switches, PicoR Remote Controls, and Shades) are
supported per system. Smart Bridge or Smart Bridge
PRO counts as one device.
Environment
• Ambient operating temperature: 32°F to 104°F
(0°C to 40°C), 0% to 90% humidity,
non-condensing. Indoor use only.
• PD-5WS-DV, PD-6ANS, and PD-10NXD can be used
with mechanical switch in 3-way applications.
2

®
SPECIFICATION SUBMITTAL Page
Job Name:
Job Number:
Model Numbers:
CasétaR Wireless Load Controls
369987a 3 09.09.16
PRO Dimmer
PD-10NXD
Plug-In
Dimmer
PD-3PCL
In-Wall
Dimmer
PD-6WCL
ELV+
Dimmer
PD-5NE
2-wire Switch
PD-5WS-DV
Neutral
Switch
PD-6ANS
Simple two-wire installation (no neutral
wire required)
√
1
√ √
Capable of dimming loads
√ √ √ √
Favorite button (user defined one touch
light level)
√
Works with Hi-lume
R
1% 2-Wire LED
Drivers (Forward-phase only)
√ √ √ √
Works with Power Interfaces (PHPM and
GRX TVI)
√ √
Works with Power Interfaces (PHPM-SW)
√
No wiring required
√
1
In some low-wattage applications the PD-10NXD will require a neutral wire connection.
Features
3

®
SPECIFICATION SUBMITTAL Page
Job Name:
Job Number:
Model Numbers:
CasétaR Wireless Load Controls
369987a 4 09.09.16
Load Type and Capacity - Switches
Model Number Description Voltage Load Type Minimum Load
Maximum Load
3
Not Ganged End of Gang Middle of Gang
PD-5WS-DV
1
Two-wire
switch
120 V~
Incandescent /
Halogen
25 W 600 W 450 W 350 W
277 V~
Incandescent /
Halogen
25 W 1350 W 110 0 W 800 W
120 V~ MLV 25 W 600 VA /475 W 450 VA / 350 W 350 VA / 275 W
277 V~ MLV 25 W 1350 VA /1075 W 1100 VA / 875 W 800 VA / 625 W
120 V~
General
Purpose Fan
0.4 A 3 A 3 A 3 A
120 / 277 V~ LED Use LUT-MLC
2
5 A 4 A 3 A
120 / 277 V~ Fluorescent Use LUT-MLC
2
5 A 4 A 3 A
120 V~ ELV Use LUT-MLC
2
600 W 450 W 350 W
277 V~ ELV Use LUT-MLC
2
1350 W 110 0 W 800 W
PD-6ANS
Neutral-wire
switch
(neutral
connection
required)
120 V~
Incandescent /
Halogen
10 W 720 W 720 W 600 W
MLV 10 W 720 VA 720 VA 600 VA
Fan 0.1 A 3.6 A 3.6 A 3.6 A
LED 1 bulb 6 A 6 A 5 A
Fluorescent 1 ballast 6 A 6 A 5 A
ELV 10 W 720 VA 720 VA 600 VA
PHPM-SW 1 interface 3 interfaces 3 interfaces 3 interfaces
1
No neutral wire required.
2
To ensure proper operation of the switch with LED, fluorescent, and ELV loads, a LUT-MLC may be required, especially at lower wattages. If the status LED
on the switch is flashing or solid red in color, a LUT-MLC must be installed. To guarantee best performance, installing a LUT-MLC with these load types
regardless of wattage is recommended. Rarely, some load types may still flicker or glow in the off state even with the LUT-MLC installed, in which case a
different load may be required or more than one LUT-MLC is required.
3
See “Ganging and Derating” section.
4

®
SPECIFICATION SUBMITTAL Page
Job Name:
Job Number:
Model Numbers:
CasétaR Wireless Load Controls
369987a 5 09.09.16
1
Cannot be ganged.
2
Need to change load type to MLV. See www.casetawireless.com/change_phase
3
See bulb list at www.lutron.com/led
4
For PD-10NXD, a neutral connection is required for MLV loads, LED drivers, dimmable ballasts, and power modules (PHPM-PA, PHPM-3F, and GRX-TVI).
5
Compatible dimmable ballasts include Tu-WireR, Mark X, and PowerSenseR.
6
These loads are best operated using a forward-phase control. Consult www.lutron.com/bulblist to ensure the appropriate phase for bulb models used.
7
SSL7 compliant when in forward-phase.
PowerSense is a registered trademark of Osram Sylvania.
Load Type and Capacity - Dimmers
Model Number Description Voltage Load Type Minimum Load
Maximum Load
Not Ganged End of Gang Middle of Gang
PD-10NXD
Wireless
In-Wall
Dimmer PRO
(neutral
connection
required for
certain load
types)
4
120 V~
Incandescent / Halogen
10 W with
neutral (25 W
without neutral)
1000 W 800 W 600 W
MLV Halogen 10 W 1000 VA 800 VA 600 VA
MLV LED See Application Note #559
CFL/LED (120 V~
Rated)
3
1 bulb
3
250 W 250 W 250 W
Hi-lumeR 1% 2-Wire
LED drivers
1 driver
1000 W
(13 drivers)
800 W
(13 drivers)
600 W
(13 drivers)
Dimmable Ballasts
5
1 ballast 1000 VA 800 VA 600 VA
PHPM-PA/3F and
GRX-TVI
4
1 interface 3 interface 3 interface 3 interface
PD-3PCL
1
Wireless
Plug-In Lamp
Dimmer
120 V~
Incandescent / Halogen 10 W 300 W N/A N/A
CFL/LED (120 V~
Rated)
3
1 bulb
3
100 W N/A N/A
PD-5NE
Phase
Selectable
Dimmer
(neutral
connection
required)
120 V~
Incandescent / Halogen 10 W 500 W 400 W 300 W
CFL/LED
(120 V~ Rated)
3, 6, 7
1 bulb
3
250 W 250 W 250 W
MLV Halogen
2, 6, 7
10 W 400 VA 400 VA 400 VA
ELV Halogen 10 W 500 W 400 W 300 W
Hi-lumeR 1% 2-Wire
LED drivers
6, 7
1 driver
400 W
(20 drivers)
400 W
(20 drivers)
400 W
(20 drivers)
Dimmable Ballasts
5, 6, 7
1 ballast 400 VA 400 VA 400 VA
PHPM-PA/3F and
GRX-TVI
6, 7
1 interface 3 interfaces 3 interfaces 3 interfaces
ELV LED See Application Note #559
MLV LED See Application Note #559
PD-6WCL
Wireless
In-Wall
Dimmer
120 V~
Incandescent / Halogen 25 W 600 W 500 W 400 W
CFL/LED
(120 V~ Rated)
3
1 bulb
3
150 W 150 W 150 W
5

®
SPECIFICATION SUBMITTAL Page
Job Name:
Job Number:
Model Numbers:
CasétaR Wireless Load Controls
369987a 6 09.09.16
Ganging and Derating
When ganging with other Switches/Dimmers in the same wallbox, derating is required. See “Load Type and
Capacity” charts.
Each Switch/Dimmer has
inside fins removed
Middle of ganged Switches/Dimmers
have all fins removed
Do not remove outside fins on ends of ganged Switches/Dimmers
Do not remove outside fins on ends of ganged Switches/Dimmers
Each Switch/Dimmer has
inside fins removed
Middle of ganged Switches/Dimmers
have all fins removed
6

®
SPECIFICATION SUBMITTAL Page
Job Name:
Job Number:
Model Numbers:
CasétaR Wireless Load Controls
369987a 7 09.09.16
Operation
FASST — Front Accessible Service Switch
Important Notice: To service load, remove power by pulling
out the FASST as far as possible. To restore power after
servicing load, push the FASS
TM back in completely.
F
A
S
S
T
M
•
F
A
S
S
T
M
•
F
A
S
S
T
M
•
F
A
S
S
T
M
•
F
A
S
S
T
M
•
F
A
S
S
T
M
•
Status LED
Indicates load status; glows softly
as night light when load is off
ELV+ Dimmer and In-Wall Dimmer
F
A
S
S
T
M
•
F
A
S
S
T
M
•
F
A
S
S
T
M
•
F
A
S
S
T
M
•
F
A
S
S
T
M
•
F
A
S
S
T
M
•
FASST
Front Accessible
Service Switch
FASST
Front Accessible
Service Switch
On
Status LEDs
Indicates load status; glows softly
as night light when load is off
Off
Brighter
Darker
In-Wall Switch
Favorite
(User defines light level. Only
available in PD-5NE)
On
Off
Plug-In Dimmer
Status LED
Indicates load status; glows softly
as night light when load is off
On
Off
Brighter
Darker
7

®
SPECIFICATION SUBMITTAL Page
Job Name:
Job Number:
Model Numbers:
CasétaR Wireless Load Controls
369987a 8 09.09.16
Mounting
Wallplate Adapter / Wallplate purchased separately
Wallplate Adapter Wallplate
Wallbox
Switch/Dimmer
Adapter Mounting Screws
Switch/Dimmer Mounting Screws
8

®
SPECIFICATION SUBMITTAL Page
Job Name:
Job Number:
Model Numbers:
CasétaR Wireless Load Controls
369987a 9 09.09.16
Dimensions
In-Wall Switches and Dimmers
Front View Side View
5/16 in
(8 mm)
1
1
⁄8 in
(30 mm)
4
11
⁄16 in
(119 mm)
2
15
⁄16 in
(75 mm)
1
3
⁄16 in
(30 mm)
2
3
⁄16 in
(56 mm)
Front View
Side View
3
1
⁄8 in
(79 mm)
Plug-In Dimmer
9

®
SPECIFICATION SUBMITTAL Page
Job Name:
Job Number:
Model Numbers:
CasétaR Wireless Load Controls
369987a 10 09.09.16
Wiring Diagrams - Switches
1
When using controls without a mechanical 3-way switch, cap the blue terminal. Do not connect the blue wire to any other wiring or to ground.
2
A LUT-MLC ensures proper function when LED, fluorescent, or ELV loads are used. Install the LUT-MLC inside a load fixture or in a separate junction box
within the circuit.
3
The red wire must be connected to the load and the black wire must be connected to Line/Hot. The switch will not work if the wires are reversed.
Single Location Installation
PD-5WS-DV
PD-6ANS
PD-5WS-DV
PD-6ANS
LUT-MLC
2
Load
Load
Line/Hot
Line/Hot
Neutral
Neutral
Green
Green
Ground
Ground
Black
Black
Black
Red
3
Blue
1
Blue
1
120 / 277 V~ 50/60 Hz
120 V~ 50/60 Hz
(continued on next page…)
White
10

®
SPECIFICATION SUBMITTAL Page
Job Name:
Job Number:
Model Numbers:
CasétaR Wireless Load Controls
369987a 11 09.09.16
Wiring Diagrams - Switches (cont.)
3-Way Installation (with mechanical switch)
Option 1
(continued on next page…)
PD-5WS-DV
1
Mechanical
Switch
1
Brass
Brass
LUT-MLC
2
Load
Line/Hot
Location 1
Location 2
Neutral
Green
Ground
Ground
Black
Black
Blue
120 / 277 V~
50/60 Hz
Black
Jumper
wire
PD-5WS-DV (Load-side)
1
Location of Caséta® Wireless In-Wall Switch and mechanical switch may be reversed.
2
A LUT-MLC ensures proper function when LED, fluorescent, or ELV loads are used. Install the LUT-MLC inside a load fixture or in a separate junction box within the circuit.
Line/Hot
Neutral
120 / 277 V~
50/60 Hz
Mechanical
Switch
1
PD-5WS-DV
1
Black
Location 1 Location 2
Ground
Green
Black
Blue
Brass
Black
Brass
Jumper wire
Ground
LUT-MLC
2
Load
PD-5WS-DV (Line-side)
11

®
SPECIFICATION SUBMITTAL Page
Job Name:
Job Number:
Model Numbers:
CasétaR Wireless Load Controls
369987a 12 09.09.16
Wiring Diagrams - Switches (cont.)
3-Way Installation (with mechanical switch)
Option 1 (cont.)
Location 2
Location 2
PD-6ANS
1
Mechanical
Switch
1
Brass
Brass
Load
Line/Hot
Neutral
GreenWhite
Ground
Ground
Black Red
3
Blue
120 V~ 50/60 Hz
Black
Jumper
wire
PD-6ANS (Load-side)
Ground
GreenWhite
Line/Hot
Neutral
120 V~
50/60 Hz
Black
Red
3
Blue
Brass
Jumper wire
Black
Brass
Load
PD-6ANS
1
PD-6ANS (Line-side)
Mechanical
Switch
1
Ground
Location 1
Location 1
1
Location of Caséta® Wireless In-Wall Switch and mechanical switch may be reversed.
2
A LUT-MLC ensures proper function when LED, fluorescent, or ELV loads are used. Install the LUT-MLC inside a load fixture or in a separate junction box within the circuit.
3
The red wire must be connected to the load and the black wire must be connected to Line/Hot. The switch will not work if the wires are reversed.
12

®
SPECIFICATION SUBMITTAL Page
Job Name:
Job Number:
Model Numbers:
CasétaR Wireless Load Controls
369987a 13 09.09.16
Wiring Diagrams - Switches (cont.)
1
When using controls without mechanical 3-way switch, cap the blue terminal. Do not connect the blue wire to any other wiring or to ground.
2
A LUT-MLC ensures proper function when LED, fluorescent, or ELV loads are used. Install the LUT-MLC inside a load fixture or in a separate junction box
within the circuit.
3
The mechanical switch will need to be removed so the PicoR Remote Control can be installed.
4
The red wire must be connected to the load and the black wire must be connected to Line/Hot. The switch will not work if the wires are reversed.
3-Way Installation (with PicoR remote controls)
Option 2: PJ2-2B-xx and wallbox mounting adapters (PICO-WBX-ADAPT)
(continued on next page…)
Black
Black
Black
Black
PD-5WS-DV
PD-6ANS
Pico
®
Remote
Control and
Wallbox
Mounting
Adapter
3
Pico®
Remote
Control and
Wallbox
Mounting
Adapter
3
LUT-MLC
2
Load
Load
Line/Hot
Line/Hot
Neutral
Neutral
Green
GreenWhite
Ground
Ground
Black
Red
4
Blue
1
Blue
1
120 / 277 V~ 50/60 Hz
120 V~ 50/60 Hz
Travelers
Travelers
PD-5WS-DV
PD-6ANS
Location 1
Location 1 Location 2
Location 2
13

®
SPECIFICATION SUBMITTAL Page
Job Name:
Job Number:
Model Numbers:
CasétaR Wireless Load Controls
369987a 14 09.09.16
Wiring Diagrams - Switches (cont.)
1
When using controls without mechanical 3-way switch, cap the blue terminal. Do not connect the blue wire to any other wiring or to ground.
2
A LUT-MLC ensures proper function when LED, fluorescent, or ELV loads are used. Install the LUT-MLC inside a load fixture or in a separate junction box
within the circuit.
3
The mechanical switch will need to be removed so the PicoR Remote Control can be installed.
4
The red wire must be connected to the load and the black wire must be connected to Line/Hot. The switch will not work if the wires are reversed.
Multi-location Installation (3 or more switches control the load)
With Pico
® remote controls (PJ2-2B-xx) and wallbox mounting adapters (PICO-WBX-ADAPT)
Pico®
Remote
Control and
Wallbox
Mounting
Adapter
3
Pico®
Remote
Control and
Wallbox
Mounting
Adapter
3
Pico®
Remote
Control and
Wallbox
Mounting
Adapter
3
Pico®
Remote
Control and
Wallbox
Mounting
Adapter
3
PD-6ANS
PD-5WS-DV
LUT-MLC
2
Load
Load
Line/Hot
Line/Hot
Neutral
Neutral
GreenWhite
Green
Ground
Ground
Red
4
Black
Black
Black
Black
Black
Blue
1
Blue
1
120 V~ 50/60 Hz
120 / 277 V~
50/60 Hz
Travelers
Travelers
Travelers
Travelers
PD-5WS-DV
PD-6ANS
Location 1 Location 2 Location 3
Location 1 Location 2
Location 3
14

®
SPECIFICATION SUBMITTAL Page
Job Name:
Job Number:
Model Numbers:
CasétaR Wireless Load Controls
369987a 15 09.09.16
Wiring Diagrams - Dimmers
Single Location Installation
Line / Hot
120 V~
50 / 60 Hz
Neutral
Black
Red
Green
Ground
Load
Blue
1, 5
White
3,4
PD-10NXD or PD-5NE
PD-6WCL
1
When using controls without mechanical 3-way switch, cap the blue terminal. Do not connect the blue wire to any other wiring or to ground.
2
Location of CasétaR Wireless In-Wall Dimmer PRO and mechanical switch may be reversed.
3
For PD-10NXD only, neutral connection optional except for MLV loads, LED drivers, and power modules (PHPM-PA, PHPM-3F, and GRX-TVI).
4
For PD-5NE, neutral is required.
5
Blue wire is only present on the PD-10NXD model.
Line / Hot
120 V~
50 / 60 Hz
Neutral
Black Black
Green
Ground
Load
In-Wall
Dimmer
In-Wall
Dimmer
15

®
SPECIFICATION SUBMITTAL Page
Job Name:
Job Number:
Model Numbers:
CasétaR Wireless Load Controls
369987a 16 09.09.16
Multi-Location Installation
With PicoR remote controls (PJ2-XX-XX) and wallbox mounting adapters (PICO-WBX-ADAPT)
PD-10NXD and PD-5NE
120 V~
50 / 60 Hz
Neutral
Red
Green
Ground
Load
Line / Hot
Black
PicoR
remote
control &
wallbox
mounting
adapter
PicoR
remote
control &
wallbox
mounting
adapter
In-Wall
Dimmer
Black
Travelers
White
3,4
Blue
1, 5
Travelers
120 V~
50 / 60 Hz
Neutral
Black
Green
Ground
Load
Line / Hot
Black
PicoR
remote
control &
wallbox
mounting
adapter
PicoR
remote
control &
wallbox
mounting
adapter
In-Wall
Dimmer
Black
PD-6WCL
Travelers
Travelers
Location 1 Location 2 Location 3
Wiring Diagrams - Dimmers (cont.)
1
When using controls without mechanical 3-way switch, cap the blue terminal. Do not connect the blue wire to any other wiring or to ground.
2
Location of CasétaR Wireless In-Wall Dimmer PRO and mechanical switch may be reversed.
3
For PD-10NXD only, neutral connection optional except for MLV loads, LED drivers, and power modules (PHPM-PA, PHPM-3F, and GRX-TVI).
4
For PD-5NE, neutral is required.
5
Blue wire is only present on the PD-10NXD model.
16

®
SPECIFICATION SUBMITTAL Page
Job Name:
Job Number:
Model Numbers:
CasétaR Wireless Load Controls
369987a 17 09.09.16
Wiring Diagrams - Dimmers (cont.)
3-Way Installation
With mechanical switch
In-Wall
Dimmer
2
Mechanical
Switch
2
Brass
Brass
Load
Line/Hot
Neutral
Green
Ground
Ground
Black
Red
Blue
120 V~
50/60 Hz
Black
Jumper wire
(included)
White
3
PD-10NXD
1
When using controls without mechanical 3-way switch, cap the blue terminal. Do not connect the blue wire to any other wiring or to ground.
2
Location of In-Wall Dimmer and mechanical switch may be reversed.
3
Neutral connection optional except for MLV loads, LED drivers, and power modules (PHPM-PA, PHPM-3F, and GRX-TVI).
4
See LutronR P/Ns 369356 and 369355 for additional wiring diagrams.
5
Blue wire is only present on the PD-10NXD model.
Installation with PHPM - Neutral required
4
L/H
N
DH
In-Wall
Dimmer
Neutral
Line/Hot
120 V~
60 Hz
Black
Ground
Ground
White
Green
Blue
1, 5
Red
PHPM
Load
Control Neutral
Zone In
PD-10NXD and PD-5NE
Location 1
Location 2
Location 1
17

®
SPECIFICATION SUBMITTAL Page
Job Name:
Job Number:
Model Numbers:
CasétaR Wireless Load Controls
369987a 18 09.09.16
Wiring Diagrams - Dimmers (cont.)
Installation with GRX-TVI - Neutral required
1
Installation with Hi-lumeR 1% 2-wire LED Drivers - Neutral required
L
2
/H
2
100-277 V~
In-Wall
Dimmer
Line/Hot
120 V~
60 Hz
Neutral
Neutral 2
Black
White
Blue
2
Ground
Green
Red
Ground
GR X-T VI
PD-10NXD and PD-5NE
PD-10NXD and PD-5NE
1
See LutronR P/N 369247 for additional wiring diagrams.
2
Blue wire is only present on the PD-10NXD model.
In-Wall
Dimmer
Line/Hot
Neutral
Black
White
White
Black
Black with White
Stripes
Green
Red
Red
Ground
Hi-lumeR 1%
2-wire LED
Driver
LED Light
Engine
Note: For more information on Hi-lumeR 1% 2-wire LED Drivers, see www.lutron.com
Location 1
Blue
2
18

®
SPECIFICATION SUBMITTAL Page
Job Name:
Job Number:
Model Numbers:
CasétaR Wireless Load Controls
369987a 19 09.09.16
Colors and Finishes
Gloss Finishes
Due to printing limitations, colors and finishes shown
cannot be guaranteed to perfectly match actual
product colors.
White
WH
Black
BL
Ivory
IV
Light Almond
LA
19
/