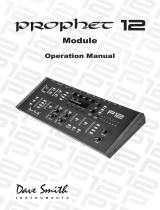
Dave Smith Instruments Evolver User manual

Category
Digital pianos
Type
User manual

This manual is also suitable for

Poly Evolver
Operation Manual
Poly Evolver
Operation Manual
Version 2.2
February, 2010
Dave Smith Instruments
1210 Cabrillo Hwy N
Half Moon Bay, CA 94019-1449, USA
© 2006-2010 Dave Smith Instruments
www.DaveSmithInstruments.com
4
Tested To Compl
y
With FCC Standards
FOR OFFICE USE
This device complies with Part 15 of the FCC Rules.
Operation is subject to the following two conditions:
(1) This device may not cause harmful interference and
(2) this device must accept any interference received,
including interference that may cause undesired
operation.
This Class B digital apparatus meets all requirements of
the Canadian Interference-Causing Equipment Regulations.
Cet appareil numerique de la classe B respecte toutes
les exigences du Reglement sur le materiel brouilleur du
Canada.
For Technical Support, email suppor
5
Contents
Quick Start 6
Preset Notes 8
FAQs 9
Chai
ning Evolvers and Polys 10
Inside Evolver 11
Signal Flow Diagram 12
Basic Operati
ons 13
Global Parameters 15
Program Parameters 18
Anal
og Oscillators (1 and 2) 18
Digital Oscillators (3 and 4) 19
Lowpass Filter 20
Amplifier (VCA) 21
Feedback 22
Delay 22
Lo
w Frequency Oscillators (LFO) 24
Envel
ope 3 25
Miscell
aneous Audio Parameters 26
Miscell
aneous Parameters 27
Miscell
aneous Timing Parameters 29
MIDI Modulati
on Parameters 30
Miscell
aneous Modulation Parameters 30
Sequ
ence Parameters 31
Program N
ame 33
Sequencer Operation 31
Modulation Destination Table 34
Modulation Source Table 36
Combo Parameters 37
MIDI Implementation 41
MIDI Parameters
41
Basic MIDI Messages 45
System exclusive Messages 48
Global Parameter Data 57
Combo Parameter Data 59
Program Parameter Data 61
6
Welcome…
Thanks for purchasing your Poly Evolver! Listen to the sounds, twiddle some
knobs, have some fun!
Register
If you purchased your Poly directly from us, there is no need to register – we
already have your contact information. If you purchased it from a music dealer,
please go to www.davesmithinstruments.com and register.
Editor –Register at http://www.soundtower.com/poly/regist.htm
to get your
registration code.
Version 2.0 Notes
Your Poly has the latest 2.0 features installed. Older Polys can be updated –
check on our website for more information.
These features were added in such a way to have no effect on programs made
on earlier units for backwards compatibility. This means that in some cases
parameters may not be in a logical order, or additional functions were added by
increasing values at the end of their range.
Quick Start
Here’s the standard short manual to get started:
First, plug in the power supply. The power supply will work anywhere in the
world; use the included Euro AC adapter if necessary. Next, plug the Poly’s
signal outputs to your mixer/sound system, and connect a MIDI keyboard to the
MIDI in jack.
The Poly Evolver has two main modes, Program and Combo. Program mode
sets all 4 voices to the same sound, one of the 128 Programs in 4 Banks (512
total). It powers up in Program mode, ready to play.
Program mode is usually meant to be played from a keyboard, but you have the
option of hitting the START button, and voice 1 will play back the sequence for that
Program. You can then play along with the other 3 voices. Note that all Programs
do not necessarily have sequences programmed.
Be sure to try keyboard pressure (after-touch) and mod wheel. Many of the
sounds will sound fairly simple at first, and then will come alive with the
controllers. Or, sometimes the notes need to be held for a while to let the sound
unfold. Playing in different ways will have a big effect on the Programs.
The upper knob changes the Program number, and the lower knob changes the
Bank. If you want to edit a Program, just hit the EDIT button. Now, the upper knob
selects parameters (128 of them), and the lower knob changes the value. The
PAGE UP and PAGE DOWN buttons jump through groups of parameters in logical
jumps, i.e. Oscillator 1 to Oscillator 2, etc.
7
To select Combo mode, just hit the C
OMBO button. Combos give you complete
flexibility configuring the four voices; you can stack or split the keyboard, assign
different Programs to different MIDI channels, set it to play multiple different
sequences synchronously, etc.
There are 3 banks of 128 Combos, a total of 384. As with the Programs, you can
edit Combos by just hitting the EDIT button. Again, the top knob selects the
parameter, the lower changes the value of that parameter. You can have up to 4
Parts to each Combo, though all four do not have to be used. For example, a
split Combo, with one voice for bass on the low end of the keyboard, and 3
polyphonic voices on the upper end, would only require 2 parts. The PAGE UP
and P
AGE DOWN buttons step between the four parts for quick editing.
Your Poly Evolver also has some very cool features for use as a stereo signal
processor. In Combo mode you can have one or more voices using the External
Signal Input, so the external signal can be routed to all four voices, with each
voice doing different things to the signal, such as filtering, envelope following,
distortion, feedback, delay, driving a sequence, etc.
Hit the GLOBAL button to change higher level parameters, such as MIDI channel
number, Transpose/Detune, etc. These are remembered when the synth is
turned off.
Poly Evolver Editor
The Poly Evolver comes with a stand-alone editor for both the PC and the Mac
OSX. Place the CDROM in your CD drive to install it. You might want to check
http://www.soundtower.com/evolver/ for the latest version. Register at
http://www.soundtower.com/poly
/regist.htm to get your registration code.
Summary
You should be up and running now; for more operation information, read on. Or,
just look up specific parameters for detailed notes. Pages 34 through 36 contain
a han
dy reference for mod destinations and sources. At some point you should
read through the manual to discover all the little features that you might not
notice at first.
I should mention that this manual does not include explanations of basic
synthesizer functions. It assumes you already know what an oscillator is, how a
lowpass filter affects the sound, what an ADSR envelope looks like, etc.
Fortunately, these days it is quite easy to find such resources on the Internet. If
you want to learn the lingo and the basics, just try a search in Google (or the
search engine of your choice), something like “analog synthesizer tutorial”. You’ll
find plenty of good reading material.
Have fun!
Dave Smith
8
Program Notes
There are 512 Programs and 384 Combos in your Poly Evolver. The factory
sound set is on the website if you ever need to refresh it. There are additional
banks of Programs on our website at:
http://www.davesmithinstruments.com/polyevolver/sounds.html
,
Remember to save your sounds via program dumps occasionally!
The Programs are not set up in any particular order, so you might just want to
listen through them to see what you like. There are some test Programs at the
end of Bank 4 that you might want to erase. Also, Program 128 in bank 2 is a
simple basic Program that can be used as a starting point.
Combos are also mixed, again with some test Combos at the end of bank 3. You
will also see that there is only one bank of Combos. You will likely want to make
your own Combos based on the specific combinations of Programs that fit your
music.
When using Combos, remember that changing a Program will affect any Combo
that refers to it. Using the editor makes it easier to track Program use in Combos.
Special thanks to Program contributors, including:
Tim Ande
Andre
w Bode
Cameron Brand
Chris Curtis
Mike Estee
Don Gothard
Damon Menne
Mike Peake
Ravi Ivan Sharma
Doug Terrebonne
Goffe Torgerson
Stefan Trippler
Dave Wyatt
9
FAQs
The Poly is a very flexible instrument. While this provides a wide range of operational
possibilities, it also means that you can put Evolver into a state where it doesn’t seem
to work. Here are some hints:
1) How do I save a Program or Combo? Hit the W
RITE button. Then hit the YES
button (also known as the P
AGE UP button) when prompted. All other switches
are locked out in the meanwhile, though you can hit the N
O button if you change
your mind. You can change the Program and/or Bank and store in a different
location using the knobs. You can also use C
OMPARE to check the sounds in the
Program destinations.
2) When I change Programs, the Sequencer speed always stays the same.
Check the Global Use Program Tempo parameter – if it is Off, then the speed is
not updated when Programs change. Set it to On.
3) I can’t get the filter to oscillate. Check the 2 pole/4 pole switch (Row 3, Knob 1,
Shift) – the filter only oscillates when 4 poles are used.
4) I seem to be getting some distortion in my output. Assuming that the
Distortion is off, you are likely just overloading the signal somewhere. There are
many signal sources in the Poly, and many sources of gain. If too many are used
at levels that are too high, you will likely get some distortion. For example, if you
are using all four oscillators, you should have the levels lower, in the 40 – 60
range. Likewise, if using all three delay taps, lower the levels of each.
5) I can’t hear the External input. In addition to turning up the Ext In Volume, the
filter and VCA must be open to hear the signal. You can initially turn up the filter
cutoff and the initial VCA Level to hear the signal. The Peak Hold or Envelope
Follower can be used to control the VCA or Filter level, or the sequencer can
trigger the envelopes. There are many different ways to use different modulations
sources to control the VCA and Filter when using external inputs.
10
Using an Evolver with a Poly Evolver
The Poly Evolver has 4 voices that are identical to the single voice in an Evolver. The
Poly is also in a 1U rack, which means that it can be slow to program at times.
Fortunately, it is set up so you can use an Evolver with a Poly to have a five voice
synth, plus you can use your Evolver as a controller for both synths!
First, connect your MIDI keyboard to the MIDI In on Evolver. Connect MIDI Out on
Evolver to the MIDI In on your Poly. Next, connect the Stereo Outputs on the Evolver
to the stereo Mix Inputs on the Poly. Finally, the Output of the Poly is connected to
your mixer/sound system.
On Evolver, set MIDI Rec and Xmit to ALL, and Poly Chain to ALL. If you want to use
an external MIDI clock, set the MIDI Clock to I-O (in-out), otherwise set it to Out. Set
the MIDI channel to All or 1-16, whichever is desired.
On the Poly, just set the MIDI channel to match the Evolver, and set the MIDI clock to
In. You should be all set to play! Note this setup works best in Program mode on the
Poly, where all five voices are set to the same sound. You can now change
Programs/Banks from the Evolver, change the Volume, or go into the Program and
edit any of the parameters – for example, if you go to the Filter Frequency on Evolver
and turn the knob, all five voices respond together.
Note: Remember that if you change a Main parameter on the Evolver, the Poly will
change also. For example, changing MIDI channels on the Evolver will also
change the MIDI channels on the Poly, which is likely what you would want.
However, if you change the MIDI Clock on the Evolver, it may not be what you
wanted on the Poly. Usually it all works out, but just be aware of what is
happening.
When in Combo mode, the chaining does not work as well, since the first note is
always played by the Evolver, and it does not know the configuration of the Combo.
So, when using an Evolver with a Poly, it’s best to stay in Program mode when
playing from a keyboard.
Multiple Polys
You can also chain multiple Poly Evolvers in the same manner. With two Polys, set
the main parameter Poly Chain of the first Poly to 8, and the second Poly Chain to
Off. With 3 Polys, the first is set to 12, the second is set to 8, and the third is Off. All
other settings will be the same.
With multiple Polys, you will be able to use Combo mode in a logical manner most of
the time. For example, if you have a Combo with 2 programs stacked, it will play them
as a 4 voice with two Polys.
Combos that have Mono parts will be handled differently. This is due to the fact that in
Mono, Poly chain does not function, since the Part interprets new notes per the Key
Mode (low note, last note, etc), and does not re-transmit the notes. If, for example,
you have a 1/3 split with Part 1 playing a mono Program, and Part 2 playing 3 voices
polyphonically, with two Polys chained you will still only have a single mono voice in
Part 1, but Part 2 will now be 6 voices. So, you will lose a voice in this configuration.
11
Inside the Poly Voice
Before going through the individual parameters, following is a brief description of the
Poly’s architecture of a single Poly voice. The signal flow diagram on the next page is
a good starting point for understanding how the Poly works.
The Analog Side
The analog electronics for each voice consist of two identical (Left/Right) synth
sections, each with an analog waveshape oscillator, a 2/4 pole resonant lowpass
filter, and a Voltage Controlled Amplifier (VCA). Control voltages are generated by the
processors to control the analog components.
The Digital Side
Surrounding the Analog electronics is a high-speed Digital Signal Processor (DSP)
that both pre- and post-processes the audio signal. Since the DSP also computes the
control voltages for the analog circuitry, it can handle a wide range of modulation with
high precision.
The DSP provides audio functions such as the Digital Oscillators, Envelope Follower,
the Peak/Hold detector (and associated external trigger generator), Highpass filter,
Distortion (with noise gate), Pan, Delay, and Hack. It also handles the tuned
feedback, as well as the additional Delay feedback paths. And all the modulation
calculations (envelopes, LFOs, routing, etc).
Analog-to-Digital (A/D) and Digital-to-Analog (D/A) converters are used to connect the
analog and digital. As can be seen, there are two sets of stereo converters; they run
at 48 kHz sampling rate with 24 bits of precision for minimum impact on the analog
sound.
Each voice is completely independent, except the single stereo External Signal Input
is routed to all four voices.
Inputs and Outputs
There are a bunch of audio jacks on the rear panel. All are stereo pairs (two mono
jacks), and unbalanced. First, there are the External Inputs, which can be routed to
the input or any or all of the voices, for using the Poly as a signal processor.
Next, there are individual voice outputs for all 4 voices. When a plug is inserted into
one of these jacks, that signal is disconnected from the mix output. This allows each
channel to go to a different mixer channel for separate EQ/processing. It also allows
the output of one voice to be routed to the External Input jacks, where it can then be
routed to another voice’s input for some interesting effects.
There is also a Mix input; this input is simply mixed with the Poly’s output with no level
control. It is a convenience feature, for example when you have two Polys chained, or
an Evolver and a Poly chained.
The last jacks are the Stereo Output mix. If you only use the Left/Mono jack, you will
get a mono mix of both channels – but you really should use both channels!
Note: Always turn down your mixer/amplifier volume when turning the Poly on or
off to prevent pops!
12
13
Basic Operation
Program Mode: When the Poly is first turned on, it will be in Program Mode with the
P
ROGRAM LED lit and the following screen active.
Program: xxx B:x
xxxxxxxxxxxxxxxx
The top line shows the Program (1…128) and Bank (1…4) number of the currently
selected Program, and the bottom line shows the 16 character name of the Program.
The top knob will change the Program, and the bottom knob will change the Bank.
The Program can also be incremented or decremented by using the P
AGE UP or PAGE
DOWN button respectively.
If you hold the S
HIFT button while changing the Program or Bank, the sound will not
change until you release the S
HIFT button. If you hold the SHIFT button while changing
the Program or Bank and the sequencer is running, when the S
HIFT button is released
the sequence will complete (according to the length of Sequence 1) before
synchronously changing to the new program and it’s sequence.
Edit Program Mode: To edit a Program, simply hit the E
DIT button while in Program
mode. See the Program Parameters section for a detailed list of all parameters and
their functionality.
Combo Mode: When the C
OMBO button is hit, it will switch to Combo Mode with the
following screen active.
Combo: xxx B:x
xxxxxxxxxxxxxxxx
The top line shows the Combo and Bank number of the currently selected Combo,
and the bottom line shows the 16 character name of the Combo. The top knob will
change the Combo, and the bottom knob will change the Bank. The Combo can also
be incremented or decremented by using the P
AGE UP or PAGE DOWN button
respectively.
Edit Combo Mode: To edit a Combo, simply hit the E
DIT button while in Program
mode. See the Combo Parameters section for a detailed list of all parameters and
their functionality.
14
Program or Combo Save: Hit the W
RITE button and the following screen will appear:
Write? P:xxx B:x
Hit: Yes or No
Simply hit the YES button to save the current Program or Combo, or NO if you
changed your mind. To store in a different location, use the upper parameter knob to
select a the new Program or Combo destination, and the lower knob for a different
bank.
Compare Feature: While editing a Program or Combo, you can hit the C
OMPARE
switch to listen to the original version. If you hit the switch again, the Poly returns to
the edited version.
While there is a write pending (see screen above), you can hit the C
OMPARE switch to
hear what is in a possible target Program or Combo destination before saving. Just be
sure to turn Compare off again before you actually hit the Y
ES button to save.
Voice Assignment: The Poly has four voices, and as such has to use a specific
method for assigning the four voices as MIDI notes are received. The scheme used
by the Poly is a circular assignment; that is, as a new notes are received, the next
unused voice is assigned to the new note. You can see how this works by watching
the 4 voice LEDs as you play.
When all 4 voices are held and a new note is received, it is necessary to “steal” a
voice to play the new note, since you always want to hear any new key hit. The
algorithm used in the Poly is to steal the oldest note held of the 4 voices playing. This
is done to be consistent; you can always predict which note will be stolen.
When in Combo mode, each Part acts as a separate mini-synthesizer, so the same
voice assignment rules apply within the Part.
An exception to the voice stealing is when Poly Chain in On; in this case rather than
stealing an already-used voice, the Poly will transmit the new note over MIDI so it can
be played by another Poly downstream.
Individual Voice Outputs: The Poly has a pair of output jacks for each of the four
voices on the back panel, allowing separate mixing/processing of each voice. When a
plug is inserted in the jack, that signal will be disconnected from the mix output.
Another trick is to route the output of one voice to the external audio inputs; then, in
Combo mode, you can use one (or more) voices to process a different voice. Or take
two different voice outputs (programmed in mono) and run one to the Left input and
one to the Right input for even more wild results.
15
Global Parameters
To edit the Global parameters, just hit the G
LOBAL button at any time, and Global
page 1 is displayed. The upper knob changes the parameter on the upper LCD line,
and the lower knob changes the lower parameter. The P
AGE UP and PAGE DOWN
buttons select the other pages.
Note: If you hold the P
AGE DOWN button while you hit the PAGE UP button, it will
jump to the last page. Similarly, if you hold the P
AGE UP button when you hit the
P
AGE DOWN button, it will jump to the first page.
Note: When in Combo mode, many of the Global parameters will be overwritten
by the Combo parameters.
Page 1:
Tempo (BPM): xxx
Clock Div:xxxxxx
Top Line: Tempo 30…250 Basic speed for the sequencer in BPM. Actual
speed also depends on the Clock Divide setting. If using MIDI clock, it will display the
BPM of the incoming MIDI clocks. If Use Program Tempo is On, the Tempo and Clock
Divide will both be updated on every Program or Combo change.
Bottom Line: Clock Divide see table Used as a clock divider to provide a
wider range of sequencer speeds. When set to Quartr (quarter notes), the BPM
setting is exact, i.e. 120 BPM = 120 BPM. If set to Half (half note), the actual speed is
half, so a setting of 120 BPM will actually play at 60 BPM.
Swing settings add a delay to every the odd steps (1, 3, 5, etc.), while shortening the
even steps by the same amount, for a swing feel to the timing. Half swing is the same
with less delay.
Here are all the possible settings, with the effect on the overall tempo:
Display Tempo Timing Division
Half
BPM/2 Half note
Quartr
BPM Quarter note
Eighth
BPM x 2 Eighth note
8 half
BPM x 2 Eighth note, half swing timing
8swing
BPM x 2 Eighth note, full swing timing
8 trip
BPM x 3 Eighth note triplets
16th
BPM x 4 Sixteenth note
16half
BPM x 4 Sixteenth note, half swing timing
16swng
BPM x 4 Sixteenth note, full swing timing
16trip
BPM x 6 Sixteenth note triplets
32nd
BPM x 8 Thirty-second note
32trip
BPM x 12 Thirty-second note triplets
64trip
BPM x 24 Sixty-fourth note triplets
16
Page 2:
Transpose: xx
Fine Tune: xx
Top Line: Transpose: -36…+36 Master Transpose control, 0 is
centered. Steps in semitones.
Bottom Line: Fine Tune: -50…+50 Master Fine Tune control; 0 centered.
Steps in cents (50 cents = ½ semitone).
Page 3:
MIDI Channel: xx
Poly Chain: xx
Top Line: MIDI Channel: ALL, 1…16 Select which MIDI channel to send
and receive data, 1 to 16. All receives on any channel.
Bottom Line: Poly Chain: Off, 5…20 – Use this to link multiple Evolvers and Poly
Evolvers into a system with more voices by intelligently processing the keys hit and
passing MIDI data through to the MIDI Out jack where it can be routed to another
Evolver or Poly Evolver. Note that MIDI clocks are handled separately per the MIDI
Clock parameter.
Page 4:
Clock: xxxxxxxx
Prog Tempo: xx
Top Line: Clock: see table Selects the MIDI clock status, and enables
External sequencer triggers, as follows:
Display MIDI Clock Setting
Internal
MIDI clock is neither sent nor received
MIDI Out
MIDI clock is sent
MIDI In
MIDI clock is received
M In Out
MIDI clock is received and transmitted (use
with Poly Chain)
In no ss
MIDI clock is received, but MIDI
start/stop/continue messages are ignored.
Bottom Line: Prog Tempo: Off, On Use Program Tempo – when set to Off,
changing a Program or Combo will not change the tempo- this is useful for keeping a
constant tempo but using different sounds. If set to On, a Program change will change
the tempo to the BPM and Clock Divide values saved with the Program. When on,
changing the main BPM will also change the Program BPM, and vice-versa. When off,
changing one has no effect on the other.
17
Page 5:
Input Gain:xxxxx
LCD Contrast: xx
Top Line: Input Gain: 0db… 24d Provides extra gain on the Left and Right
External Inputs. You can select no gain (0 dB), or a gain in steps of 3 dB up to 24 db.
Bottom Line: LCD Contrast: 1…100 This sets the contrast level for the
LCD.
Page 6:
Dump: (Hit S/S)
xxxxxxxxxxxxxxxx
MIDI Dumps: see table This screen allows dumping of Programs and combos
over MIDI in a number of ways.
Display MIDI Transmit Operation
Single Program
Send current program
Program Bank
Send all 128 programs in current bank
All Program Banks
Send all programs in all four banks
Single Combo
Send current combo
Combo Bank
Send all 128 combos in current bank
All Combo Banks
Send all combos in all three banks
Everything
Sends the whole banana (all of the above)
When this screen is active, the sequencer S
TART/STOP LED will start blinking. When
the S
TART/STOP button is hit, the transmission will start. Handy for saving Programs
on a computer or sending to another Poly. The Poly’s dumps include Program and
Bank numbers, so when received it will be stored in same location.
18
Program Parameters
The Poly has 128 parameters in a Program, plus another 64 Sequence parameters,
followed by the 16 character Program Name. These parameters are the same as in
Evolver. Following is a description of every parameter.
The upper knob selects the Parameter, and the lower knob changes the value. The
P
AGE UP and PAGE DOWN buttons step through parameter groups.
Note: If you hold the P
AGE DOWN button while you hit the PAGE UP button, it will
jump to the last page. Similarly, if you hold the P
AGE UP button when you hit the
P
AGE DOWN button, it will jump to the first page.
The parameters are listed in this section in groups according to the pages; the upper
LCD line displays the current page, and the lower line shows the parameter name and
value.
Page 1:
Oscillator 1
Oscillator 1 is an analog oscillator, and is hardwired to the Left channel. Following are
the main controls for Oscillator 1. Note that there are some additional modulation
controls that will affect Oscillator 1 – these are found in different sections of the
Parameter definitions.
Frequency: C -2…C 8 Selects base frequency over a 10 octave range,
from 8 Hz to 8KHz, stepping in semitones. C3 is middle C, the first octave is –2 (c -2,
c#-2, etc.), the second octave is –1 (c -1, c#-1, etc.), the third is zero (c 0, c# 0…),
etc.
Fine Freq: -50…+50 Fine Tune control; 0 centered. Steps in cents (50
cents = ½ semitone).
Shape: see table Selects the analog waveshape as follows:
Display Waveshape
Sawtooth
Sawtooth
Triangle
Triangle
Saw-Tri
Sawtooth – triangle mix
Pulse xx
Pulse Wave, with pulse width ranging to minimum (0) to
maximum (99). The pulse width will turn off at the two
extremes – this allows some interesting modulation
possibilities. A square wave will be around P50.
Level: 0…100 Sets the volume of Oscillator 1.
Glide: 0…100; F02…F99; OFF The oscillator 1 Glide rate; low numbers are
faster. Normal Glide covers the range from 1 to 100 (0 is no glide). A “fingered” mode
19
that only glides when more than one note is held down is selected by setting glide
over 100, where it ranges from F02 to F00 (equivalent to glides of 2 to 100).
Thought not quite Glide related, if you set glide all the way to maximum, it goes to
OFF, which has the effect of disconnecting oscillator 1 from MIDI.
Sync: Turns oscillator hard sync on or off. Whenever oscillator 2 resets, it will
also reset oscillator 1 for the classic hard sync sound.
Page 2:
Oscillator 2
Oscillator 2 is also an analog oscillator, and is hardwired to the Right channel. The
parameters for Oscillator 2 are the same as Oscillator 1 above, except there is no
Sync control.
Page 3:
Oscillator 3
Oscillator 3 is a digital waveshape oscillator, and is hardwired to the Left channel. Like
the original Prophet VS, the digital oscillators in Evolver get quite trashy at higher
frequencies. Following are the controls for Oscillator 3:
Frequency: C -2…C 8 Selects base frequency over a 10 octave range,
from 8 Hz to 8KHz, stepping in semitones. C3 is middle C, the first octave is –2 (c -2,
c#-2, etc.), the second octave is –1 (c -1, c#-1, etc.), the third is zero (c 0, c# 0…),
etc.
Fine Freq: -50…+50 Fine Tune control; 0 centered. Steps in cents (50
cents = ½ semitone).
Wave Shape 1…128 Selects a digital waveshape. Waveshapes 1 - 95
correspond to ROM (preset) Waveshapes 32 – 125 in the Prophet-VS. Waveshapes
96 – 128 are user programmable in the Poly via MIDI. In the VS, the user waves were
0 - 31, and wave 127 was noise, which is not included in the Poly since the noise
source is separate from the oscillators. Wave 95 (126 on the VS) is a “blank” wave,
which can give some options while sequencing waves. The Poly is shipped with
waves 96 – 128 the same as 1 – 31. The user waves can be changed using the
Editor.
Level: 0…100 Sets the volume of Oscillator 1.
Glide: 0…100; F02…F99; OFF The oscillator 1 Glide rate; low numbers are
faster. Normal Glide covers the range from 1 to 100 (0 is no glide). A “fingered” mode
that only glides when more than one note is held down is selected by setting glide
over 100, where it ranges from F02 to F00 (equivalent to glides of 2 to 100).
Thought not quite Glide related, if you set glide all the way to maximum, it goes to
OFF, which has the effect of disconnecting oscillator 1 from MIDI.
20
FM 4 -> 3: 0…100 The amount of Frequency Modulation of
Oscillator 3 from Oscillator 4. Note that each digital oscillator can FM the other at the
same time for some wild results.
Shape Seq: Off, SE1..4 This parameter allows sequencing Waveshapes.
Off if not in use, otherwise select one of the four sequences Seq 1, Seq 2, Seq3, or
Seq 4 to change the waveshape on every sequence step. In other words, if sequence
1 is selected, with step 1 = 10 and step 2 = 5, then waveshape 10 will play in the first
step, and waveshape 5 will play in the second.
Ring Mod 4>3: 0…100 The amount of Ring (Amplitude) Modulation of
Oscillator 3 from Oscillator 4. Note that each digital oscillator can Ring modulate the
other at the same time.
Page 4:
Oscillator 4
Oscillator 4 is a digital waveshape oscillator, and is hardwired to the Right channel.
The parameters for Oscillator 2 are the same as Oscillator 1 above, except the FM
and Ring Mod parameters go in the opposite direction.
Page 5:
Lowpass Filter
The analog (real analog!) lowpass filter is actually two different filters; one for the Left
channel and one for the Right channel. This allows true stereo processing of external
audio signals run through Evolver. However, for simplicity and consistency the two
filters are driven together in tandem, so they normally respond the same way.
Exceptions are when using the Spilt parameter as noted below, and when using the
separate filter cutoff and resonance modulation destinations, which allow the two
filters to be modulated independently. Note that though they are normally controlled
together, since they are analog there will always be some subtle differences between
the two filters, which gives the Poly Evolver a more natural sound.
Frequency: 0…164 Selects base filter cutoff frequency over more than 13
octaves. There is special smoothing on the operation of the filter knob to eliminate
stepping as you turn the knob for clean manual filter sweeps.
Resonance:
0…100 Sets the Resonance level of the filter; at high settings
the filter will self-oscillate in 4-pole mode. If the filter does not oscillate, make sure that
4 pole mode is selected.
Config: 2 Pole, 4 Pole Selects either 2 or 4 pole operation for the filter.
Envelope Amt: -99…+99 Amount of filter envelope to the cutoff frequency.
This can be positive or negative, allowing inverted envelope control of the filter.
Env Velocity: 0…100 Amount of MIDI velocity controlling the level of
the filter envelope.
  • Page 1 1
  • Page 2 2
  • Page 3 3
  • Page 4 4
  • Page 5 5
  • Page 6 6
  • Page 7 7
  • Page 8 8
  • Page 9 9
  • Page 10 10
  • Page 11 11
  • Page 12 12
  • Page 13 13
  • Page 14 14
  • Page 15 15
  • Page 16 16
  • Page 17 17
  • Page 18 18
  • Page 19 19
  • Page 20 20
  • Page 21 21
  • Page 22 22
  • Page 23 23
  • Page 24 24
  • Page 25 25
  • Page 26 26
  • Page 27 27
  • Page 28 28
  • Page 29 29
  • Page 30 30
  • Page 31 31
  • Page 32 32
  • Page 33 33
  • Page 34 34
  • Page 35 35
  • Page 36 36
  • Page 37 37
  • Page 38 38
  • Page 39 39
  • Page 40 40
  • Page 41 41
  • Page 42 42
  • Page 43 43
  • Page 44 44
  • Page 45 45
  • Page 46 46
  • Page 47 47
  • Page 48 48
  • Page 49 49
  • Page 50 50
  • Page 51 51
  • Page 52 52
  • Page 53 53
  • Page 54 54
  • Page 55 55
  • Page 56 56
  • Page 57 57
  • Page 58 58
  • Page 59 59
  • Page 60 60
  • Page 61 61
  • Page 62 62
  • Page 63 63
  • Page 64 64
  • Page 65 65
  • Page 66 66
  • Page 67 67
  • Page 68 68
  • Page 69 69
  • Page 70 70
  • Page 71 71
  • Page 72 72

Dave Smith Instruments Evolver User manual

Category
Digital pianos
Type
User manual
This manual is also suitable for

Ask a question and I''ll find the answer in the document

Finding information in a document is now easier with AI