Page is loading ...

If you have any questions about the use of this product, please contact
The Eastwood Technical Assistance Service Department:
1-866-759-2131 email: [email protected]
The Eastwood Company
263 Shoemaker Road, Pottstown, PA 19464, USA
US and Canada: 1-800-345-1178 Outside US: 610-718-8335
fax: 610-323-6268 www.eastwood.com
Instruction Manual #12435Q - Rev. 2/10
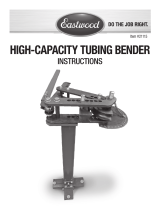
Your Eastwood 180° Tubing Bender is a high quality, precision
tool capable of creating accurate, smooth, kink-free bends up
180°. Form lines for brake, transmission, fuel and other automo-
tive applications in annealed aluminum, steel, stainless steel and
copper tubing, in sizes from 3/16” to 3/8”, left and right handed.
180° Tubing Bender
Instructions
Part #12435

1) Place the tube in the appropriate
sized groove in the Stationary Arm
matching the tubing size you are plan-
ning to form. (Note: 3/16” tubing is
done in the 1⁄4” groove). Fig A.
2) The tube must be supported by
the Stop Edge of the Stationary Arm
(Fig. B). Align the 0° marks on the
Stationary Arm and Rotating Arm
(Fig. B1-B4) and gently while keeping
a downward pressure on the tubing,
pull the Rotating Arm around until the
“0” of the Rotating Arm aligns with the
desired ° mark for a maximum of 180°.
3) Turn the Rotating Arm out and away
from the Stationary Arm and remove
formed tubing.
4) The gauge on the moveable arm
(Fig C) is designed to indicate where
the bend will begin as measured from
a user defined location beyond the
Stop Edge. Note that there are separate
markings for 1⁄4”, 3/16” & 3/8” as well
as “L” for left and “R” for right. This fea-
ture is particularly useful when creating
multiple bends in a section of tubing
and to utilize it, simply measure back
from the end of your previous bend and
place a mark on the tubing where you
want your next bend to start then align
that mark with the appropriate tubing
size indicating notch and depending on
whether your previous bend is to the
Right or Left, use the corresponding
notch. Complete your bend as indi-
cated in step 2.
Operation
To order parts and supplies, call 1-800-345-1178 or visit www.eastwood.com 32 © Copyright 2010 Easthill Group, Inc. Printed in the United States of America
Fig. A
Fig. B
Fig. C
• 49074 Brake Forming Pliers for smaller bends and adjustments.
• 25304 Eastwood Double/Single Flaring Tool for accurate and flawless
flares in a wide range of tubing.
• Eastwood also offers a complete line of line tubing and fitting kits in a
variety of sizes and materials.
• This tool is designed to gently and accurately form a radius in a piece of
line tubing. Softer metals such as aluminum and copper tubing can be
formed with minimal effort while carbon and stainless steel will require
greater effort to achieve results. Thicker walled tubing will also require
more effort than thinner walled material. Use of a small amount of anti-
seize lubricant applied to the grooved tubing contact areas of the tool will
greatly ease the process particularly with stainless.
• If your bends are to be near the end of a length of tubing, it is usually best
to create your flared ends before making bends as the bends may not
allow the tubing to fit within the flaring tool.
• If the section of line to be formed requires multiple bends in variable
directions, you may want to pre-bend a pattern piece out of mild steel
welding rod or wire then using that as a guide, create your formed line.
Helpful Tips
Tubing Size Approximate Minimum Formable Radius
3/16” and 1/4” 1/2”
5/16” 3/4”
3/8” 1”
Other Eastwood Line-Forming Items
Fig. B1
Fig. B2
Fig. B3
Fig. B4
/

