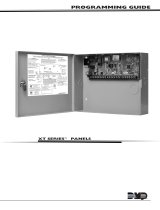
Bosch 2000 User manual

Category
Fire protection
Type
User manual
EN
Program Entry Guide
Control Panels
2000 Series
2000 Series | Program Entry Guide | About This Manual EN | 2
Bosch Security Systems | 7/05 | 35114F
About This Manual
This guide describes the programming parameters
available to the 2000 Series Control Panels (except
D2012/D2012U). This guide follows the organization of
the D2212 Product Handler in the D5200 Programmer.
The table of contents lists each programming section,
program item, and its page number.
Throughout this manual, programming prompts are
shown in bold italic letters (such as
Phone 1
).
Use the Program Record Sheet (P/N: 35113) to record
your program entries. Installation instructions can be
found in the panel’s Installation Guide. The Keypad
Diagnostics Sheet provides specific diagnostic and testing
information. A Security System User Guide comes with the
keypad.
E Version Control Panels
The E versions of the 2000 Series Control Panels (for
example, the D2412UE) do not include point
expansion. They are limited to the on-board points.
Any programming for point expanders does not apply
to E version control panels.
Using this Guide for Keypad
Programming
Keypad programming requires a text keypad. For an
explanation, refer to Section 18.0 Keypad Programming of
this manual.
Display text and keypad programming appear as
shown:
0000
0 to 9, B to F
Default entries and selections for keypad programming
also appear in shaded boxes.
2000 Series | Program Entry Guide | Contents EN | 3
Bosch Security Systems | 7/05 | 35114F
Contents
1.0 System Configuration......................................5
2.0 Phone ..................................................................7
2.1 Phone Routing Set to No...................................7
2.2 Phone Routing Set to Yes..................................7
3.0 Reports..............................................................11
4.0 Receiver............................................................15
4.1 Modem Reports................................................15
4.2 Pulse Report Groups ........................................18
5.0 Remote Programming...................................21
6.0 Open/Close .....................................................23
6.1 Step Outside......................................................24
6.2 Exit .....................................................................25
7.0 ABC Keys.........................................................27
8.0 Bell.....................................................................29
9.0 Test Timer........................................................31
10.0 Address Configuration..................................33
11.0 Point Codes......................................................35
11.1 Digit 1, Point Type...........................................37
11.2 Digit 2, Alarm Responses ................................43
11.3 Digit 3, Point Options ......................................44
11.4 Digit 4, Device Address...................................45
11.5 Digit 5, Sensor Loop ........................................46
11.6 Recommended Point Codes..................................48
12.0 Point Text.........................................................51
13.0 Relays................................................................53
13.1 Relay Function Logic.......................................53
13.2 Relay Functions ................................................53
13.3 Relay Parameters, for Keypad Programming
Only 56
14.0 User Test...........................................................57
15.0 Passcodes..........................................................59
16.0 RF Parameters.................................................61
17.0 Program Lock..................................................63
18.0 Keypad Programming...................................65
18.1 Getting Started ..................................................65
18.2 View Mode........................................................65
18.3 Modify Mode ....................................................66
18.4 Scroll Lists .........................................................66
18.5 Yes and No Entries...........................................66
18.6 An Example, Entering Custom Text..............67
18.7 Keypad Programming Tips .............................68
Index ............................................................................69
2000 Series | Program Entry Guide | Contents EN | 4
Bosch Security Systems | 7/05 | 35114F
Figures
Figure 1: Pulse Report Groups......................................18
Figure 2: View Mode......................................................65
Figure 3: Modify Mode ..................................................66
Tables
Table 1: Phone Routing Set to No..................................7
Table 2: Modem II Reports Chart................................15
Table 3: Pulse Format.....................................................18
Table 4: Answer Machine Programmed Yes...............22
Table 5: Digit 1 Selections..........................................37
Table 6: Digit 2 Selections.......................................43
Table 7: Digit 3 Selections.......................................44
Table 8: Digit 4 Selections.............................................45
Table 9: Digit Selection Summary................................47
Table 10: Smoke Detector (trouble on open,
alarm output)..............................................48
Table 11: Door with Entry/Exit Delay
(swinger bypass, alarm output,
alarm report delay)....................................48
Table 12: Door or Window with No Entry/Exit
Delay (swinger bypass, alarm output,
alarm report delay)....................................48
Table 13: Garage Door with Extended Entry/Exit
Delay (swinger bypass, alarm output,
alarm report delay)....................................48
Table 14: Motion Detector (swinger bypass,
alarm output, alarm report delay)............48
Table 15: Tamper (swinger bypass, alarm output,
alarm report delay)....................................48
Table 16: Panic Device (swinger bypass).................49
Table 17: Keyswitch (swinger bypass, alarm
output).........................................................49
Table 18: Relay Function Selections ........................54
Table 19: Relay Parameters.......................................56
Table 20: View Mode Keys ........................................65
Table 21: Modify Mode Keys.....................................66
Table 22: Entering Custom Text at the Keypad .........67
2000 Series | Program Entry Guide | 1.0 System Configuration EN | 5
Bosch Security Systems | 7/05 | 35114F
1.0 System Configuration
The System Configuration Group contains the
Account Number
,
Swinger Count
,
Keyswitch
,
Custom Idle Text
, and
Custom Service Text
prompts.
1 Account Number
Default:
0000
Selection:
0 to 9, B to F
Enter four characters for the
Account Number
to
transmit to the receiver. Enter leading zeroes (0) for
account numbers with fewer than four digits. For
example: Enter 0123 for account number 123.
2 Swinger Count
Default:
4
Selection:
1, 2, 3, 4
The
Swinger Count
prompt sets the swinger count
for the Swinger Bypass point option. When the
number of alarms or troubles reaches the swinger
count, the system automatically bypasses points
programmed for Swinger Bypass. Turning the
system off clears the bypass. If a 24-hour point
swinger bypasses while the system is off, turning the
system on (starting exit delay) and then turning it off
(pressing [CLEAR] during exit delay) clears the
bypass. Swinger bypass is a point trouble and
activates the Point Trouble Relay function.
When a point is Swinger Bypassed, the Point
Trouble Relay function activates. Refer to Section
13.2 Relay Functions.
SIA recommends the swinger count be set
to 1.
Using Digit 2 of the point code assigns the Swinger
Bypass feature to a point.
3 Keyswitch
Default:
Momentary
Selection:
Easikey, Momentary
0 Easikey
1 Momentary
Refer to the Installation Guide for instructions on
connecting a momentary keyswitch to a point.
This control panel is not compatible with
maintained contact keyswitches.
Operating the keyswitch (shorting the point) turns
the system All On with delays if the system is off.
Any faulted controlled points (Point Code Digit 1 =
6, 7, 8, 9, B, or C) are automatically bypassed.
If the system is All On or Part On, with or without
delays, operating the keyswitch (shorting the point)
turns the system off.
Leave the
Keyswitch
prompt set to Momentary if
you are not using a keyswitch on your system.
Setting the
Keyswitch
prompt to Easikey allows a
properly connected Easikey system to disarm the
system. It cannot be used to arm the system. If the
system is All On or Part On, with or without delays,
presenting the electronic key to the Easikey reader
(the Easikey shorts the point) turns the system off. If
the system is off, presenting the electronic key to the
Easikey reader (the Easikey shorts the point) has no
effect.
4 Custom Idle Text1
5 Custom Idle Text2
Default:
Bosch Security Systems
Selection:
A to Z, 0 to 9,
! # , . - / : < >
The system displays at all text keypads the two lines
of custom text you enter here whenever the system
is off and idle. Each line contains a maximum of
sixteen characters.
It can take up to 15 seconds for the
custom text you program here to appear in
all text keypads connected to the system.
2000 Series | Program Entry Guide | 1.0 System Configuration EN | 6
Bosch Security Systems | 7/05 | 35114F
6 Custom Service Text
Default:
Blank
Selection:
A to Z, 0 to 9,
! # , . - / : < >
The system displays the text you enter here in the
second line of the keypad display when ever the first
line reads, CALL FOR SERVICE. You can enter the
phone number for your service department as the
Custom Service Text
.
Up to 15 Seconds for Text to Load: It can take up
to 15 seconds for the custom text you program here
to appear in all text keypads connected to the
system.
2000 Series | Program Entry Guide | 2.0 Phone EN | 7
Bosch Security Systems | 7/05 | 35114F
2.0 Phone
The Phone Group contains prompts that configure the
system for dialing and sending reports on the
telephone line.
1 DTMF Dialing
Default:
Yes
Selection:
Yes, No
0 No
1 Yes
When
DTMF Dialing
is set to Yes, the control panel
dials in the Dual Tone Multi-Frequency (DTMF)
format for all dialing attempts.
When
DTMF Dialing
is set to No, the control panel
pulse dials for all dialing attempts.
2 Phone 1
3 Phone 2
Default:
Blank
Selection:
0 to 9, C, D, #, *, Blank
Leaving both Phone 1 and Phone 2 “Blank” creates a
local system with no reports transmitted.
Enter up to nineteen characters for each phone
number. The # and * characters only work when the
control panel is DTMF dialing. The control panel dials
these characters just as if you pressed them on a
telephone keypad. Enter C for a 3-second delay. Enter
D for a 7-second dial tone wait.
If you program a # or * to disable call waiting, warn
your customer that eliminating their call waiting
service requires a change to their security system.
4 Phone Routing
Default:
No
Selection:
Yes, No
0 No
1 Yes
2.1 Phone Routing Set to No
When this prompt is set to the default, No, the control
panel dials as shown in Table 1. The control panel only
sends reports to
Phone 2
after two failed attempts
sending to
Phone 1
.
Table 1: Phone Routing Set to No
Attempt Phone Number
1 Phone Number 1
2 Phone Number 1
3 Phone Number 2
4 Phone Number 2
5 Phone Number 1
6 Phone Number 2
7 Phone Number 1
8 Phone Number 2
9 Phone Number 1
10 Phone Number 2
11 Communication Fail event
If
Phone 2
is left blank, five attempts are made to
Phone 1
.
If you set the Phone Routing prompt to
No, skip to Section 4.2 Pulse Report
Groups. The prompts in the remainder of
this group set the routing groups.
2.2 Phone Routing Set to Yes
Set this prompt to Yes to route reports to Phone 1
or Phone 2. Reports are routed by group. A
description of each routing group follows. The
control panel makes five attempts to each routing
destination.
Reports routed to Phone 1 have a higher priority
than reports routed to Phone 2. When the control
panel has reports to send to Phone 1 and Phone 2,
it sends all reports for Phone 1, then sends the
reports for Phone 2. If the control panel fails to
send an event to Phone 1, it creates a
Communication Fail event for Phone 1 and begins
the Phone 2 Reports.
If the control panel works on Phone 2 Reports and
there is a new event for Phone 1, the control panel
continues with the Phone 2 Reports until the
Phone 2 buffer is empty, and then continues to the
Phone 1 event.
2000 Series | Program Entry Guide | 2.0 Phone EN | 8
Bosch Security Systems | 7/05 | 35114F
5 Fire Route
Default:
Local
Selection:
Local, Phone 1 only, Phone 2 only,
Both
Local 0
Phone 1 only 1
Phone 2 only 2
Both 3
Reports: Fire Alarm Reports from points or ABC
keys.
6 Non-Fire Route
Default:
Local
Selection:
Local, Phone 1 only, Phone 2 only,
Both
Local 0
Phone 1 only 1
Phone 2 only 2
Both 3
Reports:
Non-Fire Alarm Reports from points or ABC
keys
Point Tamper Alarms
Point Missing Alarms.
7 Pt Trbl Route
Default:
Local
Selection:
Local, Phone 1 only, Phone 2 only,
Both
Local 0
Phone 1 only 1
Phone 2 only 2
Both 3
Reports:
Trouble, Missing, Missing RF, Low Battery RF,
Bypass, or Swinger Bypass Reports from, Fire
and Non-fire points combined.
Point Tamper Troubles.
8 Restoral Route
Default:
Local
Selection:
Local, Phone 1 only, Phone 2 only,
Both
Local 0
Phone 1 only 1
Phone 2 only 2
Both 3
Reports:
Restoral Reports from Fire and Non-Fire points
combined
RF Battery Restorals
Point Tamper Restorals.
9 Closing Route
Default:
Local
Selection:
Local, Phone 1 only, Phone 2 only,
Both
Local 0
Phone 1 only 1
Phone 2 only 2
Both 3
Reports: Closing Reports
10 Opening Route
Default:
Local
Selection:
Local, Phone 1 only, Phone 2 only,
Both
Local 0
Phone 1 only 1
Phone 2 only 2
Both 3
Reports: Opening Reports
2000 Series | Program Entry Guide | 2.0 Phone EN | 9
Bosch Security Systems | 7/05 | 35114F
11 Cancel Route
Default:
Local
Selection:
Local, Phone 1 only, Phone 2 only,
Both
Local 0
Phone 1 only 1
Phone 2 only 2
Both 3
Reports: Cancel Reports
12 Sys Trbl Route
Default:
Local
Selection:
Local, Phone 1 only, Phone 2 only,
Both
Local 0
Phone 1 only 1
Phone 2 only 2
Both 3
Reports:
RAM Access Fail Reports (unsuccessful attempt
to connect a remote programmer)
Comm Fail Reports (Communication Failure
event) for Phone 1 and Phone 2
Watchdog Reset Reports (system automatically
reset)
Battery Missing Reports
Battery Low Reports
AC Fail Reports
RF Receiver Trouble (Address 7, Address 8)
RF Receiver Tamper (Address 7, Address 8)13
Sys Res Route
13 Sys Trbl Route
Default:
Local
Selection:
Local, Phone 1 only, Phone 2 only,
Both
Local 0
Phone 1 only 1
Phone 2 only 2
Both 3
Reports:
RAM Access OK Reports (successful connection
to a remote programmer)
Comm Restoral Reports (successful
communication after a Communication Failure
event)
Re-Boot Reports (control panel reset with the
stand-by switch or a remote programmer
Battery Restoral Reports (missing or low battery
restored)
AC Restore Reports
RF Receiver Trouble Restoral (Address 7,
Address 8)
RF Receiver Tamper Restoral (Address 7,
Address 8)
14 Duress Route
Default:
Local
Selection:
Local, Phone 1 only, Phone 2 only,
Both
Local 0
Phone 1 only 1
Phone 2 only 2
Both 3
Reports:
Duress Reports
User Tamper (six attempts with bad passcode).
2000 Series | Program Entry Guide | 2.0 Phone EN | 10
Bosch Security Systems | 7/05 | 35114F
15 Test Route
Default:
Local
Selection:
Local, Phone 1 only, Phone 2 only,
Both
Local 0
Phone 1 only 1
Phone 2 only 2
Both 3
Reports:
Test Reports
Service Start (stand-by pin locked down, installer
code entered.)
Service Stop (standby-by pin unlocked. The
control panel only sends a Service Stop Report
if a Service Start Report was transmitted).
2000 Series | Program Entry Guide | 3.0 Reports EN | 11
Bosch Security Systems | 7/05 | 35114F
3.0 Reports
1 O/C Rpts – All On
Default:
No
Selection:
Yes, No
0 No
1 Yes
If you set the
O/C Rpts-All On
prompt to Yes, the
system transmits Closing Reports to the receiver
when users turn the system All On. If any points are
bypassed, Bypass Reports are also sent. The control
panel transmits Opening
Reports when users turn
the system off from the All On state.
If the user turns the system off after an alarm, the
system attaches an AFTER ALARM message to the
Modem II Opening Report. Refer to
Section 4.0 Receiver for a description of the Modem II
Report Format.
If you set the
O/C Rpts-All On
prompt to No, the
system does not send Closing Reports to the receiver
when users turn the system All On.
2 O/C Rpts – Part On
Default:
No
Selection:
Yes, No
0 No
1 Yes
If you set the
O/C Rpts-Part On
prompt to Yes, the
system transmits Closing Reports to the receiver
when users turn the system Part On with the [0] key.
If any points are bypassed, Bypass Reports are also
sent. It transmits Opening Reports when users turn
the system off from the Part On state.
If the user turns the system off after an alarm, the
system attaches an AFTER ALARM message to the
Modem II Opening Report. Refer to Section 4.0
Receiver for a description of the Modem II Report
Format.
If you set the
O/C Rpts-Part On
prompt to No, the
system does not send Closing Reports to the receiver
when users turn the system Part On with the [0] key.
3 Restricted O/C
Default:
No
Selection:
Yes, No
0 No
1 Yes
Set the
Restricted O/C
prompt to Yes. The system
only sends Opening Reports when the user turns the
system off after an alarm. The system attaches an
AFTER ALARM message to the Modem II
Opening Report. Refer to Section 4.0 Receiver for a
description of the Modem II Report Format.
With the
Restricted O/C
prompt set to Yes, the
system only sends Closing Reports when a point is
bypassed.
Set the
Restricted O/C
prompt to No to send
unrestricted opening and Closing Reports.
4 Delay Alrm Rpt
Default:
0
Selection:
0 to 255
Delay Alrm Rpt
helps prevent False Alarm
Reports. Reporting characteristics for individual
points are programmed in Digit 2 of the point code.
Special Voice Verification function when
you set the Delay Alrm Rpt prompt to 255:
Refer to 255 = Voice Verification in this
section.
If a point with 2, 3, 7, or 8 in Digit
2
creates an
Alarm event, the system waits the number of
seconds entered at the
Delay Alrm Rpt
prompt
before transmitting reports to the receiver.
If a user enters a passcode to silence an alarm or
turns the system off before
Delay Alrm Rpt
expires:
No Alarm, Cancel, or Restoral Reports are sent
to the receiver for these points.
All other reports, including Alarm Reports for
points programmed with a 1, 4, 5, 6, or 9 in
Digit 2 are sent. If programmed for Cancel
Report, a Cancel Report sends for points with a
1, 4, 5, 6, or 9 for Digit 2.
Missing alarms are sent as missing troubles.
Tamper alarms are sent as tamper troubles.
If no passcode is entered before
Delay Alrm Rpt
expires, all reports are sent.
2000 Series | Program Entry Guide | 3.0 Reports EN | 12
Bosch Security Systems | 7/05 | 35114F
If the system is on with No Delay, alarm output at
Terminals 4 and 5 follows the alarm delay
programmed here. The alarm sounds at the keypad
without delay.
When mixing Delay Alarm points (Digit 2 set for 7
or 8), with No Delay Alarm points (Digit 2 set for 5,
6, or 9), the alarm output follows the programmed
alarm delay if Delay Alarm points are faulted first.
255 = Voice Verification: Only set the
Delay
Alrm Rpt
prompt to 255 when using an optional
two-way voice verification module. When the
Delay
Alrm Rpt
prompt is set to 255, an Alarm event on a
point with 2, 3, 7, or 8 in Digit 2 sends an Alarm
Report and begins the two-way voice verification
process. Do not set the
Delay Alrm Rpt
prompt to
255 if a voice verification module is not connected to
the control panel, because unexpected control panel
operation results.
Duress Reports and A, B, C Key Reports
are affected by Alarm Report Delay. These
reports are sent immediately in all cases.
The Security Industry Association (SIA)
recommends the Delay Alarm Report
feature be enabled with the delay set to 15
seconds. Enter 15 at this prompt to comply
with the SIA recommendation.
Press the [0] key to disable the
Delay Alrm Rpt
prompt for all points.
5 Cancel Rpt
Default:
Yes
Selection:
Yes, No
0 No
1 Yes
Set the
Cancel Rpt
prompt to Yes to enable Cancel
Report. If a user turns the system off after an alarm,
but before bell time expires, a Cancel
Report follows
the Alarm Report.
If the user turns the system off before
Delay Alrm
Rpt
prompt time expires, the control panel sends no
Alarm, Cancel, or Restoral Report for points
programmed with a 2, 3, 7, or 8 in Digit 2 of the
point code.
If you set the
Cancel Rpt
prompt to No, the control
panel does not send Cancel Reports.
6 Restoral Rpts
Default:
No
Selection:
No, Yes, Delay
0 No
1 Yes
2 Delay
Set the
Restoral Rpts
prompt to Yes to send
Restoral Reports to the receiver for all points. The
system sends Restoral Reports when points return to
normal (not faulted) after an Alarm or Trouble
Report.
Set the
Restoral Rpts
prompt to No to prevent the
system from sending Restoral Reports for any point.
Set the
Restoral Rpts
prompt to Delay to delay
sending Restoral Reports until bell time expires.
7 AC Fail Buzz/Rpt
Default:
No Buzz, No Report
Selection:
No Buzz, No Report
Buzz, No Report
Buzz, Report
Buzz, Tag-Along Rpt
No Buzz, Report
No Buzz, Tag-Along Rpt
No Buzz No Report 0
Buzz, No Report 1
Buzz, Report 2
Buzz, Tag-Along Rpt 3
No Buzz Report 4
No Buzz, Tag-Along Rpt 5
The control panel monitors AC power. When AC
power to terminals 1 and 2 is interrupted, the control
panel waits 60 seconds. If AC power is not restored
within 60 seconds, it provides the response
programmed in
AC Fail Buzz/Rpt
.
When set to No Buzz, No Report the system only
flashes the OK light at the keypad to indicate a
system trouble. It does not sound the trouble tone or
send a report to the receiver.
When set to Buzz, No Report the system flashes the
OK light at the keypad to indicate a system trouble
and sounds the trouble tone. No report is sent to the
receiver.
2000 Series | Program Entry Guide | 3.0 Reports EN | 13
Bosch Security Systems | 7/05 | 35114F
When set to Buzz, Report the system flashes the
OK light at the keypad, sounds the trouble tone, and
sends an AC Fail Report to the receiver.
When set to Buzz, Tag-Along Rpt the system
flashes the OK light and sounds the trouble tone at
the keypad after 60 seconds. It sends an AC Fail
Report to the receiver as a tag along with all reports
sent to the receiver until AC restores.
When set to No Buzz, Report the system flashes the
OK light at the keypad and sends an AC Fail Report
to the receiver.
When set to No Buzz, Tag-Along Rpt the system
flashes the OK light. It sends an AC Fail Report to
the receiver as a tag along with all reports sent to the
receiver until AC restores.
8 Point User Flag
Default:
No
Selection:
Yes, No
0 No
1 Yes
Set this prompt to Yes to send a flag with each
Modem II Report that tells the D6500 to convert
point numbers to Bosch Security System’s D8112
style Zonex Format, and User ID numbers to D8112
type COMEX Format.
2000 Series | Program Entry Guide | 3.0 Reports EN | 14
Bosch Security Systems | 7/05 | 35114F
Notes:
2000 Series | Program Entry Guide | 4.0 Receiver EN | 15
Bosch Security Systems | 7/05 | 35114F
4.0 Receiver
4.1 Modem Reports
1 Rcvr Format
Default:
Modem
Selection:
Modem, Pulse
0 Pulse
1 Modem
Set
Rcvr Format
to Modem to transmit reports in Modem II format with its advanced reporting capabilities.
You need firmware revision 8.00 or greater installed in your D6500 Receiver.
Table 2 shows the reports available.
The D6500 line card ack tone table must contain “Modem II for D9112.” Refer to the 6500: Line Program Entry
Guide.
Set
Rcvr Format
to Pulse to transmit in 4x2 Pulse Format. Be sure to program codes for each report group. Refer
to the Section
4.2
Pulse Report Groups.
Table 2: Modem II Reports Chart
Modem II Report Description
AC FAILURE
No AC power to system. Control panel runs on battery.
AC RESTORE
AC Power is restored to normal.
ALARM REPORT POINT
001 (-099)
Alarm Report from Points 1 to 24 or from an A, B, C, key. Refer to Section 7.0 ABC Keys for
instructions on setting reports from the keys.
ALARM REPORT
RECENT CLOSING
ID=001
POINT=001(24)
If an alarm occurs within 2 minutes of a Closing event, the system sends an Alarm Recent
Close Report.
ALARM CROSS POINT
001 (-099)
Alarm Report from Points 1 to 24 with point code for Cross or Partner point.
The ALARM RECENT CLOSE message overrides the ALARM CROSS POINT message.
The ALARM EXIT ERROR message does not apply to Cross, Partner, Double Knock, or Alarm
Verification points
BATTERY LOW
System battery is low.
BATTERY MISSING
System battery is disconnected. Battery must be missing for 60 seconds.
BATTERY RESTORE
Missing or low battery is restored.
CANCEL REPORT
Cancel Report from keyswitch.
CANCEL REPORT ID
001 (-008)
Cancel Report with user ID for users 1 to 8.
2000 Series | Program Entry Guide | 4.0 Receiver EN | 16
Bosch Security Systems | 7/05 | 35114F
Table 2: continued
Modem II Report Description
CLOSING REPORT
Closing Report when passcode is not used. Refer to the Passcode Rquired prompt in Section
15.0 Passcodes. Using a Keyswitch or a remote programmer also sends this Closing Report
with no user ID.
CLOSING REPORT ID
001 (-008)
Closing Report with user ID for users 1 to 8.
COMM FAIL
PHONE (1-2)
Communication Failure event. Refer to Phone 1, Phone 2 in Section 2.0 Phone.
COMM RESTORAL
PHONE (1-2)
Successful communication after a Communication Failure event. Refer to Phone 1, Phone 2 in
the Section 2.0 Phone.
DURESS
ID 008
Passcode 8 used to turn the system on, turn the system off, or to silence an alarm. Refer to the
Code 8 = Duress prompt in Section 15.0 Passcodes.
EXIT ERROR 001
(-024)
When a point is faulted at the end of exit delay it generates an Exit Alarm.
Exit Alarm Report from Points 1 to 24.
FIRE ALARM POINT
001 (-099)
Fire Alarm Report from Points 1 to 24.
FIRE ALARM CROSS
POINT 001 (-024)
Cross Point Fire Alarm Report from Points 1 to 24.
MISSING ALARM POINT
001 (-024)
Missing Non-fire Controlled point, point is on (armed). Alarm response locally.
MISSING TROUBLE
POINT 001 (-024)
Missing Non-fire Controlled point, point is off (disarmed), or 24-hour Non-fire point. Trouble
response locally.
OPENING REPORT
Turning the system off with a keyswitch or a remote programmer sends this Opening Report
with no User ID.
OPENING REPORT ID
001 (-008)
Opening Report with User ID for users 1 to 8.
OPEN FROM ALARM
Turning the system off after an alarm with a Keyswitch point or a remote programmer sends
this Opening Report with no User ID.
OPEN FROM ALARM ID
001 (-008)
Opening Report after an alarm with User ID for users 1 to 8.
PERM INST ARMED
Remote programmer used to turn the system Part On with No Delays, or user turned the
system Part On with No Delays and no passcode required. Refer to the Passcode Rquired
prompt in Section 15.0 Passcodes.
PERM INST ARMED ID
001 (-008)
User with ID shown (1 to 8) turned the system Part On with No Delays.
PERM DLAY ARMED
Remote programmer used to turn the system Part On (with Delays), or user turned the system
Part On with Delays and no passcode required. Refer to the Passcode Rquired prompt in
Section 15.0 Passcodes.
PERM DLAY ARMED ID
001 (-008)
User with ID shown (1 to 8) turned the system Part On (with Delays).
2000 Series | Program Entry Guide | 4.0 Receiver EN | 17
Bosch Security Systems | 7/05 | 35114F
Table 2: continued
Modem II Report Description
POINT BYPASS POINT
001 (-024)
Point 1 to 24 bypassed. Points can be bypassed from the keypad or from a remote
programmer. Bypass Reports are only sent when Opening and Closing Reports are enabled in
Section 6.0 Open/Close.
RAM ACCESS OK
Normal remote programmer session termination.
RAM ACCESS FAIL
Remote programmer made connection with control panel, but passcode was incorrect, or call
was not terminated with a Good-bye or Reset-Bye.
RESTORAL REPORT
POINT 001 (-024)
Restoral Report from Points 1 to 24.
RE-BOOT
Control panel reset with the standby pin (Refer to Installation Manual) or a remote
programmer.
RF BATTERY LOW POINT
001 (-024)
Low battery in RF sensor, keypad, or arming device.
RF BATT RESTORE
POINT 001 (-024)
Restored battery in RF sensor, keypad, or arming device.
RF Rcvr Tamper
SDI 7 (8)
Enclosure tamper from premises RF receiver (D208RF, D216RF).
SDI number is the device address (7 or 8). Refer to Section 10.0 Address Configuration.
RF Rcvr Tamper
Restoral
SDI 7 (8)
Enclosure tamper restoral from premises RF receiver (D208RF, D216RF).
SDI number is the device address (7 or 8). Refer to Section 10.0 Address Configuration.
RF Rcvr Trouble
Device 7 (8)
Trouble from premises RF receiver (D208RF, D216RF)
SDI number is the device address (7 or 8). Refer to Section 10.0 Address Configuration.
RF Rcvr Trbl
Restoral
Device 7 (8)
Restoral from premises RF receiver (D208RF, D216RF)
SDI number is the device address (7 or 8). Refer to Section 10.0 Address Configuration.
RF TAMPER TROUBLE
Tamper RF point, Controlled point, system off.
RF TAMPER RESTORAL
Tamper restoral, RF point.
SERVICE START
Installer mode entered (Stand-by locked down, installer passcode entered).
SERVICE STOP
Installer mode exited.
SWINGER BYPASS POINT
001 (-024)
Points 1 to 24 bypassed automatically by the system after four alarms or troubles in one armed
or disarmed period. You can program the Swinger Bypass feature to activate after less than
four alarms or troubles. Refer to Swinger Count prompt in Section 1.0 System Configuration.
Use the point code to program this feature by point. Refer to Section 11.0 Point Codes.
TEST REPORT
Automatic Test Timer Report.
TROUBLE REPORT POINT
001 (-024)
Trouble on Points 1 to 24, Fire and Non-fire combined.
USR CODE TAMPER
This report transmitted after six attempts to enter an invalid passcode.
WATCHDOG RESET
System automatically reset. Call Bosch Security Systems if reports persist.
0101
0101
0101
If you choose Modem Format, go to Section 5.0 Remote Programming. The prompts in the remainder
of the Receiver Group have no meaning for the Modem Format.
2000 Series | Program Entry Guide | 4.0 Receiver EN | 18
Bosch Security Systems | 7/05 | 35114F
4.2 Pulse Report Groups
If you select the Pulse Format you need to set the report code for each report group. Pulse 4x2 reports consist of a
four-digit account number, a one-digit report group code, and a one-digit point or User ID number.
For example, a control panel with the
Account Number
prompt set to 1213, the
Rcvr Format
prompt set to
pulse, the
Fire Group
prompt set to 3, and Point 1 programmed as a Fire point would send the report shown in
Figure 1 for an alarm on Point 1.
Figure 1: Pulse Report Groups
1213 3 1
1
2
3
1 - Account number
2 - Report group
3 - Point, user
The Pulse Format allows for only one digit in the Point, User position. If you install more than eight points and
report in Pulse Format, the control panel combines reports as shown in Table 3.
Table 3: Pulse Format
Point Number reported in Pulse
Format
1 2 3 4 5 6 7 8
Point Number displayed at keypad 1 2 3 4 5 6 7 8
9 10 11 12 13 14 15 16
17 18 19 20 21 22 23 24
Use the following Pulse Report Groups to designate Pulse Report Group codes for this installation.
Do not duplicate Pulse Report Group codes. You cannot distinguish reports from groups with duplicated
codes.
The expanded reports available in Modem II format are not available in the Pulse Format.
2 Fire Group
Default:
0
Selection:
0 to 9, B to F
1 to 8 Fire alarm from Points 1 to 24.
9 or 0
Fire alarm from key A, B, or C. Refer to Section
7.0
ABC Keys.
There is no Pulse Format version of the Modem II Alarm Cross Point Report. The Cross Point
feature creates two point alarms. Refer to Section 11.0 Point Codes.
2000 Series | Program Entry Guide | 4.0 Receiver EN | 19
Bosch Security Systems | 7/05 | 35114F
3 Non-Fire Group
Default:
0
Selection:
0 to 9, B to F
1 to 8 Non-Fire alarm from Points 1 to 24.
9 or 0 Non-Fire alarm from key A, B, or C.
Refer to Section
7.0
ABC Keys.
There are no Pulse Format versions of
the Modem II Alarm recent Close,
Alarm Cross Point, or Exit Alarm
Reports. All occur as Alarm
Reports.
The Cross Point feature creates two
point alarms. Refer to Section 11.0 Point
Codes.
4 Pt Trbl Group
Default:
0
Selection:
0 to 9, B to F
1 to 8
Trouble, Missing, Bypass, or Swinger
Bypass Reports from Fire and Non-Fire
points combined.
Multiple trouble conditions can create
duplicate Trouble Reports. For
example, a point can send a trouble for
a open sensor loop, then a trouble for
missing.
5 Restoral Group
Default:
0
Selection:
0 to 9, B to F
1 to 8
Restoral on points 1 to 24, Fire and
Non-Fire combined.
6 Closing Group
Default:
0
Selection:
0 to 9, B to F
0
Closing Report when a passcode is not
required to turn system on (refer to
Passcode
Rquired
prompt in Section
15.0 Passcodes) or a keyswitch is used.
1 to 8
Closing Report with User ID for users 1
to 8.
7 Opening Group
Default:
0
Selection:
0 to 9, B to F
0
Opening Report when keyswitch is
used, or Part On No Delay, or Part On
with delay.
1 to 8
Opening Report with User ID for users
1 to 8.
8 Cancel Group
Default:
0
Selection:
0 to 9, B to F
0
Cancel Report when keyswitch is used.
1 to 8
Cancel Report with User ID for users 1
to 8.
9 Sys Trbl Group
Default:
0
Selection:
0 to 9, B to F
1 Reports an unsuccessful attempt to connect a
remote programmer.
2
Reports an unsuccessful attempt to connect a
remote programmer.
3 The system automatically reset. Call Bosch
Security Systems if reports persist.
4 Not used.
5 Not used.
6 Reports missing battery.
7 Reports low battery.
8 No AC power to system. Control panel is
running on battery.
9 Communication Failure event for Phone 1.
B Communication Failure event for Phone 2.
C RF tamper (points or receiver).
D RF low battery.
E RF receiver 7 trouble.
F RF receiver 8 trouble.
2000 Series | Program Entry Guide | 4.0 Receiver EN | 20
Bosch Security Systems | 7/05 | 35114F
10 Sys Res Group
Default:
0
Selection:
0 to 9, B to F
1 Successful connection to a remote
programmer.
2 Not used.
3 Control panel reset with the stand-by switch
(refer to the Installation Guide) or a remote
programmer.
4 Not used.
5 Not used.
6 Not used.
7 Reports missing or low battery restored.
8 Restored AC power.
9 Communication Restoral event for Phone 1.
B Communication Failure event for Phone 2.
C RF tamper restore (points or receiver).
D RF battery restore.
E RF receiver 7 restoral.
F RF receiver 8 restoral.
11 Duress Group
Default:
0
Selection:
0 to 9, B to F
1 to 3 Not used.
4 This report transmitted after six
attempts to enter an invalid passcode.
5 Duress passcode entered at keypad.
Refer to
Code 8 = Duress
in Section
15.0 Passcodes.
7, 8 Not used.
12 Test Group
Default:
0
Selection:
0 to 9, B to F
1 to 5 Not used.
6 Service stop.
7 Service start.
8 Test Report.
  • Page 1 1
  • Page 2 2
  • Page 3 3
  • Page 4 4
  • Page 5 5
  • Page 6 6
  • Page 7 7
  • Page 8 8
  • Page 9 9
  • Page 10 10
  • Page 11 11
  • Page 12 12
  • Page 13 13
  • Page 14 14
  • Page 15 15
  • Page 16 16
  • Page 17 17
  • Page 18 18
  • Page 19 19
  • Page 20 20
  • Page 21 21
  • Page 22 22
  • Page 23 23
  • Page 24 24
  • Page 25 25
  • Page 26 26
  • Page 27 27
  • Page 28 28
  • Page 29 29
  • Page 30 30
  • Page 31 31
  • Page 32 32
  • Page 33 33
  • Page 34 34
  • Page 35 35
  • Page 36 36
  • Page 37 37
  • Page 38 38
  • Page 39 39
  • Page 40 40
  • Page 41 41
  • Page 42 42
  • Page 43 43
  • Page 44 44
  • Page 45 45
  • Page 46 46
  • Page 47 47
  • Page 48 48
  • Page 49 49
  • Page 50 50
  • Page 51 51
  • Page 52 52
  • Page 53 53
  • Page 54 54
  • Page 55 55
  • Page 56 56
  • Page 57 57
  • Page 58 58
  • Page 59 59
  • Page 60 60
  • Page 61 61
  • Page 62 62
  • Page 63 63
  • Page 64 64
  • Page 65 65
  • Page 66 66
  • Page 67 67
  • Page 68 68
  • Page 69 69
  • Page 70 70
  • Page 71 71
  • Page 72 72

Bosch 2000 User manual

Category
Fire protection
Type
User manual

Ask a question and I''ll find the answer in the document

Finding information in a document is now easier with AI